Awesome Crochet Duckling Amigurumi Pattern with Blue Belly
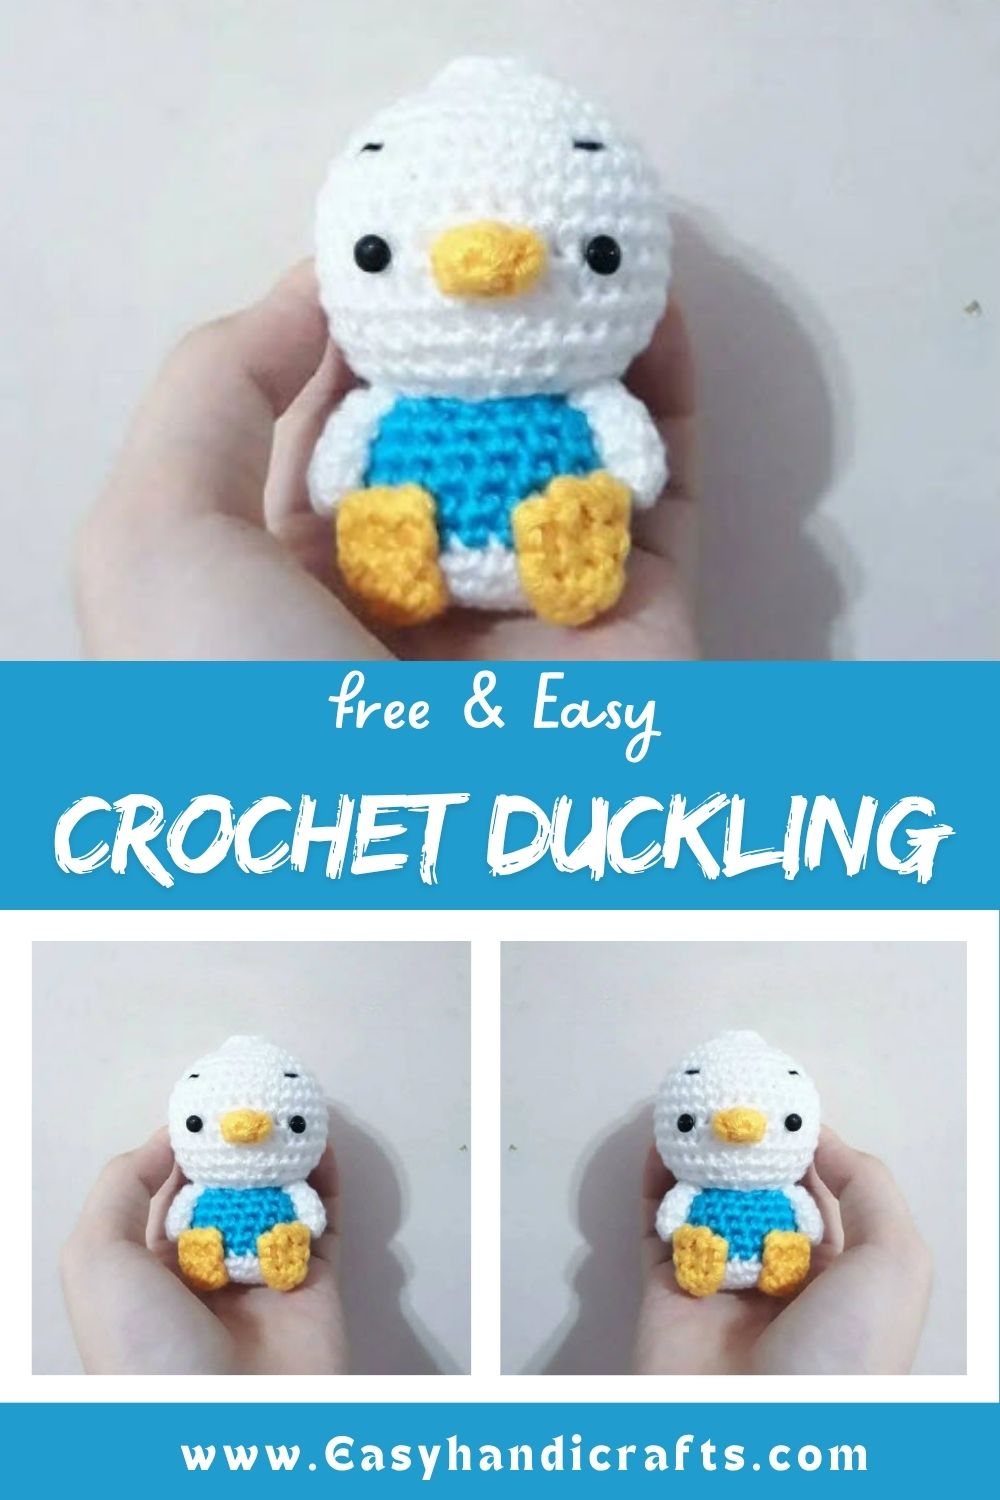
If you love adorable amigurumi characters, this Crochet Duckling Amigurumi is sure to win your heart. The beautiful combination of white and ocean-blue yarn gives it a unique and charming look, while its tiny feet, sweet little beak, and the tuft on its head add even more charm. With a soft, round shape, this project is a perfect choice for a handmade gift, nursery decor, or any amigurumi collection.
Skill Level
This Crochet Duckling Amigurumi pattern suits confident beginners and intermediate crocheters comfortable with magic rings, increases, decreases, and basic shaping. No complex stitches appear, though patience with small pieces helps a lot.
Materials
Gather these supplies before starting your Crochet Duckling Amigurumi :
- White worsted weight yarn (100g / 200 yards) for the head, hands, and lower body
- Blue worsted weight yarn (50g / 100 yards) for the belly panel and feet trim
- Orange or yellow worsted weight yarn (20g / 40 yards) for the mouthpiece
- 3.5mm crochet hook
- 8mm safety eyes (2 pieces)
- Polyester fiberfill stuffing
- Yarn needle
- Stitch marker
- Scissors
Abbreviations
MR – Magic Ring
X – Single Crochet
V – Increase
A – Decrease
S – Slip Stitch
CH – Chain
T – Double Crochet
Pattern Overview
- The duckling is built from seven separate pieces: head, hands, mouth, body, feet, hair, and tail
- The head starts with a magic ring and increases up to 36 stitches before closing at the top
- The body begins in white yarn and switches to blue midway to form the signature belly panel
- Feet are worked flat, folded, and finished with a small double crochet and slip stitch detail
- Hair is added directly onto the top of the head using chains, double crochets, and slip stitches
- The tail is a short chained detail worked directly onto the back of the body
Special Techniques
- Color changing mid-round: switch from white to blue cleanly at the start of Round 5 on the body by joining the new color during the last pull-through of the previous stitch
- Folding for flat pieces: the feet require folding both sides together before working single crochet through both layers to seal the shape
- Working directly onto a finished piece: the hair and tail are not separate pieces; they are crocheted straight into the head and body using chain-and-turn combinations
- Chain-turn combinations: rounds like (CH, turn, T, S) create small textured loops used for both the feet trim and the hair strands
Instructions
Head
- Round 1: MR 6 (6)
- Round 2: (V)×6 (12)
- Round 3: (X, V)×6 (18)
- Round 4: (2X, V)×6 (24)
- Round 5: (3X, V)×6 (30)
- Round 6: (4X, A)×6 (36)
- Rounds 7-11: X all around (36)
- Round 12: (X, A)×6 (30)
- Round 13: (2X, A)×6 (24)
- Round 14: (X, A)×6 (12)
- Round 15: (A)×6 (6) – stuff firmly, then fasten off and close
Hands
- Round 1: MR 5 (5)
- Rounds 2-4: X all around (5) – repeat to make a second hand
Mouth
- Round 1: MR 4 (4)
- Round 2: (V)×4 (8) – fasten off, leaving a tail for sewing onto the head
Body
- Round 1: MR 6 in white (6)
- Round 2: (V)×6 (12)
- Round 3: (X, V)×6 (18)
- Round 4: X all around in white (18)
- Round 5: X all around, switching to blue (18)
- Rounds 6-8: X all around (18)
- Round 9: (8X, A, 6X, A) (16) — stuff, then fasten off and close
Feet
- Round 1: MR 6 (6)
- Round 2: X all around (6)
- Round 3: Fold both sides together and work 3X through both layers (3)
- Round 4: (CH, turn, T, S) twice, working the CH, T, S into the same stitch repeat for the second foot
Hair
- Working directly on top of the head, Rounds 2 and 3: (CH, T, S, 2CH, S, CH, T, S, 2CH, T, S, CH, T, CH, S) twice
Tail
- Working directly on the body, Round 5: 4CH, then working on the opposite side, 3X
Common Mistakes
- Forgetting to switch colors exactly at Round 5 on the body, which shifts the blue belly panel out of place
- Under-stuffing the head before closing Round 15, leaving the duckling looking flat instead of round
- Skipping the fold step on the feet, which prevents the double crochet and slip stitch detail from sitting correctly
- Attaching the hair loops too loosely, causing them to lie flat instead of standing up on top of the head
- Losing track of stitch count during the increase rounds on the head, which throws off the whole shape
Assembly
- Stuff the head and body firmly, then sew them together with the head centered on the closed top of the body
- Position the safety eyes on the head before stuffing, spacing them evenly above the mouth placement
- Sew the mouth piece onto the lower front of the head using the fastened-off tail
- Attach both hands to the sides of the body, just below the head seam
- Sew both feet to the base of the body so the duckling can stand upright
- Secure the hair loops and tail directly to their designated spots as worked, weaving in any loose ends
Important Remarks
- Weave in all yarn tails securely, especially around the hair and tail sections, since these areas see the most handling
- Safety eyes should be placed and secured before final stuffing, as they cannot be adjusted afterward
- Blocking is not required for this pattern, but steaming lightly can help the belly panel lie flatter
Conclusion
This Crochet Duckling Amigurumi comes together quickly once the pieces are laid out clearly, and the blue belly panel gives it a fresh, modern look compared to typical yellow ducklings. It works equally well as a solo project or as part of a themed nursery set. Save this pattern, gather your yarn, and give this little duckling a permanent spot on your crochet shelf.