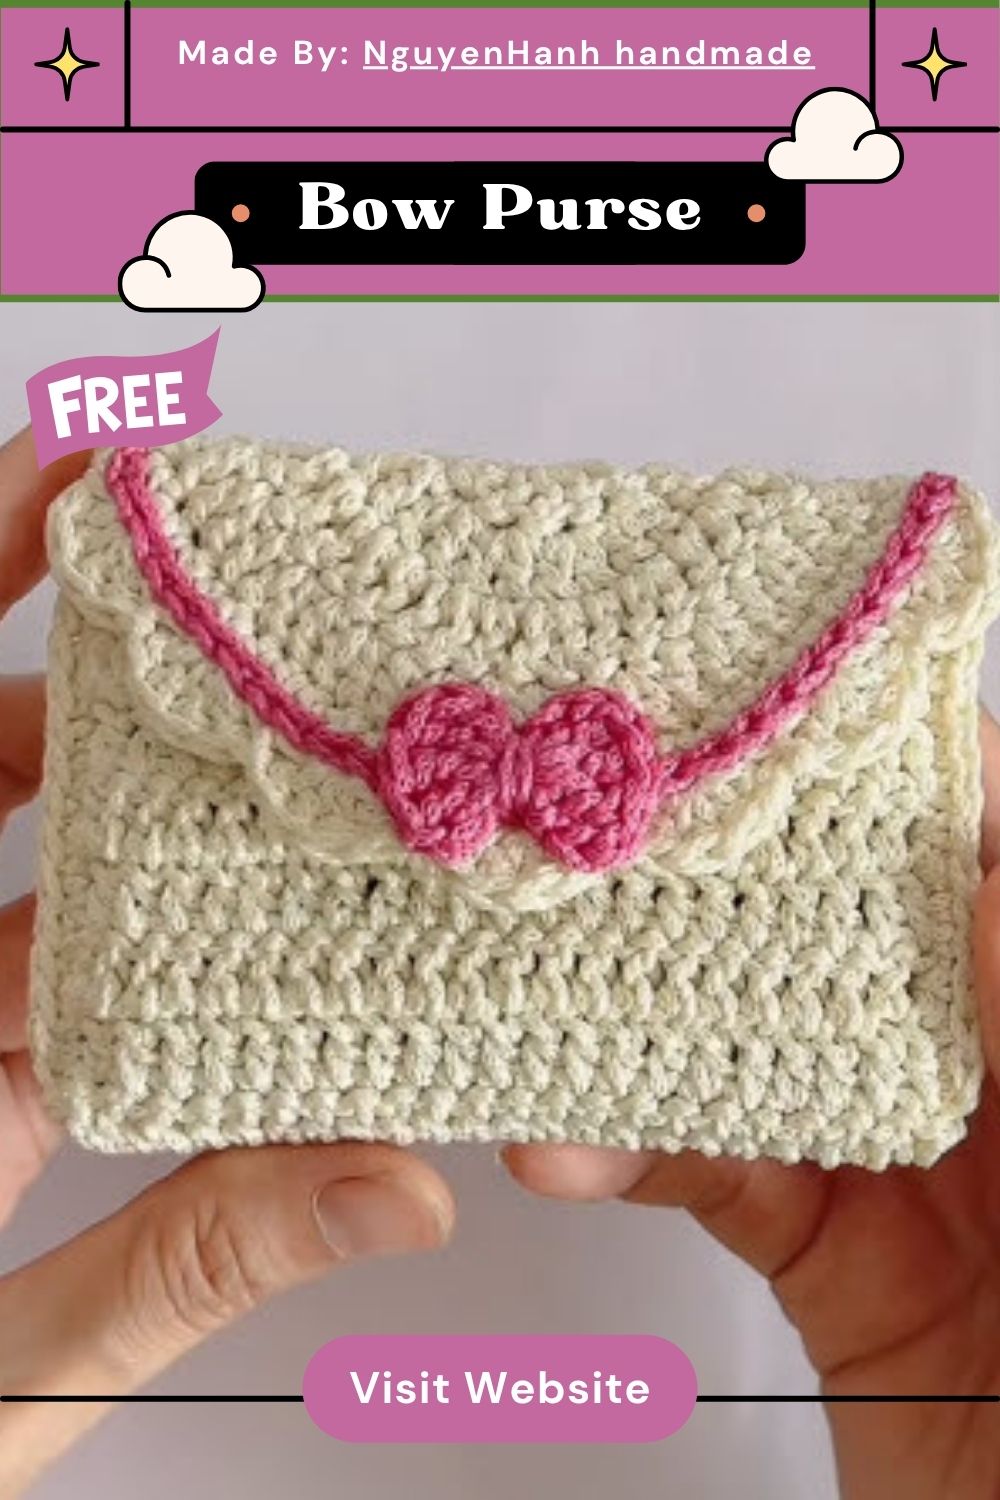
Free Crochet Bow Purse Pattern with Scalloped Flap
Cream-colored stitches build into a soft, structured little purse in this Free Crochet Bow Purse Pattern, with a delicate scalloped flap edge that elevates the whole design into something genuinely boutique-looking.
Crocheters who enjoy accessory-making, along with anyone hunting for a handmade gift with real wow factor, will love how this project balances simple construction with an elegant finished result. It’s the kind of piece that looks far more advanced than the actual stitch count required to make it.
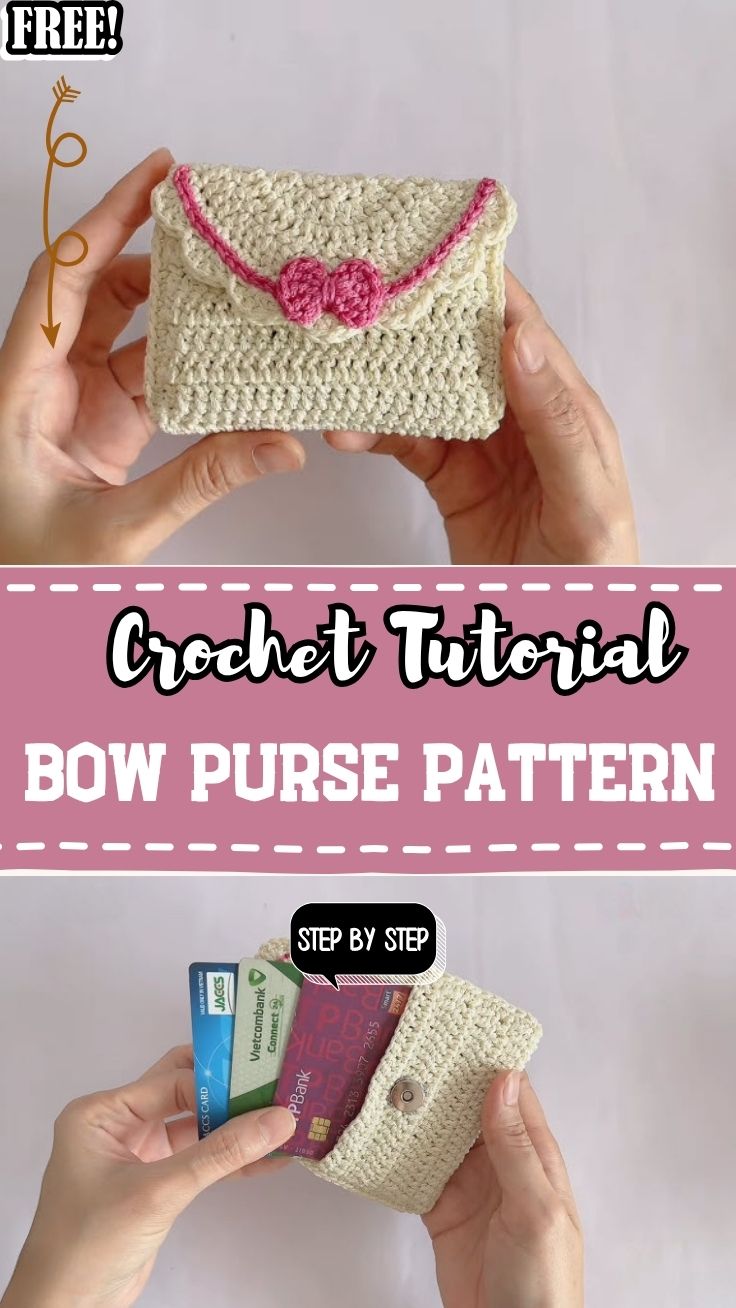
About This Crochet Pattern
Worked as a single main body panel, this purse builds upward before folding into shape, with a scalloped edge crocheted along the flap for that signature feminine, polished look. A contrasting pink accent color introduces a playful pop against the neutral cream base, hinting at the bow detail that finishes the design.
What makes this pattern stand out is how the scalloped flap transforms a fairly straightforward rectangular panel into something that reads as intentionally designed rather than simple. Because the main body works in one continuous piece before folding and seaming, this purse stays approachable even for someone who hasn’t tackled a structured accessory before, while the color accent and bow detail still deliver a genuinely eye-catching finished result.
Project Details
- Skill Level: Beginner to Intermediate
- Finished Size: Approximately 6×5 inches (adjustable based on foundation width)
- Estimated Time Required: 4–5 hours
- Recommended Yarn Weight: DK or worsted weight cotton
- Crochet Hook Size: 4mm–4.5mm
Materials Needed
- Yarn in cream (main body color)
- Small amount of pink yarn (for the bow accent)
- Crochet hook (4mm–4.5mm)
- Tapestry needle for seaming
- Stitch markers
- Scissors
- Button or snap closure (optional)
Crochet Stitches and Techniques
- Foundation Chain
- Single Crochet (sc)
- Shell Stitch (for the scalloped edge)
- Color Changes
- Fastening Off
- Sewing Pieces Together
Keeping the stitch list manageable here means the real charm comes from how these familiar techniques combine into something polished and refined.
Pattern Instructions
This purse begins with a small foundation and grows into a full panel before the scalloped flap and bow detail bring the design together. Working through the stages below in order keeps the shaping consistent and makes the finishing touches far easier to add once the main structure is complete.
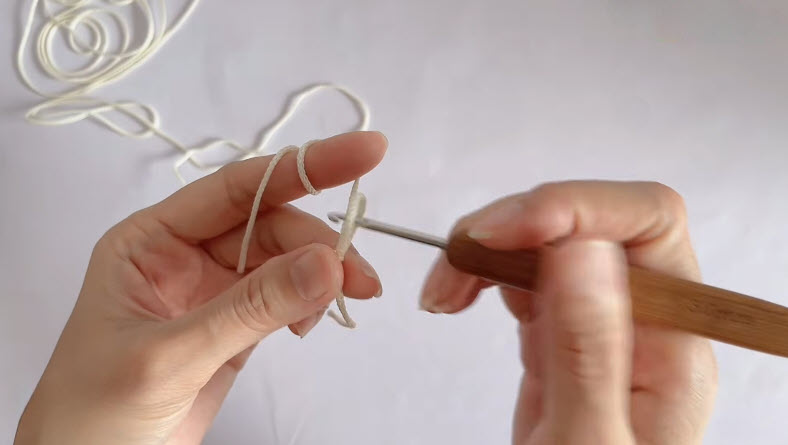
Step 1: Starting the Foundation With a Small Loop
Begin with a small loop or chain in cream yarn, anchoring your hook before working the first stitches that establish the base of the purse panel. Keep tension snug here, since this small starting point determines how evenly the panel grows in the rows that follow. This little beginning becomes the foundation the entire purse body builds from.
Step 2: Building the First Rows of the Panel
Continue working single crochet rows steadily, turning at the end of each one to build the panel’s height and width. Notice how the fabric starts forming a smooth, dense texture that will give the finished purse its structured, sturdy feel. Keep your stitch count consistent across each row to avoid the panel drifting narrower or wider than intended.
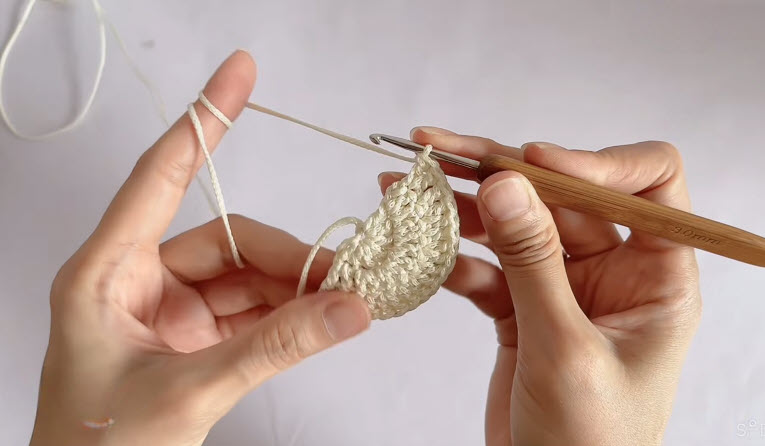
Step 3: Continuing the Panel Toward the Flap Section
Keep building rows until the main body reaches the point where the flap begins, checking your progress periodically against your intended purse size. This is where the fabric transitions from the plain body section into the area that will soon receive the decorative scalloped edging. Take care to keep tension even through this stretch, since any looseness here will show clearly once the scalloped detail is added on top.
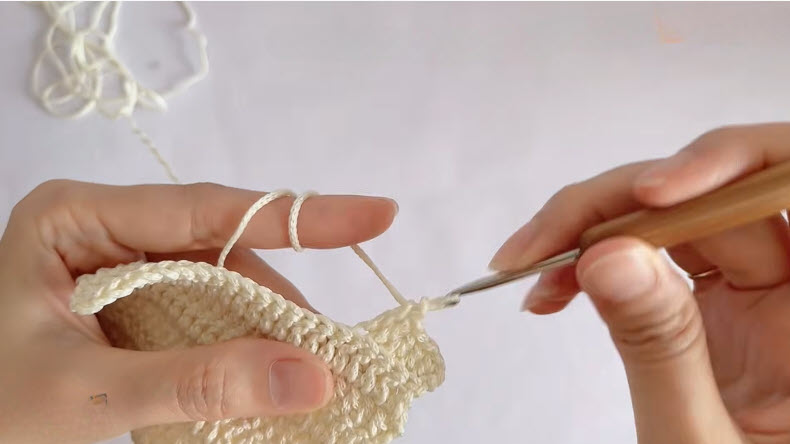
Step 4: Adding the Scalloped Flap Edge
Work a row of shell stitches along the flap edge, spacing each shell evenly to create that signature scalloped, wave-like border. Watch how the flat edge transforms into a delicate, rounded finish as each shell stitch builds outward. Fasten off once the scalloped row is complete, leaving a neat, finished edge along the entire flap.
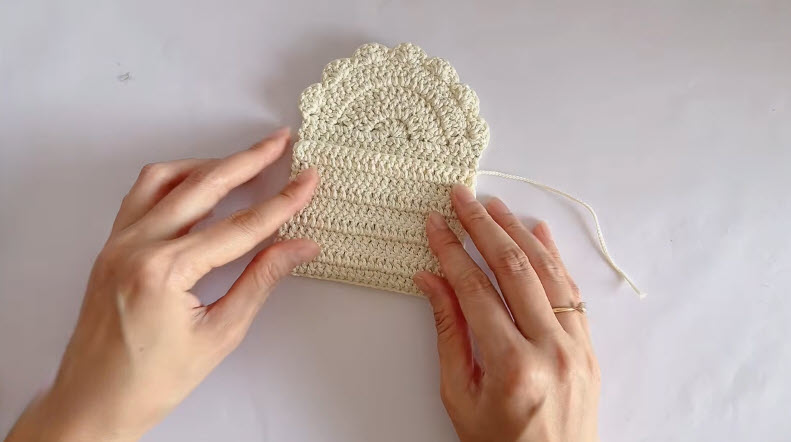
Step 5: Adding the Pink Bow Accent
Switch to pink yarn and work a small bow-shaped piece, crocheting two little loops that meet at a central knot point to form the classic bow silhouette. Keep tension firm on this smaller piece, since a bow needs crisp, well-defined loops to read clearly against the cream background. Set the finished bow aside to attach once the main purse body is fully assembled.
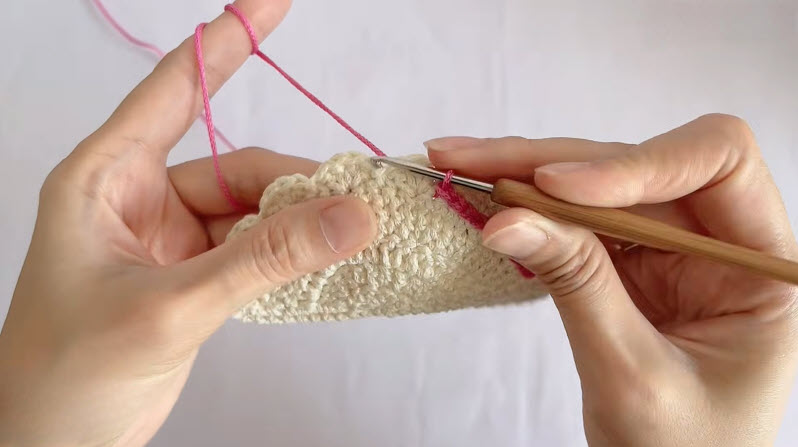
Joining All Pieces
Fold the panel into the purse shape, aligning the sides evenly before single crocheting or whipstitching the seams closed along the bottom and sides. Attach the pink bow to the center of the flap, positioning it so it sits centered and secure once stitched down with a tapestry needle.
Final Assembly
Weave in every loose yarn end neatly through the back of the stitching once all pieces are joined. Attach a button or snap closure beneath the flap if desired, checking that it aligns properly with the flap’s center. Give the finished purse a light steam or gentle shaping by hand so the scalloped edge sits crisp and even.
Tips for Success
- Keep tension consistent across every row so the panel grows evenly.
- Space shell stitches evenly along the flap for a balanced scalloped look.
- Check panel width periodically against your target measurements as you work.
- Keep the bow’s loops symmetrical for a clean, polished finished accent.
- Fold and seam carefully, checking alignment before stitching seams permanently.
- Block the finished purse gently to help the scalloped edge lie flat and crisp.
Personalization Ideas
Swapping the cream and pink palette for a deeper neutral with a bold red bow accent instantly shifts the purse toward a more dramatic, statement-making look. A pastel lavender base with a white bow offers a softer, more delicate alternative for spring and summer wear.
Adding a crossbody strap instead of a simple handle changes the purse into a more versatile everyday accessory, and a slightly larger foundation width turns this into a roomier tote-style bag. Embroidering a small initial near the bow also adds a lovely personalized touch for gifting.
Common Mistakes to Avoid
- Uneven row tension: Keep stitch tension consistent throughout to avoid a warped panel shape.
- Irregular scallop spacing: Count stitches between each shell to keep the flap edge symmetrical.
- Off-center bow placement: Measure the flap’s center point before stitching the bow down permanently.
- Loose seams: Keep joining stitches snug but not overly tight when closing the sides and bottom.
- Skipping blocking: A light steam or shaping session helps the scalloped edge hold its crisp form.
Frequently Asked Questions
What yarn works best for this bow purse pattern?
DK or worsted weight cotton yarn gives the panel enough structure to hold its shape while still remaining easy to work with.
How long does this project usually take to complete?
Most crocheters finish within four to five hours, often working the main panel and finishing details across separate sessions.
Can I make the Crochet Bow Purse Pattern larger or smaller?
Yes, simply adjust your foundation width and row count to scale the finished size up or down.
Is this Crochet Bow Purse Pattern good for someone newer to accessory crochet?
Yes, since the main body uses simple, familiar stitches, it’s an approachable project even for those new to bag-making.
What’s the best way to keep the scalloped edge looking neat?
Space your shell stitches evenly and count carefully to maintain a consistent rhythm across the entire flap.
Can I skip the bow detail if I prefer a simpler look?
Absolutely, the purse still looks lovely with just the scalloped flap as the main decorative feature.
How do I add a strap to carry this as a shoulder bag?
Crochet a long chain or strip of single crochet, then attach both ends securely to the sides of the finished purse.