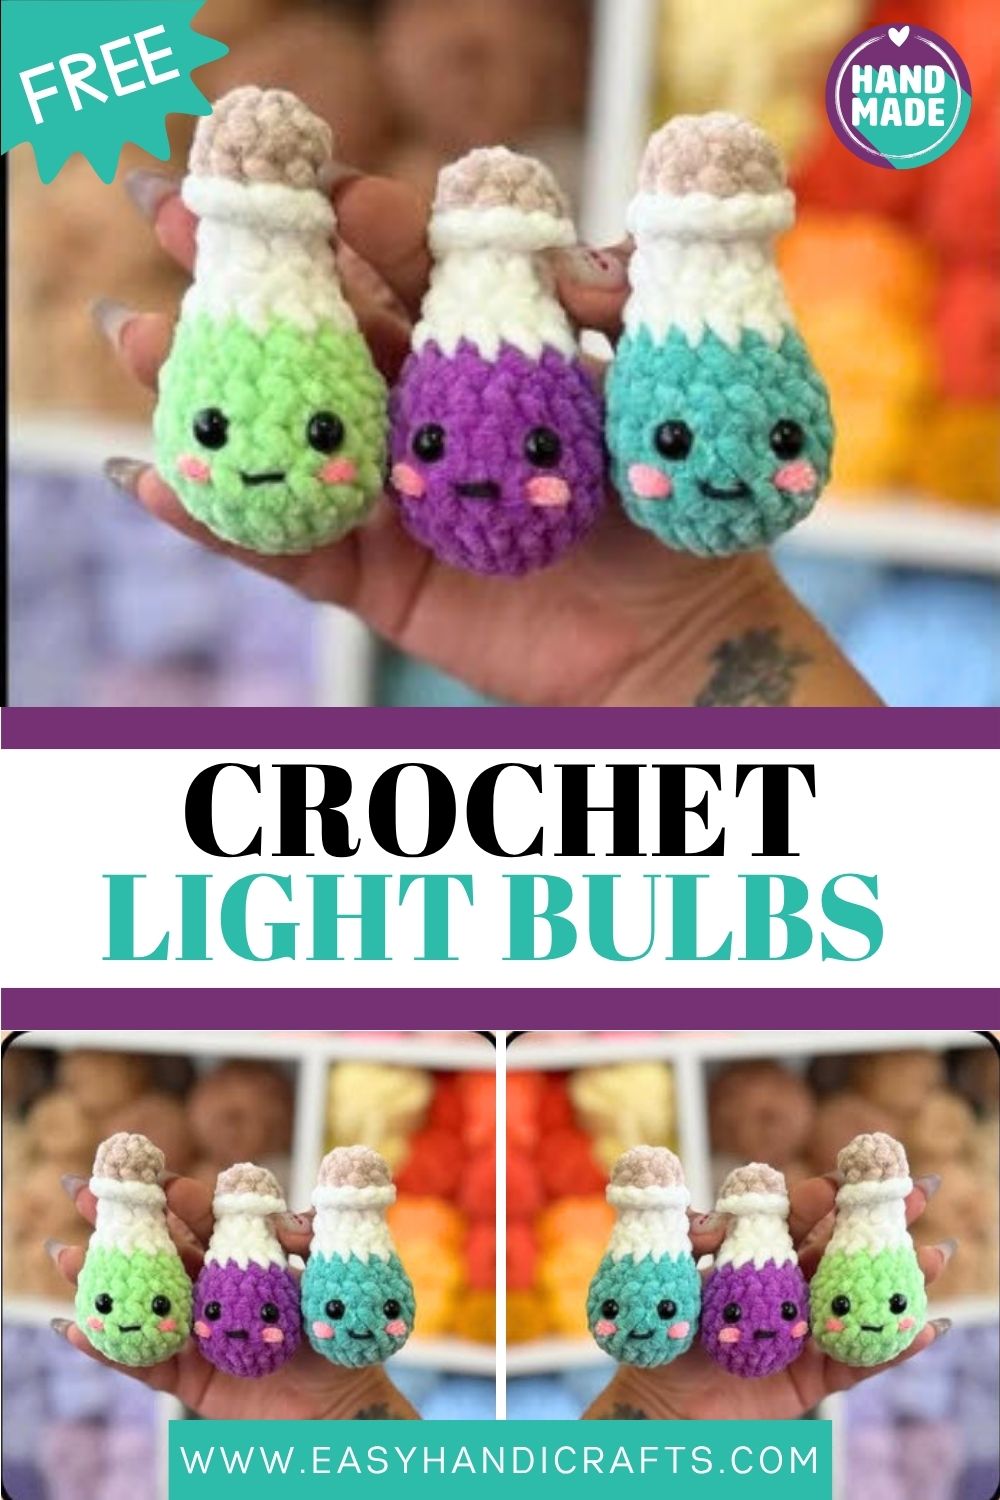
Cutest Crochet Light Bulbs Ever Amigurumi Pattern
Tiny, glowy, and weirdly charming, these Crochet Light Bulbs amigurumi are the cutest no-sew make around. Each little bulb wears a happy embroidered face, works up in about 20 minutes, and is honestly impossible not to fall for almost instantly.
This free crochet light bulb amigurumi pattern turns a little yarn into the cutest mini bulb with a cheerful face. Worked entirely in continuous rounds, it has a rounded coloured top, a soft white middle, and a chunky screw-style base, with no sewing pieces together required. The whole thing is beginner-friendly and seriously fast, so grab your hook, pick your colours, and whip up a whole glowing batch of them today.
Skill Level
This little bulb sits at confident-beginner. If you can work a magic ring, single crochet in the round, increase, decrease, and change colour, you are completely set. Back-loops-only is the only mildly new bit here.
Pattern Overview
Before you start, here is the quick rundown of what you are making and why people fall for these little guys so fast.
- What it is: A small light bulb amigurumi with a rounded coloured top, a white section, a light brown screw-style base, and a cute embroidered face.
- No sewing needed: The whole thing is worked in continuous rounds, so there are no separate pieces to stitch together.
- Designer credit: This is a designer’s free pattern. Do not copy, sell, or redistribute the pattern itself. You may sell and post the finished product, but please credit the original designer. Reach out to them or check their Instagram for more patterns.
- Time to finish: Roughly 20 minutes once you get going, give or take.
- Size: Small and palm-sized, so it is perfect for shelf decor, garlands, keychains, or quick handmade gifts.
- Best for: Stash-busting, Halloween or cosy decor, craft fairs, and beginner practice.
Materials and Supplies
You really do not need much for this one, which is half the fun. Here is the full list:
- Yarn of your choice — size 6 super bulky was used here, but any yarn works if you adjust your stitch count to match
- A 5 mm crochet hook
- 8 mm safety eyes
- Fiber filling for stuffing
- A stitch marker to track your rounds
- Scissors
- A yarn needle for closing up and weaving in ends
Small tip before you dive in: if this is one of your first amigurumi, pick a smooth, light-coloured yarn. Bulky yarn is fast and squishy, but lighter shades make it much easier to see and count your stitches.
Abbreviations Used
Crochet Light Bulbs leans hard on shorthand, so keep this little key nearby while you work:
- MR – Magic ring
- SC – Single crochet
- INC – Increase
- DEC – Decrease (invisible)
- FO – Fasten off
- SLST – Slip stitch
- CH – Chain
- STS – Stitches
- BLO – Back loops only
- CC – Change colour
- ( ) – Number of stitches at the end of each round
This pattern is written in US terminology and worked in continuous rounds, so pop in that stitch marker early.
Step-by-Step Crochet Instructions
Start with your main colour. This becomes the “glass” top of the bulb.
- R1: 6 SC into MR (6)
- R2: 6 INC (12)
- R3: (SC, INC) x6 (18)
- R4–6: 18 SC around for 3 rounds (18)
- R7: (SC, DEC) x6 (12)
Now insert your safety eyes between rounds 5 and 6, about 3 stitches apart. Once they are locked in, start stuffing the top.
- R8: CC to white, 12 SC around (12)
- R9: (2 SC, DEC) x3 (9)
- R10–11: 9 SC around for 2 rounds (9)
- R12: CC to light brown, BLO 9 SC around (9) mark the first front loop of R11 with a stitch marker before you move on
- R13: 9 SC around (9)
Slip stitch into the next stitch and fasten off, leaving a tail.
Closing the base: Use your yarn needle to thread through the front loops of the remaining stitches. Pull tight to close the bottom, then weave in the end.
Adding the ridge detail: Using white, insert your hook into the first front loop of R11 (the one you marked), and pull up a loop. Work 9 SC around, slip stitch into the first stitch, and weave in the ends. This little white round sits between the bulb and the base for that classic screw-cap look.
Finally, embroider a small smile and two rosy cheeks one round below the eyes — and your crochet light bulb is ready to glow.
Finishing and Assembly
Since this is a no-sew make, “assembly” here is really about the face and the final touches. Take your time that is the part everyone notices.
- Eyes: Lock the safety eyes between rounds 5–6, about 3 stitches apart, before stuffing.
- Stuffing: Add filling firmly enough to hold the round shape, but not so much that the stitches stretch apart.
- Smile: Embroider a gentle curved smile one round below the eyes.
- Cheeks: Add two small cheeks on either side of the smile for that extra-cute look.
- Tidy up: Weave all loose ends inside the bulb so nothing peeks out.
Special Techniques
A Crochet Light Bulbs of techniques in this pattern do the real work, so it helps to understand them first.
The back-loops-only (BLO) round is the key trick. By working only into the back loops on R12, you leave a free row of front loops behind. That ridge is exactly what gives the bulb its little screw-base detail instead of a plain straight tube.
The picked-up front-loop round is the clever follow-up. Going back into those marked front loops of R11 and adding a white round builds a raised band between the bulb and base small, but it makes the whole shape read as a light bulb.
And the invisible decrease (DEC) keeps your shaping smooth, so you avoid those gappy holes that plain decreases sometimes leave behind.
Common Mistakes and How to Fix Them
Even a quick make like this has a few easy traps. Here is what to watch for.
- Placing the eyes too late. Safety eyes lock permanently, so set them between rounds 5–6 before you stuff. Once stuffing is in, you cannot move it.
- Losing your round. Continuous rounds blur together fast. A stitch marker in the first stitch of each round saves real frustration.
- Skipping the R11 marker. That marked front loop is how you find your place later for the white ridge. Miss it, and the screw-base detail gets messy.
- Overstuffing. Too much filling stretches the stitches and lets fluff show through. Add a little, squish, then decide.
- Pulling the colour change too tight. When you change colour, keep your tension even so you do not get a puckered line between sections.
Important Remarks
A few honest reminders before you publish, sell, or gift your finished bulbs.
- Always credit the designer. This is a free pattern, but it still belongs to its creator. Selling finished bulbs is welcome; copying, selling, or redistributing the pattern itself is not.
- Stitch counts matter most. If your numbers stay correct, small tension differences will not ruin the shape.
- Match your hook to your yarn. The pattern uses bulky yarn with a 5 mm hook, but you can swap yarn as long as you adjust accordingly.
- Customise freely. Change the top colour, make a glowing set, or add a tiny chain loop to hang them. The pattern is a base, not a cage.
- Safety first for kids. For babies or young children, swap safety eyes for embroidered ones and stitch everything firmly.
Conclusion
And that is your little Crochet Light Bulbs, done. It is small, it is squishy, and it has way more personality than something this quick has any right to have. Your first one might look a touch wonky mine usually does and that is completely fine. So pick your colours, pull up the pattern, and just start. Once you make one, you will probably want a whole glowing batch.