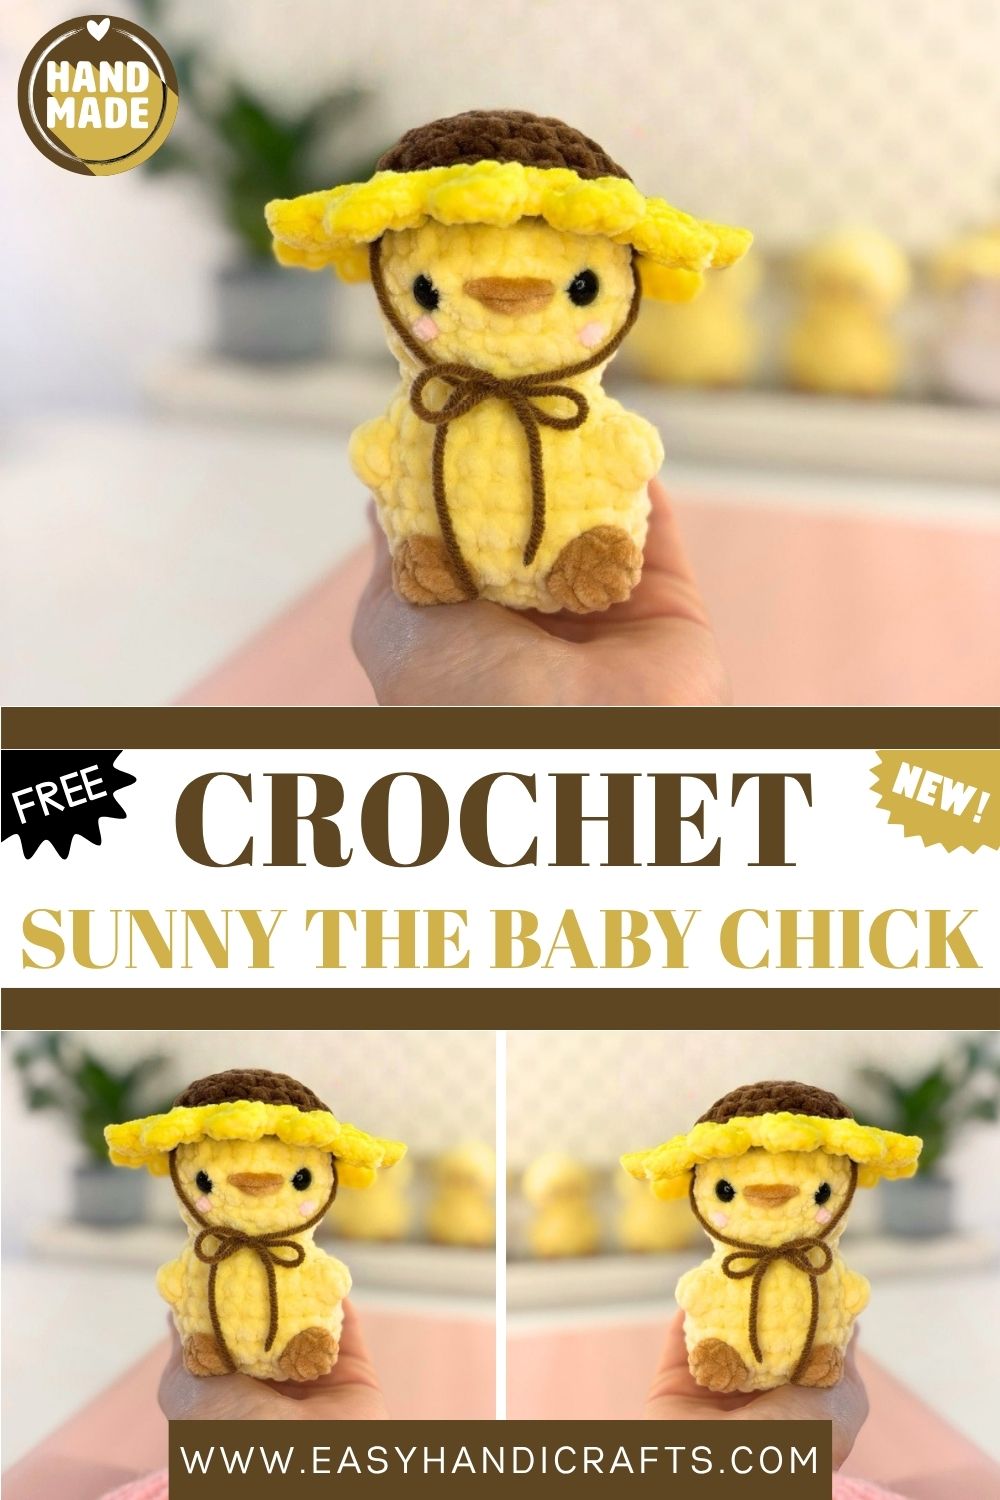
Cute Sunflower Chick Amigurumi | Handmade Crochet Yellow Plush
This tiny yellow chick wearing a sunflower hat is pure handmade magic. Stitch it up and fall in love instantly!
There is something truly special about crocheting a small creature that fits right in the palm of your hand. This baby chick amigurumi, crowned with a charming sunflower hat, is one of those projects that brings genuine joy from the very first stitch to the very last finishing touch. Made with soft chenille yarn and worked entirely in the round, this pattern is approachable enough for beginners while still being satisfying and engaging for more experienced makers. The chick’s plump little body, tiny bobble wings, and delicate embroidered beak come together to create a finished piece that looks like it came straight from a boutique shop window. Whether you are making this for a spring decoration, an Easter basket, or simply because it is irresistibly cute, this pattern delivers a result you will be genuinely proud of.
Skill Level
Beginner to intermediate. Basic single crochet knowledge is enough to get started, though color changes and bobble stitches add a satisfying new skill to practice.
Materials You Will Need
Yarn:
- Yellow chenille yarn for the chick body (Honey Bunny Chenille from Hobbii recommended)
- Light brown yarn for the bobble wings
- Dark brown yarn for the sunflower hat center
- Thinner yarn in any color for the bow
Other Supplies:
- Crochet hook — 4.5 mm
- Safety eyes — 8 mm
- Polyfill stuffing
- Scissors
- Tapestry needle for closing and finishing
Abbreviations
- R — Round
- MR — Magic Ring
- SC — Single Crochet
- INC — Increase (2 sc in same stitch)
- DEC — Decrease
- BO(N) — Bobble Stitch, pulled through with N loops on hook
- CC — Color Change
- HDC — Half Double Crochet
- SLST — Slip Stitch
- (…) x N — Repeat N times
- (N) — Total stitch count for that round
Pattern: Baby Chick
Starting with yellow yarn
R1. 6 sc in MR (6) R2. (inc) x 6 (12) R3. (sc, inc) x 6 (18) R4. (2sc, inc) x 6 (24) R5–R7. sc around for 3 rounds (24) R8. (2sc, dec) x 6 (18) R9. (sc, dec) x 6 (12) R10. (sc, inc) x 6 (18) R11. (2sc, inc) x 6 (24) R12. (5sc, inc) x 4 (28) — adjust if needed for your tension
Place safety eyes between R6 and R7, approximately 5 stitches apart.
Note on bobble placement: The arms should sit on the front of the body with 7 sc between them. Adjust the BO placement as needed based on your eye placement.
R13–R14. sc around for 2 rounds (24) R15. 11 sc, (CC to light brown) BO(6), (CC to yellow) 4 sc, (CC to light brown) BO(6), (CC to yellow) 7 sc (24)
Fasten off the brown yarn and tuck the tail inside the body. Stuff the head and body firmly at this point.
R16. (2sc, dec) x 6 (18) R17. (sc, dec) x 6 (12) R18. dec x 6 (6)
Fasten off and close the hole securely. Embroider the beak between the eyes over approximately 3 stitches. Add blush cheeks with chalk or pink yarn if you like.
Pattern: Amigurumi Sunflower Hat
Starting with dark brown yarn
R1. 6 sc in MR (6) R2. (inc) x 6 (12) R3. (sc, inc) x 6 (18) R4. (2sc, inc) x 6 (24) R5–R6. sc around for 2 rounds (24) R7. (CC to yellow) — in the same stitch: slst, ch3, 2 hdc down the chain, slst — then slst in next stitch. Repeat x 12 times around.
Begin again in the next stitch and repeat x 12 for a second layer of petals if desired. Slip stitch into the first stitch to connect the start and end of the flower round. Fasten off and weave in all ends.
Attach a small bow using thinner yarn, tied just at the base of the hat, for an extra sweet finishing detail.
Place the completed sunflower hat on top of the chick’s head and sew it down with a few secure stitches.
Customization and Variation Ideas
- Change the hat color entirely — a soft lavender center with white petals creates a daisy effect that is just as sweet as the sunflower version.
- Use standard acrylic yarn instead of chenille for a slightly firmer, more structured chick body that holds its shape differently.
- Make a whole flock in different colors — a pink chick, a mint chick, and a classic yellow chick lined up together make a stunning seasonal display.
- Skip the hat entirely and embroider a tiny crown instead for a royal chick variation that feels completely different.
- Swap the bow for a tiny crocheted flower clipped at the side of the hat for a more dimensional, textured finish.
- Scale the pattern up using a 6 mm hook and chunky yarn for a larger, squishier version that works beautifully as a nursery decoration.
Common Mistakes to Avoid
- Losing track of color changes: Lay out your yarn colors in advance and use a bobby pin or small clip to hold the unused yarn out of the way while you work with the active color.
- Bobble stitches pulling unevenly: Practice the BO stitch on a swatch before working it into the body. Consistent tension is the key to neat, rounded bobbles.
- Safety eyes placed too late: Always insert and lock your safety eyes before the body gets too close up. This is the most common beginner mistake in amigurumi, and it cannot be undone once stuffing is added.
- Overstuffing the chenille body: Chenille yarn stretches more than standard acrylic, so avoid pushing in too much stuffing or the stitches will separate and gaps will show between rows.
- Skipping the color change tail tuck: After the bobble wing round, always tuck the light brown tail inside before continuing — leaving it out creates a messy finish that is hard to fix later.
- Uneven beak embroidery: Use a straight pin to mark the exact center between the eyes before embroidering the beak. A few seconds of planning saves a lot of unpicking.
Finishing Tips
- When sewing the sunflower hat onto the chick’s head, use the same yellow yarn so the stitches blend invisibly into the body.
- Pull your magic ring closed gradually and in two stages — pull halfway, rotate slightly, then pull fully — for a tighter, neater center with no hole.
- After fastening off and closing the body, give the chick a gentle squeeze and reshape it with your hands while the stuffing is still settling.
- The chenille yarn can pill slightly with handling — a quick once-over with a fabric shaver after finishing keeps the surface looking smooth and boutique-quality.
- If your bobble wings feel stiff, use a tapestry needle to gently loosen and fluff each bobble loop from the inside before the body is fully closed.
- Take a photo of your finished chick before gifting or selling it — building a portfolio of your handmade work is one of the most rewarding parts of the craft.
Gifting Ideas
- Nestle the finished chick inside a small terra cotta pot filled with tissue paper grass for a spring or Easter gift that looks like it came from a professional gift shop.
- Pair the chick with a handmade greeting card and a small packet of sunflower seeds for a cohesive, themed gift set that feels intentional and personal.
- Make a matching set of three chicks in different seasonal hat variations — spring sunflower, autumn pumpkin, and winter snowflake — and gift them as a collectible trio.
- These chicks make wonderful teacher appreciation gifts, especially tucked into a mug alongside a small treat and a handwritten note.
- Package in a kraft paper gift bag with yellow and brown tissue for a naturally beautiful presentation that requires zero extra wrapping effort.
- Consider selling these at local craft fairs or on handmade marketplaces — the sunflower hat detail makes this chick genuinely stand out from standard amigurumi listings.
Conclusion
This sunflower chick amigurumi is one of those patterns that manages to be beginner-accessible while still producing a finished piece that genuinely impresses. The combination of soft chenille yarn, a cheerful color palette, and that irresistible little sunflower hat makes every single stitch feel worthwhile. Work at your own pace, embrace the color changes, and do not skip the bow — it is the tiny detail that pulls the whole look together. Whether this little chick ends up on a shelf, in a gift basket, or in the hands of someone you love, it carries with it every bit of care and creativity you put into making it.
Happy crocheting! Cannot wait to see your sunshine chick come to life.