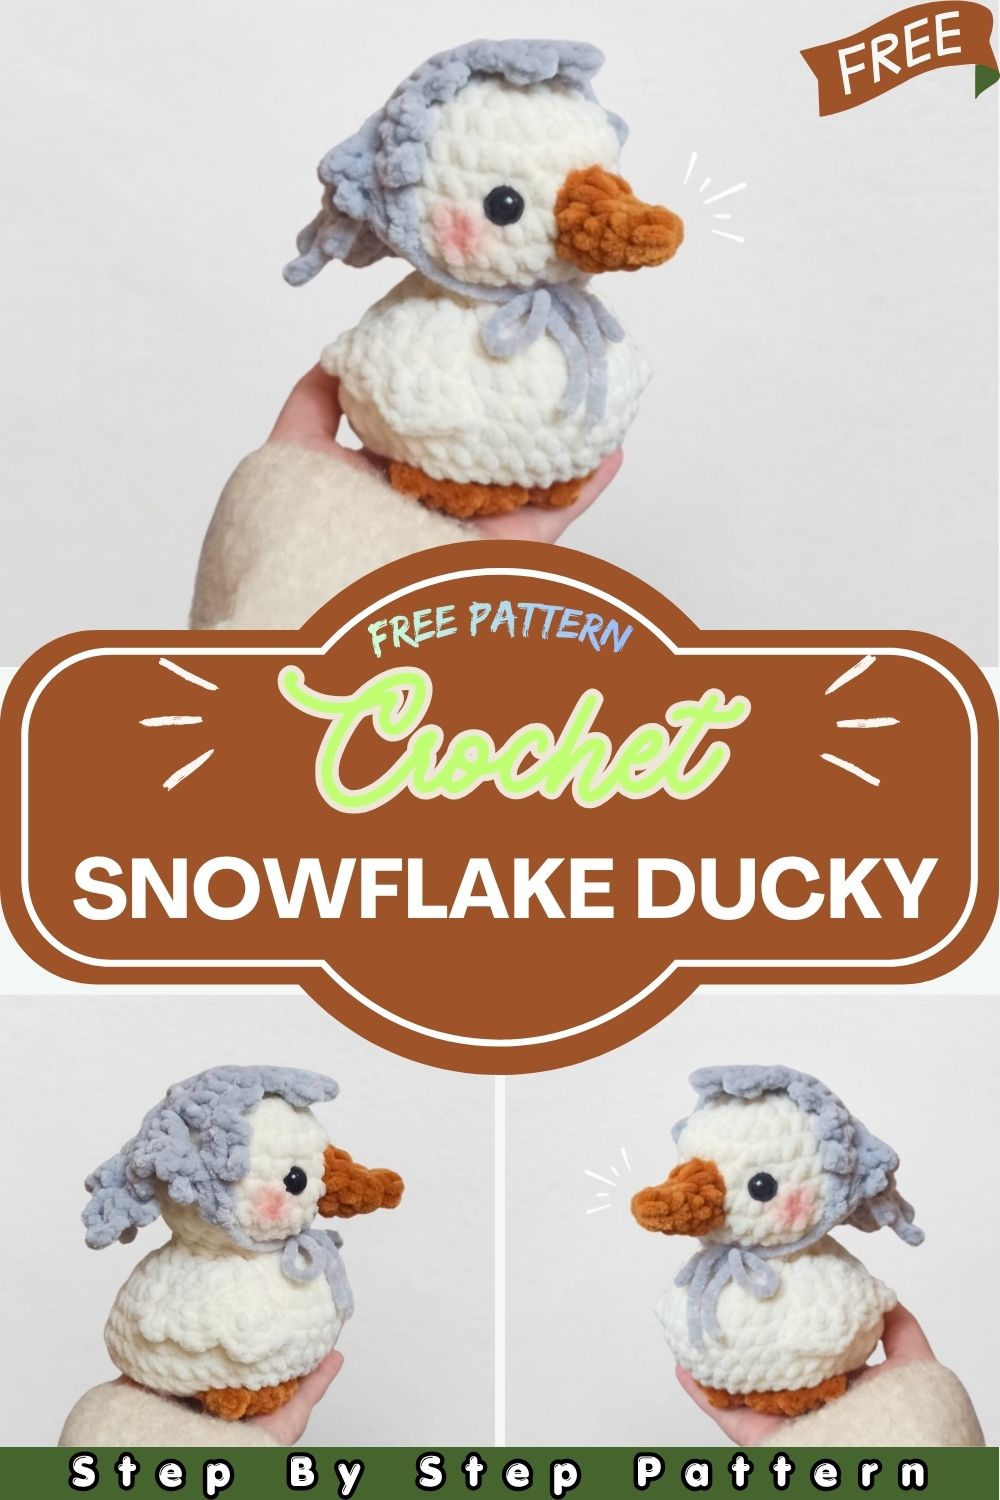
Adorable crochet duck amigurumi wearing a snowflake bonnet, worked in continuous rounds with easy step-by-step instructions for a cute handmade winter-themed plush.
This crochet duck pattern is a detailed amigurumi project designed using US crochet terms and worked in continuous rounds. It features a soft duck plush with wings, beak, feet, and a beautiful snowflake bonnet for a cozy winter look. The instructions are beginner-friendly yet enjoyable for experienced crocheters, making it perfect for gifts, décor, or personal collections. Each section is clearly explained to help you create a neat and professional-looking finished plushie.
MATERIALS
- 4mm & 5mm crochet hook
- Size 6 chenille yarn in: white, light blue & orange
- 2× 10–12mm safety eyes
- Optional: pink cotton yarn or powdered blush + brush (for cheeks)
- Tapestry/darning needle
- Toy stuffing
- Scissors
ABBREVIATIONS
- R / Rnd = Row / Round
- MR = Magic Ring (Magic Circle)
- Ch = Chain
- St = Stitch
- Sl st = Slip Stitch
- Sk = Skip a stitch
- FO = Fasten off
- Sc = Single crochet
- Dec = Invisible decrease
- Dc = Double crochet
- Hdc = Half double crochet
- Inc = Increase (2 stitches in the same stitch)
Cheek Placement Note
In the next round, stitch markers indicate where the cheeks (blush area) will be placed.
R7:
7 sc, place a stitch marker on the last stitch,
2 inc, 6 sc,
2 inc, place stitch marker on next stitch,
7 sc (28)
R8: sc around (28)
R9: (2 sc, dec) × 7 (21)
R10: (sc, dec) × 7 (14)
Face Placement
Insert safety eyes between R6–R7, with 6 visible stitches between them.
Stuff the head and cheek area firmly.
R11–R12: sc around (2 rounds) (14)
R13: inc × 14 (28)
R14: 4 inc, 21 sc, 3 inc (35)
R15–R18: sc around (4 rounds) (35)
Back Detail
R19: 3 hdc inc (center back of duck), sc 32 (38)
R20: sc around (38)
Stuff the body generously
R21: dec × 19 (19)
R22: (sc, dec) × 6, sc (13)
R23: (sc, dec) × 4, sc (9)
DUCKLING WINGS
Crochet in White Yarn (5mm hook)
Make 2
R1: ch 7 (7)
R2: starting in the 2nd ch from the hook, 6 sc, ch 1, and turn (6)
R3: 5 sc, ch 1, and turn (5)
R4: sk 1, 4 sc, ch 1, and turn (4)
R5: 3 sc, ch 1, and turn (3)
R6: sk 1, 2 sc (2)
Finishing
Fasten off (FO), leaving a long tail for sewing.
Sewing Instructions
Align the wing carefully on the body before sewing:
- The FO tail should face the front of the duck’s body
- Align it with the eye placement line (dashed guide)
- The top of the wing starts at R12
- The bottom of the wing aligns with R16
DUCKLING BEAK
Crochet in Orange Yarn (4mm hook)
R1: 4 sc in MR (4)
R2: (sc, inc) × 2 (6)
R3: sc around (6)
R4:
Place a stitch marker on the last stitch,
inc × 2, place stitch marker on next stitch,
4 sc (8)
Finishing
Slip stitch and fasten off (FO), leaving a long tail for sewing. Do not stuff.
Placement
Sew the beak across R5–R8 of the head.
Make sure the increases marked with stitch markers are positioned at the top of the beak for proper shaping.
DUCKLING FEET
Crochet in Orange Yarn (4mm hook)
Make 2
R1: 5 sc in MR (5)
R2: inc × 5 (10)
R3:
Fold the piece in half, tuck the MR tail inside,
work 5 sc through both layers, ch 1, and turn (5)
R4: (dc, sl st) × 2, dc, sl st
SNOWFLAKE BONNET
Crochet in Light Blue Yarn (4mm hook)
R1
CH 6 in MR (this counts as first DC),
(work: dc, ch 3) × 4,
sl st into 3rd ch from initial ch 6 to close round.
R1 Completed
R2
Work only into the ch-3 spaces (see R1 circles).
Sl st into next ch-3 space,
ch 3 (counts as first dc),
4 dc, ch 3,
(5 dc, ch 3) × 4,
sl st into 3rd ch.
R2 Completed
R3 (Snowflake Formation)
In this round, you will create small bumps (dc sections) and large decorative loops (chain spaces).
Pattern:
(
2 sl st, ch 3, 3 sl st → small bump
You are now in ch-3 space.
Now in the same space, work on large bumps:
ch 3, sl st, ch 5, sl st, ch 7, sl st, ch 5, sl st, ch 3, sl st) × 5
This forms all 5 points of the snowflake.
Finishing
Slip stitch and fasten off (FO), leaving a long tail.
Final Shape
The snowflake may curl after completion. Gently stretch and shape it flat. You may also block it for a clean finish.
SNOWFLAKE BONNET (ASSEMBLY)
Using the long fasten-off (FO) tail and a tapestry needle, sew along the edge of the snowflake so that the yarn tail sits at one of the 5 snowflake points.
Attach another yarn tail 2 points away and secure firmly. Hide the MR tail neatly inside the stitches.
These tails will be used to secure the bonnet onto the head.
Attachment Method
- Place the bonnet gently around the duck’s head
- Tie the ends under the chin in a secure bow
- Trim any excess yarn neatly
You can slightly curve the bonnet around the head to give it a cozy, fitted shape and keep it snug.
OPTIONAL BLUSH
Use pink yarn and a tapestry needle to add blush under the eyes on both cheeks.
Conclusion
Your crochet duck with snowflake bonnet is now complete! This handmade amigurumi is soft, cute, and full of character, making it perfect for gifting or display. You can also personalize it with different yarn colors, blush details, or bonnet styles to create your own unique version.