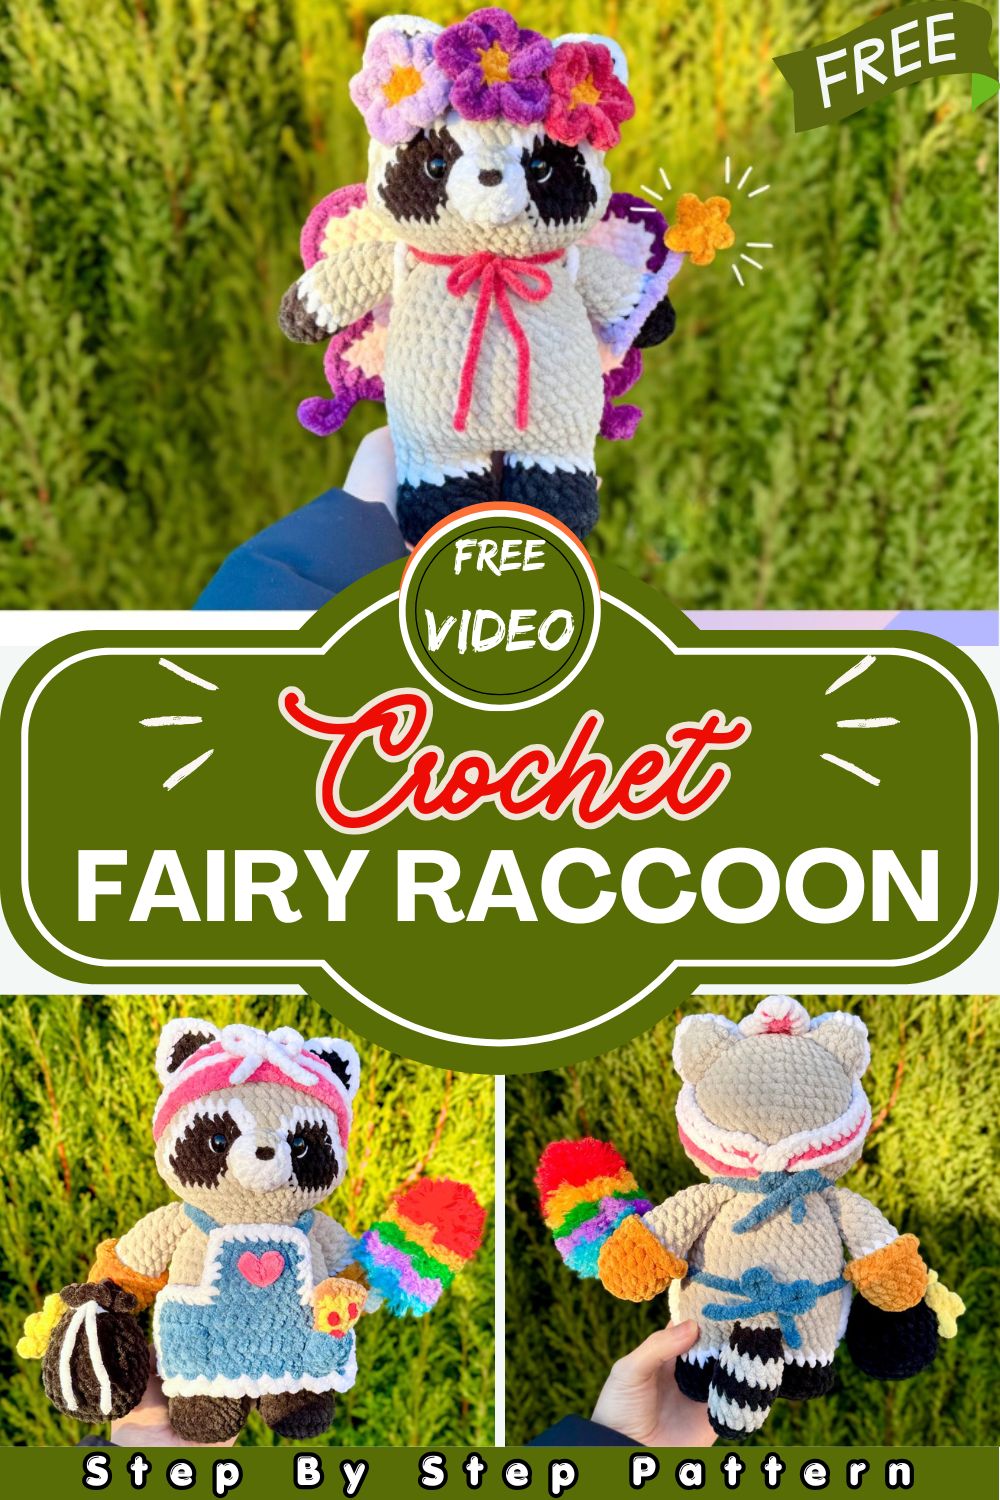
Handmade Crochet Raccoon Doll | Cute Amigurumi Plush Toy | Kawaii Handmade Gift
Bring creativity to life with this Handmade Crochet Raccoon Doll, a super cute amigurumi plush designed for crochet lovers. With its adorable details and kawaii charm, this raccoon makes a perfect handmade gift, nursery decor piece, or collectible plush toy for all ages.
Crochet lovers are always searching for unique and adorable projects, and this Handmade Crochet Raccoon Doll is the perfect choice for anyone who loves cute handmade creations. Designed with soft textures, charming details, and playful accessories, this cute amigurumi plush instantly stands out with its sweet kawaii style.
Materials
Before starting your Handmade Crochet Raccoon Doll, gather all the materials to make the process smoother. Using soft yarn and the right tools will help you achieve the perfect, cute amigurumi plush finish.
Yarn Colors
Yarn: Hobbii – Honey Bunny
- Gray — Raccoon
- Black — Raccoon + Accessories
- White — Raccoon + Accessories
- Pink — Accessories
- Blue — Accessories
- Yellow — Accessories
- Light Yellow — Accessories
Tools & Supplies
To complete your kawaii crochet raccoon, you will also need:
- 4 mm Crochet Hook
- 12 mm Safety Eyes
- Darning Needles
- Stuffing
- Stitch Markers
- Scissors
Crochet Stitch Abbreviations
Before you begin, it is important to understand the crochet abbreviations used throughout this amigurumi raccoon pattern. As a result, following the instructions becomes much easier.
- MR — Magic Ring
- sc — Single Crochet
- inc — Increase
- dec — Decrease
- sc3tog — Single Crochet 3 Together
- hdc — Half Double Crochet
- dc — Double Crochet
- ch — Chain
- slst — Slip Stitch
- st(s) — Stitch(es)
- FLO — Front Loop Only
- BLO — Back Loop Only
- Rnd(s) — Round(s)
- Rw(s) — Row(s)
- FO — Fasten Off
- Repeat × times
How to Crochet the Raccoon Head
The head is worked in joined rounds. First, make Ch 1 at the beginning of every round. Afterward, close each round with 1 slip stitch (slst) in the first stitch.
Head Base
Rnd 1: 8 sc in MR (8 sts)
Rnd 2: 8 inc (16 sts)
Rnd 3: (1 sc, 1 inc) × 8 (24 sts)
Rnd 4: (2 sc, 1 inc) × 8 (32 sts)
Rnd 5: (3 sc, 1 inc) × 8 (40 sts)
Rnd 6–8: 40 sc (40 sts)
Color Placement for the Face
From Rnd 9 to Rnd 14, alternate yarn colors between gray, white, and black. Additionally, follow Photo 1 (Face Chart) for exact color placement.
Safety Eye Placement
Once you finish Rounds 11 and 12, insert the 12 mm safety eyes. Make sure they are placed about 6 stitches apart while staying 2 stitches away from the gray section. Therefore, your raccoon face will look balanced and symmetrical.
Crocheting the Raccoon Body
After completing the head, continue using gray yarn and cut the black and white yarn. Meanwhile, keep shaping the head while maintaining even tension in your stitches.
Making the Arms (x2)
Start with black yarn, then switch to white, and finally use gray yarn for the upper section. Moreover, lightly stuff the arms so they remain soft and flexible.
Crocheting the Legs (x2)
For the legs, begin with black yarn and later transition into white yarn. Afterward, join both legs together to begin forming the raccoon body.
Building the Body
Once both legs are connected, continue crocheting the body in rounds. In addition, add stuffing gradually to maintain the proper shape. This step helps your Handmade Crochet Raccoon Doll stay soft yet structured.
Adding the Tail & Final Assembly
Crochet the Tail
The tail alternates between black and gray yarn, creating the raccoon’s signature striped appearance. As a result, the plush looks more realistic and adorable.
Assembling the Raccoon
Sew the muzzle between the eyes, attach the tail to the back, and then sew the head onto the body. Furthermore, check the alignment carefully before securing everything permanently.
How to Make the Bandana
To make your raccoon even cuter, crochet the pink bandana in rows. Then, add the white border around the edges. Finally, tie the bandana into a small bow to complete the kawaii look.
Crocheting the Apron
Apron Base
First, crochet the apron base in blue yarn. After that, create the straps and continue shaping the upper section.
Adding the Border
Next, attach white yarn and crochet around the edges for a clean finish.
Pockets & Decoration
Finally, sew the pockets and embroider a pink heart in the center. Consequently, the apron will perfectly match the playful personality of your cute amigurumi plush.
Accessories for Your Crochet Raccoon
Gloves
Crochet the gloves in yellow yarn to create a fun cleaning theme.
Trash Bag & Banana Peel
Additionally, make the tiny trash bag and banana peel accessories to give your raccoon even more character. As a result, your Handmade Crochet Raccoon Doll will feel extra unique and full of charm.
Final Touches
Now it’s time to dress your raccoon! Tie the bandana, place the apron, and add the tiny gloves. Overall, this cute amigurumi plush becomes an adorable kawaii gift and a memorable handmade keepsake. Whether you keep it for yourself or gift it to someone special, this Handmade Crochet Raccoon Doll is guaranteed to bring smiles.