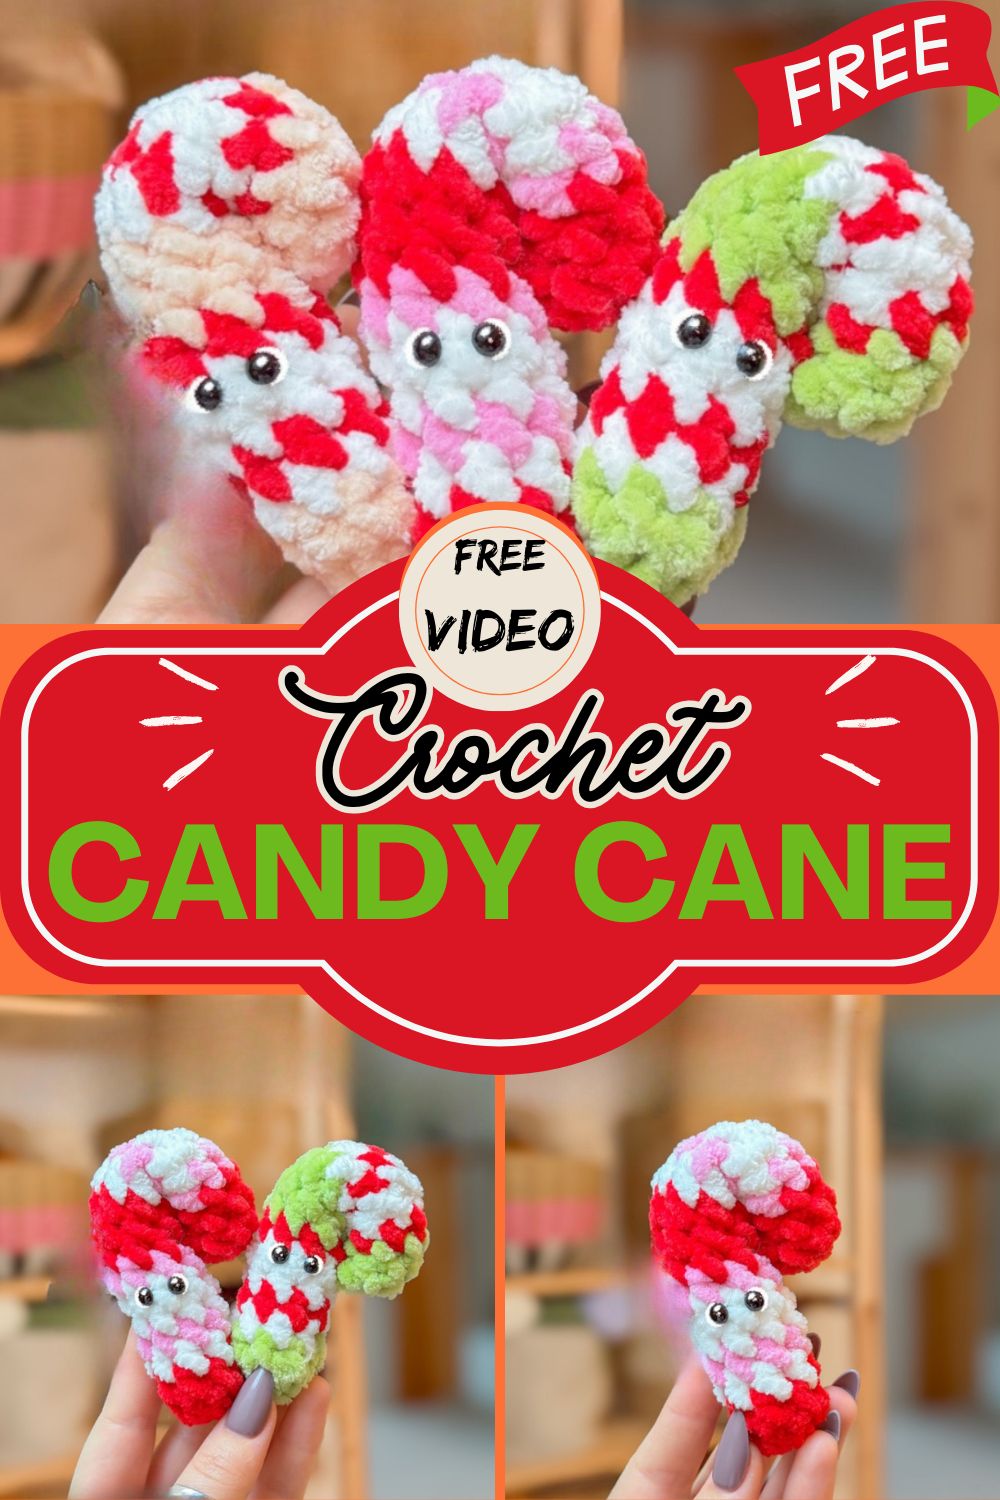
Free Mini Crochet Candy Cane Pattern for Beginners
Peppermint stripes, cheerful curves, and not a bit of stickiness. A Crochet Candy Cane Pattern gives you all the holiday charm of real candy, and as something you can reuse on your tree every year.
Tiny ornaments have a way of pulling a whole tree together, and this mini Crochet Candy Cane Pattern is one of the easiest you can stitch. A few yarn scraps, a single evening, and a couple of basic stitches are all it takes to crochet a sweet, festive keepsake of your own.
Pattern Overview
Here’s what you’re signing up for before you grab your hook:
- A small striped candy cane worked as one continuous tube, then gently curved into that classic hook shape.
- Made with just two main colors, white and red, with the option to add a third for extra stripes.
- Stuffed softly so it holds its shape but still bends into the curve.
- Finished with a few hidden stitches that lock the curve in place, no complicated shaping required.
- An optional kawaii face turns it from a plain ornament into a smiley little plushie.
Skill Level
If you can work a magic circle and single crochet in rounds, you can make this. It’s a perfect first amigurumi, with simple color changes the only new skill.
Supplies You’ll Gather
- Size 6 (super bulky) yarn in white and red, plus pink if you want an extra stripe color
- 4.5mm crochet hook
- 6mm yarn needle
- Stitch marker
- Scissors
- Stuffing material
- Optional: 6mm safety eyes for a face
Abbreviations (US Terms)
- st(s) – stitch(es)
- sc – single crochet
- sc2tog – single crochet two stitches together (a decrease)
- yo – yarn over
- mc – magic circle
- cc – color change
- FO – fasten off
Stitches and Techniques to Know
A quick look at the few skills this project leans on:
- Magic circle (mc): opens the candy cane with a tidy, closed center.
- Continuous rounds: you spiral without joining, so drop a stitch marker into the first stitch of each round to stay on track.
- Color changes (cc): swapping colors every couple of rounds is what creates the candy stripes. Change on the last yarn over of the final stitch before the new color.
- Single crochet decrease (sc2tog): used at the very end to close the tube neatly.
- Shaping by hand: instead of crocheting a curve, you bend the finished tube and tack it with a needle, which keeps the pattern beginner simple.
How to Crochet the Mini Candy Cane
This is worked in continuous rounds. Mark the first stitch of every round so you never lose your place. Start with white.
- Round 1: 7 sc in mc (7)
- Round 2: sc around (7)
- cc to red
- Rounds 3–4: sc around (7)
- cc to white
- Rounds 5–6: sc around (7)
- cc to red
- Rounds 7–8: sc around (7)
- cc to white
- Rounds 9–10: sc around (7)
- cc to red
- Rounds 11–12: sc around (7)
- cc to white
- Rounds 13–14: sc around (7)
Begin stuffing lightly around round 10, then add a little more as you go. Keep the fill soft so the cane can still bend later.
- Round 15: [sc2tog, sc] around until the opening closes (about 3 sts), then FO leaving a long tail.
Use the tail and your yarn needle to cinch the opening shut, then weave the end inside.
Optional face: if you’d like a smiley plushie, place 6mm safety eyes between rounds 5 and 6, about one stitch apart, before you stuff. Embroider a small smile underneath.
Putting It Together
Once the tube is done, the candy cane shape comes together fast:
- Lay the finished tube flat and decide where the hook of the cane will sit, usually the top three or four rounds.
- Gently bend that top section into a curve.
- Thread your yarn needle and tack the inside of the curve with a few small, hidden stitches so the shape stays put.
- Tug lightly to test that the curve holds, then secure and weave in the end.
- If you added a face, give the eyes a gentle check to make sure they’re even.
Common Mistakes to Watch For
A few easy slip ups can change how your candy cane turns out, so keep these in mind:
- Forgetting the stitch marker. In continuous rounds the spiral hides the start, so mark the first stitch every single round.
- Messy color changes. If your stripes look muddy, you’re switching colors too late. Change on the final yarn over of the last stitch before the new color.
- Stuffing too firmly. An overstuffed tube won’t bend, so keep the fill light and even.
- Curving too much of the tube. Only the top few rounds should hook over. Bending more makes it look like a cane, not a candy cane.
- Loose tacking stitches. If the curve springs back, your hidden stitches need to be tighter and closer together.
- Skipping the test bend. Always check the curve holds before you weave in your final end.
Good to Know Before You Start
A handful of remarks to make the whole thing smoother:
- Size 6 yarn keeps this make chunky and quick, but you can size down with thinner yarn and a smaller hook for a daintier cane.
- Two colors is the classic look, but a third stripe color adds a fun twist.
- Weave in your color change ends as you go so you’re not left with a pile of tails at the end.
- The optional face is entirely up to you. Leave it off for a traditional ornament, or add it for a cute plushie vibe.
- This pattern uses US crochet terms throughout.
- Keep your tension even so the stripes stay the same width all the way up.
Fun Color Ideas to Try
Crochet Candy Cane Pattern doesn’t have to be red and white. Mix it up:
- Classic red and white for a timeless holiday ornament.
- Pink and white for a soft, peppermint sweet look.
- Pastel blue and white for a frosty winter theme.
- Green and white to match the rest of your Christmas palette.
- Rainbow stripes for a playful, non-traditional candy cane the kids will love.
Ways to Use Your Mini Candy Canes
Once you’ve made a few, you’ll find these little canes pop up everywhere:
- Hang them as ornaments on a Christmas tree or a mini tabletop tree.
- Tie one onto a wrapped gift as a handmade topper that doubles as a keepsake.
- String several together into a cheerful holiday garland.
- Pop them into stockings as a no sugar treat that lasts.
- Use them as place card markers or napkin ties for a festive dinner table.
- Group a bowlful on a shelf or mantel for instant seasonal decor.
Beginner Tips for a Tidy Tube
Small habits go a long way toward a neat, professional looking candy cane:
- Work into the back of each stitch consistently so your rounds stay smooth and even.
- Keep your stuffing in small pinches rather than one big wad, which prevents lumps.
- Trim and weave your color change tails inside the tube before you close it up.
- If a stripe looks crooked, it usually means your round count slipped, so recount as you switch colors.
- Block or steam the finished cane lightly if you want the stripes to sit perfectly flat.
Deck the Tree and Get Hooked
And that’s your free mini Crochet Candy Cane Pattern, ready to hang, gift, or pile into a festive bowl. It’s the kind of small, satisfying thing you can finish in an evening, so go ahead and whip up a whole batch in different colors. String them on a garland, clip them to gift bags, or share your finished canes with a crafty friend.