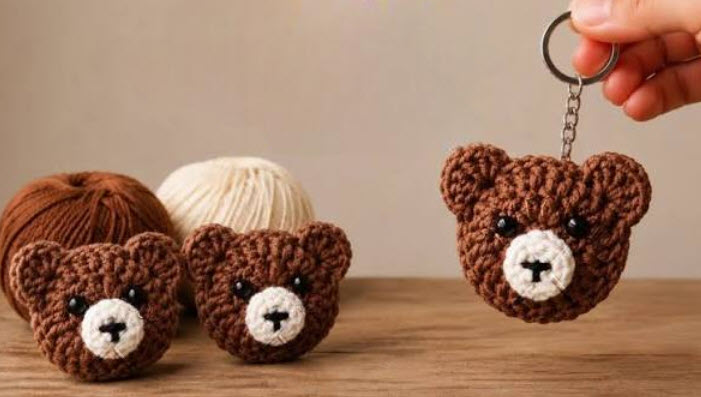
Easy Crochet Bunny Keychain Pattern Little Gift
This pink crochet bunny keychain has a white bow between its ears and a creamy white chin. A small pom-pom dangles below on a thin strand, so the finished charm moves a little with every step. Save this free pattern for a very easy handmade gift idea.
The face is pink with tall pink ears, and black bead eyes sit above a stitched nose. Besides that, a metal chain hangs from the top, and a pink and white pom-pom dangles below. It works as a bag charm and as a simple present. Therefore, it is a good pick for Thanksgiving gift ideas and Christmas stocking stuffers.

Pink Crochet Bunny Keychain Overview
The finished piece is a flat bunny face with two upright ears. Pink forms most of the face and ears, while white appears in the lower part of the face. Both colours show again in the border. After that, a keychain ring goes at the top, and a small bow is glued near one ear.
The front and back match, so there is only one set of rows to learn. Once the first piece is done, the second is a simple repeat. In addition, nothing needs shaping or turning inside out, which keeps the project calm and predictable.
Two Matching Sides
Every bunny made this way has a face on both sides. For that reason, two pairs of plastic eyes are needed. Likewise, both pieces must follow the same rows and color changes.
Color Changes and Ears
Pink and white switch within the early rows to draw the face. This is simple colour blocking rather than detailed colourwork, so it adds personality without adding hard stitches. Meanwhile, the ears are not made separately. After the face rows, three slip stitches move the yarn to the right spot, and each ear grows from a chain topped with half double crochet and double crochet stitches.
Finally, a little pink and white fluffy material, a mini pom-pom, or a bit of cotton goes between the layers. As a result, the keychain feels cushioned without becoming bulky.
Finished Size: The bunny head with ears measures about 3 inches (7.5 cm) tall and 2.5 inches (6 cm) wide. With the hanging pom-pom it comes to roughly 4.5 inches (11 cm) in total, not counting the metal chain. The size changes a little with your yarn weight and hook size.
Skill Level and Stitches
Everything here is basic: chain, slip stitch, single crochet, half double crochet, and double crochet. Increases mean working two stitches into one stitch, and colour changes happen mid-row. Anyone who has made a flat swatch or a small coaster will recognise these moves. However, newer crocheters should allow extra time for the ears, since the chain-and-stitch combination needs a steady hand.
Here are the abbreviations used in this pattern:
- Ch: chain
- Sl st: slip stitch
- SC: single crochet
- HDC: half double crochet
- DC: double crochet
Materials for the Pink Crochet Bunny Keychain
- Yarn: 5-ply milk cotton, about 2 mm thick, in pink and white
- Hook: 2.5 mm
- Tapestry or wool needle
- Stitch marker, or a short piece of scrap yarn
- Plastic eyes: two pairs
- Black thread for the Y-shaped mouth and nose
- Keychain ring
- Hot glue gun
- Filling: pink and white fluffy material, a small pom-pom, or a little cotton
Gather everything before starting. The gluing stage moves quickly, so hunting for supplies midway only slows things down.
Yarn Notes
The source pattern uses 5-ply milk cotton at roughly 2 mm. Because cotton-style yarn holds its shape and shows stitches clearly, the colour changes stay crisp on such a small piece.
A different yarn can work if its thickness is close. On the other hand, something much thicker will enlarge the bunny and crowd the ears. Similarly, something much thinner will give a smaller, floppier result unless the hook is reduced to match.
Details the Pattern Leaves Out
The supplied instructions explain the construction but skip a few details: stitch counts for each row, yarn amounts, and finished measurements. For this reason, this guide does not guess those numbers. Instead, write down your own counts while making the first piece, and the second one will be easy to match.
Tips Before Starting the Pink Crochet Bunny Keychain
- Keep both colors within reach. Pink and white alternate inside the same rows, so keep both balls nearby and untangled. Smooth switching depends on it.
- Mark the start of each row. A stitch marker or scrap yarn shows where a row begins. This matters most when the same rows must be repeated for the second piece.
- Count at the end of every row. Tiny shapes go uneven fast when one row gains or loses a stitch. Therefore, a quick count keeps the front and back the same size.
- Hold the yarn snugly. Wrap the yarn over the index finger and keep steady tension. Otherwise, loose stitches leave gaps that let filling or glue show through later.
Pink Crochet Bunny Keychain Step-by-Step Instructions
Make two identical pieces by following Steps 1 to 4 twice. One becomes the front and the other becomes the back. Then Steps 5 and 6 bring everything together.
Step 1: Start the Chain
Begin with pink yarn. First, make a slip knot on the hook, then chain 5. This short chain is the base for the whole face. Also, wrap the working yarn over the index finger so the tension stays even from the first stitch.
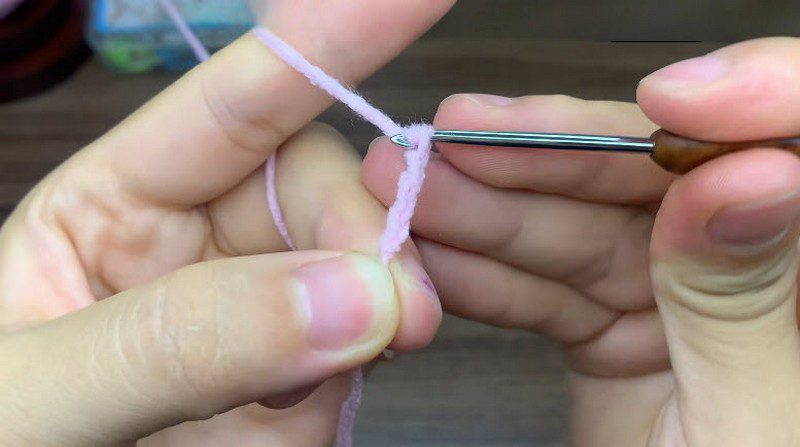
Step 2: Work the First Row
Next, skip the 5th chain as directed, then begin single crochet in the 4th chain. In this row, pink and white yarn are combined to start the face design. To change color cleanly, pull the new yarn through on the last loop of the stitch before the change. Additionally, a stitch marker placed in the first stitch keeps the row easy to find.
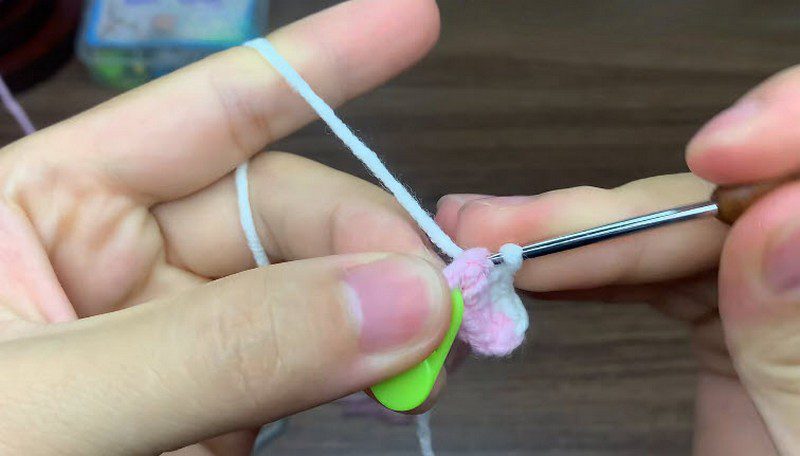
Step 3: Increase and Change Colours
Rows 2 and 3 use increases, meaning two stitches in the same stitch, plus colour changes from pink to white and back to pink. Together, these increases widen the face and prepare the ear area. Leave the marker in place, and count the stitches before moving on.

Step 4: Shape the Ears and Border
After the face rounds, make 3 slip stitches to reach the ear section. Then chain 6. Starting from the 4th chain, work half double crochet stitches and one double crochet to form the ear. Next, repeat the same process for the second ear. Finally, finish with a slip stitch border in white and pink yarn, then cut the yarn. Now make the second piece the same way.

Step 5: Assemble the Pink Crochet Bunny Keychain
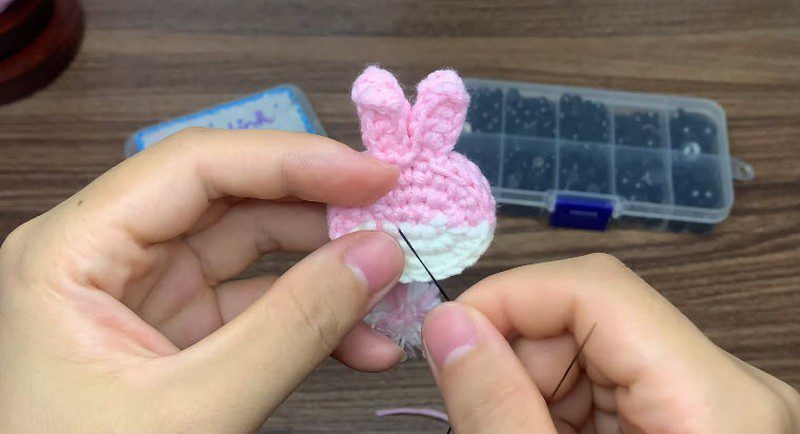
First, place a small amount of pink and white fluffy material between the two finished pieces so the keychain turns out thick and soft. Then apply hot glue along the edges to join the front and back securely. After that, make a small bow, glue it near one ear for decoration, and attach the keychain ring at the top.

Step 6: Add the Pink Crochet Bunny Keychain Face
Thread the needle with black thread and embroider a small Y-shaped mouth and nose. Then add the plastic eyes to each side. Keep the embroidery small, so it stays in proportion to the little face.
Ways to Change the Pink Crochet Bunny Keychain
- Swap the colours. Pink and white are the supplied colours. However, any two shades with clear contrast keep the face design readable.
- Rework the bow. The bow is decorative only. For example, make it in a contrasting colour, or leave it off for a plainer look.
- Pick another filling. Pink and white fluffy material, a pom-pom, or cotton all give body. Just use only a little, so the glued edges still close flat.
- Resize with care. A thicker yarn and larger hook make a bigger bunny, while thinner yarn does the opposite. Since the original size is not given, test any change on the first piece before making the second.
Fixing Common Problems
- The two pieces do not match. Different stitch counts between rows are the usual cause. Hold the pieces side by side before gluing. If one is slightly larger, work its slip stitch border a bit tighter.
- Colour changes look messy. Bring the new colour through on the final step of the stitch before the switch. As a result, the line stays clean instead of blurry.
- The ears look uneven. Both ears should start from matching spots with the same chain length. Counting the chains for each ear helps them mirror one another.
- Glue shows at the edges. Use a thin line of hot glue and press the pieces together lightly. Afterwards, trim any excess once it cools.
- The keychain feels flat. Add a touch more filling before gluing. Still, stay modest so the edges can meet.
Finishing and Care
Weave in loose yarn ends with the tapestry needle before assembly, since they are harder to hide afterwards. Next, trim them close, glue the pieces together over the filling, and check that the ring and bow are firmly attached.
The yarn is milk cotton, but glue and plastic eyes are part of the finished item. For that reason, spot cleaning is the safer choice: dab gently with a damp cloth and let it air dry. Also avoid soaking or machine washing, which could loosen the glue. Finally, store the keychain somewhere dry and away from heavy objects that might flatten it.
Quick Gift Presentation Ideas
A small bunny looks better with a little presentation. For instance, tuck it into a kraft envelope with a short handwritten note, or tie it to a greeting card with ribbon. Alternatively, place it in a clear treat bag with a tag. These ideas suit birthdays, holidays, and small thank-you gifts.
FAQs About the Pink Crochet Bunny Keychain
Is this pattern good for beginners?
The stitches are basic, but the colour changes and ears need care. Still, anyone comfortable with simple flat pieces will likely manage it.
Why are two pairs of eyes needed?
Both the front and the back have a face, so each side needs its own pair.
Can the pieces be sewn together instead of glued?
The source pattern uses hot glue. Sewing is possible, but it changes the finish and is not part of the supplied instructions.
What if the yarn is not milk cotton?
Pick a yarn of similar thickness and test a small piece first, because another fiber may change the size and softness.
Can the bunny be used for something besides a keychain?
Yes. It can hang from a bag zipper, sit on a gift, or serve as a small ornament.

One Small Bunny, Many Gifts
Basic stitches and two colours are enough to turn yarn into a charming keepsake. Thanks to the matching sides, simple ears, and glued assembly, the process stays straightforward from start to finish. So make one to keep, or hand it to someone who would enjoy a small surprise.