Free Crochet Mickey Mouse Amigurumi Pattern for a Friend
Free Crochet Mickey Mouse Amigurumi Pattern for a Friend starts with a small metal split ring, a strand of bright red yarn, and a stack of tiny finished pieces waiting to be joined. This design turns basic amigurumi shapes into a wearable, giftable charm. Because the finished piece stays pocket-sized, it works as a quick, thoughtful handmade token for someone special.
What makes this particular build stand out is the way the components come together after they are made separately. Rather than crocheting one continuous body, crafters build the head, ears, shorts, and limbs on their own, then join everything by hand. This approach suits any amigurumi keychain pattern search, and it also fits well into a broader Disney-inspired crochet gift collection for birthdays or holidays.
Pattern Overview
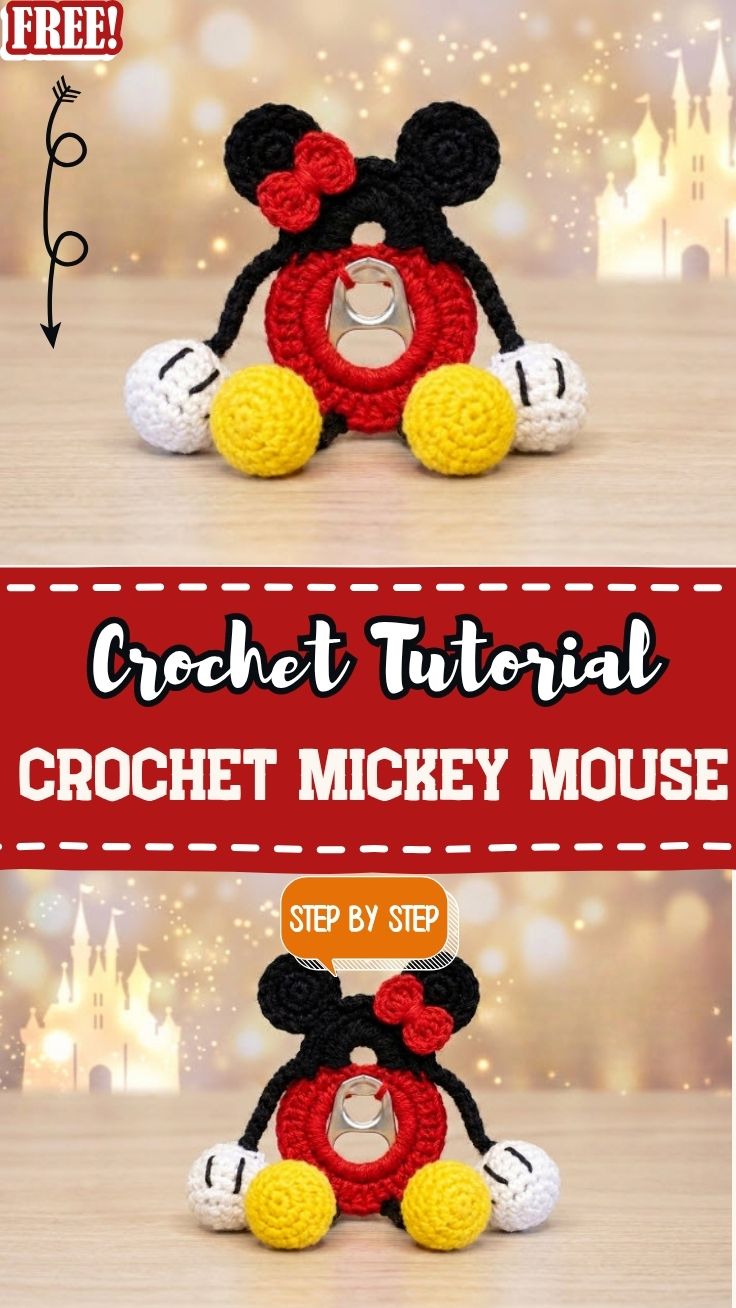
- Character-style amigurumi keychain shaped like a classic mouse figure
- Worked in black, red, yellow, and white yarn
- Uses a metal split key ring as the hanging base
- Finished size sits around 10-12 cm, ideal for bags or keys
- Suitable for confident beginners who know single crochet basics
Special Techniques
This build relies on magic ring starts for every rounded piece, including the head, ears, and hand balls. Increasing and decreasing rounds shape the sphere-like sections, so stitch counts shift often. The red shorts piece works flat in the round directly around the split ring, which locks the yarn and hardware together permanently. Surface embroidery adds the eyes and nose once stuffing is complete. A Mickey Mouse amigurumi figure like this depends on clean color changes, since fewer stitches means less room to hide messy joins.
Time Box
- Prep time: 10 minutes (sorting yarn colors, cutting lengths, threading needle)
- Stitching time: 90-120 minutes (head, ears, body, limbs, shorts ring)
- Finishing time: 20-30 minutes (stuffing, sewing pieces together, embroidering face)
Total project time lands between two and three hours for most confident beginners. Slower crocheters can spread the work across two short sessions instead.
Common Mistakes
- Skipping stitch markers, which makes round counting harder to track
- Overstuffing small pieces, causing seams to pucker or stretch
- Using yarn that is too thick for a 2.5- 3 mm hook
- Forgetting to leave a long tail for sewing pieces together
- Attaching the split ring loosely instead of crocheting straight through it
Uses & Benefits
A finished Mickey Mouse amigurumi keychain does more than decorate a bag. It teaches sphere shaping, color changes, and hand-sewing assembly in one manageable project. Because every piece is small, yarn scraps from bigger projects work perfectly here, so almost nothing gets wasted. The keychain format also means the finished piece gets used daily instead of sitting on a shelf, which makes the practice time feel worthwhile long after the last stitch.
Helpful Beginner Tips
- Count stitches after every round to catch mistakes early
- Use stitch markers on any round with increases or decreases
- Keep yarn tension even, especially on the tiny ear pieces
- Pre-stuff pieces lightly before closing so shapes stay firm
- Sew with the same yarn color to hide seam lines
Assembly
Attaching the Body Ring to the Split Keyring
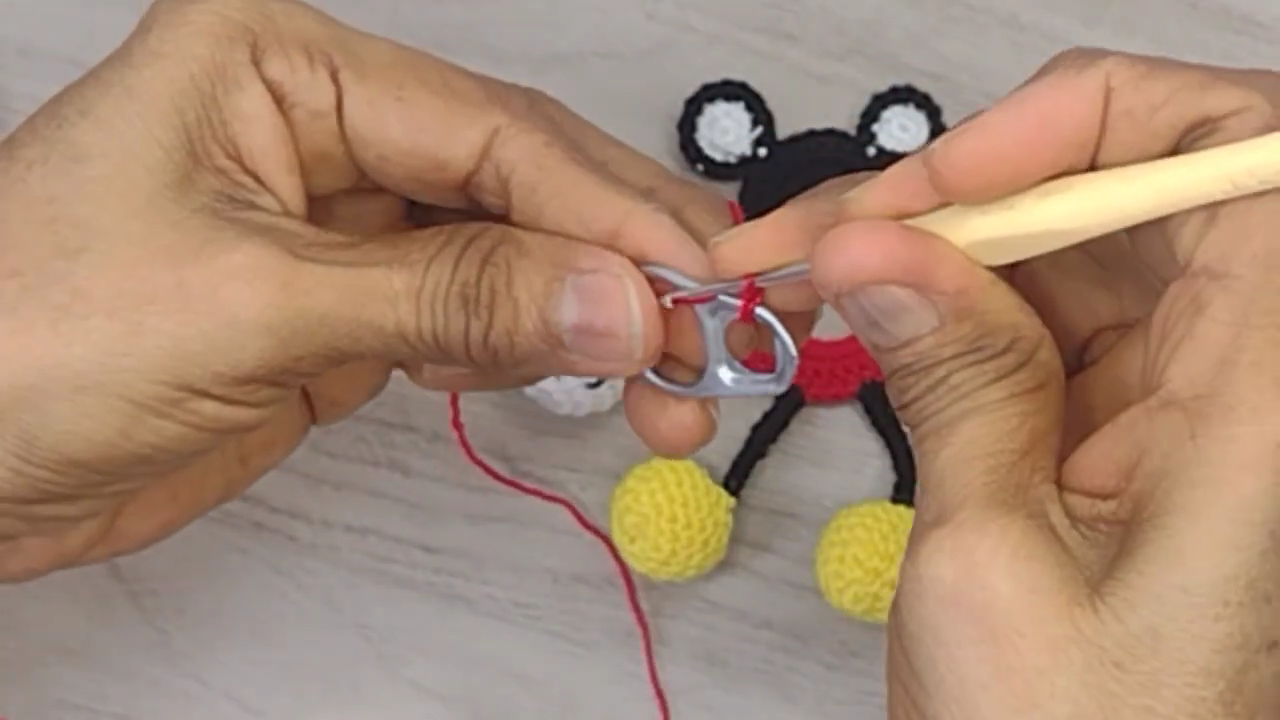
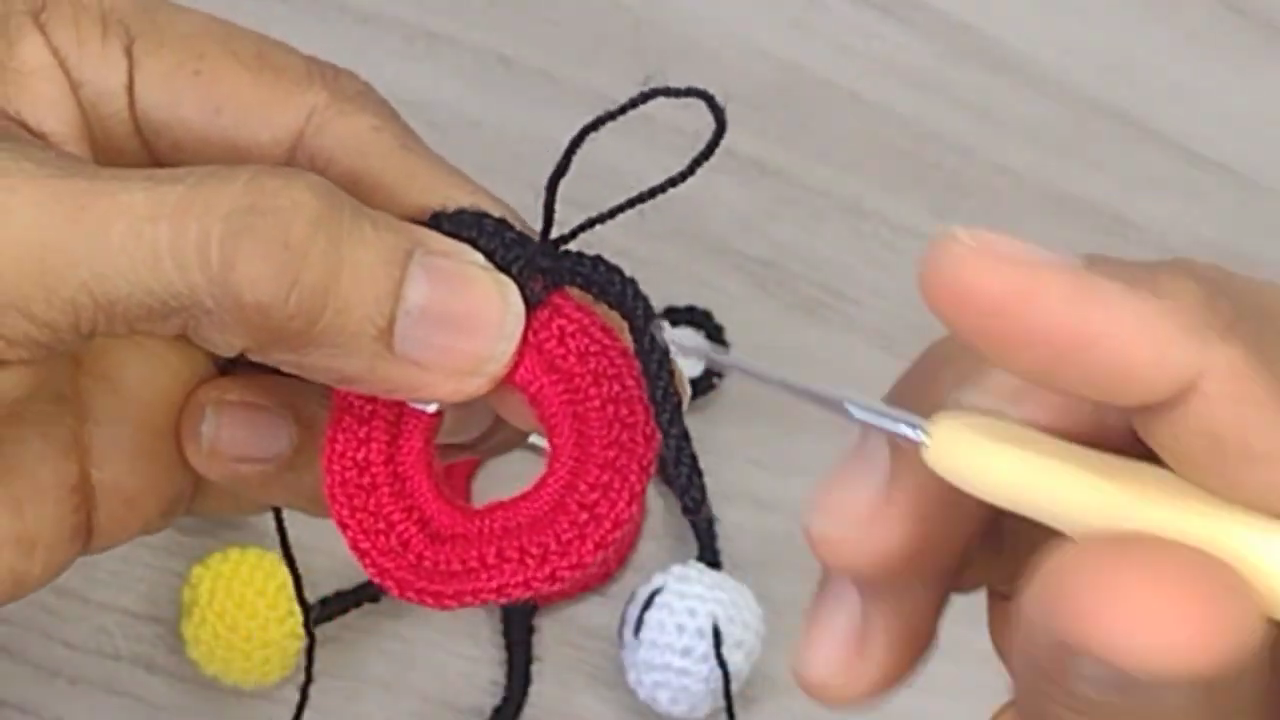
Work the first round of red stitches directly around the metal split ring so the yarn locks the hardware in place from the start. The head, ears, and yellow hand pieces should already be finished and set aside nearby. This step fuses the hardware to the fiber permanently, so double-check the ring sits centered before continuing.
Building Up the Shorts Shape
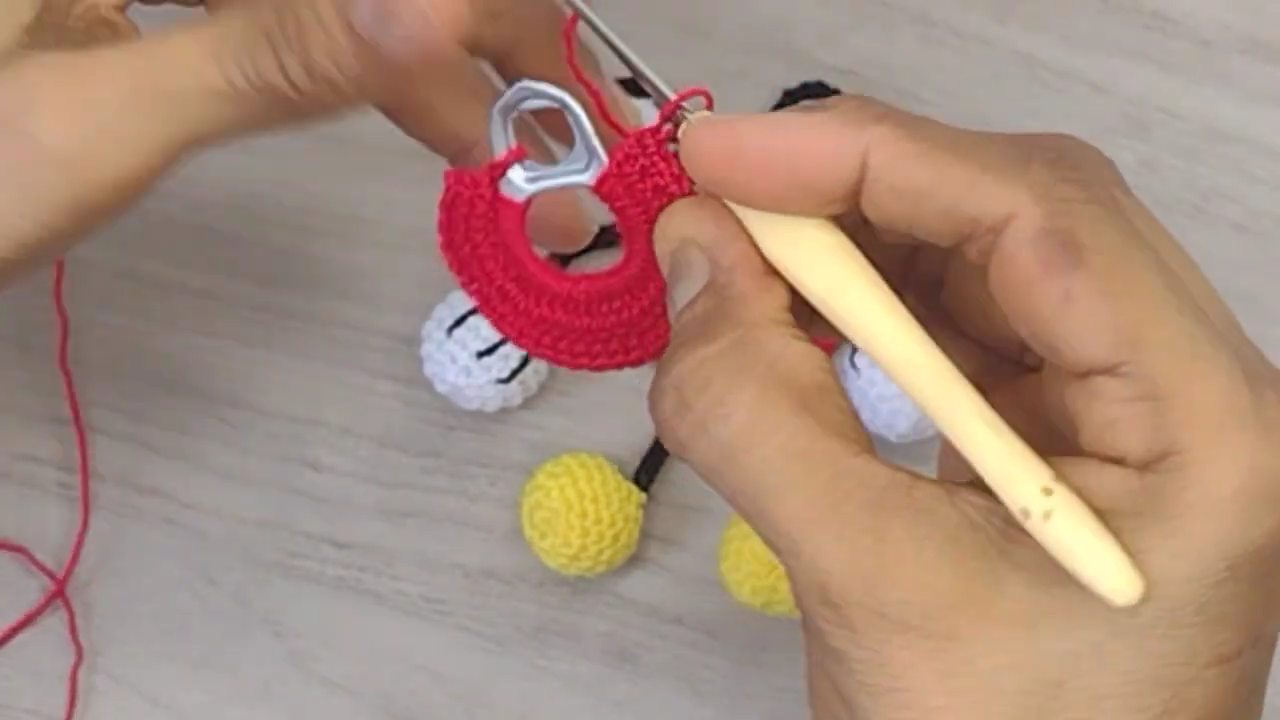
Continue working red stitches in rounds around the ring, letting the piece widen into a rounded shorts shape. Keep tension consistent so the ring stays centered and does not pull to one side. Black leg pieces and yellow footballs should already dangle below the working piece at this stage, giving a visual guide for finished length.
Completing the Loop and Closing the Ring
Finish the red round so it forms a full circle around the split ring, then fasten off and weave in the tail. A small black loop of yarn should already extend from the top of the head piece nearby, ready for later use as a hanging point. A white hand ball gets picked up next for attaching with a yarn needle.
Sewing the Hands and Final Pieces Together
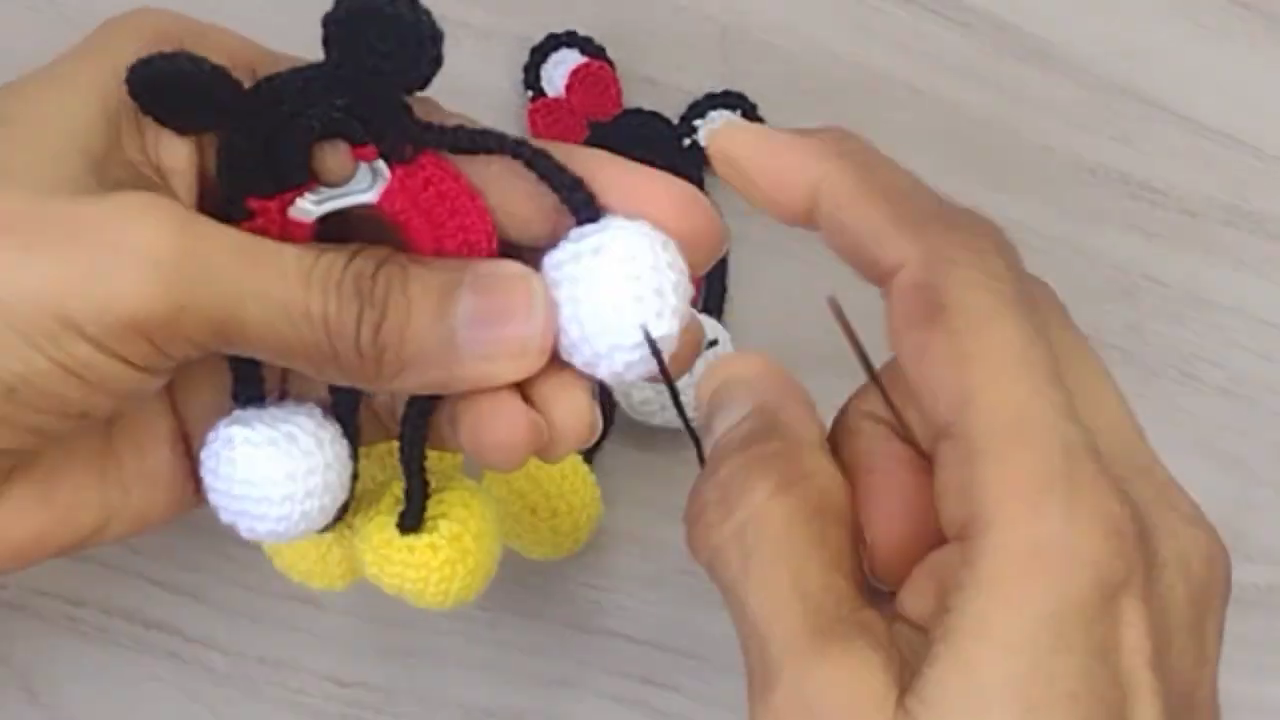
Thread a yarn needle and stitch the white hand balls onto the ends of the black arm pieces. Line up two finished figures side by side to compare proportions before sewing anything permanently. Once hands, ears, and shorts all sit in the right place, secure every join with several small stitches for durability.
Where Can You Use This?
This little figure works well anywhere a small charm fits. Crafters often clip it onto a backpack zipper or dangle it from a car mirror. It can also attach to a purse strap, hang from a keyring loop, or tuck into a lunch bag as a surprise. Because the shape stays compact, it travels easily without adding bulk.
Why Beginners Will Enjoy This Pattern
Beginners tend to enjoy this project because every piece stays small and forgiving. Mistakes on a tiny sphere are easy to unravel and redo, unlike a full-sized doll. The Mickey Mouse amigurumi format also builds real amigurumi skills, including shaping, color work, and assembly, without demanding hours of continuous stitching in one sitting.
Tips and Tricks for Success
- Pin pieces together with locking stitch markers before sewing
- Photograph each finished part to check color and size consistency
- Work in good lighting so tiny color changes stay accurate
- Take breaks between pieces to avoid tension drift over time
Why This Pattern Is Trending
Character-inspired amigurumi keychains have grown popular across handmade marketplaces and gift shops alike. Small, recognizable shapes photograph well for social sharing, which keeps interest high. This particular design fits three trends at once:
- Nostalgic character-based crochet gaining traction among adult crafters
- Keychain-format amigurumi replacing larger, harder-to-finish plush toys
- Scrap-yarn-friendly projects appealing to budget-conscious hobbyists
Gift & Occasion Ideas
A finished keychain suits birthdays, graduation gifts, or small holiday stocking stuffers. It also works as a thank-you gift for a friend who loves classic cartoon characters. Pairing the keychain with a matching gift tag or small card turns a simple handmade item into a thoughtful, personalized present without much added cost.
Conclusion
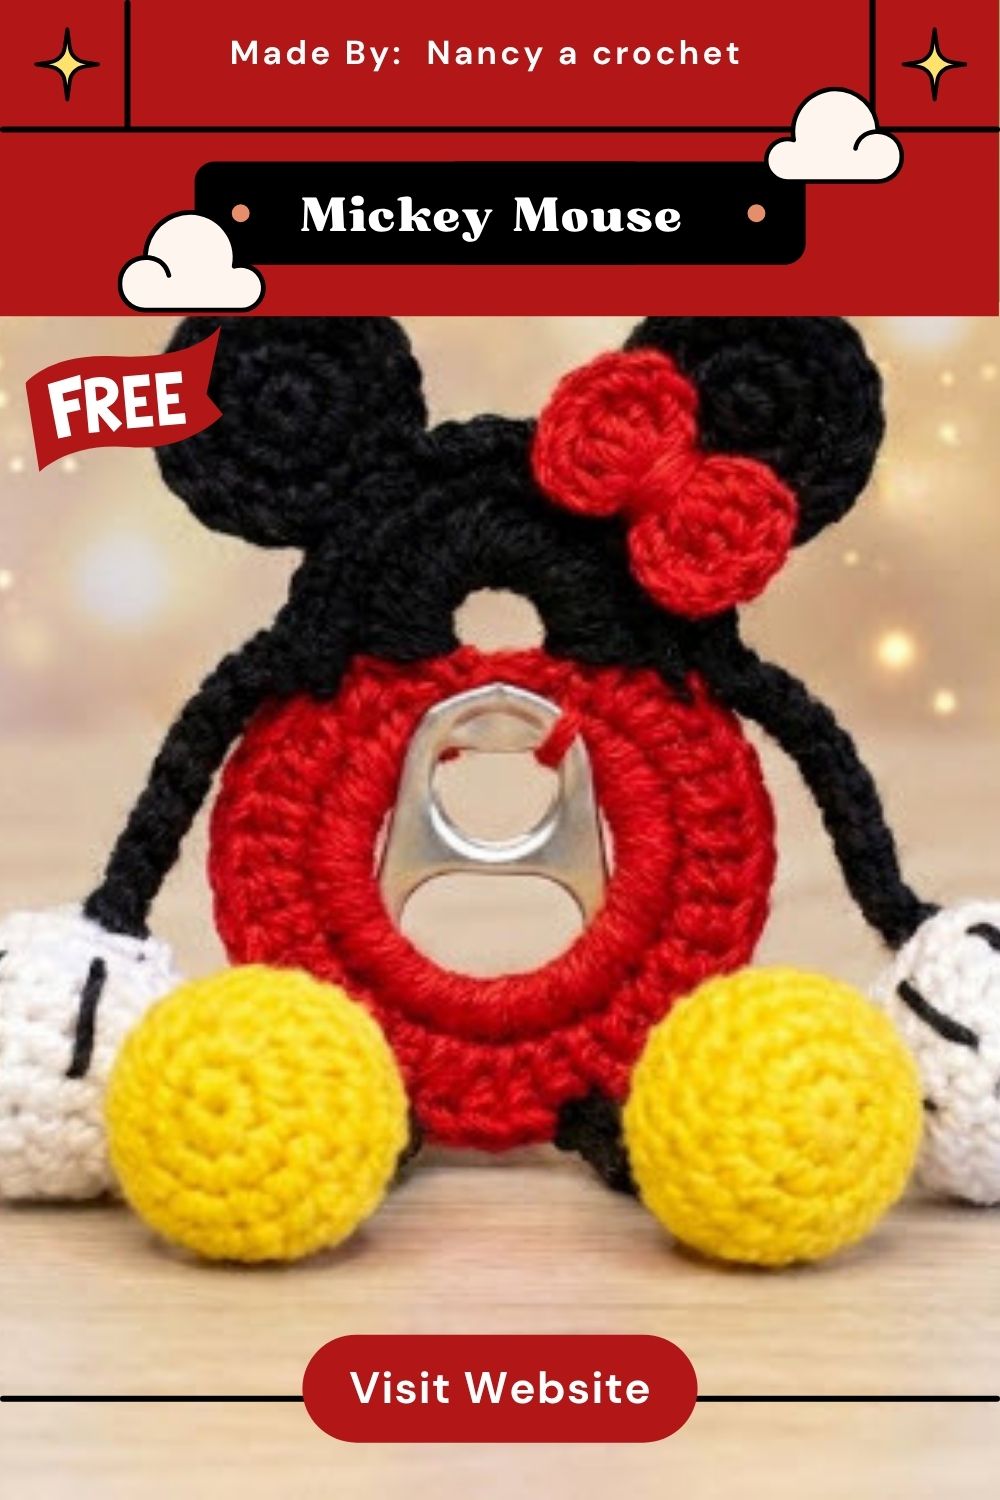
This Mickey Mouse amigurumi keychain pattern packs classic character charm into a compact, giftable shape. Because every piece works up quickly on its own, the project stays approachable even for newer crocheters. Once assembled, the finished keychain makes a cheerful handmade gift that a friend will actually carry and use.
FAQ
What yarn weight works best for this pattern?
DK or worsted-weight cotton yarn paired with a 2.5- 3 mm hook gives the cleanest stitch definition for a piece this small.
Can this pattern be made without a split key ring?
Yes, a simple loop of yarn or a jump ring can replace the split ring for a hanging ornament instead of a keychain.
How much yarn does one keychain require?
Small amounts of each color work fine, since every piece stays under a few grams, making leftover scraps ideal for this project.
Conclusion:
This Free Crochet Mickey Mouse amigurumi keychain pattern packs classic character charm into a compact, giftable shape. Because every piece works up quickly on its own, the project stays approachable even for newer crocheters. Once assembled, the finished keychain makes a cheerful handmade gift that a friend will actually carry and use.