Immaculate Easy Crochet Skirt Warm for Summer Weather Beginner Pattern
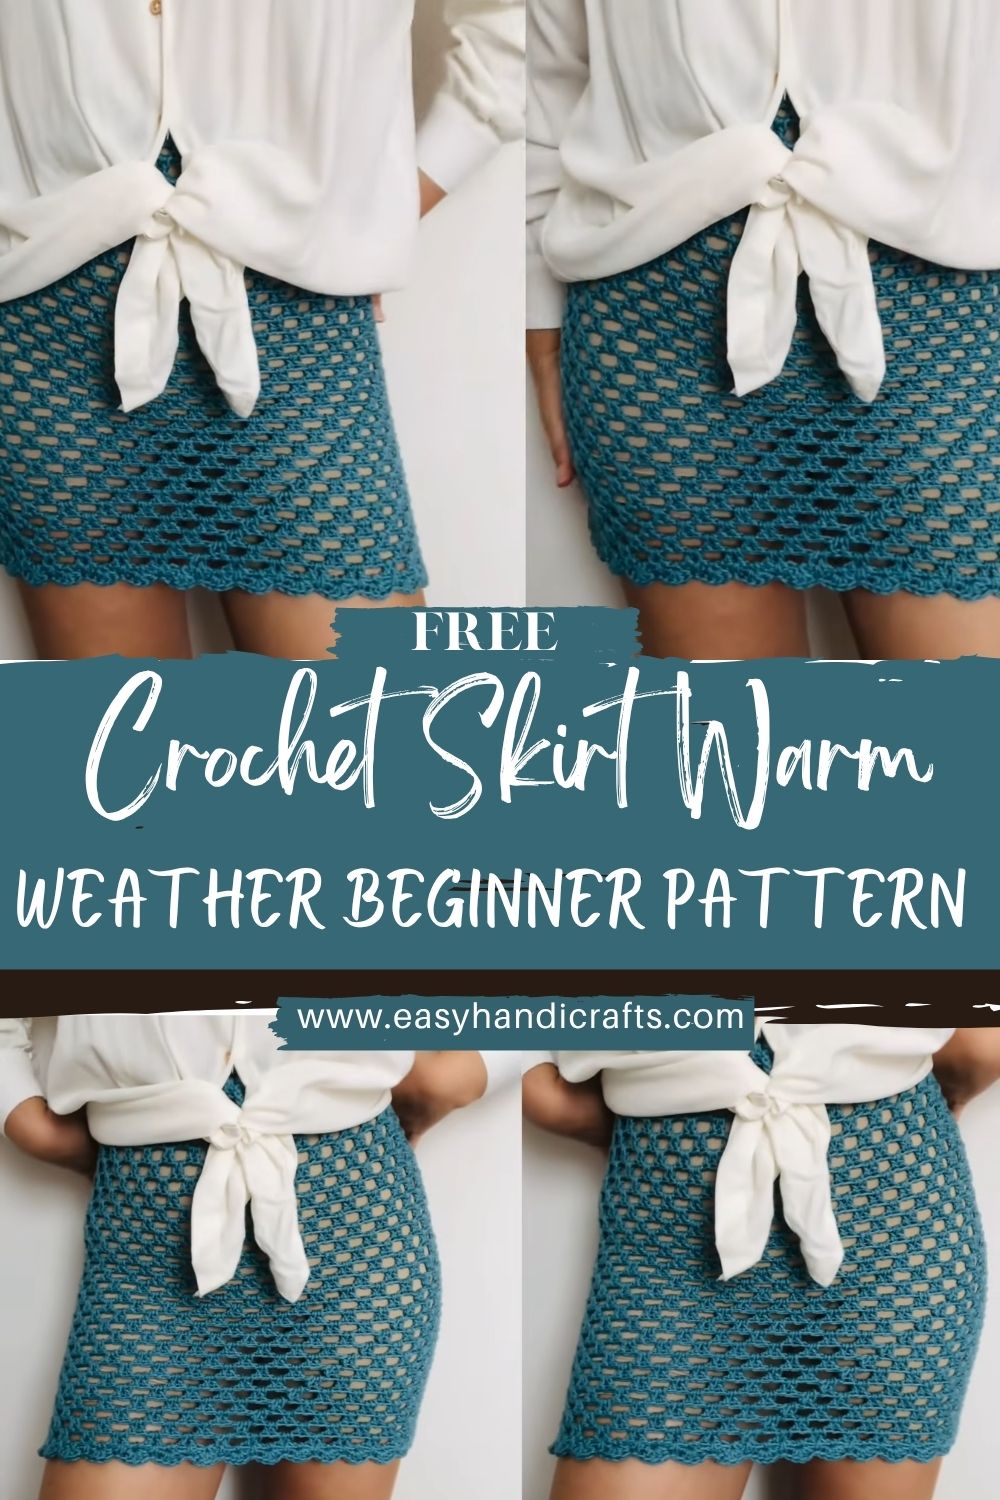
Looking for a light and comfy crochet skirt pattern perfect for sunny days? This easy beginner-friendly Crochet Skirt Warm is just what you need! Made with breathable yarn and simple shaping, it’s ideal for warm weather. The pattern is perfect for beginners, using basic stitches like chains and simple repeats, with no complicated shaping involved.
Crocheting your own clothing is incredibly satisfying, and a skirt is one of the easiest wearables to make. This pattern is designed to be lightweight and comfortable, making it great as a summer Crochet Skirt, warm beach cover-up, or everyday casual piece. In this guide, you’ll learn how to choose the right yarn, stitch pattern, and sizing tips to create a customized skirt that’s flattering and ready to wear.
Materials Needed (Exact Measurements)
- Lightweight yarn (cotton or acrylic blend recommended): 300–450 g total (depends on size and length)
- Yarn weight: DK (Category 3) or Light Worsted (Category 4)
- Hook size: 3.5mm–4.5mm
- 3.5mm for a firmer, more fitted fabric
- 4.5mm for extra drape and a more open mesh
- Stitch markers: 2–4
- Measuring tape: 1
- Yarn needle: 1
- Elastic band (optional): 2 cm (¾ in) wide, length = waist measurement minus 2–5 cm (1–2 in)
- OR drawstring (optional): 120–160 cm (47–63 in) cord, ribbon, or crocheted tie
Skill Level
Beginner / Easy
Making Time (Overview)
Total approximate time: 4–6 hours, depending on size, stitch speed, and how often fit checks are done.
Waistband (Making time: 45–75 minutes)
First, decide where the skirt should sit—at the natural waist for a classic fit, or at the high hip for a slightly relaxed feel. Next, measure the area with a tape measure, then keep the number handy while crocheting.
Numbered steps:
- Start with a foundation chain based on waist size:
First, chain until the length matches the waist measurement, and then add 1–2 extra chains for comfort. Next, carefully check that the chain is not twisted. Finally, join with a slip stitch to form a ring. - Create a stretchy waistband using simple stitches:
Next, crochet single crochet (sc) evenly around the ring for 3–6 rounds. Meanwhile, keep the stitches snug, because a slightly firm waistband helps the mesh body hang smoothly. - Optional: create a waistband casing (for elastic):
After that, crochet one round of double crochet, and then crochet one round of single crochet to firm up the edge. Next, fold the top inward later to create a casing, or simply let the elastic sit inside the top rounds if the waistband is already thick. - Mark the round start and sides:
Finally, place one stitch marker at the beginning of the round. Next, place a second marker on the opposite side, because it helps keep the skirt balanced while the mesh grows.
Main Body (Mesh Pattern) (Making time: 2–3 hours)
First, the mesh section is where the skirt becomes breezy and lightweight. Next, once the repeat becomes familiar, the pattern moves quickly and feels relaxing. Meanwhile, try-on checks are especially helpful in this step, because mesh can stretch as it gains length.
Numbered steps:
- Work in rounds:
First, begin working in rounds directly from the waistband. Next, keep the right side facing outward for a clean look. After that, either join each round with a slip stitch or continue in a spiral; both options work well so that comfort can decide. - Create an open grid/mesh pattern using chains and double crochet:
Next, use this beginner-friendly mesh repeat:- Round A: (dc, ch 1, skip 1 stitch) repeat around
After that, work the next round into the stitches and chain spaces to keep the grid aligned: - Round B: (dc into next dc, dc into ch-1 space, ch 1, skip 1) repeat around
Meanwhile, the exact placement can be adjusted slightly, as long as the rhythm stays consistent and the mesh squares look even.
- Round A: (dc, ch 1, skip 1 stitch) repeat around
- Explain repetition clearly (easy rhythm):
First, repeat Rounds A and B until the skirt reaches its widest point at the hips. Next, do a quick stitch count check every few rounds to prevent the mesh from drifting wider or tighter by accident. Finally, keep moving the stitch marker up each round so the start point stays obvious. - Gentle shaping tip (optional):
After that, if the skirt needs a little extra room at the hips, add increases by working two dc into a chain space every 6–10 repeats. Later, if the skirt feels loose, reduce the space slightly by replacing occasional ch-1s with ch-0s on a round.
Length Adjustment (Making time: 45–90 minutes)
First, length is the fun part, because the mesh grows quickly and shows progress fast. Next, measure the skirt while it hangs naturally, because the openwork fabric relaxes under its own weight.
Numbered steps:
- Continue rounds to the desired skirt length:
First, keep repeating the mesh rounds until the skirt is slightly shorter than the final goal. Next, remember that the scalloped border will add extra length. - Tips for mini, midi, or longer styles:
- Mini: Stop around the upper thigh, and then add the hem.
- Midi: Continue to mid-calf, and then keep the scallops modest for a neat finish.
- Longer: Continue toward ankle length, and then consider a slightly tighter mesh so the skirt does not feel too heavy.
- Comfort check:
Meanwhile, sit down and move around during a fit check. After that, adjust early if the skirt rides up or feels too snug at the thighs.
Hem / Border (Making time: 30–50 minutes)
First, the scalloped hem is what makes the skirt look extra special. Next, it is made from simple stitch groups that repeat around the edge. Meanwhile, a stabilizing round helps the scallops sit evenly rather than curl.
Numbered steps:
- Create a base round for the border:
First, crochet one round of single crochet around the bottom edge, placing stitches evenly into mesh spaces. Next, keep the tension smooth so the edge stays flat. - Create a scalloped or wavy edge:
Next, use this easy scallop repeat:- Skip 2 stitches, 5 dc in next stitch, skip 2 stitches, sl st in next stitch
After that, repeat around until the hem is complete. Later, if the scallops feel too crowded, skip 3 instead of 2; if they feel too flat, reduce the skips slightly.
- Skip 2 stitches, 5 dc in next stitch, skip 2 stitches, sl st in next stitch
- Add decorative finishing:
Finally, slip-stitch to finish, fasten off neatly, and weave the end into the border so it disappears.
Assembly & Finishing (Making time: 30–45 minutes)
First, finishing details make the skirt look tidy and wearable. Next, a few careful steps help the waistband sit comfortably and keep the edges neat.
Numbered steps:
- Weave in ends neatly:
First, thread each yarn tail onto a yarn needle. Next, weave through several stitches, change direction once, and then trim close. - Add elastic or tie (if needed):
After that, if using elastic, thread it through the waistband using a pin or needle. Next, overlap the elastic ends by 2–3 cm (1 in) and stitch securely.
Alternatively, if using a drawstring, weave it through the top round and tie a bow at the front or side. - Shape and adjust fit:
Finally, lay the skirt flat and smooth it into shape. After that, lightly steam the block if desired, because it helps the mesh open evenly and makes the scallops look crisp.
Special Features
- Breathable mesh texture that feels cool in warm weather
- Lightweight and comfortable for all-day summer wear
- Stylish fitted look with a clean silhouette
- Perfect for summer outfits, beach layers, and casual styling
Sizing Tips
First, sizing works best when the waistband is measured carefully, and the skirt is checked at the hips early on. Next, the mesh will relax slightly over time, so a gentle snugness at first is usually a good sign.
- Adjust chain count for waist size:
First, chain to match the waist measurement, and then join without twisting. Next, aim for a stitch count that repeats easily around the round. - Yarn and hook size affect fit and drape:
Meanwhile, a smaller hook creates a tighter, more supportive fabric. After that, a larger hook creates a softer drape and a breezier mesh. - Tips for custom sizing:
Later, add length by repeating rounds. Finally, adjust the fit by adding or reducing chain spaces in small areas rather than changing the whole stitch pattern.
Finishing Tips
- First, keep edges even by placing stitch markers at the round start and halfway point.
- Next, maintain stitch consistency by counting a few repeats every couple of rounds.
- Finally, ensure a neat look by weaving ends deeply and smoothing the waistband before adding elastic or a tie.
Common Mistakes to Avoid
- Uneven tension:
First, slow down slightly on the mesh rounds, because openwork shows tension changes more easily. Next, switch to a smaller hook if the fabric looks too loose. - Incorrect stitch count in the mesh pattern:
Meanwhile, check that the repeat finishes cleanly at the end of each round. After that, recount if the pattern begins to “travel” awkwardly. - Skipping measurement checks:
Later, measure the length every few rounds because the mesh can stretch as it grows. Finally, adjust early, since small changes are easier than big fixes.
Variations & Customization Ideas
- First, add a lining or wear with a slip for extra coverage while keeping the airy look.
- Next, try different colors such as neutral sand tones, bright summer shades, or soft coastal pastels.
- After that, add stripes by switching colors every 3–6 rounds for a simple, stylish pattern.
- Finally, change the length and scallop size to create a mini skirt, a crisp midi, or a relaxed longer style.
Tutor Suggestions
First, practice chains and double crochet on a small swatch to get comfortable with spacing. Next, use stitch markers generously, because they make counting rounds much easier. Meanwhile, keep the first few mesh rounds slow and steady, since the rhythm becomes automatic later. Finally, celebrate progress often, because beginner crochet clothing feels much more approachable when it grows quickly and fits beautifully.
Conclusion
First, this Easy Crochet Skirt is a lovely, beginner-friendly wearable that looks trendy and is simple to make. Next, the mesh texture keeps it light and breathable, and the scalloped hem adds that special handmade charm. Finally, with a few measurements and a steady stitch rhythm, this summer skirt becomes a feel-good project that is just as fun to wear as it is to crochet.