Crochet Sentro Hybrid Sweater Machine Knit Body Pattern
You hold the yarn and notice one stitch looks uneven. You’re not failing; you’re just tired. Crochet Sentro Hybrid Sweater Machine Knit Body Pattern is a calm crochet pattern for beginner crochet progress.
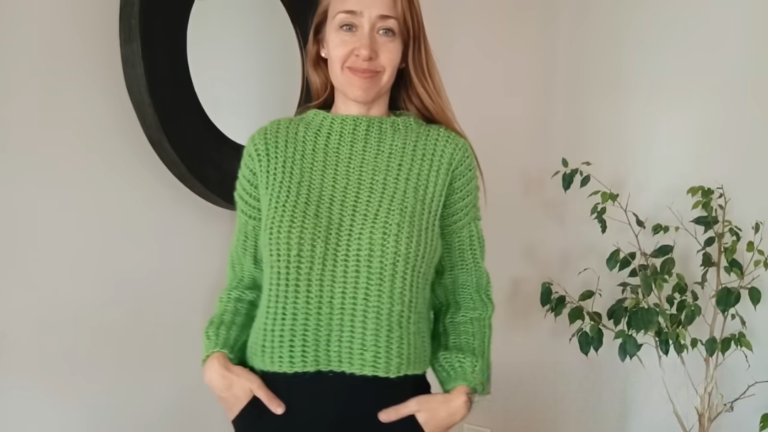
If you’ve been stuck lately, this Crochet Sentro Hybrid Sweater Machine Knit Body Pattern brings a calm, steady rhythm back to your hands. Using a circular knitting machine (like a 48-needle Sentro) to create simple front and back panels, then finishing with crochet seams and single crochet edging, you’ll get a neat, handmade sweater without stress. It’s a cozy crochet project for everyday wear, thoughtful gifts, or a small business idea.


With the right yarn and an easy join, it comes together gently. Save or share this for your next quiet make.
Crochet Sentro Hybrid Sweater Machine Knit Body Pattern (Beginner Friendly)
If you love crochet but want a faster way to build a sweater body, this crochet Sentro hybrid sweater is such a comforting project. First, you use a circular knitting machine to create simple knit panels for the front and back. Then, you bring it all together with easy crochet finishing, neat seams, and clean single crochet edges. As a result, you get a cozy, handmade sweater that looks polished without feeling overwhelming. Also, this pattern is flexible, so you can adjust the fit, colors, and sleeve style in a way that suits you.
What You Are Making
A simple sweater made from:
- Machine-knit front panel
- Machine-knit back panel
- 2 sleeves made either as tubes (round and round) or as panels (smaller fit)
- Crochet finishing around the neckline, sleeve cuffs, and hem using single crochet
This is a hybrid method because the body is made on a Sentro-style circular knitting machine, while the structure and edges are finished with crochet.
Skill Level
Beginner friendly
You only need basic crochet skills like slip knot, chaining, and single crochet. Sewing skills can be very simple because you can sew with a yarn needle.
Finished Uses
- A cozy everyday sweater for jeans, leggings, and lounge outfits
- A meaningful handmade gift for birthdays and holidays
- A great product for a small handmade business because it works up quickly and looks neat
Sizing Overview and Fit Notes
This sweater is built from rectangles, so sizing is simple.
How to Choose Your Size
Measure your bust or chest around the fullest part. Then add ease:
- Relaxed fit: add 4 in to 8 in (10 cm to 20 cm)
- More fitted: add 2 in to 4 in (5 cm to 10 cm)
Because the original method uses a 48-needle machine, the sleeve tube can be large. Therefore:
- For Small to Medium, sleeves are best made as panels, then seamed.
- For Large to XL, you can often do sleeves round and round on 48 needles.
- For 2XL and up, you can still use panels, or you can use a larger machine if available.
What You’ll Need
These amounts are written to match the method you provided, including two colors and edge finishing.
Yarn
- 4 ply yarn, 2 colors
- Color A (base or starter color): 50 g to 100 g
- Purpose: a starter section to anchor the work before switching to the main color
- Color B (main color): 200 g to 350 g for sizes S to XL
- If you want a longer length or an oversized fit, plan 350 g to 500 g
- Color A (base or starter color): 50 g to 100 g
Total expected yarn:
- S to M: 250 g to 350 g
- L to XL: 350 g to 500 g
Note: Your yarn thickness and stitch size change the yardage. So if your yarn is fluffy or heavy, buy a bit extra.
Tools
- Sentro style circular knitting machine, 48 needles (or any circular knitting machine)
- Crochet hook: 4.0 mm to 5.0 mm (choose what matches your yarn)
- Yarn needle for seaming
- Scissors
- Measuring tape
- Stitch markers or a small clip for marking needle position on the machine
Gauge and Measurements
Because this is machine-knit and panel-based, focus on measurements instead of strict gauge.
Target Measurements for Panels
You will make two rectangles.
Front panel width: 18 in to 24 in (46 cm to 61 cm), depending on size
Back panel width: same as front
Panel length: 20 in to 26 in (51 cm to 66 cm), depending on crop or long style
A very beginner-friendly method is this:
- Measure an existing sweater you like.
- Copy the width and length.
- Then adjust the neckline depth later.
1: Plan Your Sweater (Making time: 10 to 20 minutes)
Before knitting, decide these 3 things:
- Length: cropped, regular, or tunic length
- Sleeves: panel sleeves for smaller arms, tube sleeves for wider fit
- Neckline width: tighter crew neck or wider neck opening
Then, write down your target measurements:
- Body panel width
- Body panel length
- Sleeve length
- Sleeve width
Because rectangles are forgiving, you can adjust as you go.
2: Machine Knit the Front Panel (Making time: 35 to 70 minutes)
2A. Start with the base color
In the video method, Color A is used first as a short starter section. This helps the machine grab the yarn and stabilizes the panel.
- Set your machine to panel mode.
- Cast on using your preferred machine method.
- Knit a short section in Color A as your starter.
2B. Switch to main color
- Switch to Color B.
- Continue knitting back and forth to form a rectangle.
- Keep going until the panel reaches your desired length.
2C. Bind off and remove
Remove the panel carefully. Do not stretch it too hard because the edges can curl.
Result: You have your front panel rectangle.
3: Machine Knit the Back Panel (Making time: 35 to 70 minutes)
Repeat Step 2 and make another panel:
- Same width
- Same length
Tip: Count rows if you can. However, measuring length is often easier. Therefore, measure every few minutes to match both panels.
4: Make the Sleeves (Two Options)
You will make 2 sleeves.
Option A: Tube Sleeves on 48 Needle (Making time per sleeve: 20 to 40 minutes)
This method is done round and round. It makes a wide tube, so it fits larger sizes well.
- Set the machine to circular mode.
- Knit the desired sleeve length.
- Remove the sleeve tube.
- Repeat for the second sleeve.
This is best if you want roomy sleeves or if the wearer is Large to XL.
Option B: Panel Sleeves for Small to Medium (Making time per sleeve: 25 to 45 minutes)
This follows the exact approach from your provided text.
- Switch to panel mode rather than going around.
- Use about half the needles on a 448-needle machine, which is approximately 24 needles.
- Place a marker to show where to stop.
- Knit back and forth to make a smaller rectangle.
- Remove the panel.
- Repeat for the second sleeve.
Then the sleeve panel is folded and sewn into a tube later, so it becomes a sleeve that is not too large.
5: Seam the Sleeve Panels Into Tubes (Only for Option B) (Making time: 15 to 25 minutes total)
If you made sleeves as panels:
- Fold each sleeve panel in half lengthwise.
- Use a yarn needle and matching yarn.
- Seam down the long edge.
You can do a whip stitch seam, a mattress stitch, or a simple in-and-out running seam. In the video method, a fast in-and-out seam is used.
Now you have 2 sleeve tubes.
6: Join Front and Back Panels (Body Assembly) (Making time: 25 to 45 minutes)
This is where the sweater starts looking real.
6A. Place panels together
- Lay your front and back panels together.
- Turn them so the wrong side faces out.
- Match the edges.
The video emphasizes the negative side, so the positive side becomes the outside when flipped.
6B. Seam the shoulders and sides
You will stitch:
- Shoulder seams
- Side seams
However, you must leave openings for:
- Neck hole
- Armholes
Neck opening
Start seaming across the top edge. Then stop and leave a center opening for the neckline. After that, seam the rest of the top edge to finish the shoulder.
A simple neckline plan:
- Small neckline: leave 6 in to 7 in (15 cm to 18 cm)
- Medium neckline: leave 7 in to 8 in (18 cm to 20 cm)
- Large neckline: leave 8 in to 9 in (20 cm to 23 cm)
Tip: If you want an easy fit, keep the neckline wider, then neaten it with crochet later.
Armholes
Seam down each side. Then stop to leave armhole space, then continue seaming below the armhole to the hem.
A beginner-friendly armhole height:
- Small to Medium: 7 in to 8.5 in (18 cm to 22 cm)
- Large to XL: 8 in to 10 in (20 cm to 26 cm)
7: Attach the Sleeves (Making time: 25 to 45 minutes)
- Keep the sweater body inside out.
- Slide a sleeve into the armhole so the sleeve seam lines up with the side seam.
- Pin or clip in place.
- Stitch around the armhole opening to attach.
Repeat for the second sleeve.
Then turn the sweater right side out and check the fit. If the sleeve feels tight, you can loosen the seam slightly. If it feels wide, you can seam deeper.
8: Crochet the Neckline Finish (Single Crochet Edging) (Making time: 15 to 30 minutes)
The edging is what makes this hybrid sweater look clean and intentional.
- Join yarn at the neckline on the right side.
- Single crochet evenly around the opening.
- When you reach the start, slip stitch to join.
For a thicker neckline, make 2 rounds of single crochet, as described in your scrap.
Beginner tip: If the neckline starts to ripple, you may have too many stitches. Therefore, skip a stitch occasionally. If it puckers, add a few extra single crochets.
9: Crochet the Sleeve Cuffs (Making time: 10 to 20 minutes per sleeve)
- Join yarn at the cuff.
- Single crochet around the cuff edge.
- Make 1 to 2 rounds, depending on your desired thickness.
If the cuff is too loose, use slightly fewer stitches, or use a smaller hook for the edging.
10: Crochet the Hem (Bottom Edge) (Making time: 15 to 30 minutes)
- Join yarn at the bottom hem.
- Single crochet evenly around.
- Make 2 rounds for a firmer, more stable hem.
This step also helps control curling edges, which can happen with machine-knit fabric.
Finishing (Making time: 15 to 25 minutes)
- Weave in all ends on the wrong side.
- Turn the sweater right side out.
- Lightly steam block if your yarn allows it. Do not press hard.
- Try it on and check the neckline comfort and sleeve placement.
Optional: If edges still roll, add one more round of single crochet.
Basic Tips for Success
- Use a firm surface for the knitting machine. The video notes that a stable base helps prevent skipped stitches.
- Turn to the wrong side for sewing. Then the seams look cleaner when flipped.
- Measure as you go. Length and width matter more than exact row counts.
- Single crochet edging is your best friend. It keeps edges firm and tidy.
- Make sleeves as panels for smaller sizes. This prevents sleeves from being too wide on a 48-needle machine.
Common Mistakes and How to Fix Them
1. The machine skips stitches
Cause: machine not stable, yarn tension inconsistent, or yarn not feeding smoothly.
Fix: place the machine on a firm table, slow down, and guide the yarn with gentle tension.
2. Sleeves come out too big
Cause: knitting sleeves round and round on 48 needles for a small size.
Fix: use panel sleeves on half the needles, then seam into a tube.
3. Neckline is too tight
Cause: leaving too small an opening.
Fix: unpick a little shoulder seam and enlarge the neck hole, then add crochet edging.
4. Neckline or hem ruffles after single crochet
Cause: too many stitches picked up.
Fix: skip stitches evenly on the next round, or rip back and redo with fewer stitches.
5. Seams look messy on the outside
Cause: seam on the right side.
Fix: always seam with the wrong side facing out, then flip.
6. Uneven edging
Cause: inconsistent stitch placement along knit edges.
Fix: pick up stitches in a steady rhythm, for example, 1 stitch per row edge, and adjust slowly as needed.
Easy Variations
1. Make it striped
Because the sweater uses two colors already, you can alternate colors every 10 to 20 rows for a playful look.
2. Add ribbed crochet cuffs
After the single crochet base round, add ribbing with:
- Front post double crochet and back post double crochet, or
- Back loop only single crochet rows
3. Create a turtleneck
Make the neckline opening smaller. Then crochet extra rounds upward, switching to half double crochet for height.
4. Add side slits
Stop side seams 3 in to 6 in above the hem. Then crochet the slit edges to stabilize them.
5. Oversized drop shoulder fit
Make the panels wider and keep larger armholes. As a result, the sweater looks relaxed and trendy.
Estimated Total Making Time
- Planning and measuring: 10 to 20 minutes
- Front panel: 35 to 70 minutes
- Back panel: 35 to 70 minutes
- Sleeves: 40 to 90 minutes for both
- Seaming body and sleeves: 50 to 90 minutes
- Crochet edging neckline, cuffs, hem: 45 to 90 minutes
- Weaving ends and finishing: 15 to 25 minutes
Total: about 4 to 8 hours, depending on size, speed, and edging thickness.
Beginner Sizing Tips for a Great Fit
- If you are unsure, make the body panels slightly wider. Then you get a comfy fit.
- If you want a neat shoulder line, keep shoulder seams shorter and armholes slightly deeper.
- If you are between sizes, choose the larger sleeve option, then tighten cuffs with crochet edging.
You Are Ready
This hybrid sweater is a wonderful mix of speed and handmade charm. The machine gives you fast, even fabric, and then the crochet adds structure and personality. Most importantly, every seam and edge teaches you something useful for future wearables. Therefore, take it step by step, try it on as you go, and enjoy watching the sweater come together in your hands.