Crochet Otter Kindle Sleeve Pattern and Its Tiny Book
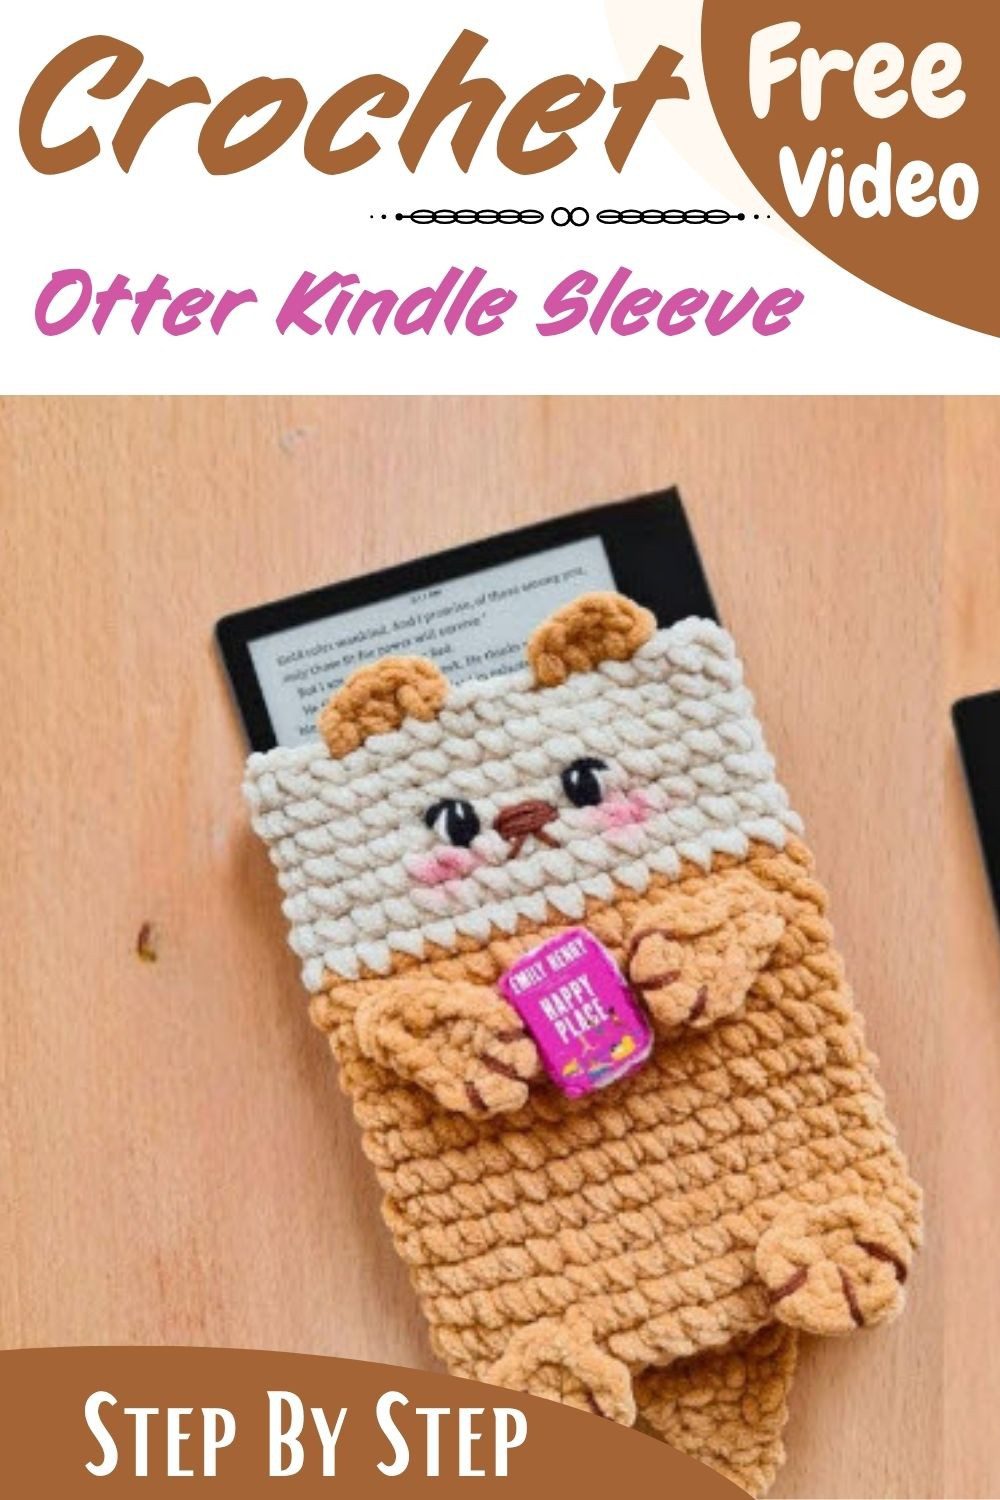
Ever wished your e-reader could feel as cozy as you do on a rainy evening? This crochet otter Kindle sleeve protects your device with thick, soft yarn and makes a sweet handmade Christmas gift. Follow the free pattern and video step by step.
Here is a sweet little project for the book lovers in your life. This crochet otter Kindle sleeve has a cream face and a caramel body. The otter holds a tiny book in its paws. The yarn is thick and soft, so your e-reader stays safe from scratches. This crochet Kindle cover pattern is free and easy for beginners. It is perfect for cozy winter crochet and handmade Christmas gifts.

What Makes This Crochet Otter Kindle Sleeve Different
Most device covers are worked flat and seamed. This crochet otter Kindle sleeve starts with a long chain, then circles around it, so the body forms a closed tube with no side seam. Your Kindle sets the size instead of a printed number, which means the same method adapts to other devices.
Each colour has a clear job. Tan yarn builds the body, hands, feet, tail, and book cover, while cream yarn shapes the head and the book pages. Black, white, and brown scraps handle the eyes and nose, and a darker yarn adds tiny nails to the hands.
The tiny book is a real part of the design. Two small rectangles, one tan and one cream, make it up, and a long yarn tail keeps it closed and fixes it to the otter.
Finished Size: The sleeve is about 9 inches (23 cm) tall including the ears and tail, and about 6 inches (15 cm) wide. The inside is roomy enough for a standard Kindle, which is about 4.75 x 6.75 inches (12 x 17 cm). Chunky chenille yarn makes the sleeve a little thicker than a flat one.
Materials You Need
Gather these supplies before you start your crochet otter Kindle sleeve:
- Tan plush or chenille-style yarn
- Cream plush yarn for the head and book pages
- Black and white yarn for the eyes
- Brown yarn for the nose
- A darker yarn for the nails
- A crochet hook that suits the yarn label
- Stitch markers, a tapestry needle, and scissors
- The Kindle, kept close for measuring
The source does not list a hook size or yarn amounts. Check the yarn label for the recommended hook, and keep extra yarn on hand, since the body can grow taller with added rounds.
Stitches Used in the Pattern
A short list of stitches is a big reason this pattern suits newer crocheters.
Single crochet (sc) forms the body, head, tail, and book. Slip stitches (sl st) join rounds and even out the edge, while half double crochet (hdc) and double crochet (dc) appear only in the feet and ears. A single crochet decrease shapes the tail: pull up a loop in each of two stitches, then yarn over and pull through all three loops on the hook.
Basic embroidery completes the face, nails, and nose.
Getting the Fit Right
No finished measurements are supplied, because the crochet otter Kindle sleeve is built around the device. Make the foundation chain cover the Kindle’s width exactly. After a couple of rounds, slide the Kindle inside. At that stage, the tutorial calls the fit a perfect one, so a snug chain is a good sign.
Height is flexible. You can add rounds to the body until the sleeve is tall enough, and the colour change then happens wherever you choose. In the video, the switch to cream comes after 12 body rounds.
Seven Photo Steps for Your Crochet Otter Kindle Sleeve
Step 1: Chain and Mark the Crochet Otter Kindle Sleeve
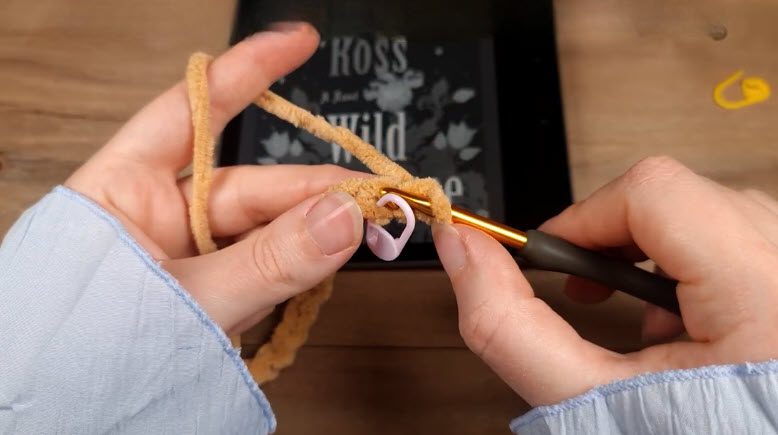
Make a slip knot, then chain until the chain matches the Kindle’s width. Mark the right side of the last chain. Chain 1, then work a single crochet into the second chain from the hook and mark that stitch. Continue with one single crochet in each chain. In the last chain, work two single crochets on one side and one on the other side, then travel back along the underside with one single crochet per chain. Work two single crochets in the marked chain.
Chenille hides the V shapes, so insert the hook under both loops and keep the marker moving up with each round. The first photo shows a marker already clipped in place. Keep it there, because everything else counts from it.
Step 2: Build the Rounds
Start round two with a single crochet in the stitch marked at the beginning, which counts as the first stitch of the round. From here on, work one single crochet in every stitch. After a couple of rounds, the tube takes shape on the hook, as the second photo shows, and the Kindle can be tested inside. Decide now which side is the front, because the head starts from that choice.

Step 3: Finish the Tan Body
Keep adding rounds until the sleeve is tall enough. The third photo shows the finished tan tube, with a strand of yarn lying diagonally across it. After 12 rounds, the tutorial stops to check the edges. One side may sit slightly higher than the other, so a few slip stitches along the shorter side bring both edges level.

Step 4: Join the Cream Head of the Crochet Otter Kindle Sleeve
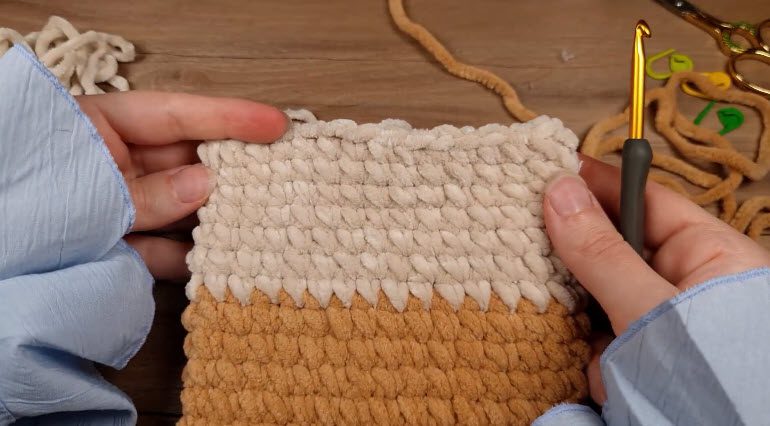
Pick a stitch right after the last slip stitch. Pull up a loop of cream yarn, leave a small tail, and chain 1. Work a single crochet in the same stitch, then one in every stitch all the way around. The last single crochet of each round goes into the first single crochet of the previous round. Skip the slip stitch from the round before, keep the loop on the hook small, and join with a slip stitch in the first single crochet.
Every later round begins with chain 1 and a single crochet at the base of that chain. Add as many head rounds as the design needs. The fourth photo shows the cream band sitting above the tan section with a clean colour line.
Step 5: Make the Tail
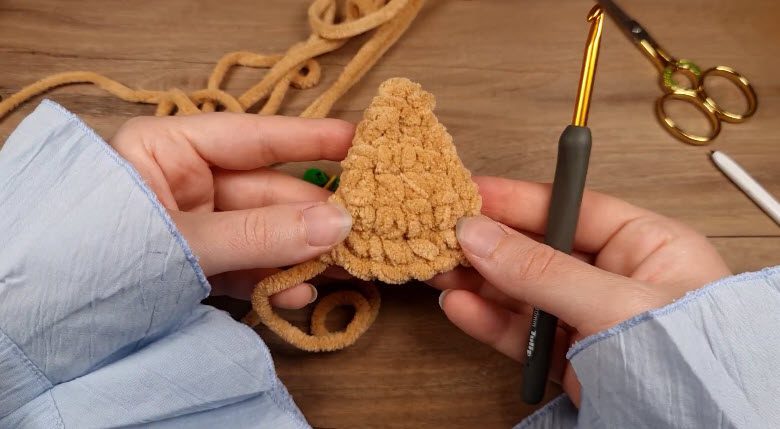
Leave a long starting tail, then chain 6. Work a single crochet in the second chain and in the next four chains. Turn without chaining, work a single crochet in the first stitch, mark it, and add four more. On the next row, turn and work a single crochet in the first stitch and two more, then decrease over the last two stitches. After another turn, work two single crochets and decrease. A third turn calls for one single crochet and a decrease, and a final turn finishes with one last decrease. The result is the small triangle in the fifth photo.
Use the long tail to sew it to the back of the body, then weave the loose end through the back of the piece to hide it.
Step 6: Place the First Eye
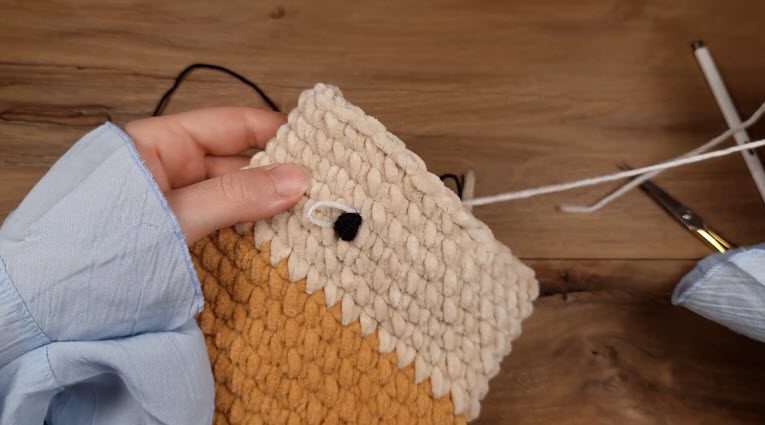
Black yarn forms the pupil on the cream section. A tiny loop of white yarn sits beside it as a highlight, which gives the face a glossy, awake look. The sixth photo shows the position well: a few rows below the top edge, toward the front of the head.
Mark the second eye’s spot before stitching the first, so both end up at the same height.
Step 7: Complete the Crochet Otter Kindle Sleeve Face
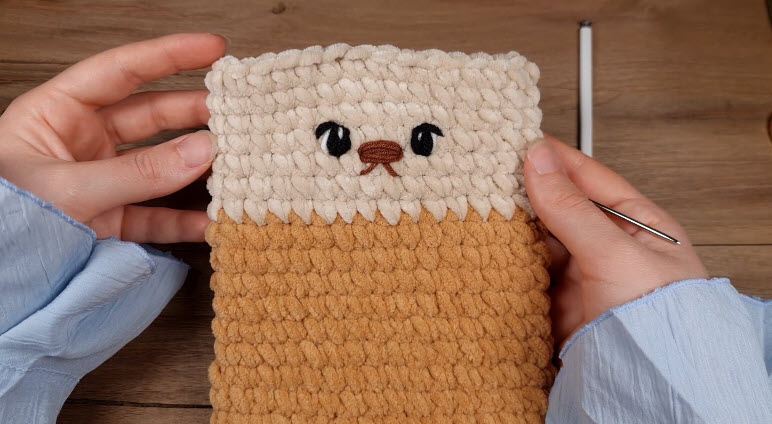
Repeat the eye on the other side, then stitch a brown nose in the centre and slightly lower. The final photo shows a calm, sleepy expression, with a small triangular nose and a short line beneath it. Since the source text does not describe the exact embroidery stitches, follow the placement in the photo.
Hands, Feet, Ears, and Book
Otter Hands
Make a slip knot and chain 5. Slip stitch in the second chain from the hook and in the next one. Single crochet in the next chain, then work four single crochets in the last chain, two on each side. Single crochet in the next chain and slip stitch in the next two stitches. Add one more slip stitch in the end loop, leave a tail for sewing, and cut the yarn. Add the nails with darker yarn.
Otter Feet
Make a slip knot and chain 2. In the second chain from the hook, work two single crochets (mark the first), one half double crochet, four double crochets, and one half double crochet. Slip stitch into the marked stitch, then cut the yarn and leave a tail.
Otter Ears
Each ear uses three stitches on top of the head. Pull up a loop in the first stitch and leave a very small tail. Chain 1, work a single crochet in the same stitch, and crochet over the tail to hide it. Work two half double crochets in the next stitch, one single crochet in the next, and a slip stitch in the same stitch.
The Tiny Book for the Crochet Otter Kindle Sleeve
Make a slip knot, chain 6, then add one more chain. Work a single crochet in the second chain from the hook and in each remaining chain. Turn without chaining and work a single crochet in every stitch. Keep the stitch count identical in every row. After 10 rows, the tan cover is complete. Repeat with cream or white yarn for four rows to make the pages. Place the pages inside the cover, then use the long tail to keep the book closed and fasten it to the otter.
Choosing a Book Colour for Your Crochet Otter Kindle Sleeve
The book is the easiest place to personalise this crochet otter Kindle sleeve. A deep green cover suits fantasy readers, while a soft pink one pairs well with romance fans. Because the cover is only 10 rows, a second book in another colour takes very little extra yarn.
Quick Fixes for the Crochet Otter Kindle Sleeve
- Lost round start: clip a marker into the first stitch of every round.
- Uneven top edge: add slip stitches along the shorter side, as in Step 3.
- Loose joins: shrink the loop on the hook before each slip stitch.
- Short sewing tails: leave longer tails on the hands, feet, tail, and book.
- Crooked eyes: pin both positions before stitching.
Caring for Your Otter Kindle Sleeve
The yarn’s fibre content is not stated, so follow the care symbols on the label. Plush yarn is generally best washed gently by hand and dried flat, which also protects the sewn-on parts.
Quick Answers About the Otter Kindle Sleeve
Can this Kindle sleeve pattern fit a tablet or phone?
Yes. The chain is measured against the device, so the same method works for other sizes.
How tall should the Otter sleeve body be?
The tutorial uses 12 rounds before the cream section, but the right number depends on the Kindle’s height.
Does the book come off the otter?
No. The book is fastened with its own yarn tail, so it stays attached.
Grab Your Hook and Start Your Otter
One measured chain, mostly single crochet, and a handful of small shapes are all this otter needs. Measure your Kindle, choose a tan and cream pair, and begin the foundation chain. Save the little book for the very last step.