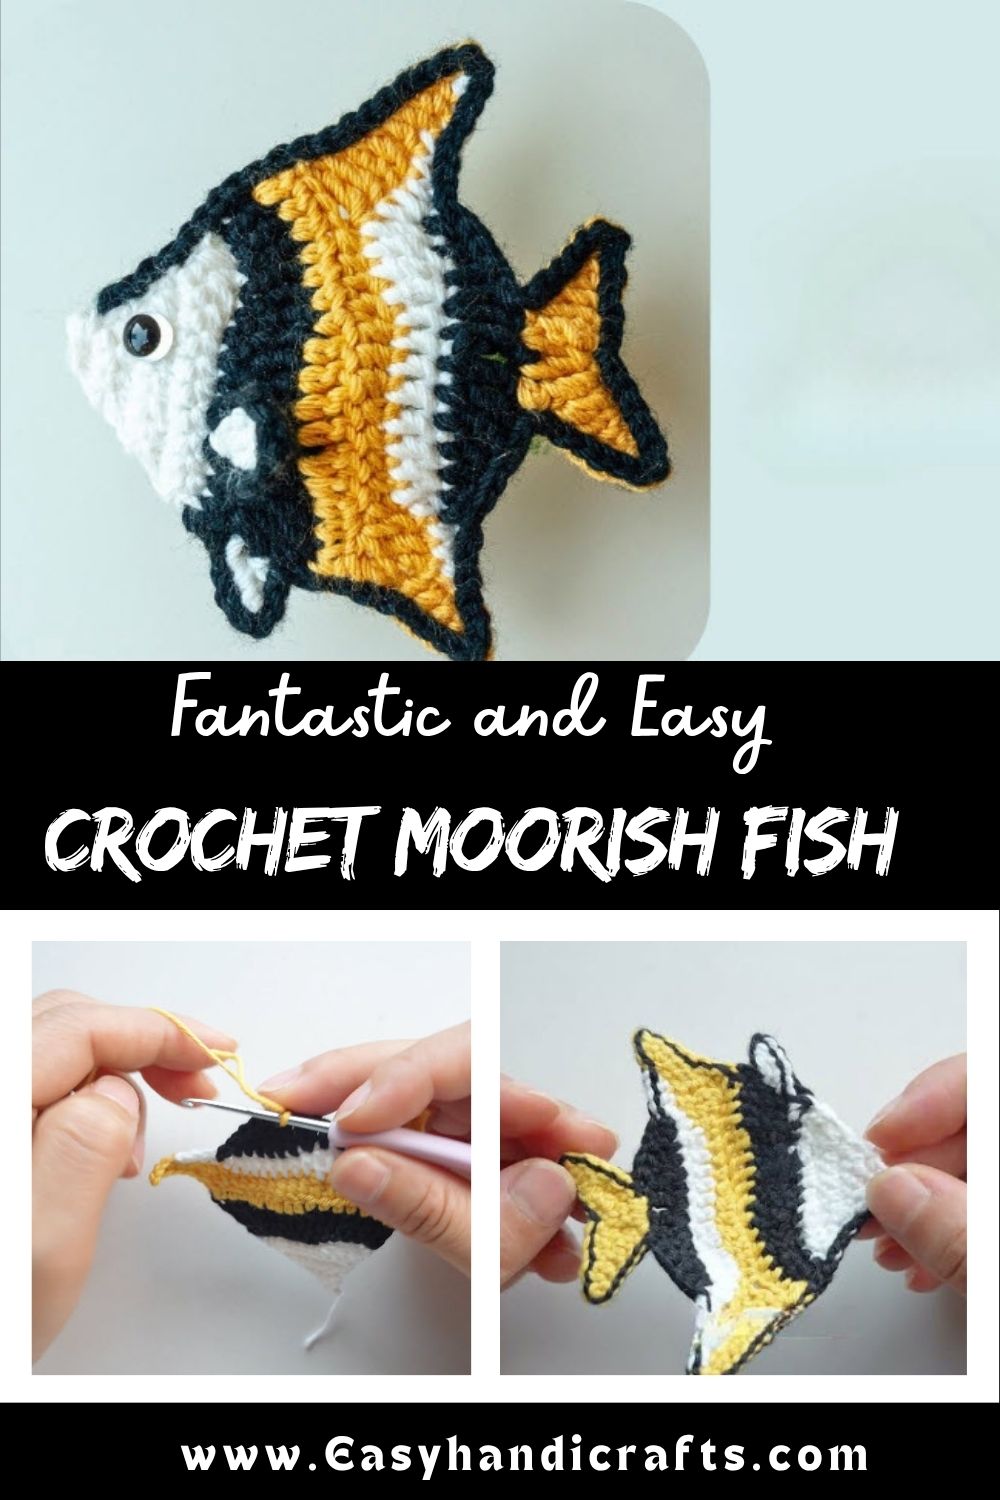
Crochet Moorish Fish Amigurumi Pattern With Striking Fin
Crafters who enjoy color-work will especially appreciate how forgiving this pattern is. Since the stripes are worked in straightforward rows rather than intricate colorwork techniques, the piece comes together quickly, making it a satisfying project for an afternoon or a cozy evening beside the yarn stash.
Project Details
- Skill Level: Beginner to Intermediate (comfortable with color changes)
- Finished Size: Approximately 4–5 inches tall, 4 inches wide
- Estimated Time Required: 2–3 hours
- Recommended Yarn Weight: DK or worsted weight (weight 3–4)
- Crochet Hook Size: 3.5mm–4mm, matched to your chosen yarn
Materials Needed
- Yarn in black, white, and mustard yellow
- Crochet hook (3.5mm–4mm)
- Tapestry needle for weaving in ends
- Stitch markers to track rounds
- Scissors
- Fiberfill stuffing (optional, if making a plush 3D version)
- Small amount of felt or embroidery thread for facial details (optional)
Crochet Stitches and Techniques
- Magic Ring
- Chain Stitch
- Single Crochet (sc)
- Increase (inc)
- Invisible Decrease (invdec)
- Color Changes
- Fastening Off
- Sewing Pieces Together
Only these core techniques are needed, which makes the project approachable even for someone who has only made a handful of amigurumi pieces before.
Pattern Instructions
Every stage of this fish comes together through layered color changes and simple shaping, so working through the steps in order keeps the stripes lining up neatly. Below is the visual breakdown of how the piece builds up, from the very first loop to the finished fish.
Step 1: Starting With the Magic Ring
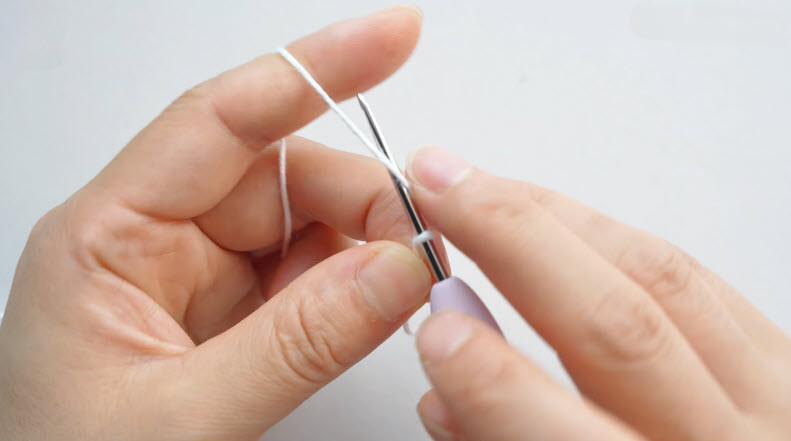
Begin by forming a magic ring with your first color of yarn. Hold the tail between your thumb and middle finger, wrap the yarn around your fingers, and pull the working yarn through with your hook to create the initial loop shown below. This adjustable ring becomes the anchor point for the very first round of stitches and allows you to cinch the center closed tightly once the round is complete, leaving no gap at the base of the fish.
Step 2: Building the First Rounds in Black
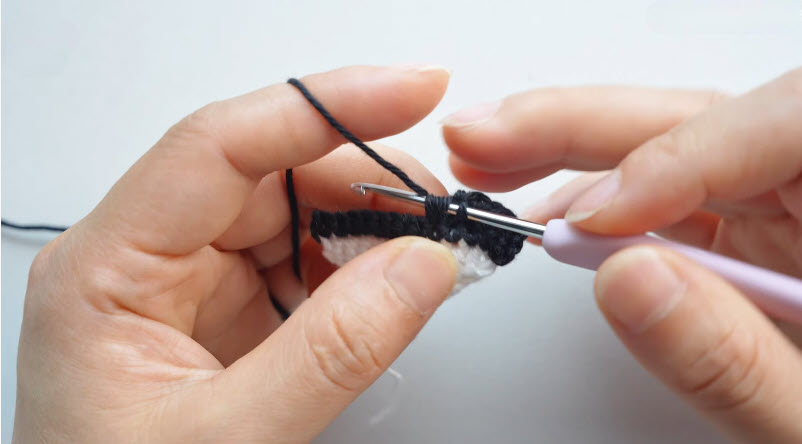
Working into the magic ring, single crochet your foundation stitches to form the small starting shape of the fish’s body. At this stage, the black yarn establishes the base color that will frame the white and yellow stripes later on. Keep tension even here, since these opening rounds set the shape for everything that follows. Pull the ring closed once your stitch count matches the pattern, then continue working in a spiral to build height.
Step 3: Introducing the Yellow Stripe and Shaping the Fin
Switch to mustard yellow yarn once the black and white base rows are complete, working your color change at the last pull-through of the final stitch in the previous color. This is where the fish begins to take on its recognizable silhouette, with the fin edge shaping outward through a series of increases along one side. Angle your increases carefully so the fin flares naturally rather than curling, giving the piece that signature pointed look.
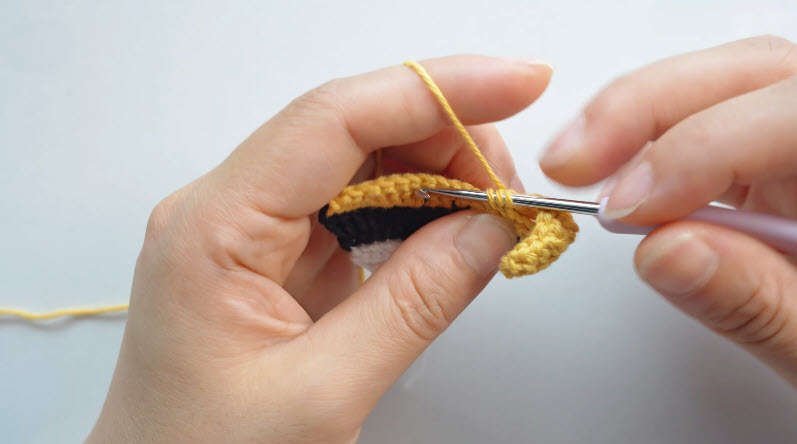
Step 4: Continuing the Stripe Pattern and Widening the Body
Keep alternating single crochet rows in yellow, working steadily to widen the body while maintaining the crisp separation between each color band. The contrast between the golden yellow and deep black becomes especially striking here, and you’ll start to see the classic Moorish fish pattern emerge as the stripes stack on top of one another. Count your stitches at the end of every row to make sure the widening stays symmetrical on both sides.
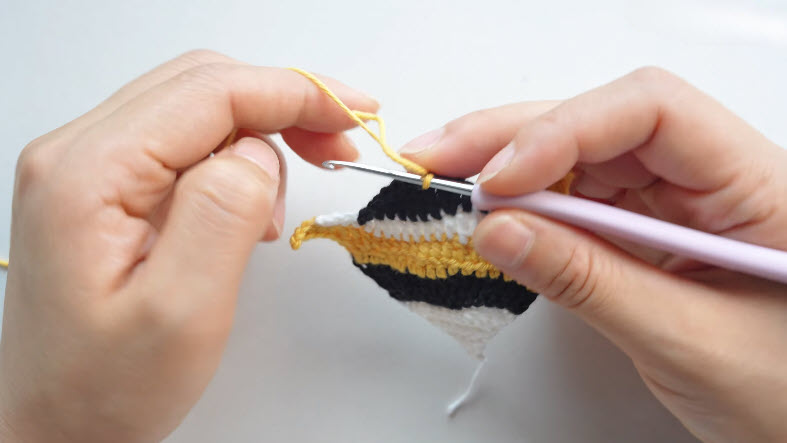
Step 5: Finishing the Body and Tail Details
Complete the remaining stripe sequence, alternating white and black bands to finish out the body toward the tail end. Taper your stitch count gradually through this section so the tail narrows into a smooth point rather than an abrupt edge. Fasten off, leaving a long tail of yarn for sewing any final seams together.
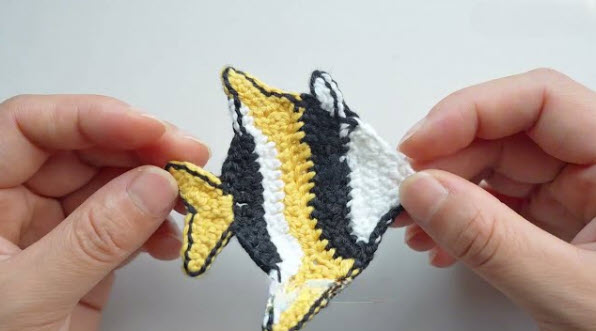
Joining All Pieces
If you’re crocheting a two-sided fish, work a mirrored second panel and whipstitch the pieces together around the edges using a tapestry needle, stuffing lightly with fiberfill before closing the final gap. Keep your stitches close together along the seam so the striped pattern lines up cleanly on both sides.
Final Assembly
Weave in any loose ends using your tapestry needle, tucking them neatly into the back of the stitches, so they stay hidden. Give the fish a gentle steam or light block if the edges look uneven, and add embroidered eyes or felt details for extra personality, as shown in the finished piece below.
Tips for Success
- Keep your tension consistent across color changes so the stripes stay even.
- Use a stitch marker at the start of each round to avoid losing track of your place.
- Count stitches after every increase or decrease row before moving forward.
- Stuff evenly and in small amounts if making a plush version, checking the shape as you go.
- Weave in ends securely so nothing unravels after repeated handling.
- Block the finished piece lightly for crisp, professional-looking edges.
Personalization Ideas
Swapping the yellow for orange or teal instantly turns this into a completely different reef fish, and a soft pastel palette works beautifully for a nursery-themed version. Halloween crocheters might enjoy an orange-and-black variation, while a red-and-white combination feels right at home during the winter holidays.
Adding a small keyring loop at the top transforms the fish into a charming bag charm, and a magnet glued to the back makes for a fun fridge decoration. A jumbo version stuffed generously with fiberfill becomes a delightful throw pillow, while a mini version stitched with fingering weight yarn works wonderfully as an ornament.
Common Mistakes to Avoid
- Uneven tension between colors: Practice color changes slowly until the join looks seamless.
- Losing stitch count: Always place a marker at the beginning of the round.
- Curling fin edges: Space your increases evenly rather than clustering them in one spot.
- Visible color-change knots: Weave ends in along the same color line to keep them hidden.
- Over-stuffing: Add fiberfill gradually to avoid distorting the striped shape.
Frequently Asked Questions
1. What yarn weight works best for this pattern?
DK or worsted weight yarn gives the cleanest stitch definition and holds the fin shape well.
2. Can I make this fish without stuffing?
Yes, a flat version works great as an appliqué, patch, or wall hanging.
3. How long does this Crochet Moorish Fish Amigurumi project usually take?
Most crocheters finish within two to three hours, depending on experience level.
4. Is this Crochet Moorish Fish Amigurumi suitable for beginners?
Absolutely, as long as you’re comfortable with basic color changes and single crochet.
5. What’s the best way to keep stripes lined up evenly?
Counting stitches at the end of every row is the single most helpful habit for keeping the pattern symmetrical.
6. Can I turn this into a keychain?
Yes, simply attach a small metal ring and clasp to the top of the finished piece.
7. What hook size gives the tightest stitches for amigurumi?
Going down half a size from what’s recommended on your yarn label usually creates a tighter, stuffing-friendly fabric.
Conclusion
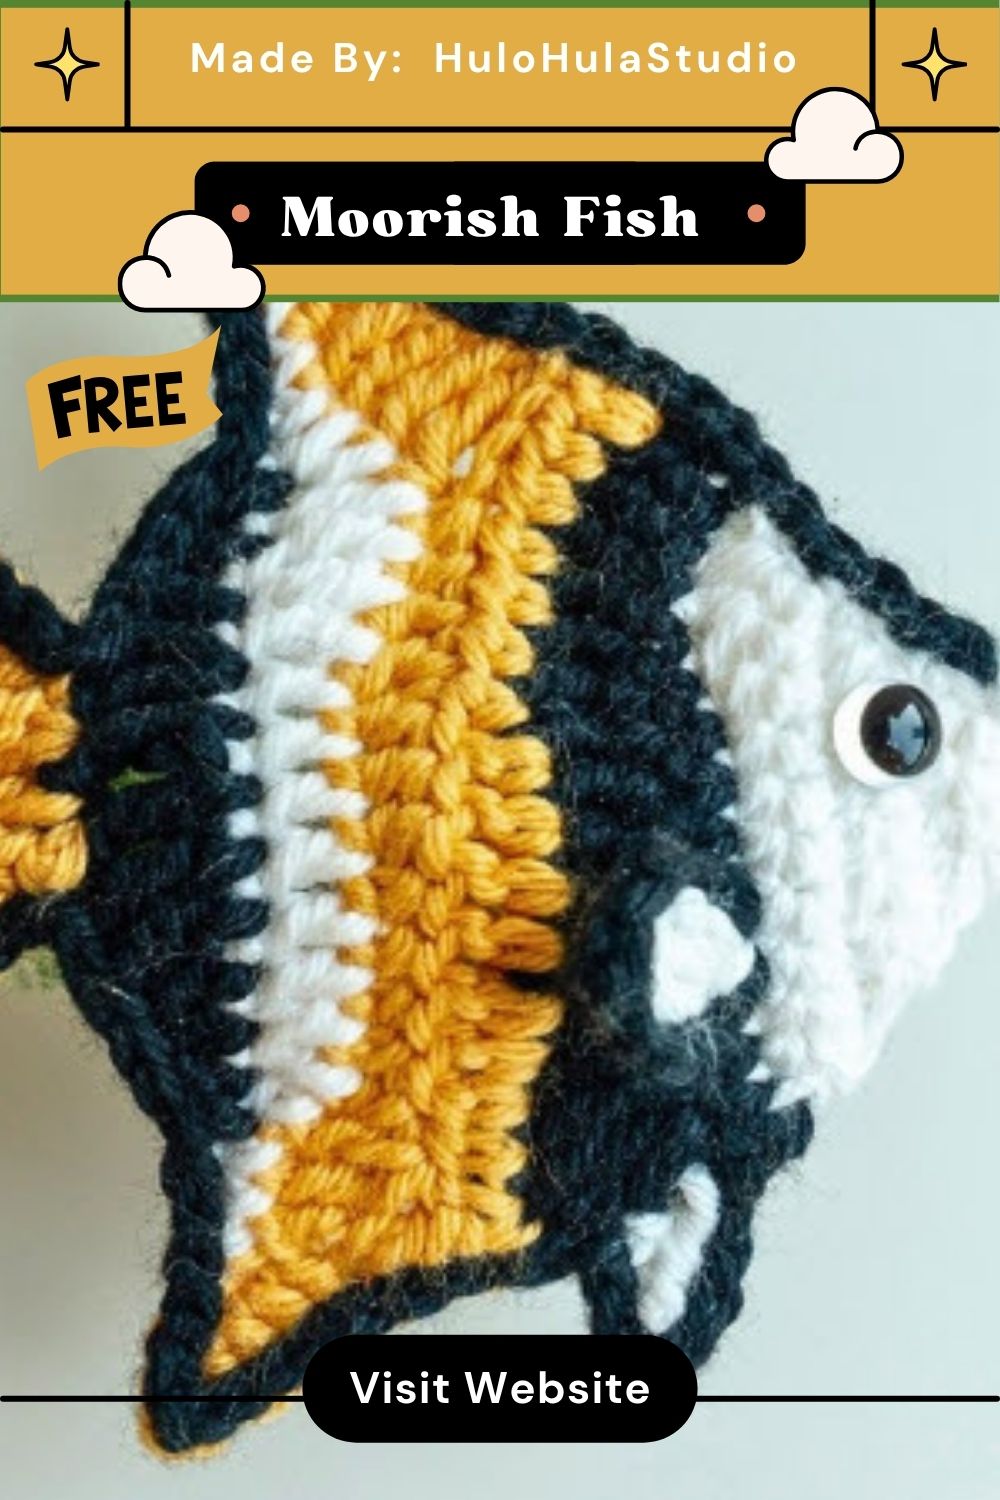
This striped little fish proves that bold color choices and simple stitches can create something truly eye-catching. Give yourself permission to experiment with the palette, take your time through the color changes, and enjoy watching those stripes stack into a finished shape. Once complete, thisCrochet Moorish Fish Amigurumi makes a wonderful gift, a playful home accent, or the start of an entire crocheted ocean collection, so grab your hook and share your finished creation with fellow crafters.