Free Crochet Ghost Halloween Amigurumi Pattern for Fun Decor
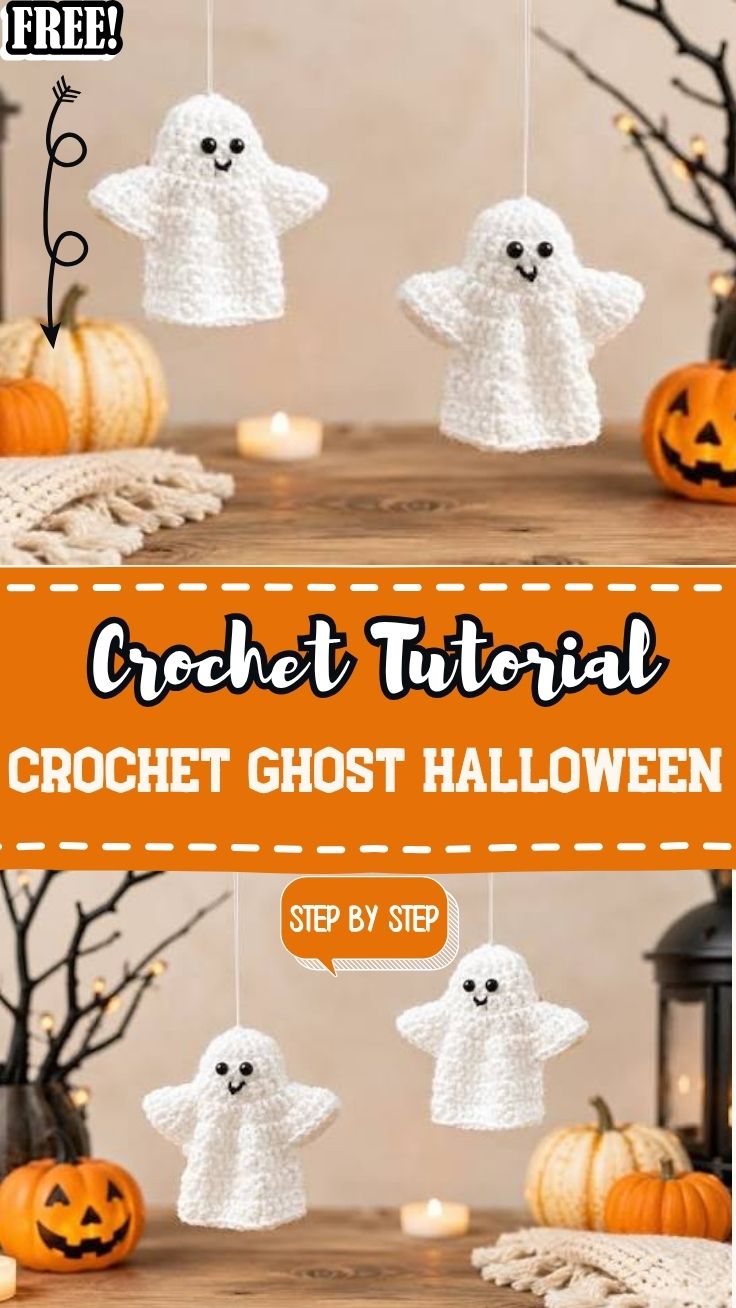
Round eyes peek out from a soft white shape, and suddenly a leftover ball of yarn turns into the friendliest thing on the shelf this October. Free Crochet Ghost Halloween Amigurumi Pattern for Fun Decor builds a plush little ghost from a simple magic ring, with no scary shapes or tricky shaping involved.
What makes this pattern approachable is the construction itself: the body works up as one continuous piece from crown to hem, with the wavy bottom edge created through simple increases and decreases rather than separate pieces sewn together later. That single-piece build keeps this amigurumi ghost beginner-friendly while still looking polished enough for a Halloween decor shelf.
What is this pattern?
The ghost starts life as a tiny magic ring at the top of the head, then grows round by round into a rounded body shape no arms, no legs, just one smooth, continuous form stuffed as you go. The bottom edge gets its classic “flowing sheet” look from a wave stitch pattern: alternating taller and shorter stitches around the hem instead of a flat, straight edge.
Safety eyes or small black beads get added partway through for the face, then a simple embroidered smile finishes the expression. The whole thing sits somewhere between a coaster-level project and a full amigurumi animal, quick enough for one sitting, detailed enough to feel like a finished toy.
What do I need to make it?
- Worsted weight white or cream yarn (a slightly fuzzy or brushed yarn gives a softer, more ghost-like finish)
- A 3.5mm–4.0mm crochet hook
- Polyester fiberfill stuffing
- Two small safety eyes or black beads (6mm works well for a compact ghost)
- Black embroidery thread or fine yarn for the mouth
- Yarn needle for weaving ends and embroidery
- Stitch marker to track round starts
- Scissors
Nothing on this list needs sourcing from a specialty shop. A fuzzy or brushed white yarn is the one upgrade worth considering; it softens the finished look noticeably compared to a plain smooth cotton.
Pattern Instructions: Building the Ghost
Starting the Magic Ring
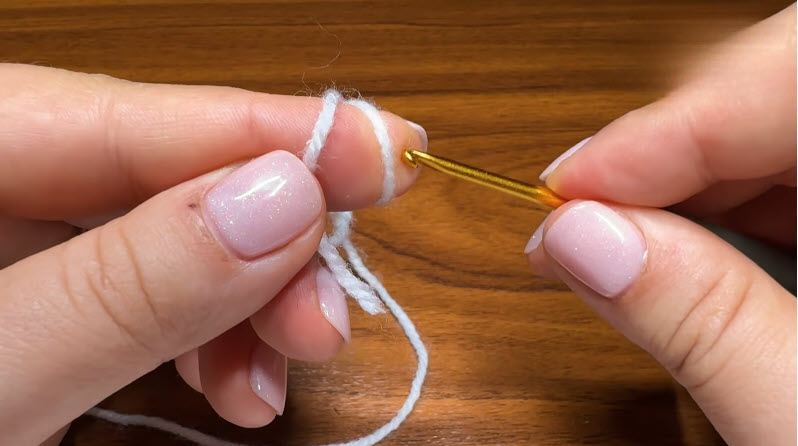
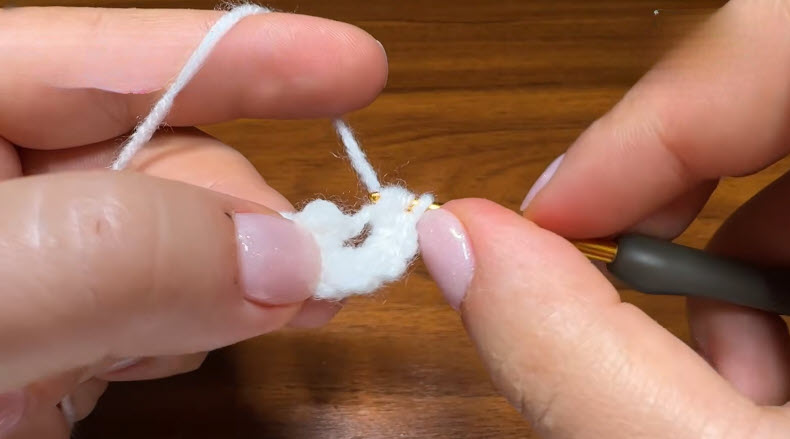
White yarn is looped around the finger to form a magic ring, with the hook positioned through the ring, ready to begin working stitches into it.
Working Stitches into the Ring
The magic ring has been closed, and stitches are being worked into it with the gold hook. A small round shape is forming, which serves as the base for the top of the ghost’s head.
Building the Round Body
The piece has grown larger, now showing a solid round shape with new stitches being worked along the upper edge, indicating increase rounds are being worked to widen the body.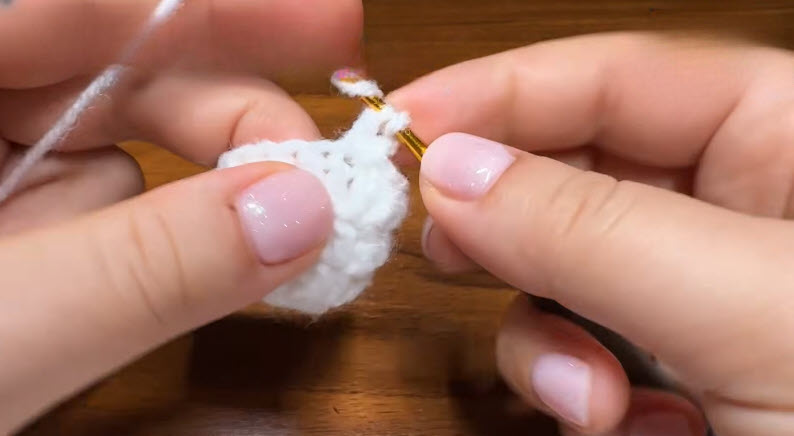
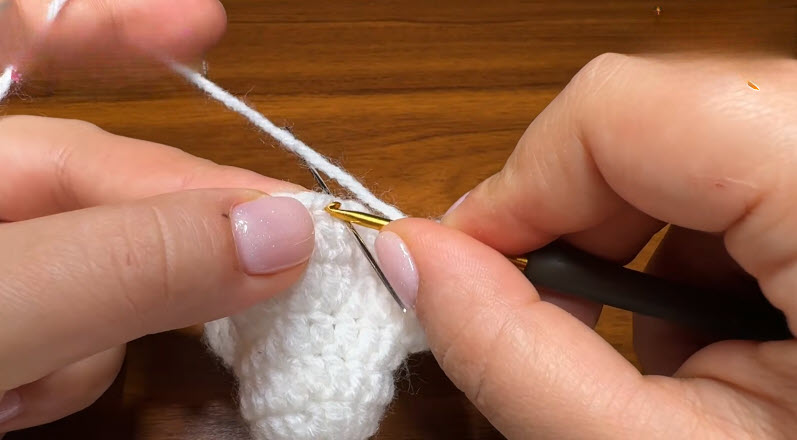
Body Growing Taller
The piece has taken on a longer shape (moving from round to more cylindrical), with the hook continuing to work stitches along the top edge; this appears to be completing the upper body section before stuffing.
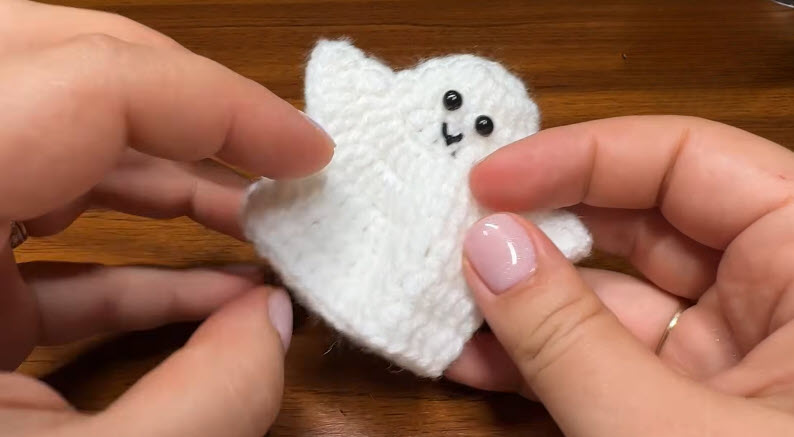
Finished Ghost
Final result: a stuffed white ghost shape with an uneven, wavy bottom edge (the traditional flowing ghost look), plus two black beads for eyes and an embroidered smile on the face.
How long does it actually take?
A single ghost runs about 1–1.5 hours for someone comfortable with basic amigurumi shaping, closer to 2 hours for a beginner working through increase and decrease rounds carefully.
Realistic time budget:
- 45 minutes for the body, start to Round 15
- 20–30 minutes for the wave hem and finishing
- 15 minutes for stuffing, eyes, and face embroidery
Total project time lands around 90 minutes to 2 hours genuinely a single-evening make, which is part of why it works so well as a quick seasonal project or last-minute gift.
What usually goes wrong?
Stuffing too late is the most common misstep. Waiting until the whole body is complete to add fiberfill makes it nearly impossible to distribute stuffing evenly through the narrow neck opening. Stuffing gradually as rounds progress, especially right after the head rounds close up, keeps the shape smooth throughout.
Eye placement ranks second. Eyes set too close together read as cross-eyed once the head is stuffed and rounds out; spacing them slightly wider than feels natural on the flat piece usually looks correct once stuffing fills the shape out.
Wave hem stitches losing their rhythm is a third common issue miscounting the stitch groups partway around the final round flattens one side of the scallop while the other stays wavy. Counting stitch groups out loud (or marking every fifth group) keeps the pattern even.
Overstuffing the body is a fourth trap. A ghost stuffed too firmly loses the soft, slightly slouchy silhouette that makes it read as a ghost rather than a solid ball — firm but pliable is the target.
Assembly — Finishing Touches
Weave in the starting tail from the magic ring first, hiding it inside the head before stuffing gets too dense to work a needle through easily. Once the wave hem round closes, weave the fastening-off tail down through a few stitches on the inside to secure it invisibly. Embroider the mouth last, using the eye placement as a guide for keeping the smile centered and level.
What’s it good for / how can I use it?
A finished ghost works as a stand-alone shelf decoration, tucked among other Halloween pieces on a mantel or windowsill. Strung on a loop of thread through the top of the head, it becomes a hanging ornament for a Halloween tree or garland. Smaller versions, worked with a finer yarn and hook, turn into keychain charms or bag clips for trick-or-treating season.
Beyond decor, the same shape and technique work as a teaching project — the wave-stitch hem is a useful skill to practice before attempting more complex amigurumi finishing edges.
Any tips before I start?
Count stitches out loud during increase rounds, especially Rounds 2 through 5 where the stitch count changes every round losing track early compounds into a lopsided head by Round 9.
Insert safety eyes before stuffing the head, not after. Pushing eye posts through already-stuffed fabric is far harder and risks distorting the stitches around the eye placement.
Keep a scrap of the working yarn nearby to test wave-stitch tension before committing to the full Round 16 — the scallop effect depends on a clear height difference between the half double crochet and double crochet stitches in each group.
Why are people making this right now?
Amigurumi Halloween decor is moving beyond spooky themes. Cute and friendly designs are becoming more popular. A smiling ghost fits this trend perfectly. Quick amigurumi projects are also popular for Halloween. They let you build seasonal decor without spending a full weekend on one piece.
Handmade Halloween decorations have a cozy, nostalgic appeal. Mass-produced decor cannot quite match that feeling. A soft crocheted ghost adds the same warmth. Other holiday amigurumi pieces offer a similar charm. Its compact size also makes this project easy to finish. The short make-time works well for gifts and swaps before Halloween.
Frequently Asked Questions
Can beginners make this ghost?
Yes basic single crochet, increases, and decreases cover the entire pattern, making it one of the more approachable amigurumi projects for someone newer to the craft. The wave hem round is the only slightly fiddly section, worth practicing on a scrap swatch first if unfamiliar.
What size does the finished ghost turn out?
Worked at the stated gauge with worsted weight yarn, the finished ghost stands roughly 4–5 inches tall, small enough to sit on a shelf or hang as an ornament without overwhelming a display.
Can safety eyes be swapped for something else?
Small black beads can be sewn on with matching thread. Embroidered French knots are another option. They work well for young children. Sewn features stay attached more securely over time. This makes them a safer choice than plastic safety eyes.
Does the yarn weight change the technique?
DK weight yarn on a smaller hook (3.0mm–3.5mm) produces a more delicate, finer-stitched ghost suited to ornaments, while the pattern as written in worsted weight suits shelf decor and gift-sized pieces best.
How much stuffing does one ghost need?
A single ghost typically uses a small handful of fiberfill, roughly enough to loosely fill a fist — adding it in small amounts across several rounds gives better control than stuffing all at once at the end.

Ready to Start?
This friendly little ghost fits perfectly into Halloween decor. It does not require a whole weekend to make. Choose a soft white yarn for the body. Work through the rounds in one sitting. Then, stitch on a simple smile. The finished ghost looks cute and cheerful. It may be the least spooky part of your Halloween decor.