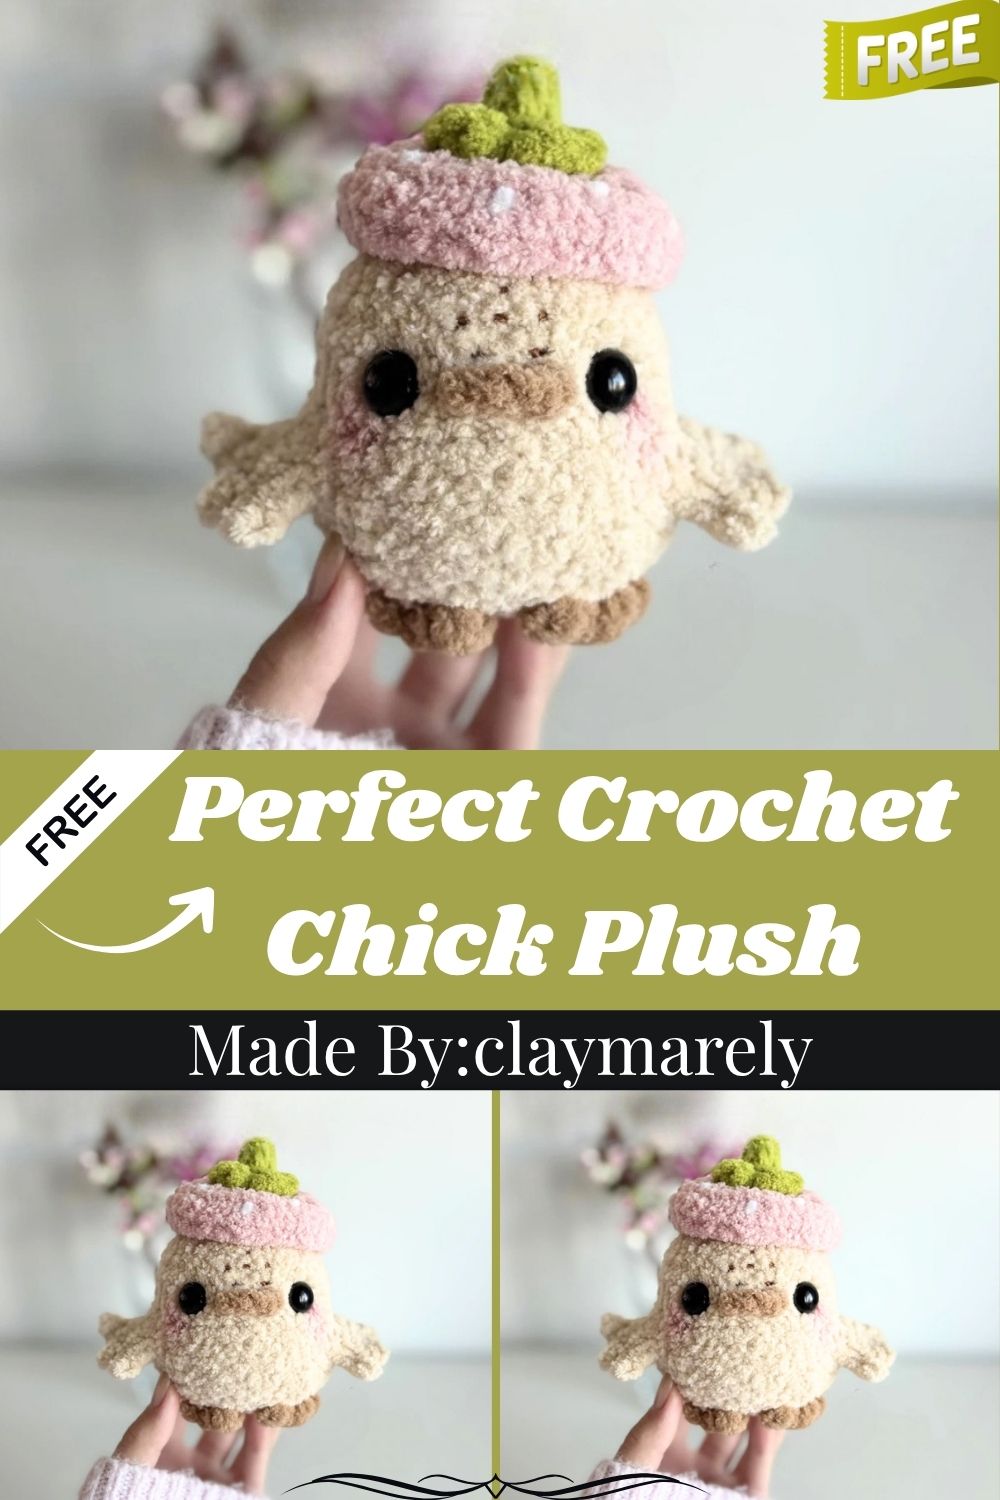
The Perfect Crochet Chick Plush for Gifts and Collectors
Abbreviations
MR – Magic Ring Ch – Chain R – Round St – Stitch Sc – Single Crochet Slst – Slip stitch Dec – Invisible Decrease FO – Fasten Off Inc – Increase CC – Color Change Dc – Double Crochet FLO – Front Loop Only BLO – Back Loop Only *French Knot Stitch Hdc – Half Double Crochet
Materials
- Yarn of choice + matching hook size (Alize Softy Plus with a 4.5mm hook was used)
- Embroidery needle
- Safety eyes (14mm used)
- Stuffing, stitch marker, scissors
- Embroidery floss – brown
Flippers x2
We will be working with beige yarn. This part is crocheted in chains.
R1. ch6, starting from the 2nd ch from your hook: 5slst, ch1, turn R2. 4sc, ch2, starting from the 2nd ch from your hook: 5slst, ch1, turn R3. 4sc, ch2, starting from the 2nd ch from your hook: 5slst
FO, no need to leave a tail as we will crochet the flippers into the body.
Head and Body
We will be working with beige yarn.
R1. 8sc in a MR R2. inc around (16) R3. (sc, inc) x8 (24) R4. (2sc, inc) x8 (32) R5. (4sc, inc) x2, 4sc with flipper, inc, (4sc, inc) x2, 4sc with flipper, inc, (4sc, inc) x2 (48) R12-15 (4 rounds): sc around (48)
Start stuffing, insert eyes between R8-R9, around 6 visible stitches apart.
R16. (4sc, dec) x8 (40) R17. (3sc, dec) x8 (32) R18. (2sc, dec) x8 (24) R19. (sc, dec) x8 (16) R20. dec around (8)
FO, finish stuffing, close.
Beak
We will be working with brown yarn. You will be working in 4 stitches total.
Insert the hook between the eyes, make 4sc, ch1, turn, make 2dec, FO, hide the yarn tails.
Feet
We will be working with brown yarn. You will be working in 3 stitches total per foot.
Insert the hook between R17-R18, make: ([slst, hdc, dc, slst] into the same stitch) x3, FO, hide the yarn tails, repeat for the second foot, make the feet around 2 stitches apart from each other.
Strawberry Beret
We will be working with 2 colors: pink, green. Start with green yarn.
R1. 4sc in a MR R2-3 (2 rounds): sc around (4) R4. inc around (8) R5. (sc, inc) x4 (12) R6. FLO: (slst, 3hdc in one stitch, slst) x4
FO the green yarn, CC to pink by attaching it to the BLO of R6 of the beret.
R7. BLO of R6: inc around (24) R8. (2sc, inc) x8 (32) R9. (3sc, inc) x8 (40) R10. sc around (40) R11. (3sc, dec) x8 (32)
FO. If you want to sew the beret to your chick, stuff it and leave a tail for sewing; otherwise, skip stuffing and the tail.
Tip: Make the beret with a slightly looser tension. Embroider seeds on the pink part of the beret (white yarn works well for this).
Freckles
We will be working with embroidery floss in brown color.
Choose the placement of your freckles, then make French knot stitches in your desired spots. Wrapping the thread around the needle 4 times instead of 2 makes the freckles more visible.
Optional: add blush using chalk pastels.
Pattern Overview
- Finished size depends on yarn weight and hook, though a 4.5mm hook with medium worsted yarn produces a palm-sized plush
- Worked entirely in continuous rounds (no joining unless noted) using standard amigurumi shaping
- Body, head, and flippers are crocheted as one continuous piece for a seamless silhouette
- Beak and feet are added separately using brown yarn for contrast
- A two-tone strawberry beret tops off the design with a color change from green to pink
- Embroidery floss creates the freckles, finished off with an optional soft blush touch
- Materials needed: beige and brown yarn, pink and green yarn for the beret, 14mm safety eyes, stuffing, a stitch marker, scissors, an embroidery needle, and brown embroidery floss
Special Techniques
This pattern leans on a handful of techniques worth practicing before diving in. The invisible decrease keeps shaping rounds smooth instead of leaving visible gaps, which matters a lot on a small plush like this. Front loop only and back loop only stitches create a defined ridge, used here to separate the beret’s brim from its crown. Trust me, the color change step for the beret is easier than it looks: simply attach the new color into the back loops of the previous round and continue. French knot stitches finish the freckles, and wrapping the thread around the needle a few extra times makes them stand out more clearly against the beige yarn.
Skill Level
This project suits confident beginners who already know single crochet, increases, and decreases. The flippers and beret add a slightly intermediate touch, ngl, but nothing here demands advanced amigurumi experience or complicated shaping.
Common Mistakes
- Skipping the stitch marker and losing track of where each round starts
- Placing the safety eyes too close together, which changes the chick’s entire expression
- Pulling the color change stitch too tight, causing the beret brim to pucker
- Forgetting to stuff firmly before closing the final rounds, leaving the head soft and floppy
- Rushing the French knots, which results in loose, flat freckles instead of raised dots
- Attaching the feet too far apart, making the plush look unbalanced when it sits
Uses & Benefits
A crochet chick plush like this one works well beyond just a shelf decoration. It makes a thoughtful Easter or spring gift, a nursery accent piece, or a small handmade item for craft fairs and online shops. Collectors appreciate the detailed touches like the beret and embroidered freckles, since those small additions set it apart from generic plush toys. For beginners, the project also builds real confidence with color changes, embroidery, and multi-piece assembly, all in one manageable pattern. It’s a practical way to practice several skills while ending up with something genuinely giftable.
Helpful Beginner Tips
- Use stitch markers on every round change, especially through the increase and decrease sections
- Keep tension slightly loose on the beret rounds so the color change lays flat
- Insert the safety eyes before finishing the stuffing, not after, so placement stays accurate
- Count stitches after every round during the increase sections to avoid shape drift
- Practice the invisible decrease separately first if it’s new, since it appears often here
- Use a contrasting scrap of yarn as a placeholder to test eye placement before committing
Assembly
- Crochet the flippers first in beige yarn, working in short rows as directed, then set aside without fastening off since they get worked directly into the body
- Build the head and body as one continuous piece, inserting the flippers at the marked round and adding safety eyes between rounds 8 and 9
- Stuff gradually as the rounds close, packing firmly around the head for a rounded shape
- Add the brown beak by working four single crochets between the eyes, then decreasing and fastening off
- Crochet the feet directly into the lower body rounds, spacing them evenly apart
- Make the two-tone beret separately, starting in green and switching to pink through the back loop color change
- Sew or rest the finished beret on top of the head, depending on whether a permanent or removable look is preferred
- Finish with embroidered French knot freckles and an optional light dusting of blush for extra realism
Where Can You Use This?
This little plush fits right into an Easter basket, a baby shower gift set, a spring-themed home display, or a handmade shop listing aimed at collectors who love character-driven amigurumi.
Why Beginners Will Enjoy This Pattern
Beginners tend to enjoy this pattern because it introduces new skills like color changes and embroidery without overwhelming them, low-key making it a satisfying next step after mastering basic amigurumi shapes.
Tips and Tricks for Success
- Work in good lighting when placing the safety eyes, since symmetry makes a big visual difference
- Keep a small notebook of your round counts if you’re prone to losing your place
- Test your embroidery floss tension on scrap fabric before starting the freckles
- Choose a yarn with good stitch definition so the FLO and BLO rounds stay visible
- Block the finished beret lightly if it curls after the color change section
Why This Crochet Pattern Is Trending
Amigurumi with small styled accessories, like this chick’s strawberry beret, keep showing up across Pinterest and handmade marketplaces because they photograph well and feel personal. For real, the combination of a classic spring character with an unexpected fashion detail gives it a fresh, shareable quality that plain plush patterns don’t always have.
- The strawberry beret adds a playful, seasonal twist that stands out in a crowded amigurumi niche
- Embroidered freckles give the design a handmade, one-of-a-kind feel that buyers specifically search for
- Compact size makes it easy to photograph, ship, and display, which suits both gifting and reselling
Conclusion
No joke, this crochet chick plush earns its spot as a go-to gift pattern through its mix of simple shaping and standout details. The beret, freckles, and tiny feet turn a basic amigurumi base into something collectors genuinely want to display. Whether it’s made for a nursery shelf, an Easter basket, or a handmade shop listing, this pattern delivers a finished piece that feels far more polished than the effort it actually takes.