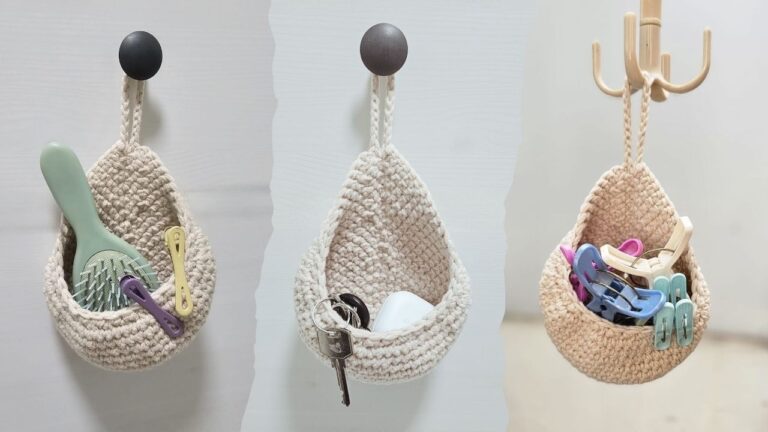
Get This Crochet Backpack Shoulder Bag Pattern Now
Dense ridges and a firm hand-feel make Get This Crochet Backpack Shoulder Bag Pattern Now a texture lover’s project. Each row builds sturdy fabric that holds its shape. Follow the phases below, and a wearable bag takes form panel by panel.
A crochet shoulder bag with backpack-style panels stands out because the fabric stays firm, the outline stays rounded, and the long strap spreads weight comfortably. Daily errands, campus days, and short trips all suit a handmade crochet backpack like this one. Moreover, the flat panels work up in manageable pieces, so progress feels steady. Practical structure meets soft color, and the result holds keys, a phone, and a small notebook without sagging.

What You’ll Need
- Yarn: Sturdy cotton or cotton-blend strands in a mid-range thickness. Plan on generous yardage, since two panels and a long band use more yarn than expected.
- Hook: A diameter that produces dense stitches, often one step below the label’s advice. Smooth aluminum glides well through tight loops.
- Tools: Tapestry needle, stitch markers, and sharp scissors.
- Closure and lining: A zipper, magnetic snap, or button, plus optional lining fabric and matching thread.
Materials Substitution Ideas
Swap cotton for a cotton-acrylic blend when softer drape matters. Likewise, chunkier strands with a larger hook diameter create a roomier bag in less time. However, keep the same fabric density across every piece, since mismatched tension produces uneven panels. For the opening, a drawstring cord can replace the zipper. Alternatively, a sewn-in lining adds stability and hides the inner stitches.
Skills You’ll Use
Intermediate makers handle this crochet backpack shoulder bag pattern comfortably, because the same moves repeat on every piece.
- Chaining a long, even foundation
- Working rows into a chain and into stitches below
- Turning cleanly at row ends
- Narrowing edges to shape curves
- Joining panels with a needle
Time Needed
Plan on roughly 8 to 12 hours of hook time, split across several sessions. Panels take the longest, while the long band works up faster. Afterward, set aside an hour for joining and final touches.
PHASE 2: WHILE YOU MAKE IT
Step-by-Step Process
Every step below matches one photo, in order. Move through it slowly, and confirm each checkpoint before continuing.
Step 1: Chain the foundation for the long band. Pinch the base of the chain between the left thumb and fingers. Hold the hook in the right hand. Keep each loop relaxed so the hook slides in easily later, and leave a tail for weaving in.
Why it matters: a loose, even foundation prevents a puckered band edge.
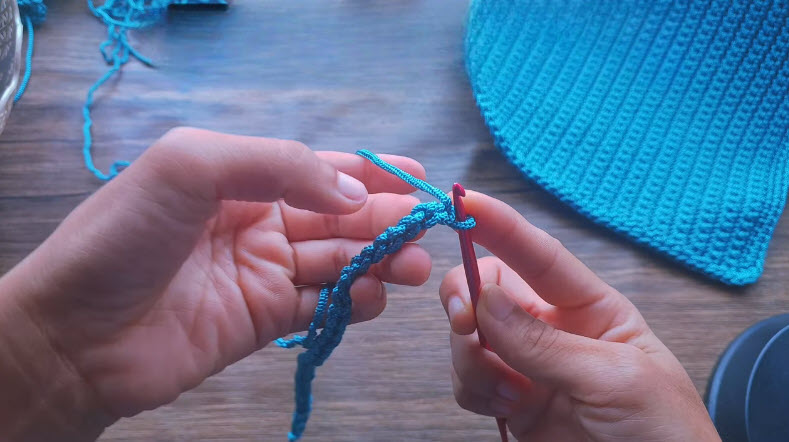
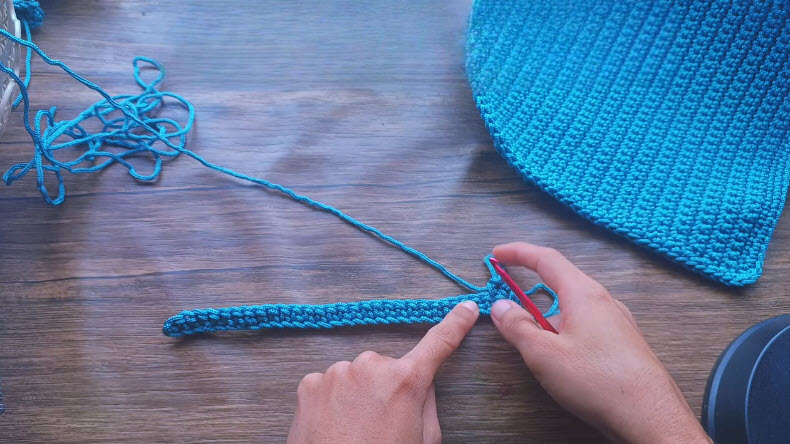
Step 2: Work the first row into the chain. Insert the hook into each chain in turn, and stitch along the full length. Pinch the growing strip flat while the hook travels, so the band stays straight instead of twisting.
Count now: Compare the stitch total against the chain total, and confirm the band lies flat.
Step 3: Build the panel fabric in rows. Grip the small panel at its side edge with the left hand. Pull the working yarn across the top, insert the hook, and stitch across the row. Turn at every row end, keeping the raised texture aligned.
Why it matters: consistent turning keeps the ridges parallel and the fabric dense.

Step 4: Shape the rounded top edge. Continue working rows on the larger panel until the top edge arrives. Then narrow both sides at the pattern’s decrease points, so the corners curve inward.
Shape check: Hold the panel upright, and confirm both shoulders slope by the same amount.
Why it matters: symmetrical curves let the front and back panels meet cleanly later.
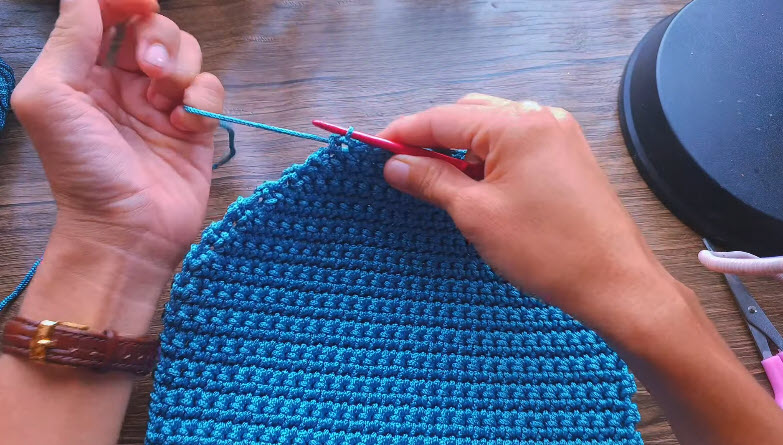
Step 5: Compare the twin panels. Lay both finished panels side by side on a flat surface. Smooth them with an open hand, then match height, width, and curved tops.
Stitch check: Count the rows on each panel. The totals should match exactly.

Common Mistakes and Their Fixes
- Problem: The band twists while chaining.
→ Fix: Lay the chain flat before the first row, and keep the bumps facing one direction. - Problem: Panels differ in width.
→ Fix: Track row and stitch totals with markers, and keep the hook grip consistent. - Problem: The curved top flares outward.
→ Fix: Recheck decrease placement on both sides, then rework the last rows. - Problem: Fabric feels loose and floppy.
→ Fix: Drop to a smaller hook diameter, and pull each loop snug.
Signs You Did It Right
- Rows form even, parallel ridges on both panels.
- The long band lies flat without curling.
- Both panels match in height, width, and curve.
- The fabric feels dense and holds its shape when lifted.
- Edges stay straight, with no gaps or flared corners.
PHASE 3: AFTER IT’S DONE
Troubleshooting Guide
- Bag slumps when loaded: Add lining or a stiff insert, then lighten the load.
- Strap stretches over time: Sew ribbon or webbing along the inside of the band.
- Panels bulge at the joins: Unpick the seam, then rejoin stitch to stitch with even spacing.
- Corners curl inward: Dampen lightly, pin flat, and let the fabric dry.
Washing and Cleaning Instructions
Check the yarn label first. Spot-clean with a damp cloth and mild soap. For a deeper wash, use cool water and a gentle hand-wash. Press out moisture with a towel instead of wringing. Finally, reshape the panels and air-dry flat, away from direct sun.
Storage Tips
Stuff the bag with tissue paper so it keeps its shape. Store it in a breathable cotton pouch, not plastic. Also, avoid hanging it by the strap for months, because the band can stretch.
Creative Projects You Can Make With This Pattern
Reuse the panel shape and ridged stitch for related makes:
- a matching crochet coin pouch pattern
- a mini crochet crossbody bag pattern
- a crochet laptop sleeve pattern
- a crochet pencil case pattern for school supplies
Ways to Style or Display It
Wear it high on the back for hands-free errands. Alternatively, sling it over one shoulder for a relaxed weekend look. At home, hang it on an entryway hook, or set it in a woven basket as a textured accent.
Bonus: Color Pairing Ideas
Teal pairs well with cream, mustard, and soft coral. For a bolder result, add a charcoal strap. Meanwhile, tonal shades of one hue create a calm, polished effect. Test each combination with a small swatch before committing.
Who This Pattern Is Great For
Intermediate crocheters looking for a structured project will enjoy it most. Students, gift-makers, and market sellers benefit too, since the finished bag carries daily essentials. Confident beginners can also succeed with patience and a practice swatch.
Why It’s Popular Right Now
Handmade bags keep gaining ground as shoppers favor durable, personal accessories. A crochet backpack shoulder bag pattern also fits the slow-craft movement, where visible texture and quality stitching matter.
- Hands-free carrying suits busy days.
- Color choices let every maker personalize the result.
- Modest yarn amounts keep the project affordable.
FAQ
Is this pattern beginner-friendly?
Confident beginners can manage it with patience. Shaping and joining feel easier after a few practice swatches.
Can a different yarn work?
Yes, provided the fiber is sturdy. Swatch first, then match the fabric density before starting the panels.
How big is the finished bag?
Size depends on yarn thickness, hook diameter, and stitch totals. Measure the first panel against the pattern before continuing.
Does the bag need a lining?
A lining is optional. Still, it adds structure, hides stitches, and protects belongings from snagging.

Conclusion
Every row brings the bag closer to real. Keep tension steady, trust the checkpoints, and enjoy watching flat panels become a sturdy carry-all. Choosing this crochet backpack shoulder bag pattern rewards patience with a bag worth carrying daily. Keep hooking, and trust each row.