Crochet Baby Reindeer Cute Amigurumi Pattern Toy
Soft brown yarn, a splash of red, and a sweet round face come together to form one of the most heartwarming amigurumi designs of the season. The proportions are kept small and stubby, giving the reindeer an adorable baby-like appearance that looks wonderful whether it’s tucked into a stocking or perched near the tree.
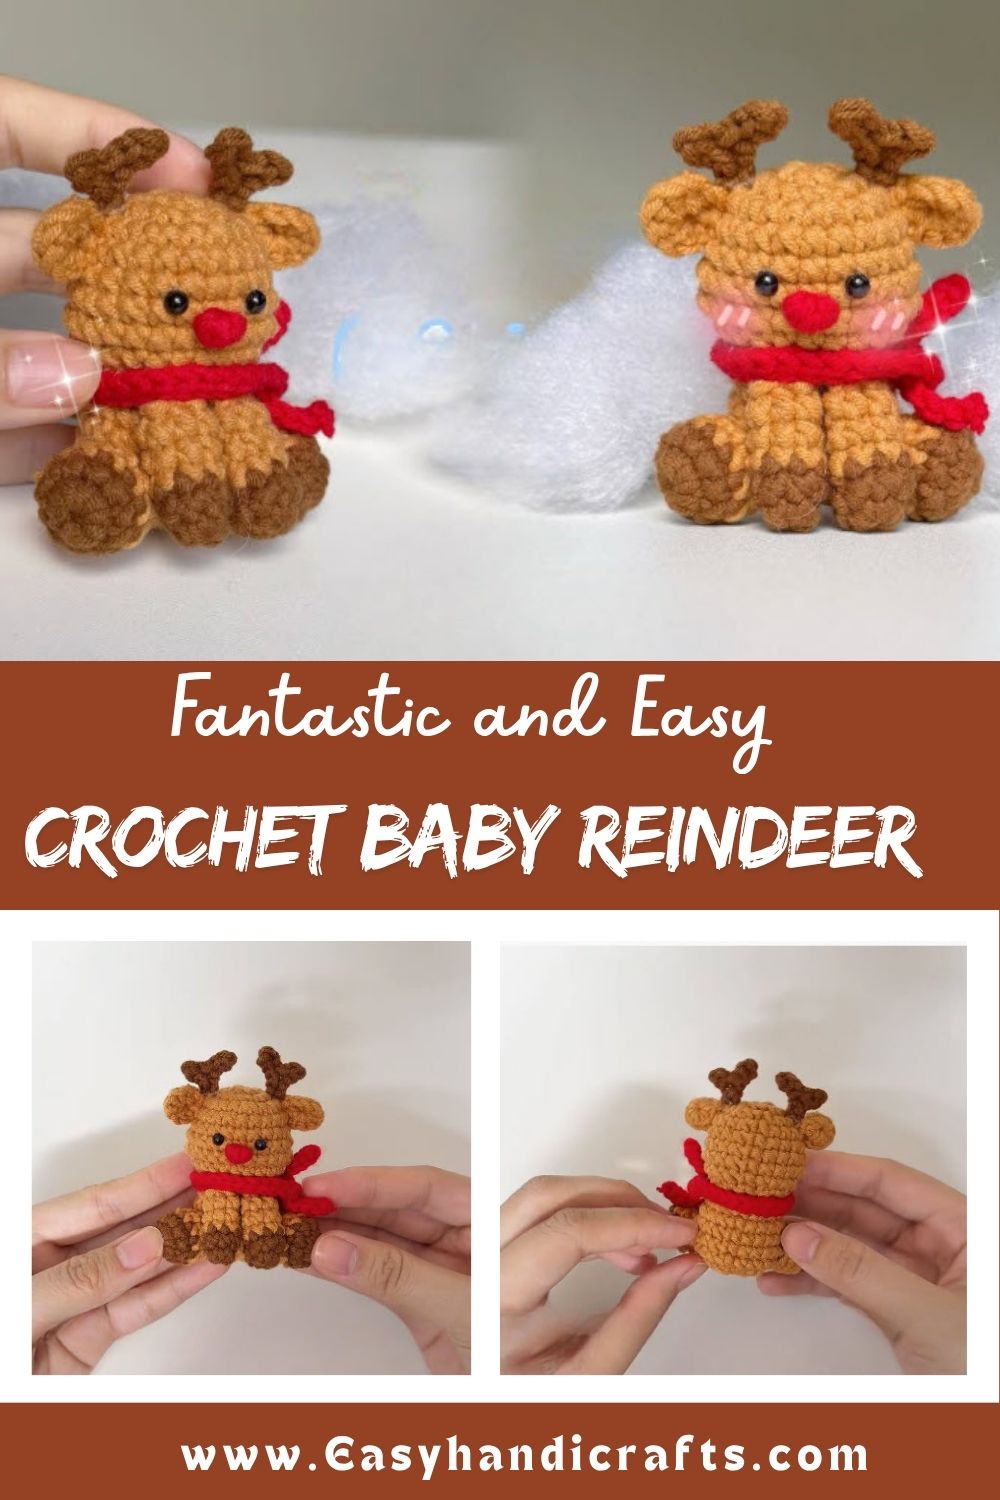
Newer crocheters often gravitate toward this design because the pieces are worked in small, manageable rounds rather than large, complicated sections. Each part comes together quickly, and the payoff of a finished reindeer with antlers and a scarf feels far more impressive than the actual effort required to make it.
Project Details
- Skill Level: Beginner-friendly
- Finished Size: Approximately 3–4 inches tall while seated
- Estimated Time Required: 3–4 hours
- Recommended Yarn Weight: DK or worsted weight (weight 3–4)
- Crochet Hook Size: 2.5mm–3mm for a tight, stuffing-friendly fabric
Materials Needed
- Yarn in light brown, dark brown, red, and small amounts of black and white
- Crochet hook (2.5mm–3mm)
- Fiberfill stuffing
- Safety eyes (or black embroidery thread for beginners)
- Tapestry needle
- Stitch markers
- Scissors
Crochet Stitches and Techniques
- Magic Ring
- Single Crochet (sc)
- Increase (inc)
- Invisible Decrease (invdec)
- Color Changes
- Fastening Off
- Sewing Pieces Together
These techniques cover everything needed for the reindeer’s rounded body, tiny limbs, and layered facial details.
Pattern Instructions
Building this little reindeer happens piece by piece, with several small rounds joining together into one finished toy. Following the stages below in order keeps the proportions balanced and makes assembly far smoother once every piece is ready.
Step 1: Starting the First Piece With a Magic Ring
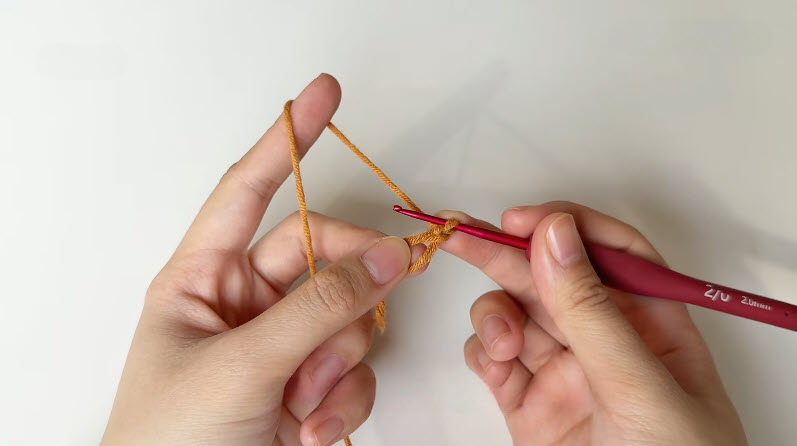
Form a magic ring using your mustard-brown yarn, chaining as needed to anchor your hook before working the opening round of stitches into the loop. This adjustable ring becomes the base of one of the reindeer’s smaller pieces, such as a leg or an ear, and pulling it snug afterward keeps the center completely closed with no visible hole.
Step 2: Shaping the Rounded Piece
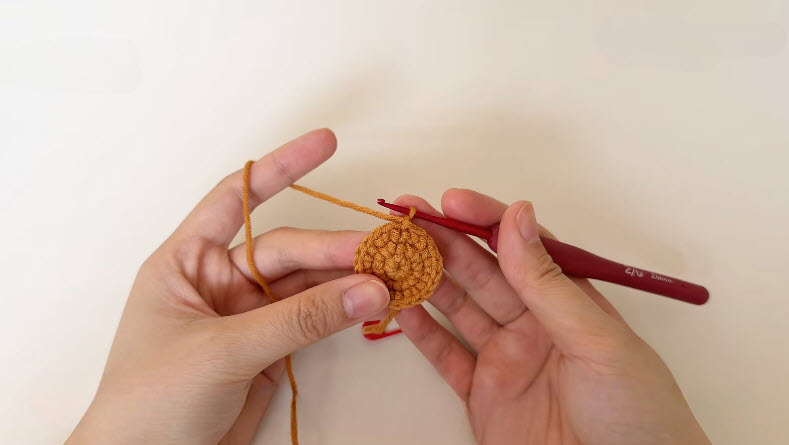
Continue single crocheting in a spiral, increasing where the pattern calls for it to build outward roundness into the small piece. Notice how the stitches naturally curve into a dome shape as the rounds progress, forming the compact little limb or ear that will later attach to the main body. Keep your tension snug here since smaller pieces show uneven stitches more obviously than larger ones.
Step 3: Creating the Matching Second Piece
Repeat the same sequence to crochet a second identical piece, since most limbs on this reindeer come in matching pairs. Holding both finished pieces side by side lets you double-check that the stitch counts and shaping line up evenly before moving forward. This little pause saves time later, preventing a lopsided pair of legs or ears from throwing off the toy’s overall balance.
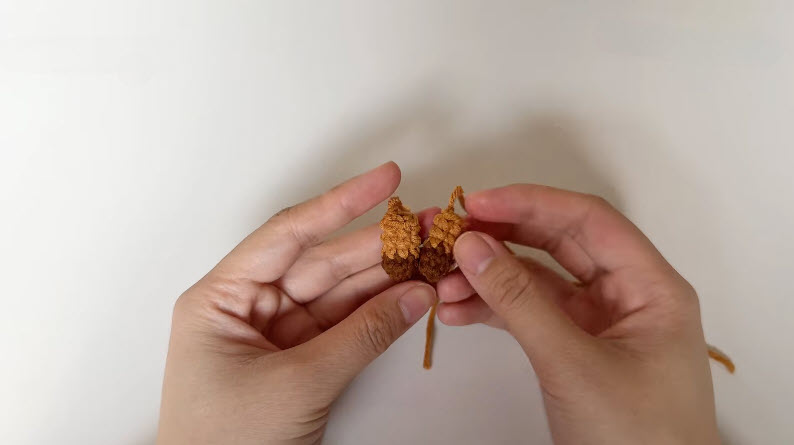
Step 4: Assembling the Body and Attaching Small Parts
Once the smaller pieces are complete, work the main body separately, stuffing it firmly as the rounds close in toward the top. Thread your tapestry needle to begin attaching the finished legs, ears, or antlers onto the body, positioning each piece carefully before stitching it into place. Take your time aligning everything symmetrically, since this step determines how balanced the finished reindeer will sit.
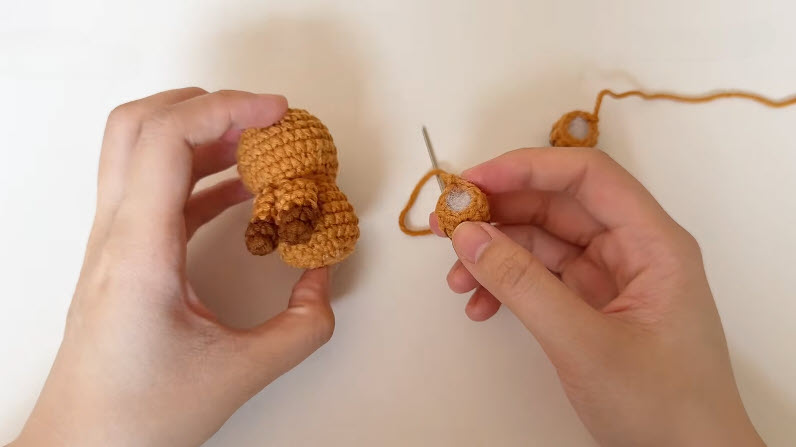
Step 5: Adding the Face and Final Details
Attach safety eyes or embroider the eyes by hand, then stitch on a small red nose to complete that classic reindeer look. Crochet or embroider the tiny scarf detail and wrap it snugly around the neck, securing it with a few discreet stitches. Once every piece sits in place, the finished reindeer takes on that unmistakable, huggable charm shown in the final result below.
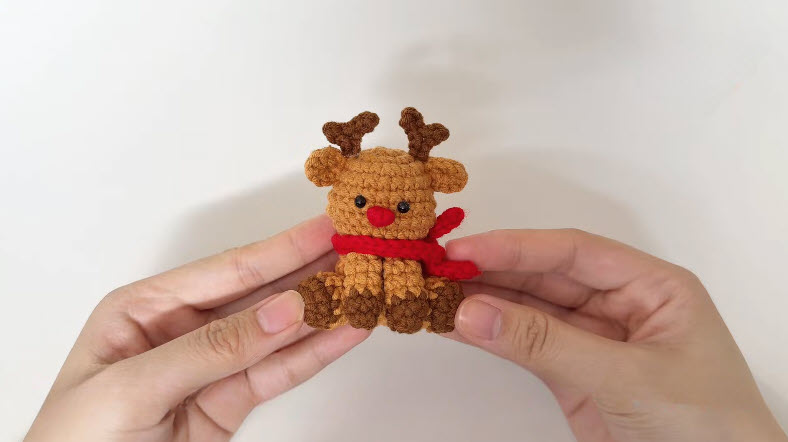
Joining All Pieces
Sew the antlers onto the top of the head using small, tight stitches so they stand upright rather than flopping to one side. Attach the legs to the underside of the body at an angle that lets the reindeer sit upright on its own, checking balance as you go.
Final Assembly
Weave in every loose end neatly through the back of the stitches, trimming excess yarn close to the fabric. Fluff the stuffing gently through the seams if any lumps appear, and give the finished toy one last check to make sure the scarf, antlers, and face sit evenly before it’s ready to display.
Tips for Success
- Keep stitch tension tight and even, especially for small pieces like ears and antlers.
- Use stitch markers on every round so you never lose your place mid-piece.
- Stuff firmly but gradually, checking the shape stays rounded rather than lumpy.
- Position paired pieces symmetrically before sewing them onto the body.
- Hide yarn ends by weaving them through several stitches rather than just knotting them.
- Steam or lightly block any pieces that look uneven before final assembly.
Personalization Ideas
Swapping the red scarf for a green or plaid version instantly shifts the look toward a broader winter theme rather than a strictly Christmas one. A pastel palette works beautifully for a nursery decoration, while a jumbo version stitched in bulky yarn makes a wonderful oversized cuddle toy.
Adding a small bell to the scarf brings in a playful jingling detail, and a tiny loop at the top of the head turns this reindeer into an ornament for the tree. A mini keychain version stitched in fingering weight yarn also makes a lovely stocking stuffer for friends and family.
Common Mistakes to Avoid
- Uneven paired pieces: Always compare both legs, ears, or antlers side by side before attaching them.
- Loose stuffing: Add fiberfill in small amounts, checking firmness as you close each round.
- Crooked antlers: Pin pieces in place before sewing to check alignment first.
- Visible knots: Weave color-change ends along the same shade to keep them hidden.
- Wobbly sitting position: Angle the legs slightly forward when attaching for a stable base.
Frequently Asked Questions
1. What yarn weight suits this reindeer pattern best?
DK or worsted weight yarn holds shape well and keeps the proportions nicely compact.
2. Do I need safety eyes, or can I embroider them instead?
Either option works fine; embroidered eyes are a great choice for anyone avoiding small plastic parts.
3. How long does this project typically take to finish?
Most crocheters complete the full reindeer within three to four hours, spread across a couple of sittings.
4. Is this pattern good for someone new to amigurumi?
Yes, the small individual pieces make it a forgiving project for beginners still building confidence.
5. Can I make this Crochet Baby Reindeer without the scarf?
Absolutely, leaving off the scarf still results in a charming, simpler-looking toy.
6. What’s the best way to keep the antlers standing upright?
Stuff them lightly and sew them onto the head with several secure anchor stitches.
7. Can this Crochet Baby Reindeer pattern be turned into an ornament?
Yes, simply add a small hanging loop at the top of the head before final assembly.
Conclusion
This Crochet Baby Reindeer amigurumi proves that a handful of small, simple pieces can turn into something truly heartwarming once everything comes together. Take your time shaping each little part, enjoy the process of watching the pieces transform into a tiny character, and don’t be afraid to add your own personal touches along the way. Once finished, this cozy little reindeer makes a beautiful gift or holiday keepsake so pick up your hook and share your finished creation with fellow crochet lovers.