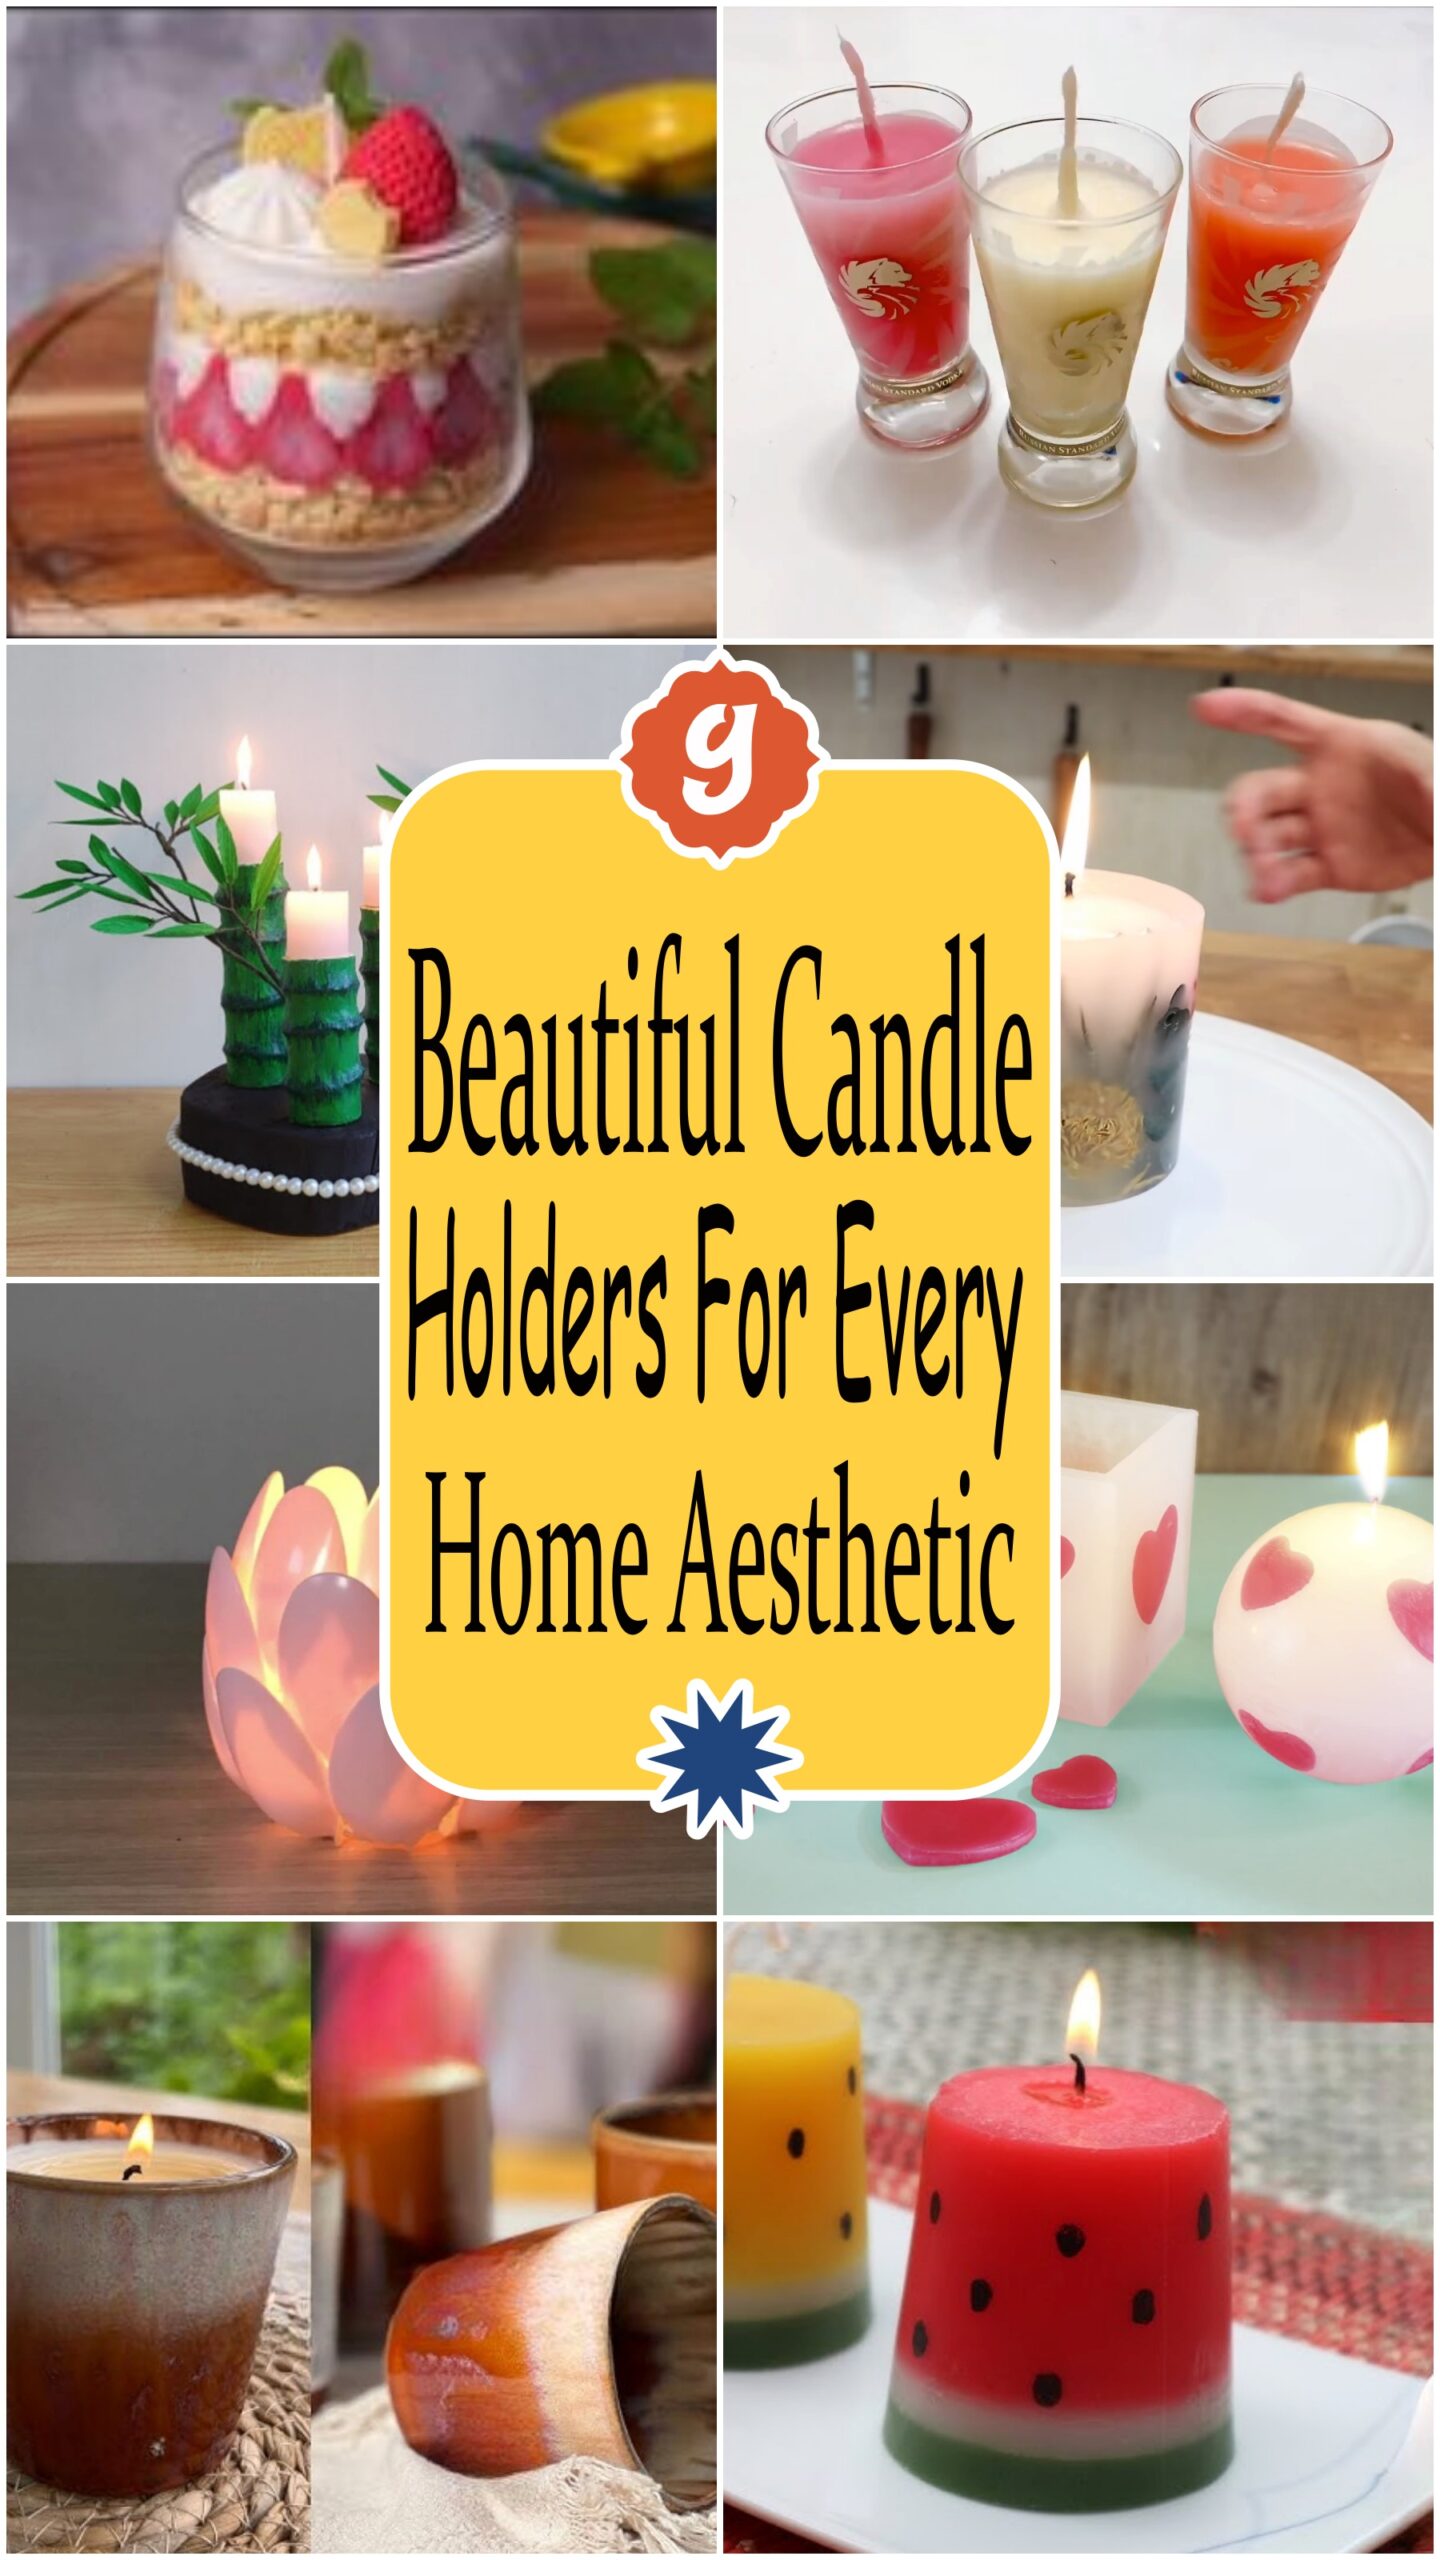
Beautiful Candle Holders For Every Home Aesthetic
Beautiful Candle Holders For Every Home Aesthetic” add warmth and elegance to any space, making them perfect for creating a cozy and inviting atmosphere in the home. Whether placed on a dining table, coffee table, or shelf, these candle holders complement various home decor styles, from rustic to modern. The process of creating beautiful candle holders is simple and can be done with a few essential materials: wax, a wick, a mold (which can be a glass jar or metal container), and decorative elements like dried flowers or essential oils for added fragrance. This DIY project usually takes around 2-3 hours, depending on the complexity of the design, and allows for customization with different scents and colors to match the room’s aesthetic.
Variations in design can include using unique containers such as vintage teacups, mason jars, or elegant metal stands. For a more modern touch, geometric shapes or metallic finishes can be added to the holders. Additionally, adding natural elements like wood, stones, or crystals can further elevate the look, making each candle holder a unique statement piece. The use of different wax types, such as soy or beeswax, can also change the candle’s appearance and scent, creating a personalized experience for each space. These beautiful candle holders not only illuminate a room but also serve as a functional and stylish decor piece that enhances the overall aesthetic of any home.
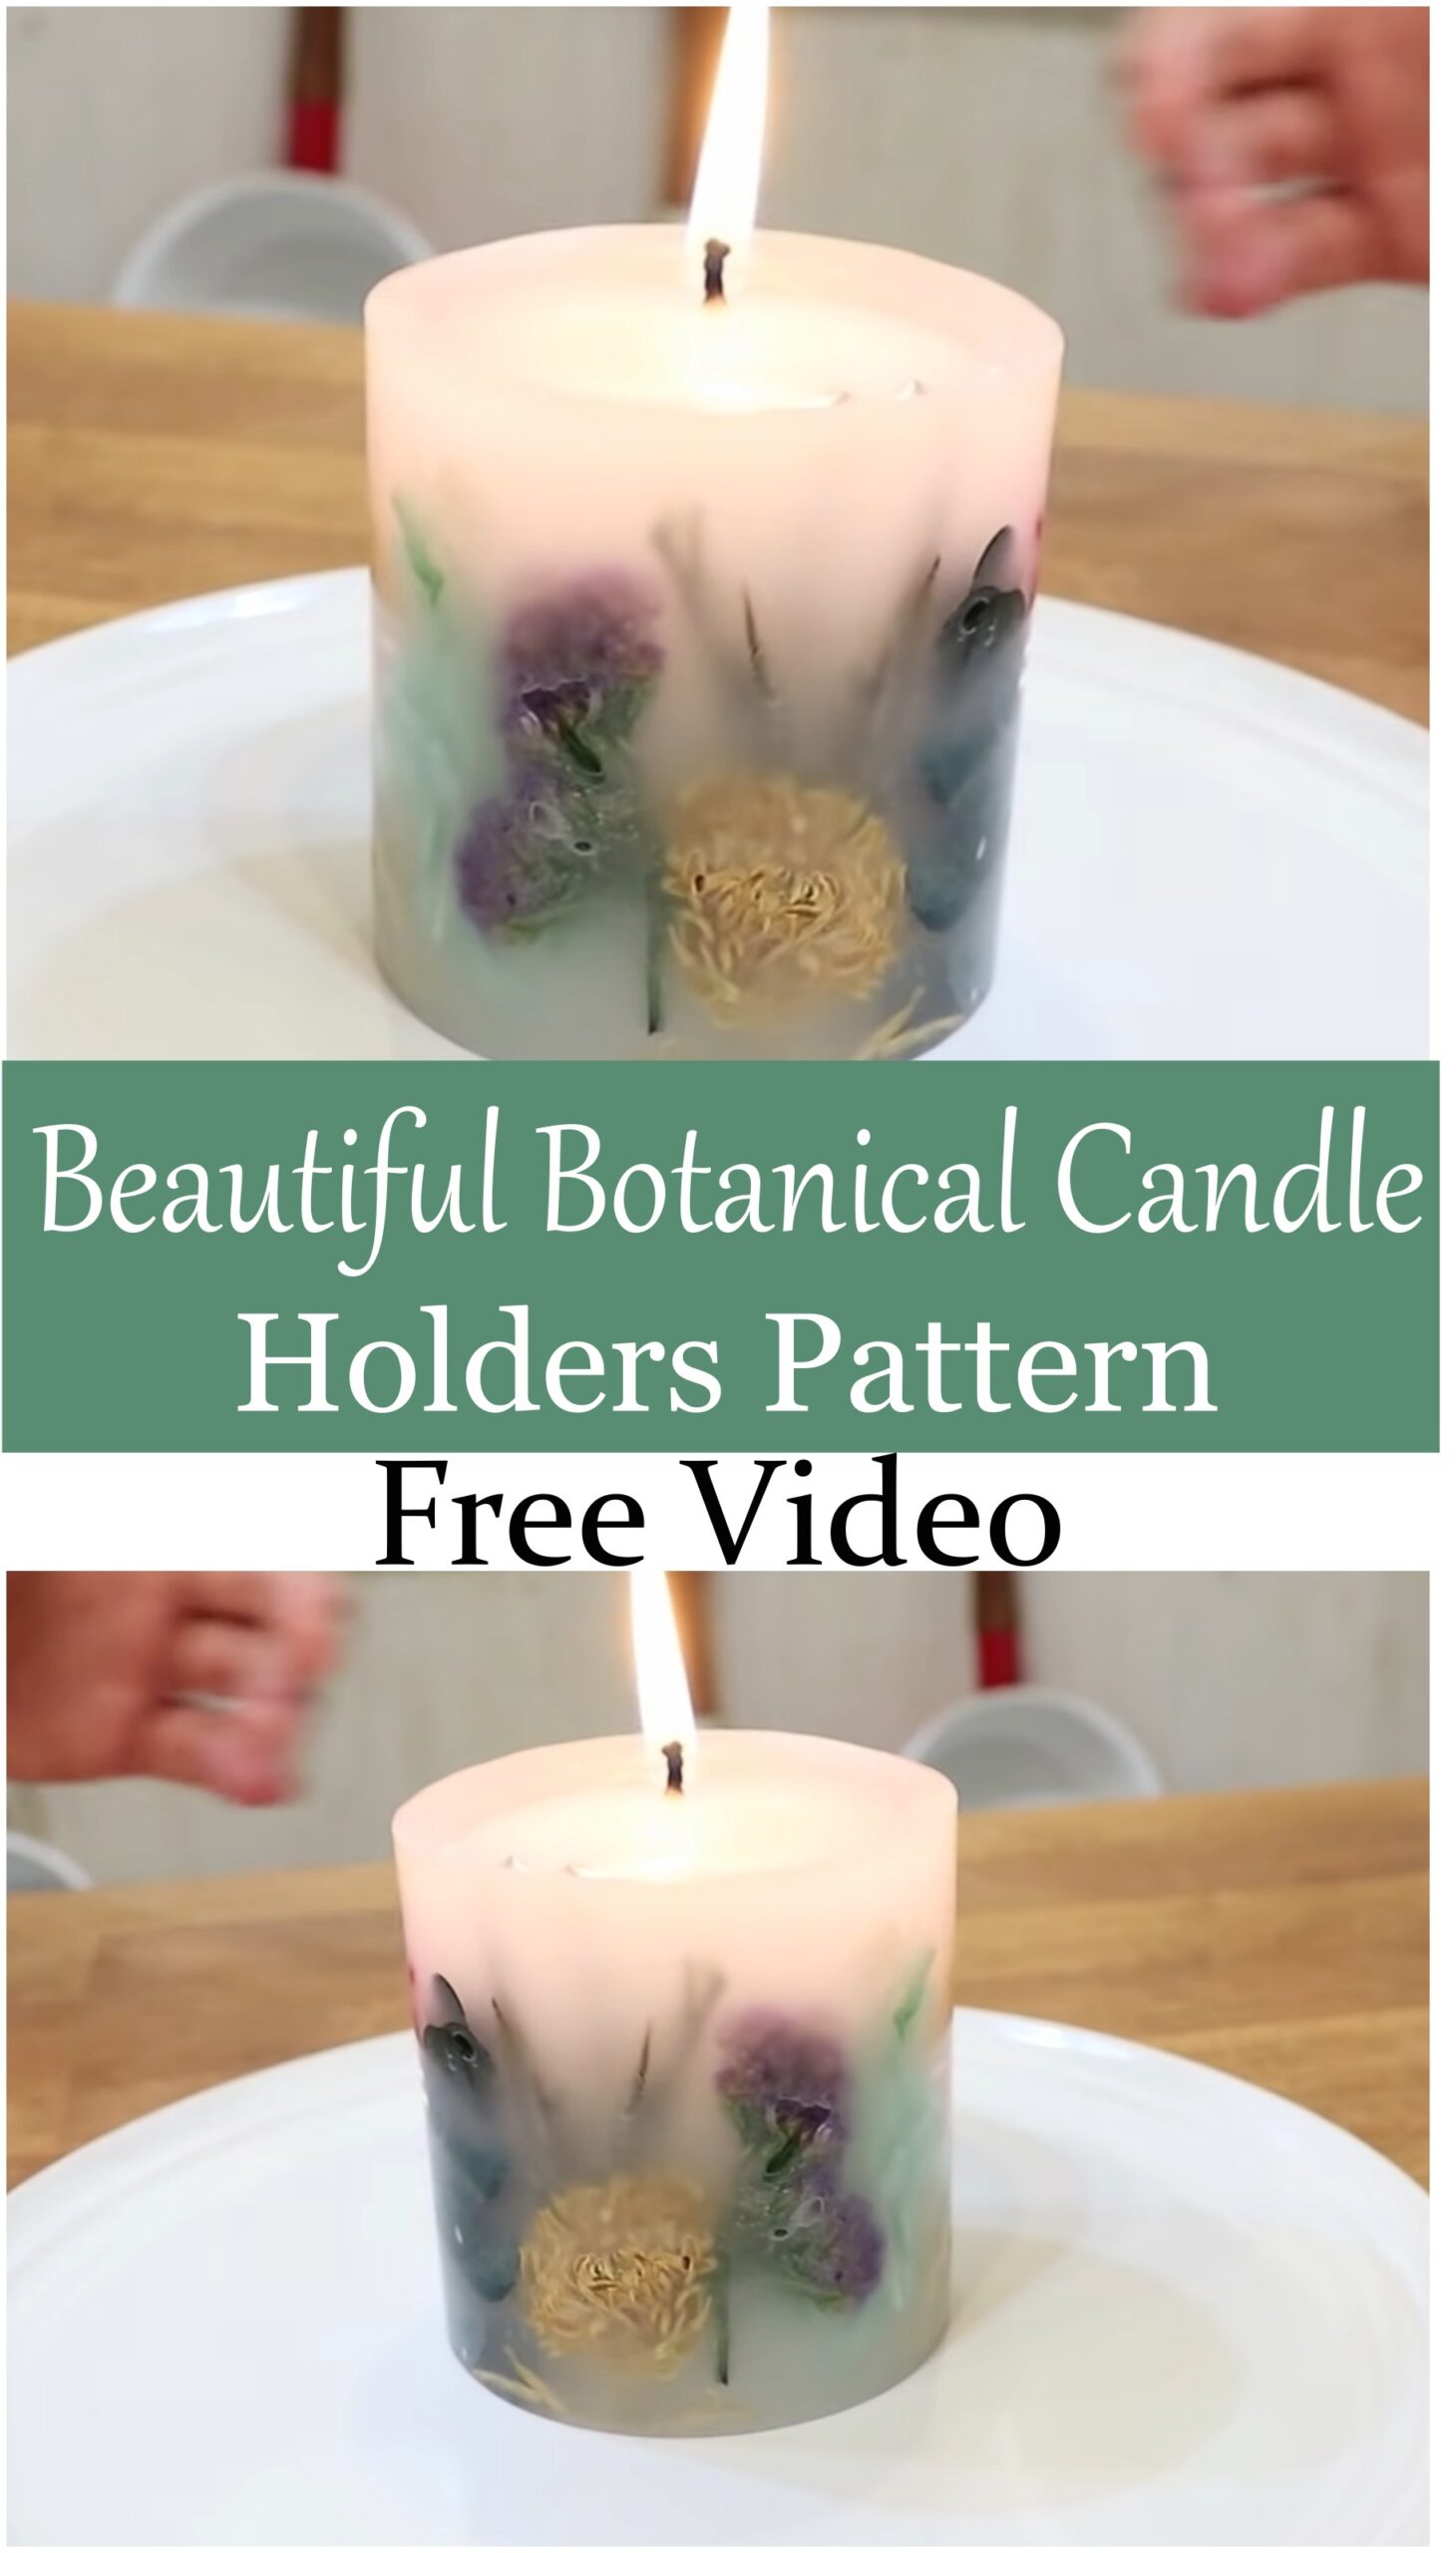
Beautiful Botanical Candle Holders Pattern
Beautiful Botanical Candle Holders Pattern” adds a natural, elegant touch to any home decor with easy-to-create designs.
Procedure of Making: Start by selecting a glass container, such as a mason jar or small vase, and prepare the wax of your choice. Place a wick in the center and secure it. Pour the melted wax into the container, filling it almost to the top. Before the wax fully hardens, gently press dried botanicals like lavender, eucalyptus, or rose petals into the surface for a stunning botanical effect. Allow the candle to cool completely before trimming the wick.
Materials: Glass containers, wax (such as soy or beeswax), wicks, dried botanicals (flowers, leaves, herbs), and a melting pot for the wax.
Different Design Ideas: Try using different dried flowers or plants to create unique patterns. For a more rustic look, use a wooden container or add a touch of gold leaf to the botanicals for a more glamorous feel.
Precautions: Ensure the wick is centered before pouring the wax and always let the candle cool completely before lighting. Keep the candle away from flammable surfaces and trim the wick to prevent excessive burning.
This simple process results in beautiful, fragrant candles that serve as lovely decor pieces while bringing a calming, nature-inspired atmosphere to any room.
Candles Holders With Hearts Pattern
“Candle Holders with Hearts Pattern” add a charming, romantic touch to any room, perfect for special occasions or everyday use.
Procedure of Making: Start by selecting a candle holder, such as a glass jar or ceramic container. Apply a heart stencil or freehand heart designs using a glass paint marker or adhesive decals. For a more textured effect, consider gluing small heart-shaped embellishments like beads or glitter around the holder. Once the design is in place, allow it to set or dry before inserting the candle.
Materials: Glass or ceramic candle holders, glass paint markers, heart stencils or decals, beads or glitter (optional), and a candle.
Different Design Ideas: Experiment with different heart shapes and colors to suit your style. Create a gradient effect with red, pink, or gold hearts for a festive look, or use frosted or metallic finishes for a modern feel.
Precautions: Ensure that the paint or decorations are securely fixed before lighting the candle. Always place the candle holder on a stable, heat-resistant surface to prevent accidents.
This easy and personalized design brings warmth and love to any setting, making it a perfect addition to a romantic dinner or a thoughtful gift.

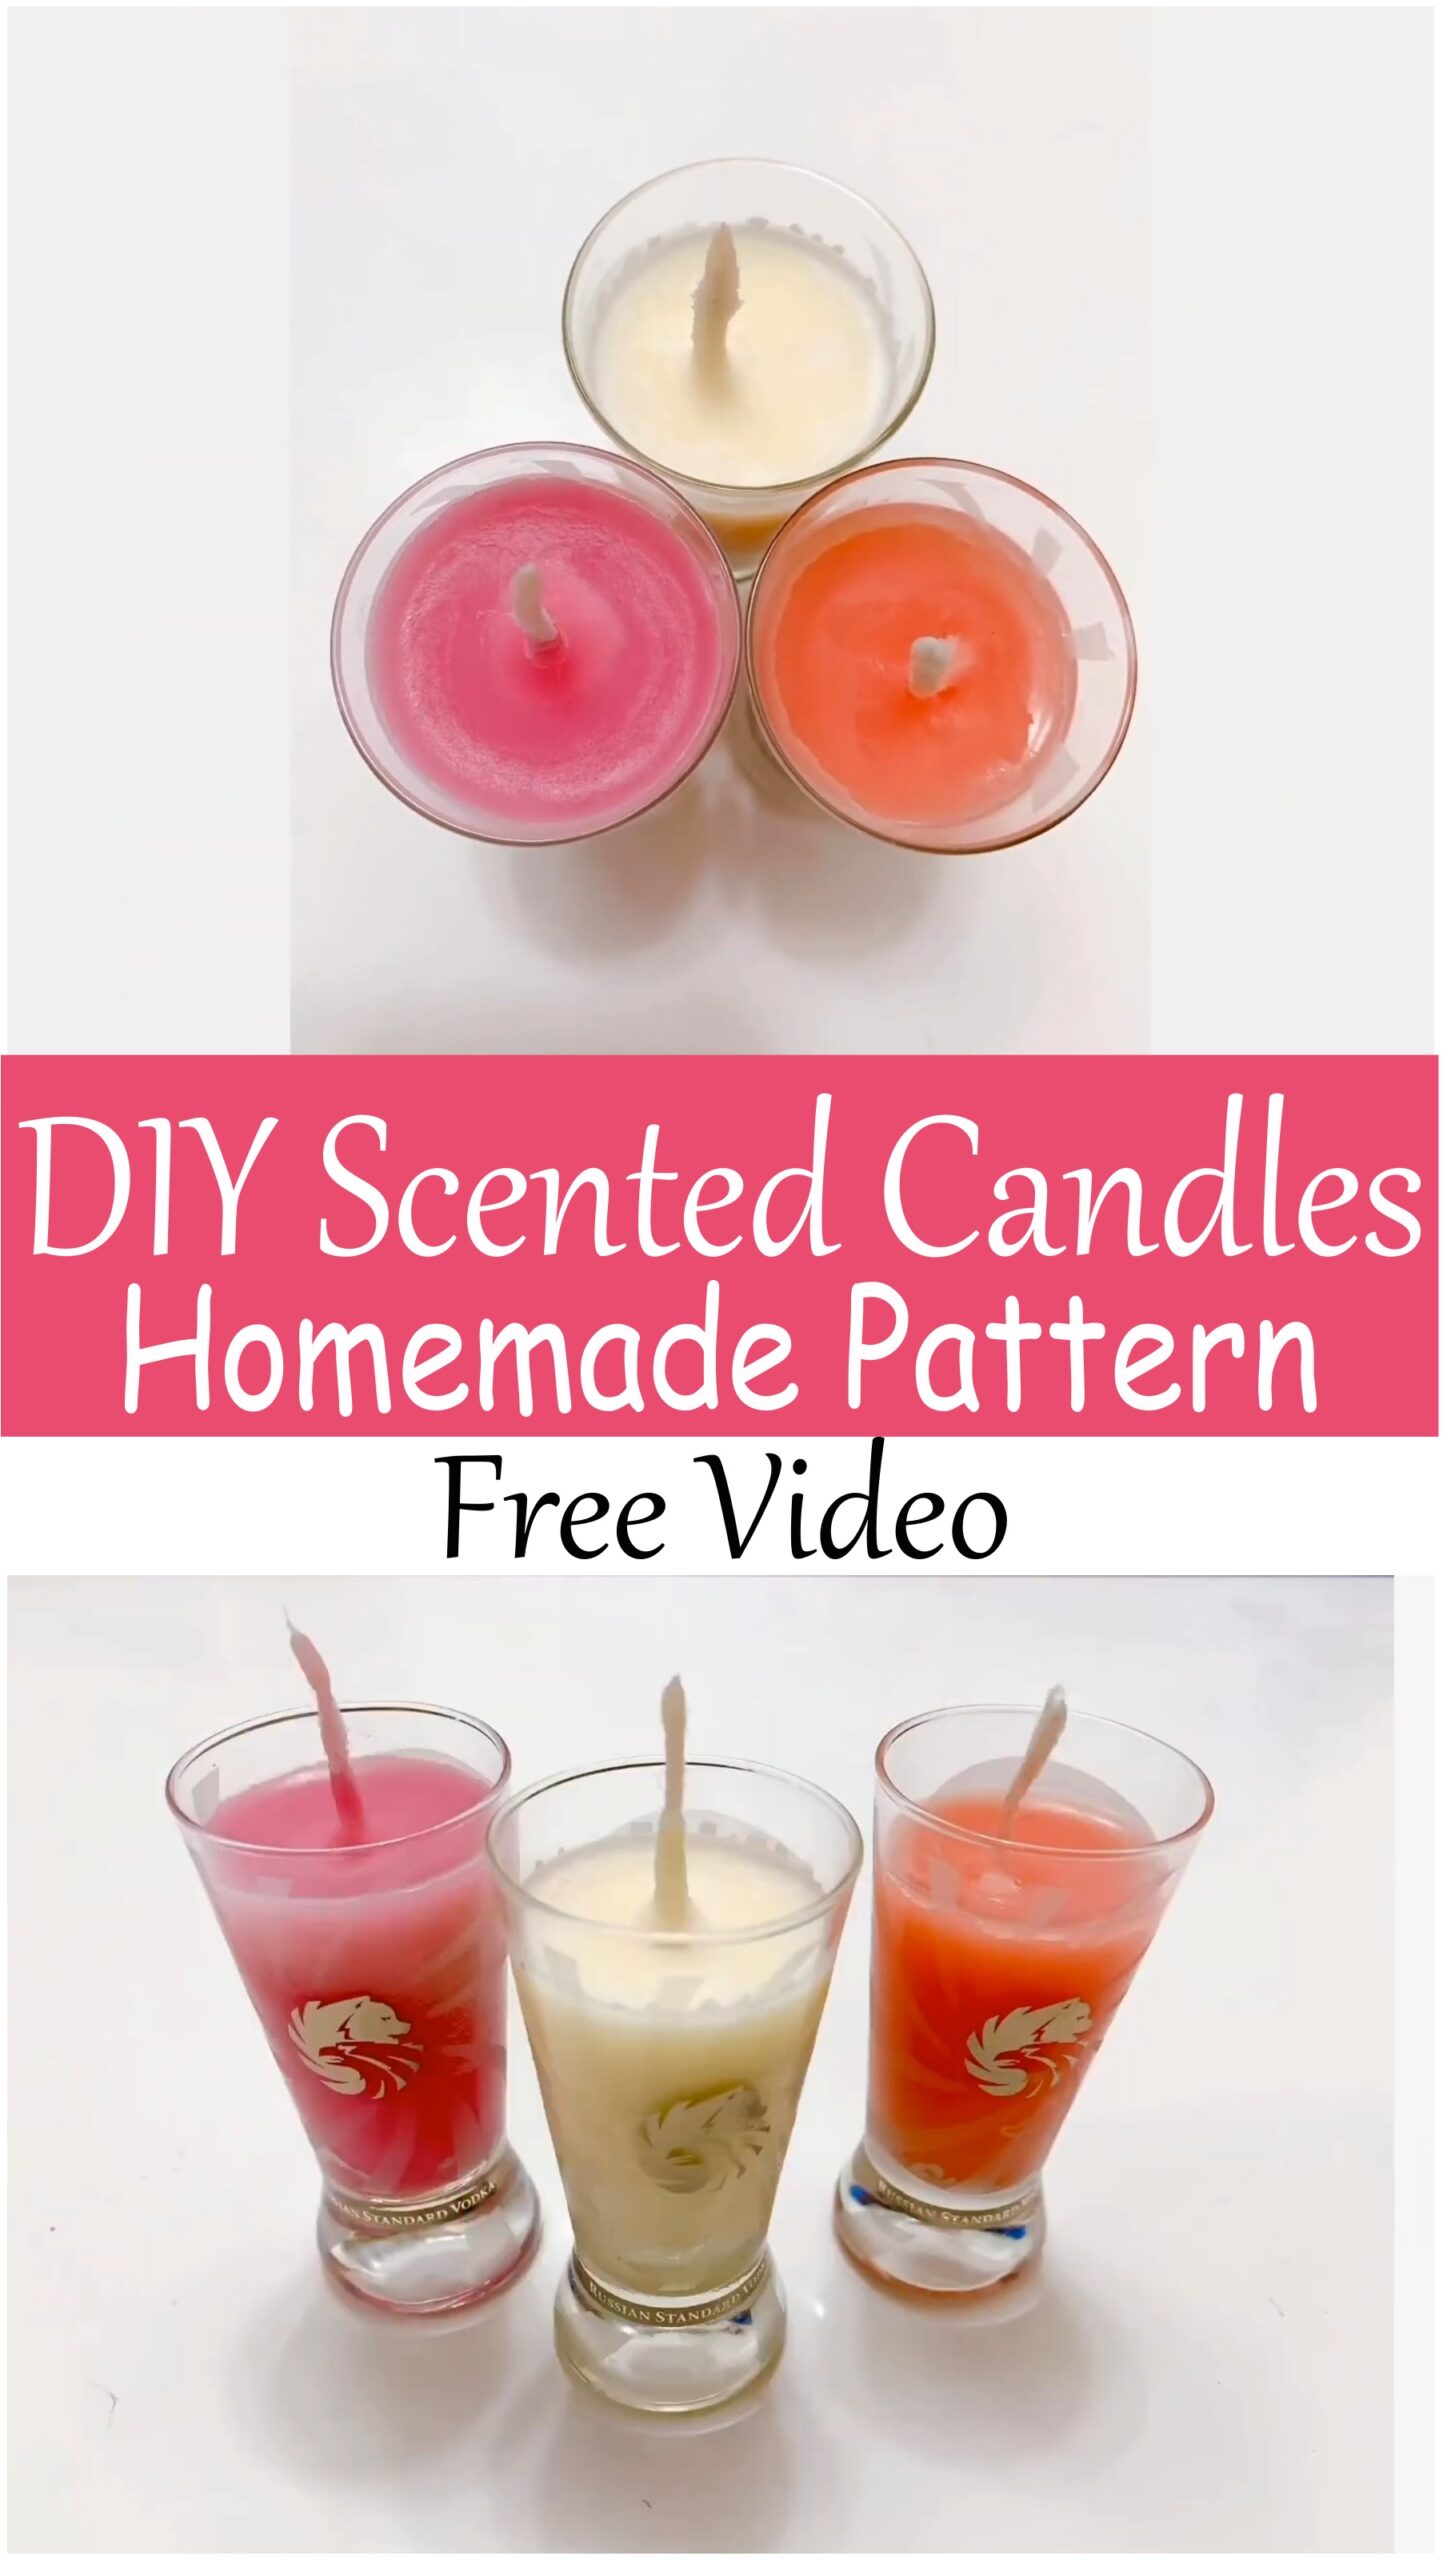
DIY Scented Candles Homemade Pattern
“Candle Holders with Hearts Pattern” add a charming, romantic touch to any room, perfect for special occasions or everyday use.
Procedure of Making: Start by selecting a candle holder, such as a glass jar or ceramic container. Apply a heart stencil or freehand heart designs using a glass paint marker or adhesive decals. For a more textured effect, consider gluing small heart-shaped embellishments like beads or glitter around the holder. Once the design is in place, allow it to set or dry before inserting the candle.
Materials: Glass or ceramic candle holders, glass paint markers, heart stencils or decals, beads or glitter (optional), and a candle.
Different Design Ideas: Experiment with different heart shapes and colors to suit your style. Create a gradient effect with red, pink, or gold hearts for a festive look, or use frosted or metallic finishes for a modern feel.
Precautions: Ensure that the paint or decorations are securely fixed before lighting the candle. Always place the candle holder on a stable, heat-resistant surface to prevent accidents.
This easy and personalized design brings warmth and love to any setting, making it a perfect addition to a romantic dinner or a thoughtful gift.
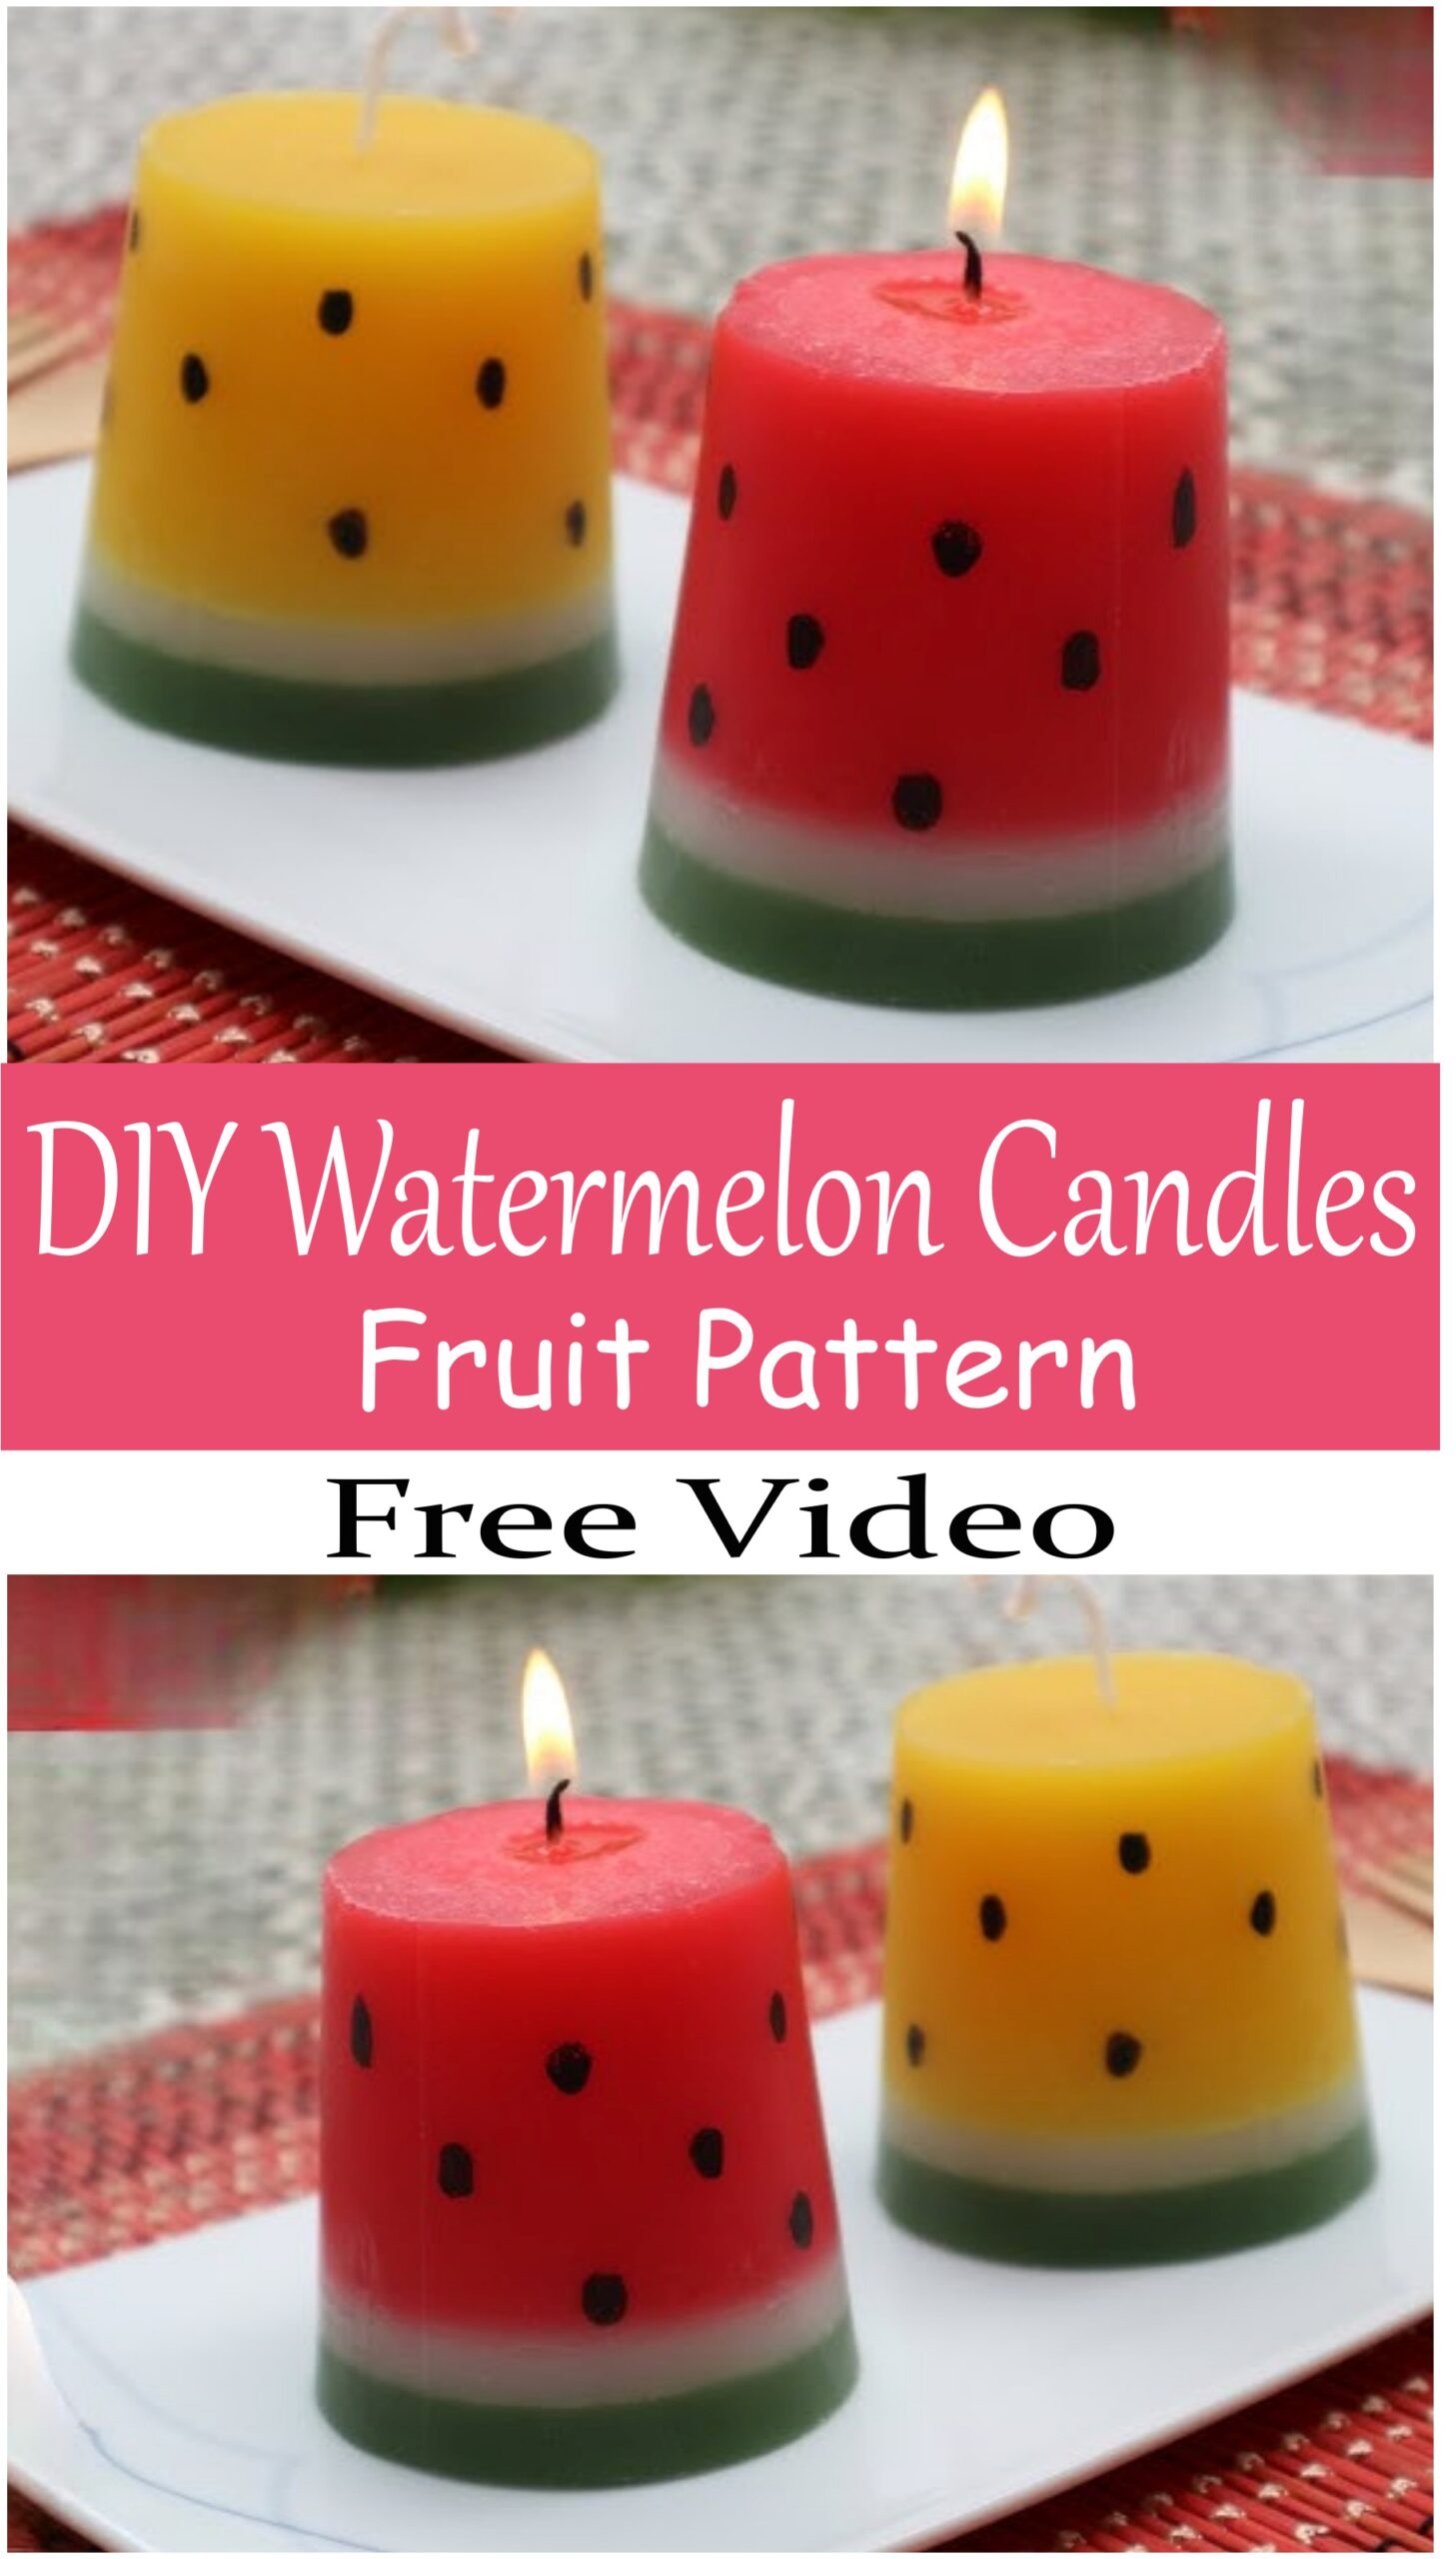
DIY Watermelon Candles Fruit Pattern
“DIY Watermelon Candles with Fruit Pattern” add a fun, fresh, and vibrant touch to any room, making them perfect for summer decor or special events.
Procedure of Making: Begin by selecting a small round container or mold to form the candle shape. Melt your preferred wax (such as soy or beeswax) and color it with red and green dyes to match the watermelon colors. Pour the green wax first, creating the outer rind, then pour the red wax for the interior. To create the seed effect, use black wax or small dark beads. Let the wax cool completely before trimming the wick.
Materials: Wax (soy or beeswax), candle dye (red, green, black), small round mold or container, wick, and black beads or small wax bits for seeds.
Different Design Ideas: Create layers of different colors to mimic the watermelon’s rind and flesh. For added realism, incorporate a textured outer layer or use a natural watermelon scent to enhance the design.
Precautions: Ensure the wick is centered and the wax is completely cool before lighting. Always use a heat-resistant surface when burning the candle.
These playful, fruity candles not only brighten up your space but also make unique gifts or festive table decor, especially for summer-themed occasions.
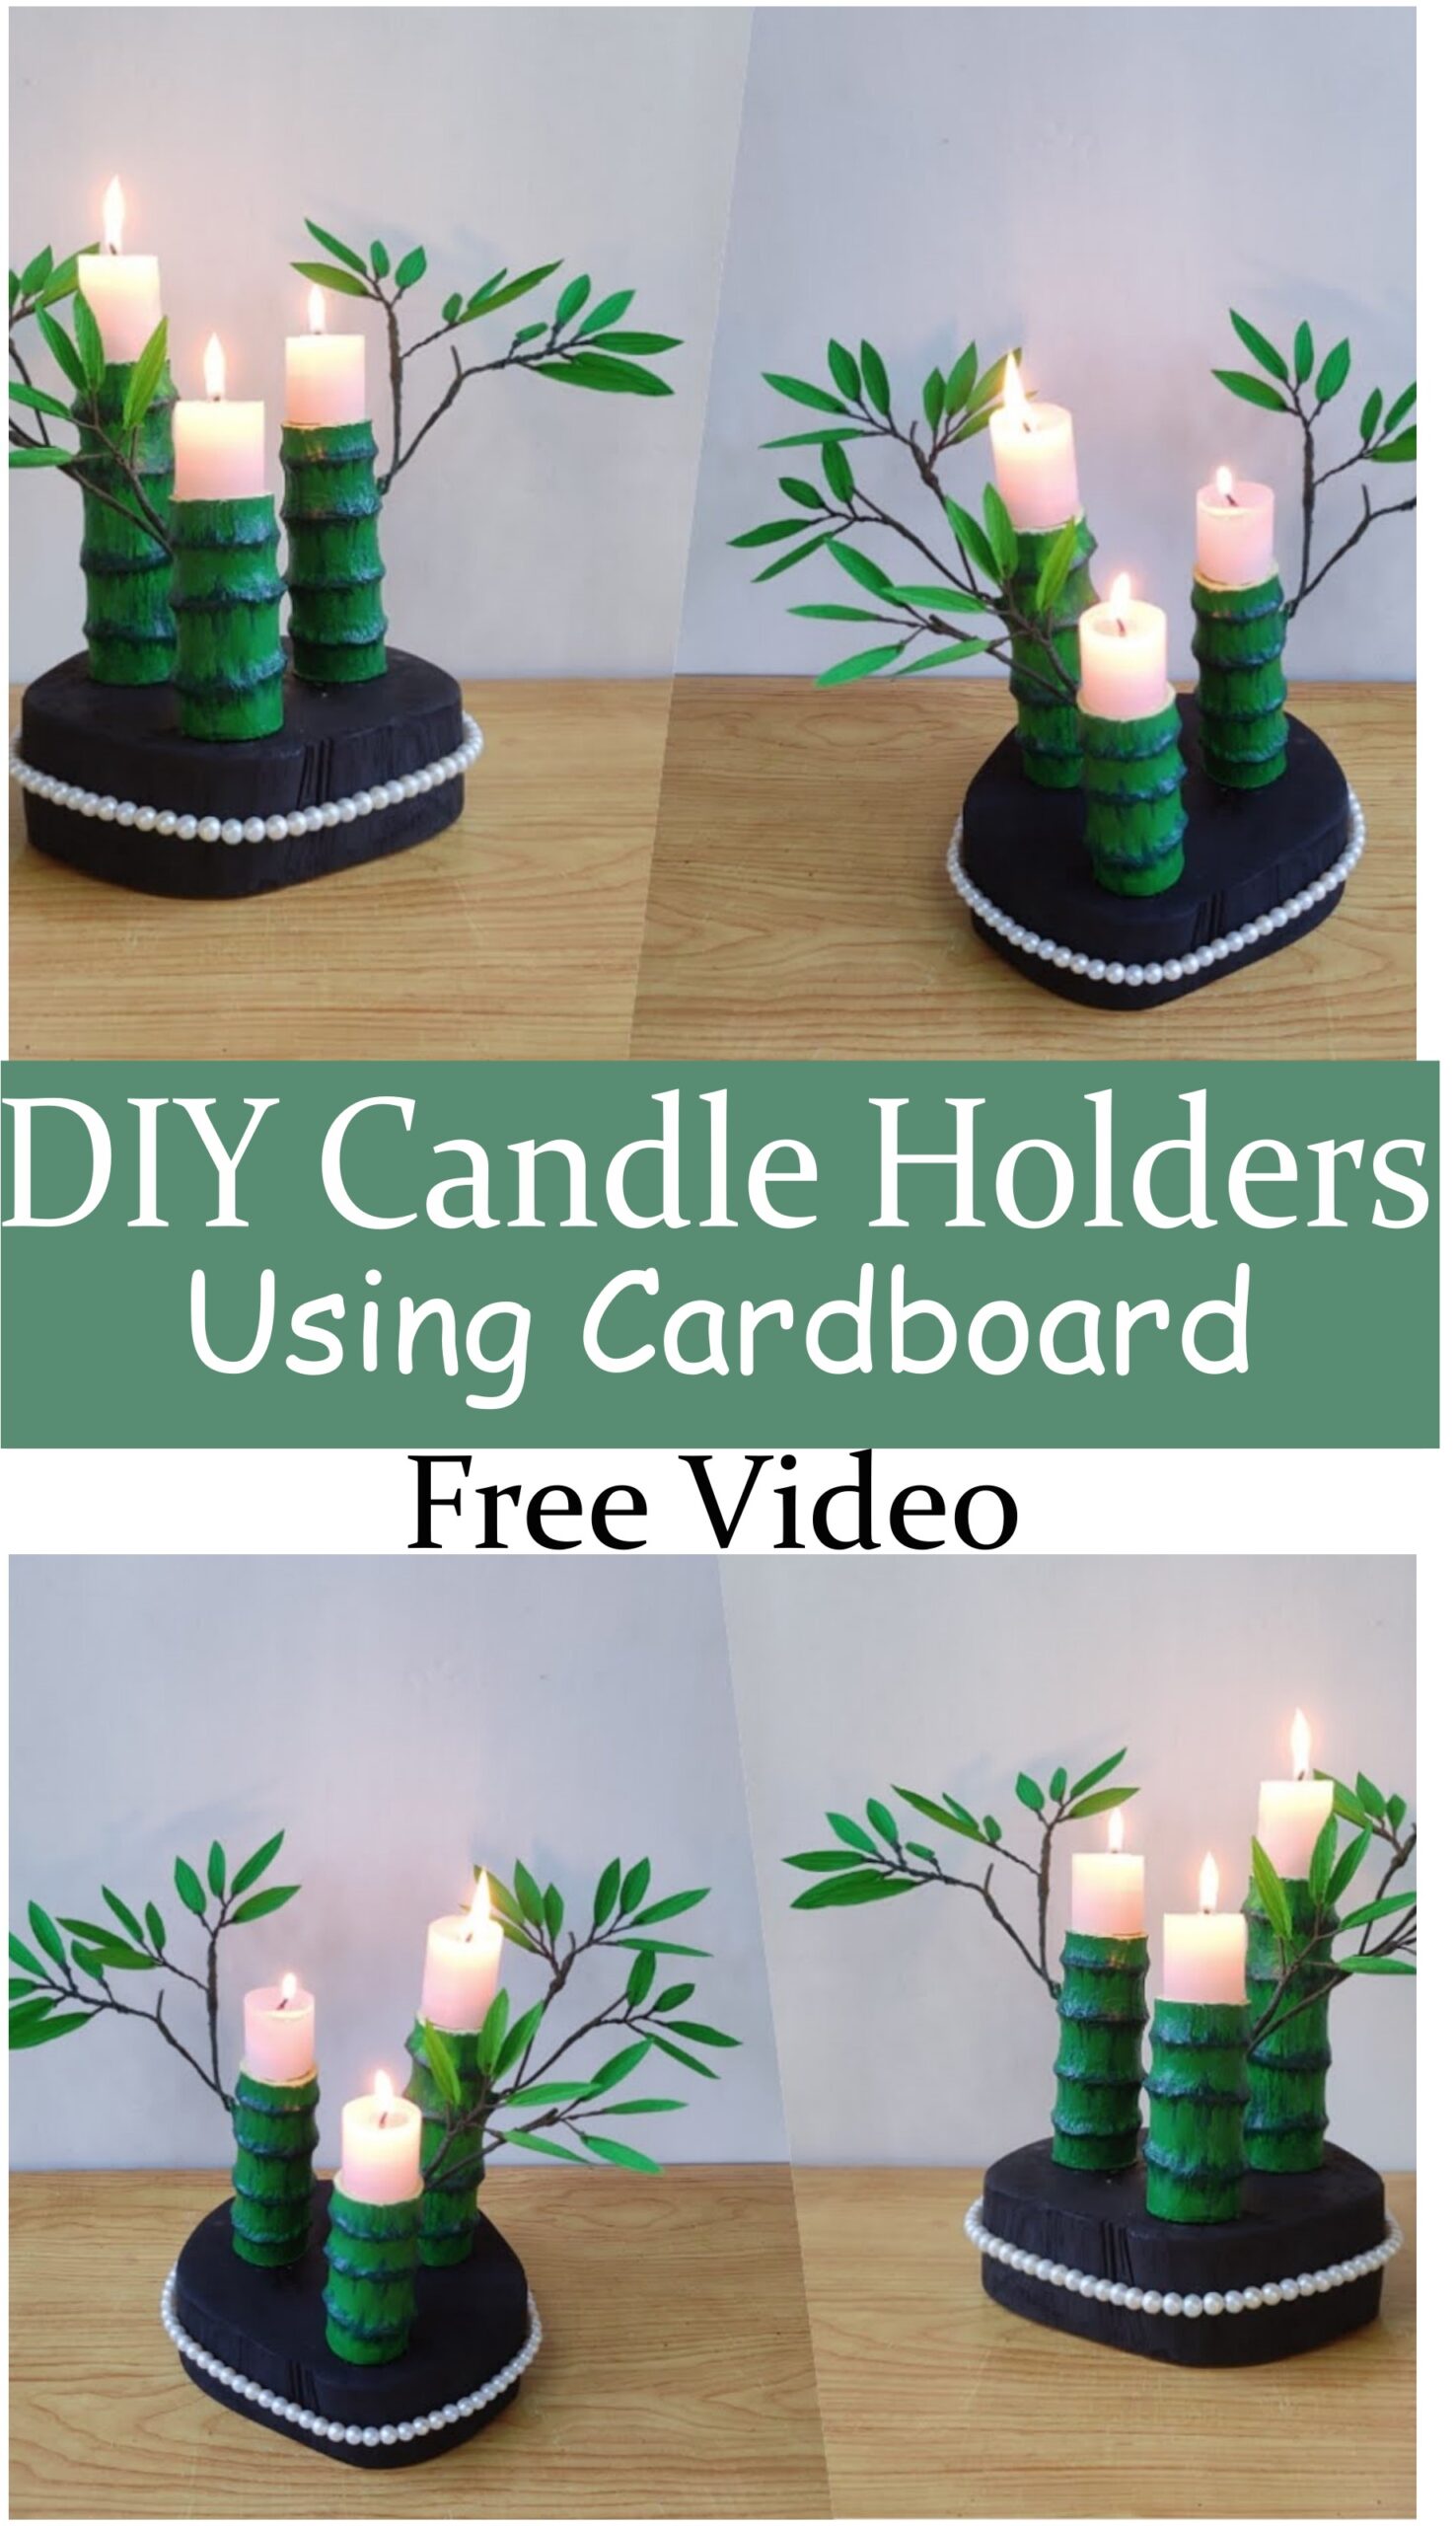
DIY Candle Holders Using Cardboard
“DIY Candle Holders Using Cardboard” offer an easy and eco-friendly way to create personalized candle holders that add a unique touch to any space.
Procedure of Making: Start by cutting cardboard into the desired shape for the candle holder, such as a cylinder or geometric design. Secure the edges with glue or tape to form the holder, ensuring it fits the size of your candle. For added style, paint or decorate the cardboard with patterns, glitter, or fabric. Finally, insert a small glass or metal container inside to hold the candle securely.
Materials: Cardboard, glue or tape, paint or fabric for decoration, scissors, and a small glass or metal container for the candle.
Different Design Ideas: Experiment with different shapes like squares, triangles, or layered designs. Use vibrant colors, metallic finishes, or even natural textures like burlap for a rustic look. For a more intricate design, try cutting out patterns or shapes on the cardboard to create a lace-like effect.
Precautions: Ensure the cardboard is properly glued and sturdy before placing the candle inside. Keep the candle holder on a flat, heat-resistant surface and never leave it unattended while lit.
This simple and customizable project provides an affordable way to create stylish, one-of-a-kind candle holders that complement any home decor.
https://www.youtube.com/watch?v=YYvu43n1BiQ
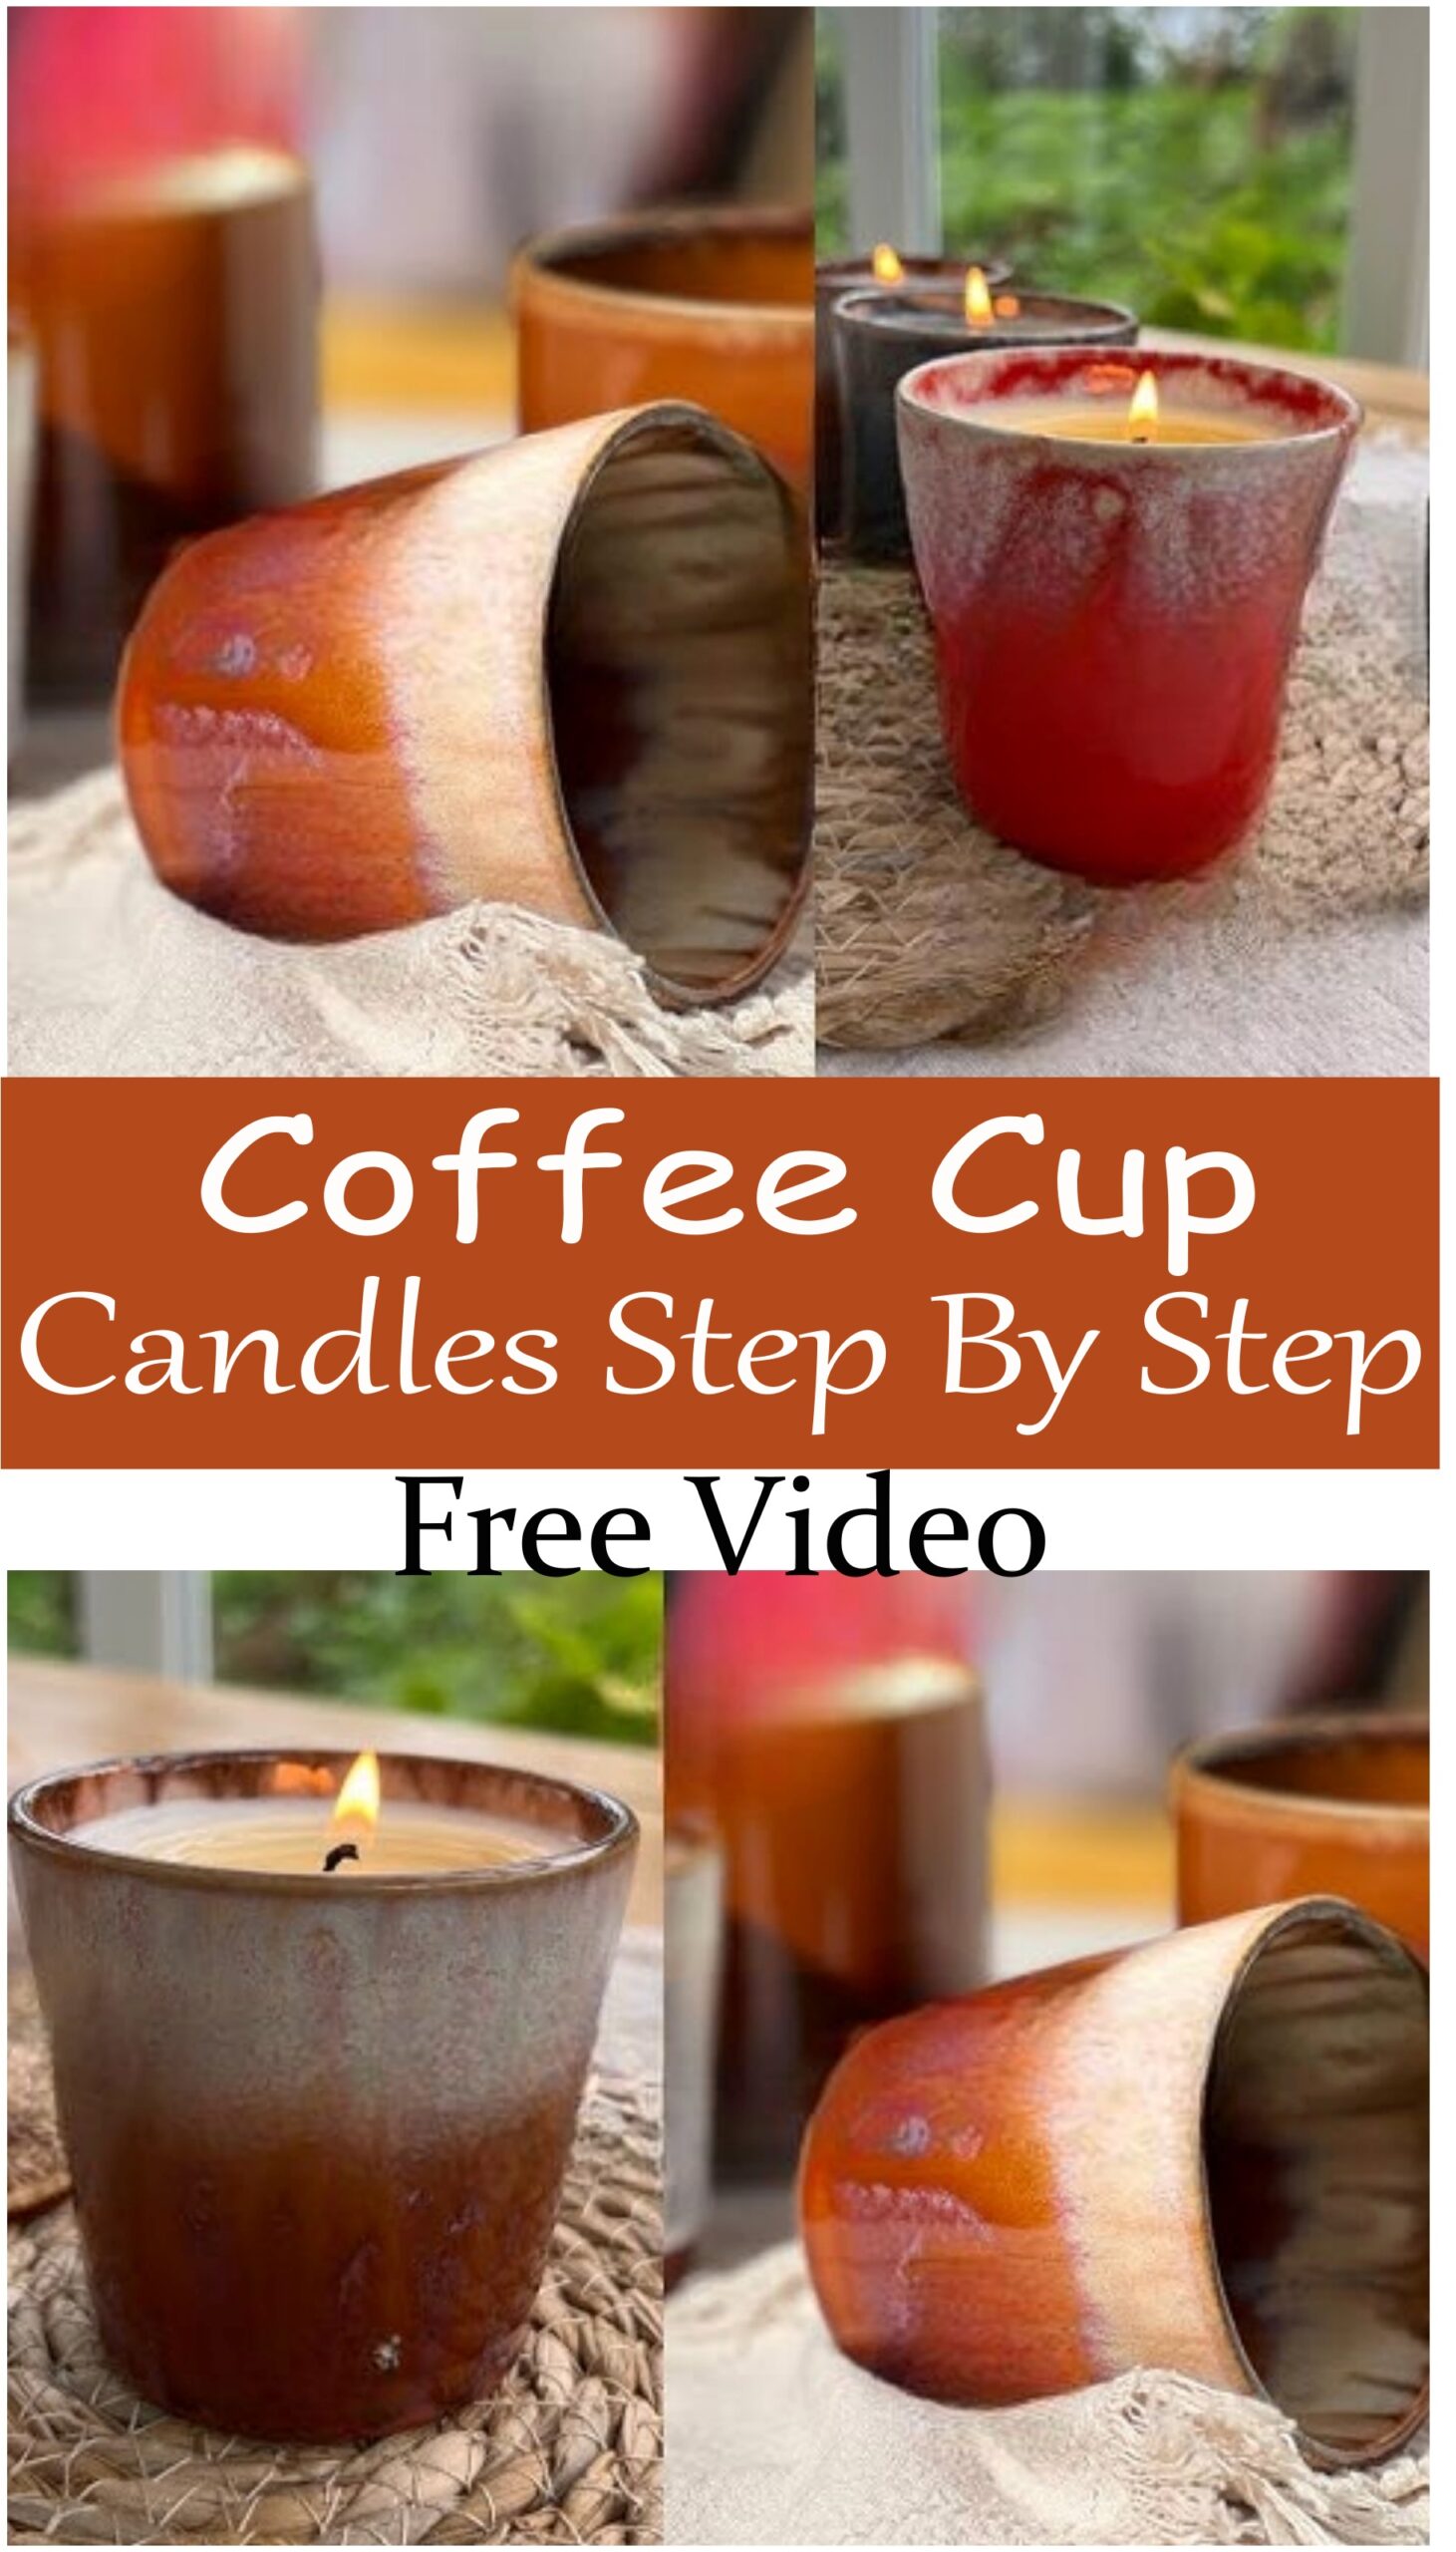
Coffee Cup Candles Step By Step
“Coffee Cup Candles Step By Step” are a fun and creative way to turn simple coffee cups into charming, functional candles that bring a cozy vibe to any room.
Procedure of Making: Begin by preparing a clean coffee cup and securing a wick at the bottom using a small amount of melted wax or a wick sticker. Next, melt the wax in a double boiler and add fragrance oils if desired. Pour the melted wax into the coffee cup, leaving a small gap at the top. Let the wax cool and harden completely before trimming the wick to about half an inch.
Materials: Coffee cup, wick, wax (soy or beeswax), fragrance oils (optional), double boiler, and wick stickers or glue.
Different Design Ideas: Add color to the wax by using candle dye, or layer different colored waxes to create a beautiful ombre effect. For a unique touch, consider adding dried coffee beans around the inside edge of the cup or decorating the cup with a rustic ribbon.
Precautions: Be sure the wick is centered while the wax sets to ensure an even burn. Always keep the candle on a heat-resistant surface and never leave it burning unattended.
This simple project transforms everyday coffee cups into cozy candles, perfect for gifting or enhancing your home’s ambiance with a personalized touch.
Beautiful Candle Holders From Simple Supplies
Beautiful Candle Holders From Simple Supplies
Procedure of Making:
Creating beautiful candle holders can be done with minimal supplies. Start by gathering materials like glass jars, wooden sticks, or even toilet paper rolls. Depending on the design, choose decorative items like beads, twine, or paint to personalize your holders. Begin by preparing your base – wrap the wooden sticks around the jar or glue beads for added texture. Let your creation dry if necessary before adding a candle.
Materials:
- Glass jars or toilet paper rolls
- Wooden sticks or twine
- Beads, buttons, or fabric for decoration
- Paint or markers for color
- Hot glue gun or craft glue
Different Design Ideas:
For a rustic look, wrap twine around glass jars and add wooden sticks for a natural touch. For a more colorful design, use paint to create vibrant patterns on the base. Beads can be added to create a luxurious feel, or use fabric to cover the base for a cozy appearance. Customize the size and shape based on your personal style.
Precautions:
Ensure the glue has dried properly before placing a candle inside. If using glass containers, handle them carefully to avoid breakage. Always place candles on a stable surface away from flammable materials. Keep candles in sight while lit for safety.
Master Class Ice Cream Candle
Master Class Ice Cream Candle
Procedure of Making:
Making a master class ice cream candle is a fun and creative process. Start by melting wax in a double boiler and adding color to it based on your preference. Pour the melted wax into a silicone mold shaped like an ice cream cone. Once the wax starts to set, carefully place a wick in the center. For the topping, melt a different color of wax and pour it over the base once the first layer has cooled, creating the illusion of ice cream. Allow it to completely cool and harden before removing from the mold.
Materials:
- Wax (paraffin or soy)
- Silicone ice cream cone mold
- Wick
- Wax dye or crayons for coloring
- Hot glue gun (optional for securing the wick)
Different Design Ideas:
For a realistic ice cream look, use multiple wax colors to mimic different ice cream flavors. Add sprinkles, mini beads, or even glitter to the top layer to enhance the aesthetic. Customize the size and shape of the candle to suit different occasions, such as creating mini cones for party favors or larger ones for display.
Precautions:
Be cautious when melting wax to avoid burns. Always ensure the wick is centered before the wax hardens. Allow the candle to cool fully before handling to avoid deformation. Keep the candle away from open flames when lit.
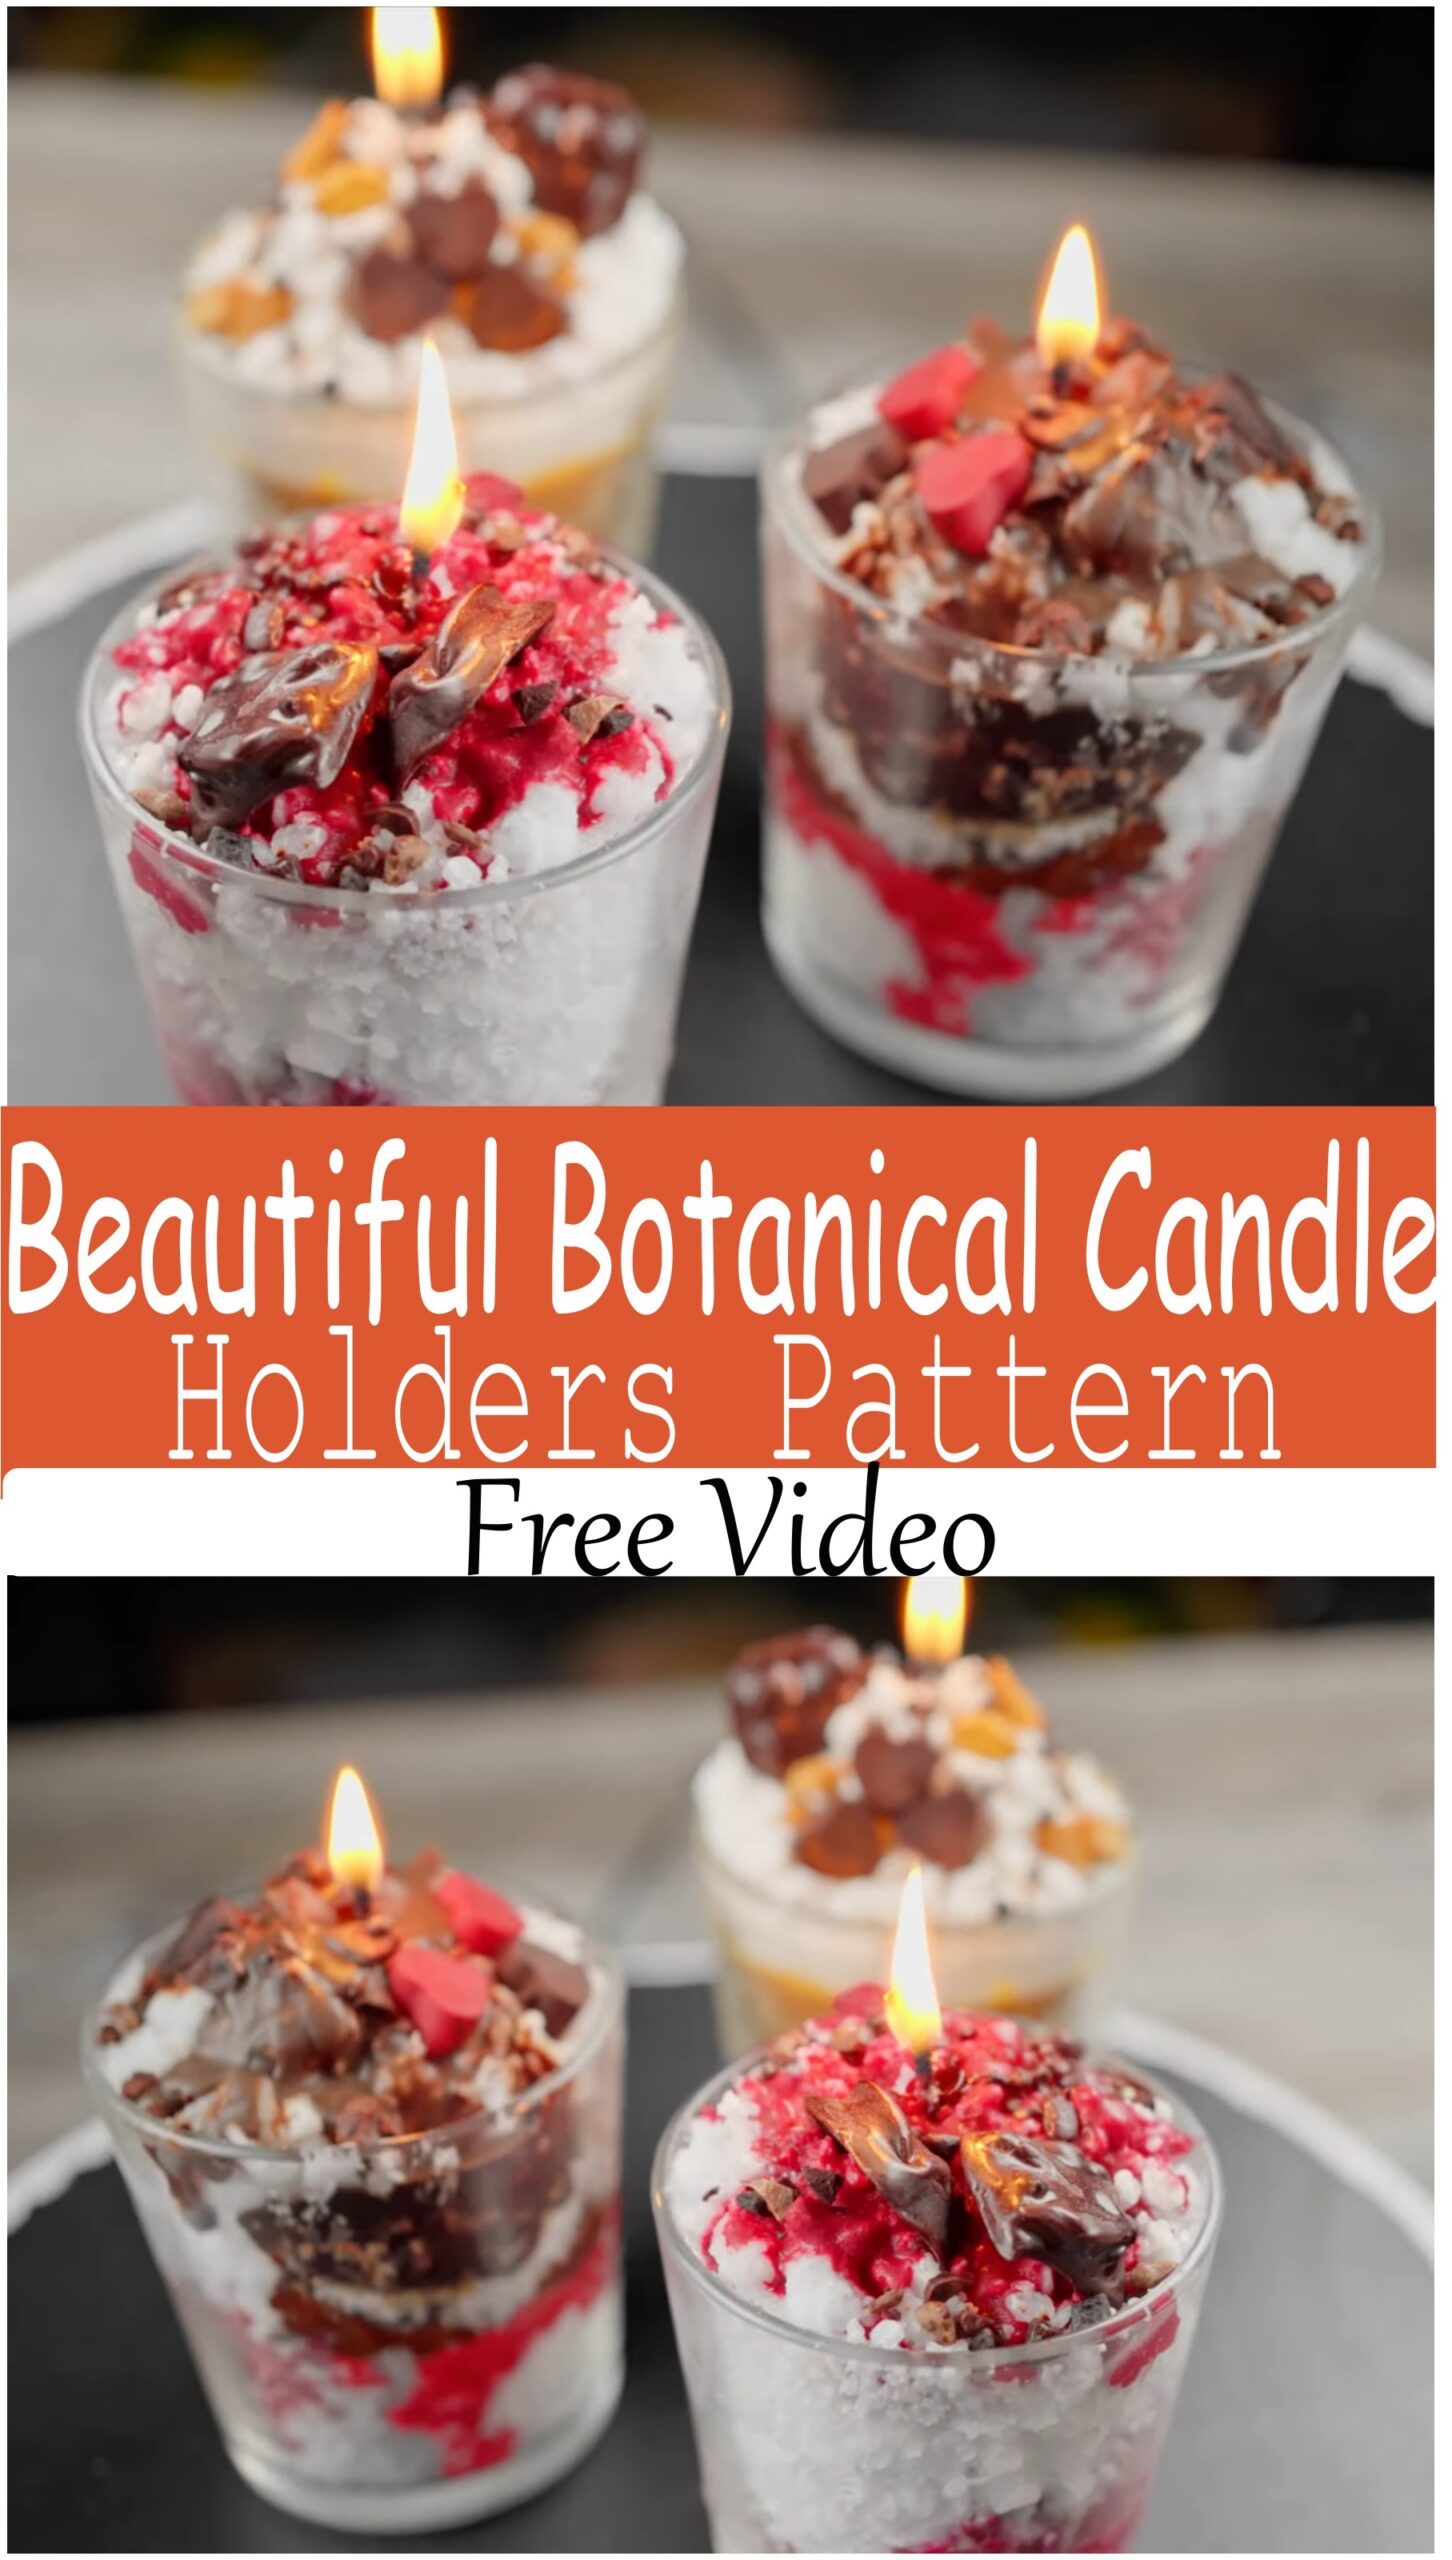
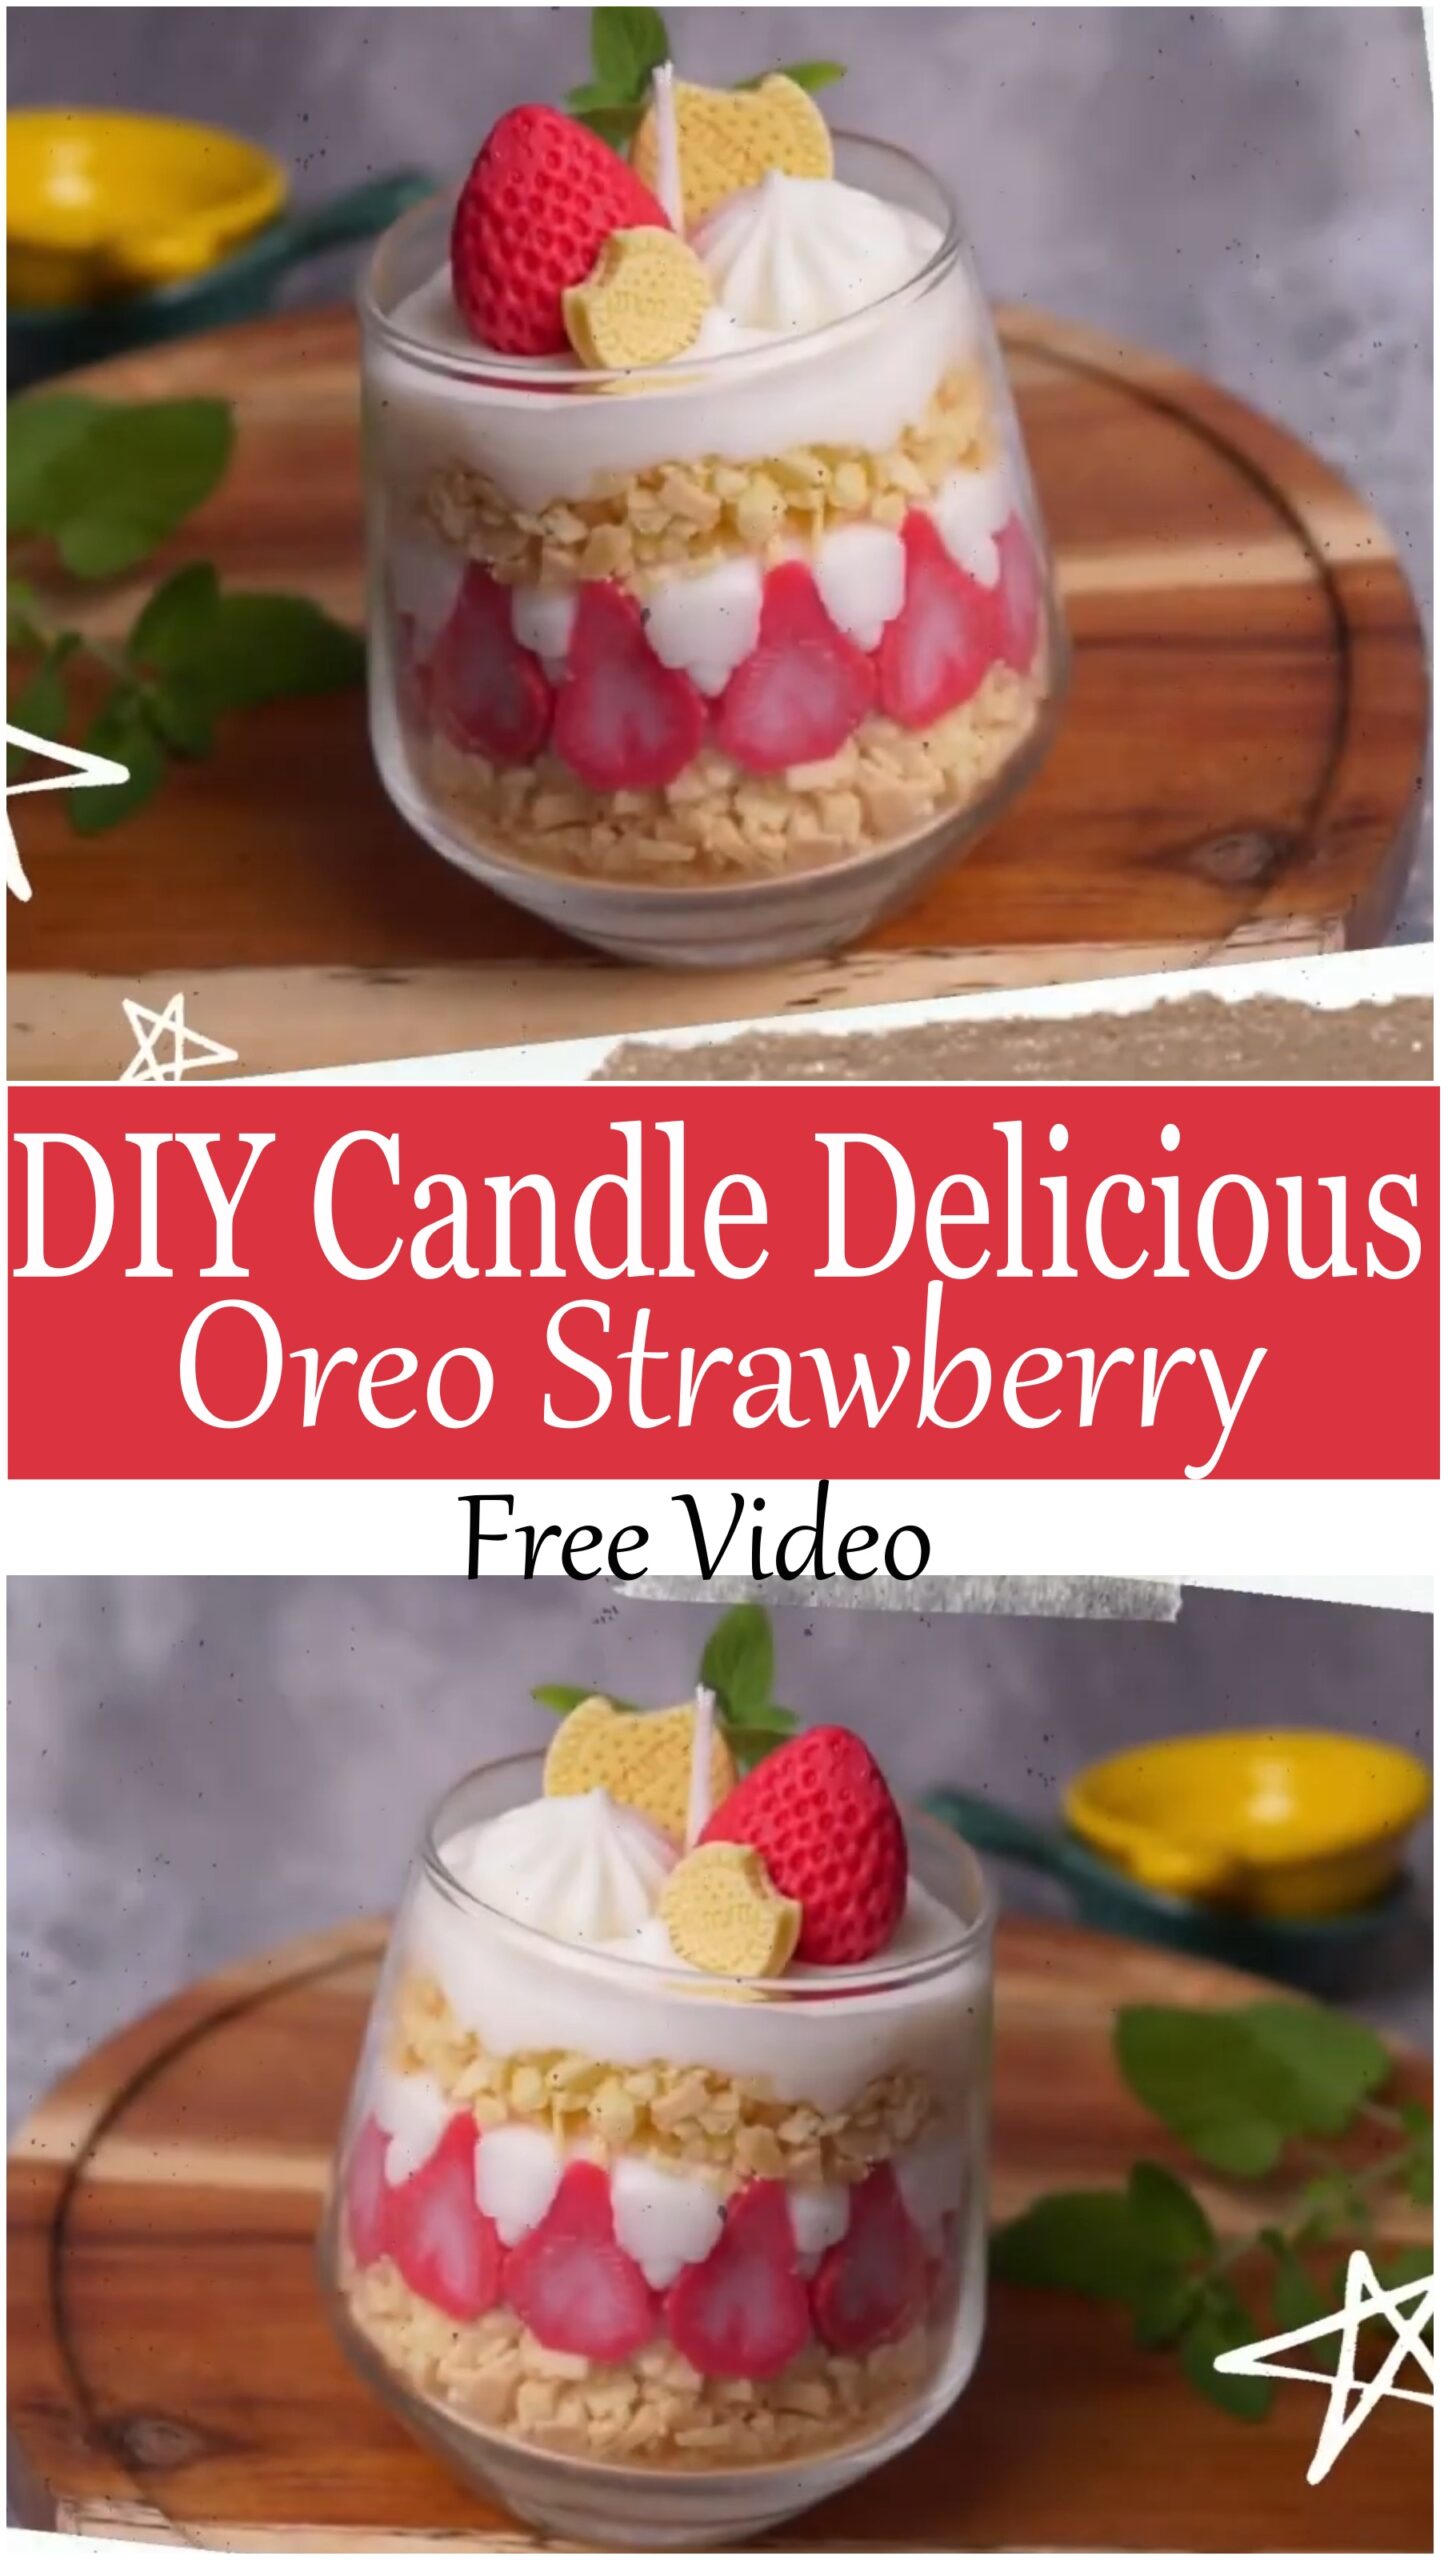
DIY Candle Delicious Oreo Strawberry
To create a delightful Oreo Strawberry candle, begin by melting wax in a double boiler. Once melted, divide the wax into two portions. Color one portion with black dye to mimic the Oreo cookie, and the other with red or pink dye for the strawberry flavor. Pour the black wax into a silicone mold shaped like an Oreo cookie and allow it to set. After the Oreo layer has cooled, pour the red or pink wax into a separate mold to form the strawberry topping. Once both layers are solidified, carefully assemble them by placing the strawberry layer atop the Oreo base, ensuring the wick is centered. Allow the candle to cool completely before use.
Materials:
- Wax (paraffin or soy)
- Double boiler or microwave-safe container
- Silicone molds (Oreo cookie shape and strawberry topping)
- Candle wick
- Black and red/pink candle dye
- Hot glue gun or adhesive for securing the wick
Different Design Ideas:
For added realism, consider embedding small, crushed Oreo cookie pieces into the black wax before it sets. This creates a textured effect reminiscent of real Oreo cookies. Alternatively, for a more whimsical design, use glitter or shimmer dust in the strawberry layer to give the candle a sparkling finish. Experiment with different molds to create various shapes and sizes, such as mini Oreo Strawberry candles for party favors or larger ones for decorative purposes.
Precautions:
Always melt wax in a well-ventilated area and never leave it unattended. Use a thermometer to monitor the wax temperature to prevent overheating. Ensure the wick is securely attached to the bottom of the mold to prevent it from floating during the pouring process. Allow the candle to cool completely before handling to avoid burns or deformation. Keep the candle away from flammable materials and never leave a burning candle unattended.