Crochet Peach Pig Amigurumi With Round Snout
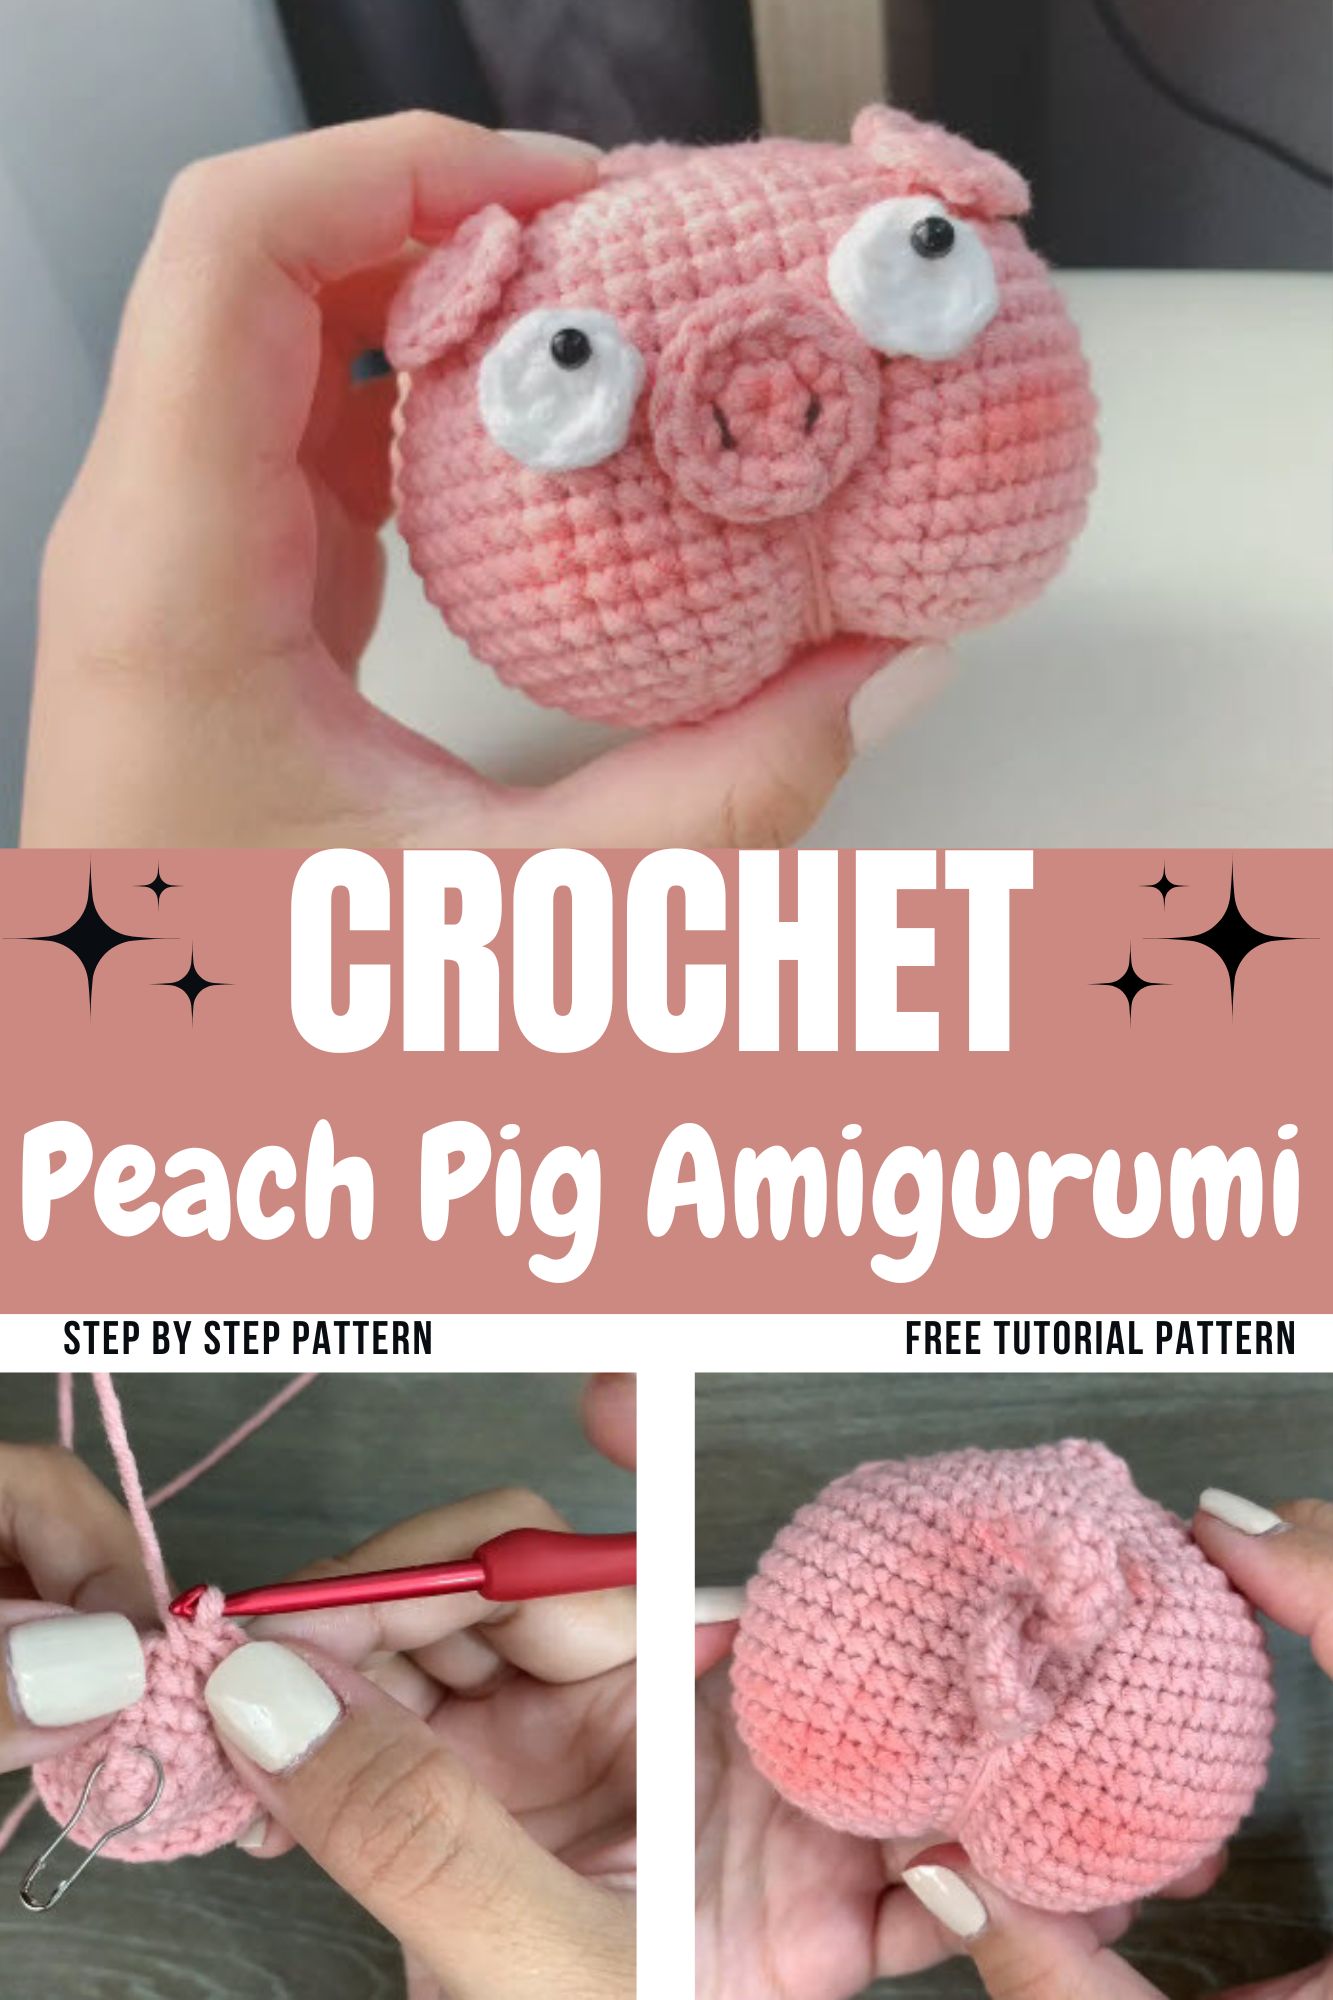
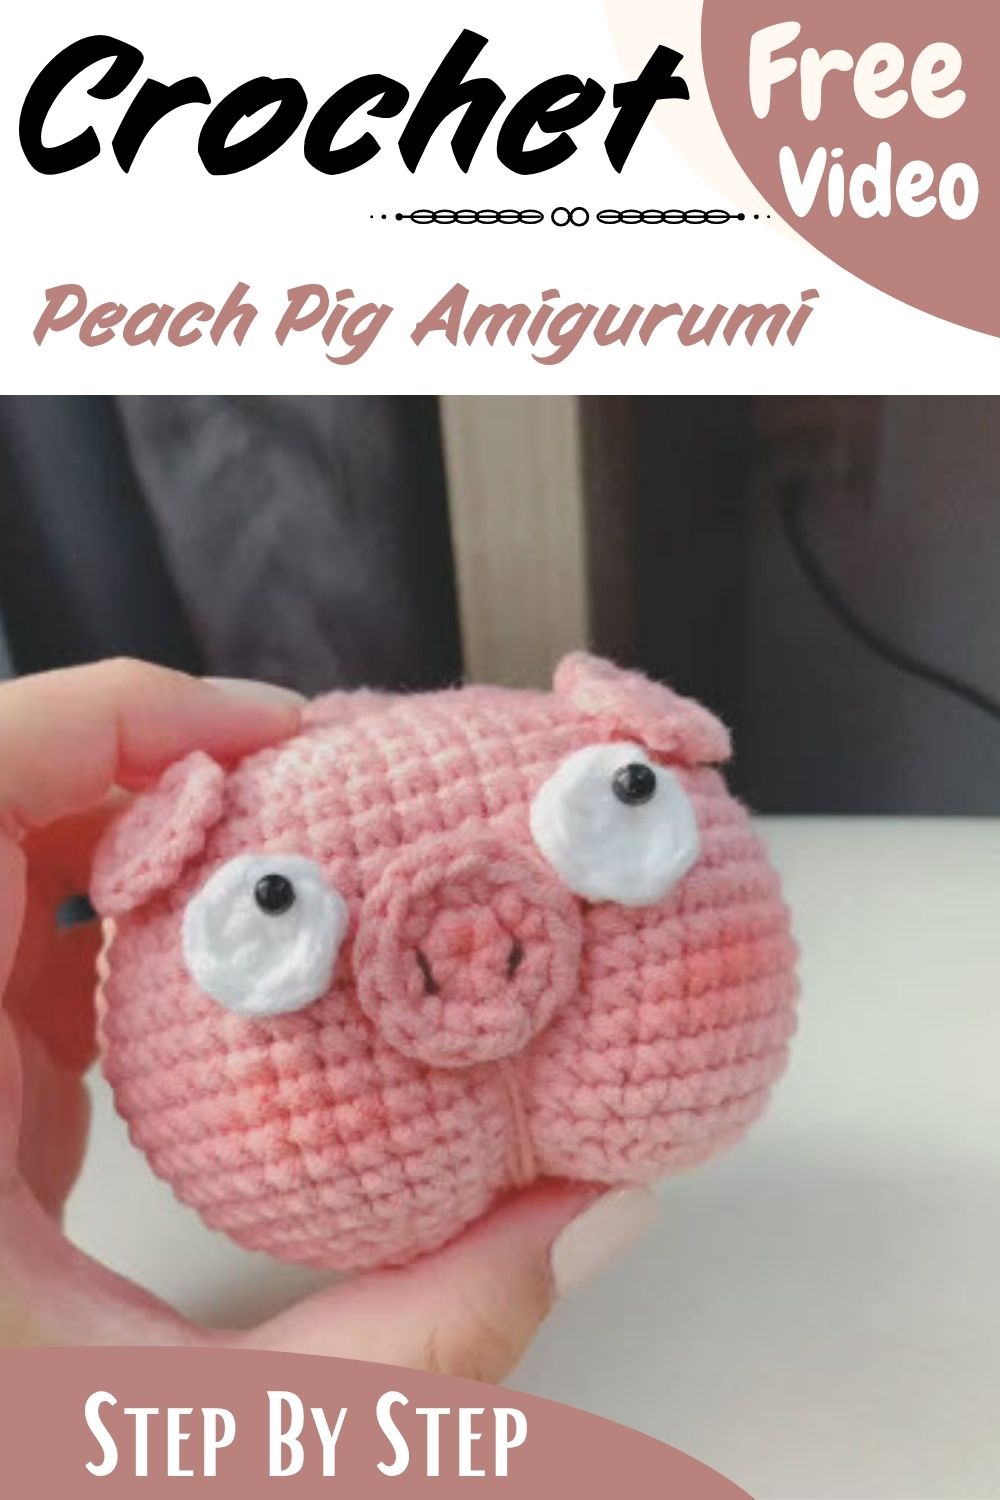
The crochet peach pig amigurumi is a chubby pink pig with a soft peach cleft at the bottom. It has a small round snout, two flat petal ears, a curly tail and big white eye patches that give it a sleepy, sweet face. It makes a cute gift, a desk buddy, a nursery shelf decoration or a bag charm.
You only need single crochet, increases and invisible decreases to make it. That keeps the pattern friendly for beginners, and the whole pig works up in one continuous spiral. By the end, you will have a squishy little friend you can colour, resize or dress up however you like.
Crochet Peach Pig Amigurumi Project Overview
The pig starts as a simple ball. First, you crochet the body from the top down and stuff it firmly. Next, you close it and pull a strand of yarn through it to shape the peach cleft. Finally, you attach the snout, ears and tail, since these are small pieces worked separately.
Estimated finished size: roughly 3 to 3.5 in / 8 to 9 cm wide. However, this is an estimate and is not confirmed by the source. Your size will also change with your yarn, hook and stuffing.
Materials for the Crochet Peach Pig Amigurumi
Yarn
- Gazzal Baby Cotton (or a similar sport or DK weight cotton)
- Pink, shade 19, for the body, ears and tail (Estimated: about 30 g)
- White, shade 303, for the snout and details (Estimated: about 5 g)
- Small amount of black yarn for the nostril stitches (Recommended)
Hooks and Notions
- 3.5 mm hook for the body (Rnd 1 to 24)
- 3.0 mm hook for Rnd 25 to 27 and the small parts
- Stitch markers
- Fiberfill stuffing
- Tapestry needle
- Safety eyes, 8 to 10 mm (Recommended size)
- Hot glue (optional)
- Pink blush for the cheeks, snout and cleft
Stitch Abbreviations and Special Stitches
This pattern uses US terms. Therefore, here are the abbreviations you will see:
- MR = magic ring
- sc = single crochet
- inc = increase (2 sc in the same stitch)
- inv dec = invisible decrease
- sl st = slip stitch
- sts = stitches
- Rnd = round
- ch = chain
Magic Ring (MR)
First, make a loop and work your first round of stitches into it. Then pull the tail to close the centre tightly. A tight ring leaves no hole, so this step matters when you stuff the toy.
Increase (inc)
Work two single crochets into one stitch. In this way, you add one stitch to the round, and the shape grows outward.
Invisible Decrease (inv dec)
First, insert your hook into the front loop only of the next two stitches, one after the other. Next, yarn over and pull through both front loops. Then yarn over again and pull through the two loops left on the hook. As a result, the shaping closes neatly with almost no gaps.
Skill Level, Gauge and Sizing
This crochet peach pig amigurumi is beginner friendly. If you can make a magic ring and work in a spiral, you are ready to start.
The source does not give a gauge. Instead, crochet tightly enough that the stuffing cannot show through the stitches (Recommended). If your fabric looks loose, go down a hook size.
For a bigger pig, use thicker yarn and a larger hook. Similarly, choose thinner yarn and a smaller hook for a smaller one.
Before You Begin: Pattern Notes
- First, work in continuous rounds and do not join unless the pattern says so.
- Also, place a stitch marker in the first stitch of every round and move it up as you go.
- Then change to the 3.0 mm hook at Rnd 25.
- Start stuffing at Rnd 24, and fill the body firmly so the peach shape holds.
- Because mistakes are easy to miss, check the stitch count in brackets after each round.
- Finally, leave long tails on the body and the small parts, since you need them for shaping and sewing.
The Full Crochet Peach Pig Amigurumi Pattern
Body (pink, 3.5 mm hook)
Rnd 1: 6 sc in MR (6)
Rnd 2: [1 sc, inc] x3 (9)
Rnd 3: [2 sc, inc] x3 (12)
Rnd 4: [1 sc, inc] x6 (18)
Rnd 5: [2 sc, inc] x6 (24)
Rnd 6: [3 sc, inc] x6 (30)
Rnd 7: [4 sc, inc] x6 (36)
Rnd 8: [5 sc, inc] x6 (42)
Rnd 9: sc in each st (42)
Rnd 10: [6 sc, inc] x6 (48)
Rnd 11 to 20: sc in each st for 10 rounds (48)
Rnd 21: [6 sc, inv dec] x6 (42)
Rnd 22: [5 sc, inv dec] x6 (36)
Rnd 23: [4 sc, inv dec] x6 (30)
Rnd 24: [3 sc, inv dec] x6 (24)
At this point, start stuffing firmly. After that, switch to the 3.0 mm hook.
Rnd 25: [2 sc, inv dec] x6 (18)
Rnd 26: [1 sc, inv dec] x6 (12)
Rnd 27: inv dec x6 (6)
Fasten off with a long tail. Then thread the tail through the front loops of the last 6 stitches and cinch the opening closed.
Peach Shaping
First, use the yarn tail and your tapestry needle. Anchor the yarn from the cinched ring up to Round 14 on the upper body. Next, pull tight so the body dips in and forms the peach cleft. After that, secure it with a few small stitches so it stays put.
Snout (white, 3.0 mm hook)
Rnd 1: 6 sc in MR (6)
Rnd 2: inc in each st (12)
Sl st to join, then fasten off. Also, leave a tail for sewing.
Ears (make 2, pink, 3.0 mm hook)
Rnd 1: 6 sc in MR (6)
Rnd 2: 1 sc, inc x4, 1 sc (10)
Sl st, then fasten off and leave a tail for sewing. Do not stuff the ears, because they stay flat like petals.
Tail (pink, 3.0 mm hook)
Ch 10. Starting in the 2nd ch from the hook, work 2 sc in every chain (18 sc). Because of the extra stitches, the tail twists into a little corkscrew curl. Finally, fasten off with a tail.
Assembly and Finishing Your Crochet Peach Pig Amigurumi
Placing the Parts
Before you sew anything, pin the ears, snout and tail in place, or use a dab of hot glue to hold them. Then step back and check the face from a distance. Since small shifts can change the whole expression, it is worth taking a moment here.
Eyes and Eye Patches
Attach the safety eyes above the snout. If you add the big white oval patches, place them behind the eyes, because they are part of the design. Black safety eyes in the 8 to 10 mm range are a good starting point (Recommended).
Nostrils and Blush
First, embroider two short stitches on the snout with black yarn for the nostrils. Next, brush pink blush softly on the cheeks, the snout and the cleft. Also, build the colour slowly so it stays gentle.
Sewing On
First, sew the snout to the face using its tail, and add a little stuffing before you close it. After that, sew the ears flat against the head. Then stitch the curly tail at the back. Finally, weave in all loose ends.
Customisation Ideas for Your Peach Pig Toy
- For a mini keychain pig, use thinner yarn and a smaller hook.
- Instead of pink, try a different shade or a cream body for a new look.
- Also, add a tiny bow or flower between the ears.
- For a rosier, rounder cheek, use a bit more blush.
- Finally, sew a loop of yarn or a ring to the top to turn it into a bag charm.
Troubleshooting Your Crochet Peach Pig Amigurumi
The peach cleft looks weak
Pull the shaping yarn tighter and add a few more anchoring stitches. In addition, firm stuffing helps the dip show clearly.
Stuffing shows through the stitches
Your tension is probably too loose. Therefore, go down one hook size, or stuff in smaller bits.
The body looks lumpy
Before you close, push the stuffing evenly into the sides. Then roll the pig gently in your hands to smooth it out.
The stitch count is off
Count after every round and use your marker. Otherwise, mistakes become much harder to fix ten rounds later.
Care Instructions
These notes are recommendations only. First, spot clean with a damp cloth and mild soap. Then let the pig air dry fully before you put it away. Also, keep the blush light, since it can rub off with handling.
For very young children, use embroidered eyes instead of safety eyes. They are safer because nothing can come loose.
Bonus: Gift and Display Ideas
This little pig looks great wrapped in tissue paper with a handwritten tag. Besides that, you can place it on a bookshelf, a desk or a nursery shelf, where its peach shape shows from the side. For a sweet group display, make a trio in three shades of pink.
Crochet Peach Pig Amigurumi FAQs
Is this pattern good for beginners?
Yes. It uses only sc, inc and inv dec, and every round is short and clear.
Which yarn works best?
The source used Gazzal Baby Cotton. However, any similar sport or DK weight cotton will work.
Why do I change the hook size?
The smaller 3.0 mm hook from Rnd 25 gives a tighter finish on the closing rounds and the small parts.
Can I sell the finished pigs?
That depends on the pattern designer’s rules, so check the source for its terms first.
Can I skip the blush?
Yes. The pig still looks cute without it, although blush adds a soft glow.
Go Make Your Own Little Pink Pig
So that’s the pig. It’s a small project, but you can finish it in one sitting and then keep staring at it. The peach dip at the bottom is the best bit, because it’s just one pull of the yarn, and suddenly the pig has character.
Take your time with the face, since a tiny shift in the eyes or the snout changes everything. After that, make one for yourself first, then a few more for friends. Once people see your crochet peach pig amigurumi, they’ll want one too.