Colorful Crochet Granny Square Hat Pattern for Looks
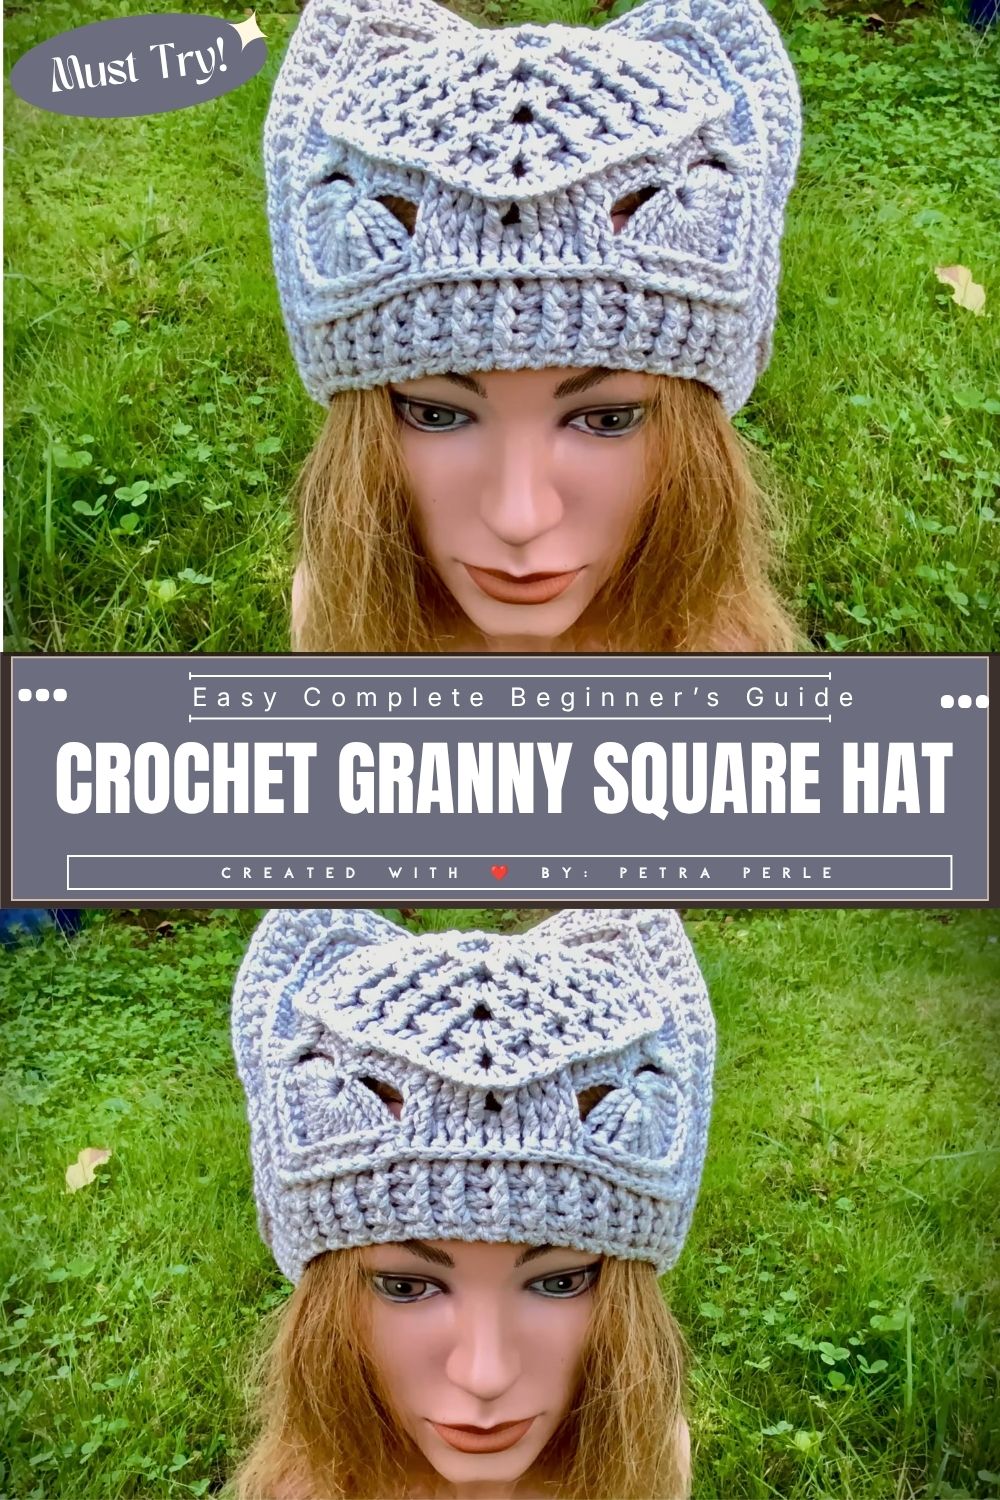
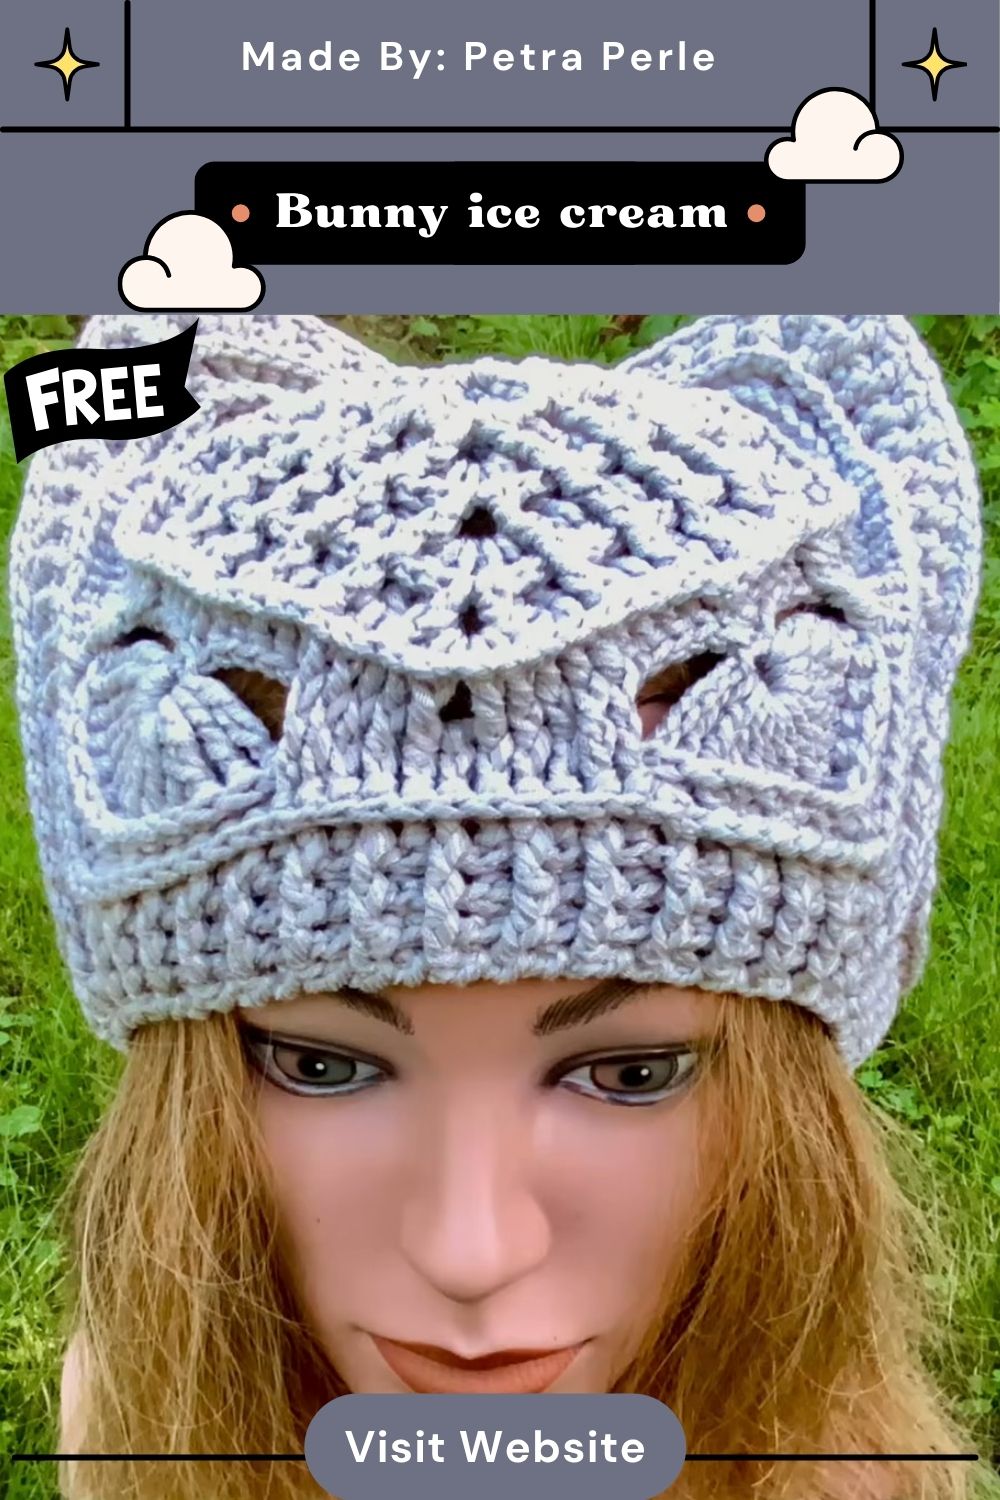
Three simple granny squares turn into a playful cat-ear beanie inside the Crochet Granny Square Hat Pattern for Cute Looks, perfect for crafters wanting a colorful, wearable, cozy weekend project.
Folding two squares into pointed ears and seaming a third square as the back panel builds the entire shape, with clear steps for stitching, joining, and finishing the brim. Materials, special techniques, and beginner-friendly tips appear along the way, alongside color, sizing, and gifting ideas for customizing the finished cap. Read on below for the full, helpful step-by-step pattern instructions.
Pattern Overview
Three granny squares, a handful of color changes, and a few seams are all it takes to build this hat. Two squares fold diagonally to form pointed ears, while the third wraps around as the back and crown panel.
The crochet tutorial below breaks everything into short numbered steps, so tracking progress stays simple even for a first-time square-joiner. Nothing about the shaping is technical it relies on stitches most crocheters already know.
Time Box
- Prep time: 10–15 minutes (winding yarn, checking gauge, gathering tools)
- Stitching time: 3–4 hours (three squares plus ear shaping)
- Finishing time: 25–35 minutes (joining, brim edging, weaving ends)
- Total project time: roughly 4–5 hours, easily split across two or three short sessions
Materials & Supplies
- Worsted weight (Aran/#4) yarn in 3–4 colors one main shade plus bright accent colors for the granny rounds
- 5.0mm (H/8) crochet hook, or whatever size matches your gauge
- Yarn/tapestry needle for seaming and weaving in ends
- Small sharp scissors
- Stitch markers (locking ones work best on granny rounds)
- Fabric measuring tape, for checking head circumference
- Optional: small buttons or embroidery floss for a whimsical cat-face detail
Special Techniques Used
- Magic ring (adjustable ring) to start each square
- Traditional granny square rounds with corner chain-2 spaces
- Color changes between rounds for a layered look
- Diagonal folding to transform a flat square into a pointed ear
- Single crochet seam (or slip stitch join) to connect motifs
- Single crochet edging to finish the brim
Step-by-Step Pattern Instructions
Step 1: Start Your First Granny Square
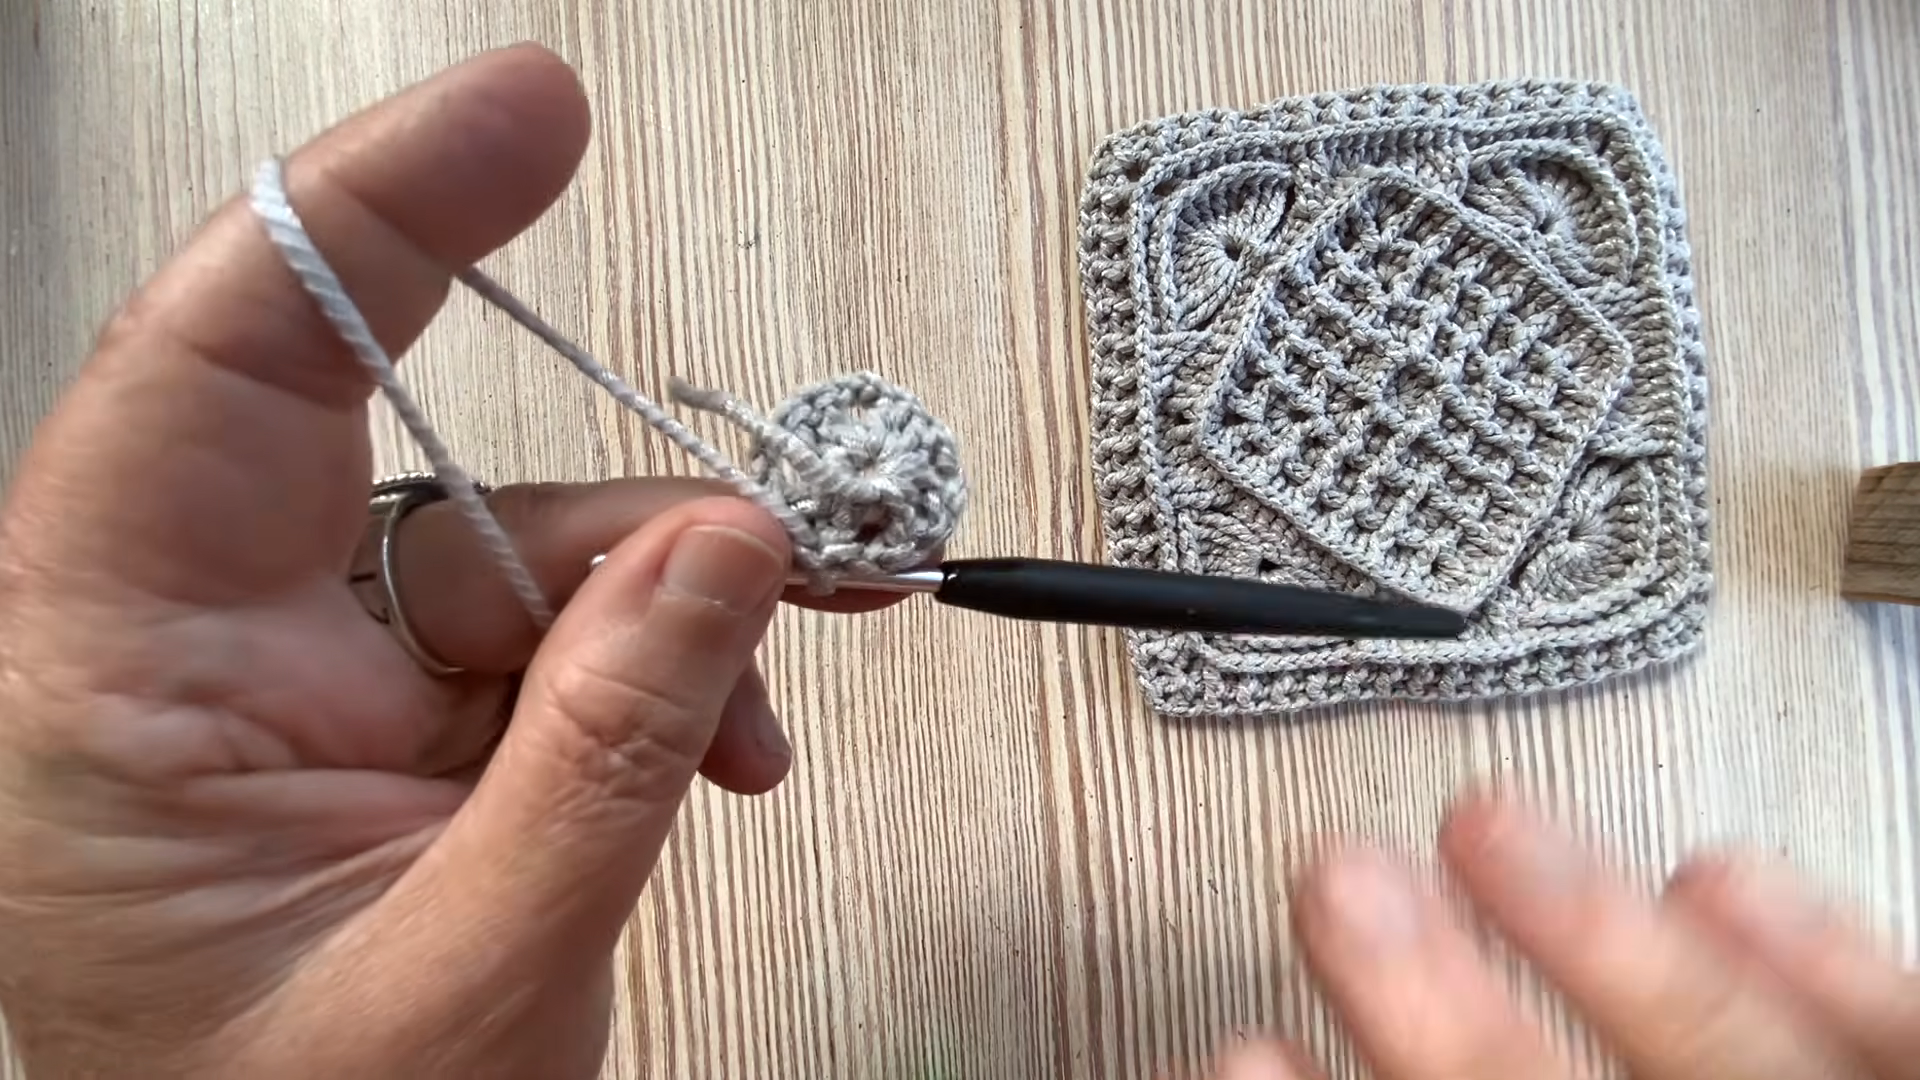
Make a magic ring, chain 3 (counts as first double crochet), then work 2 double crochet, chain 2, and repeat [3 double crochet, chain 2] three more times into the ring. Join with a slip stitch to the top of the starting chain and pull the ring closed.
Step 2: Build Up the Rounds
Work additional rounds by placing 3 double crochet, chain 2, 3 double crochet into every corner space, and 3 double crochet into each side space. Switch colors at the start of a new round for a striped, colorful look, weaving in ends as you go rather than leaving a pile for later.
Stitch check: count the corner spaces before moving to a new round — a proper granny square always keeps four even corners, no matter how many rounds are added.
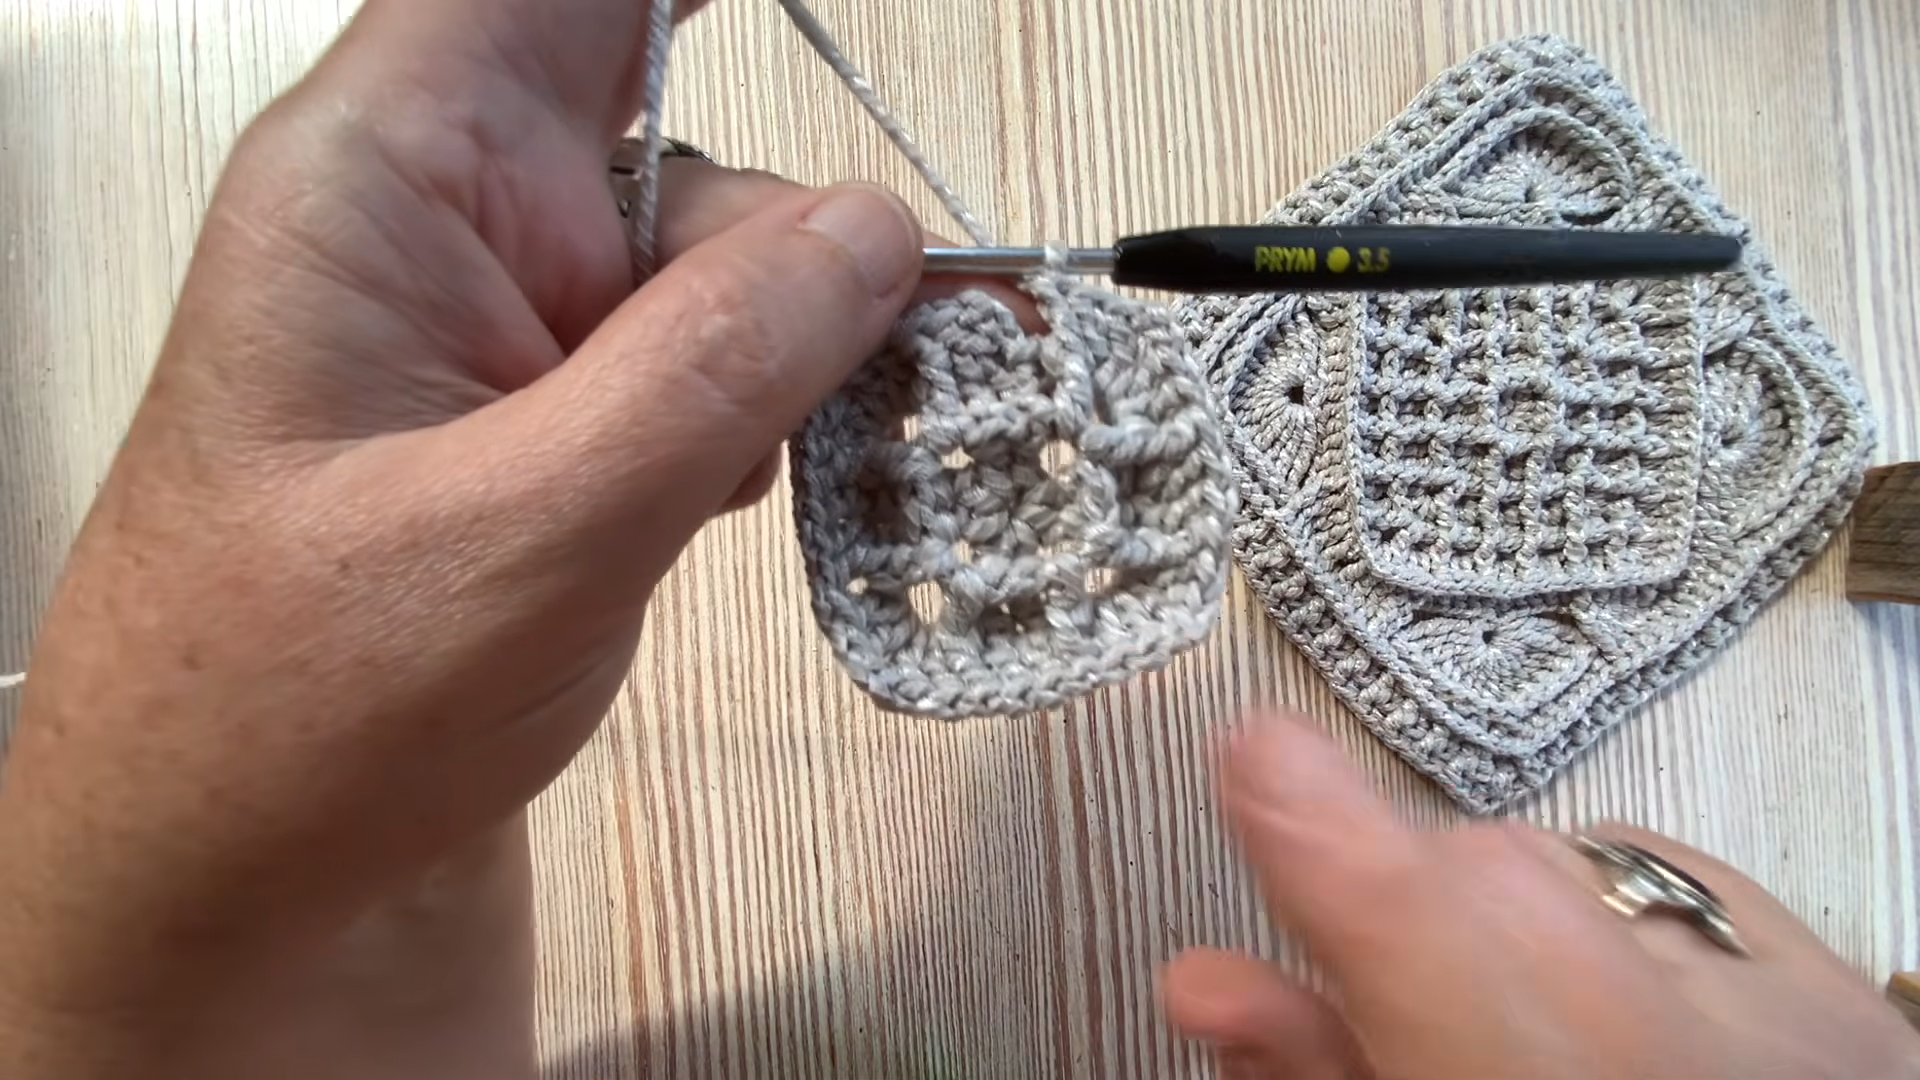
Step 3: Repeat for All Three Squares
Make two more squares the same size, working each to the same number of rounds. Keep tension consistent between squares, since a looser or tighter motif will throw off the finished shape once everything gets joined.
Pro-Tip: Crochet all three squares before joining anything. Laying them side by side first makes it far easier to spot a stray loose stitch or an uneven round while it’s still simple to fix.
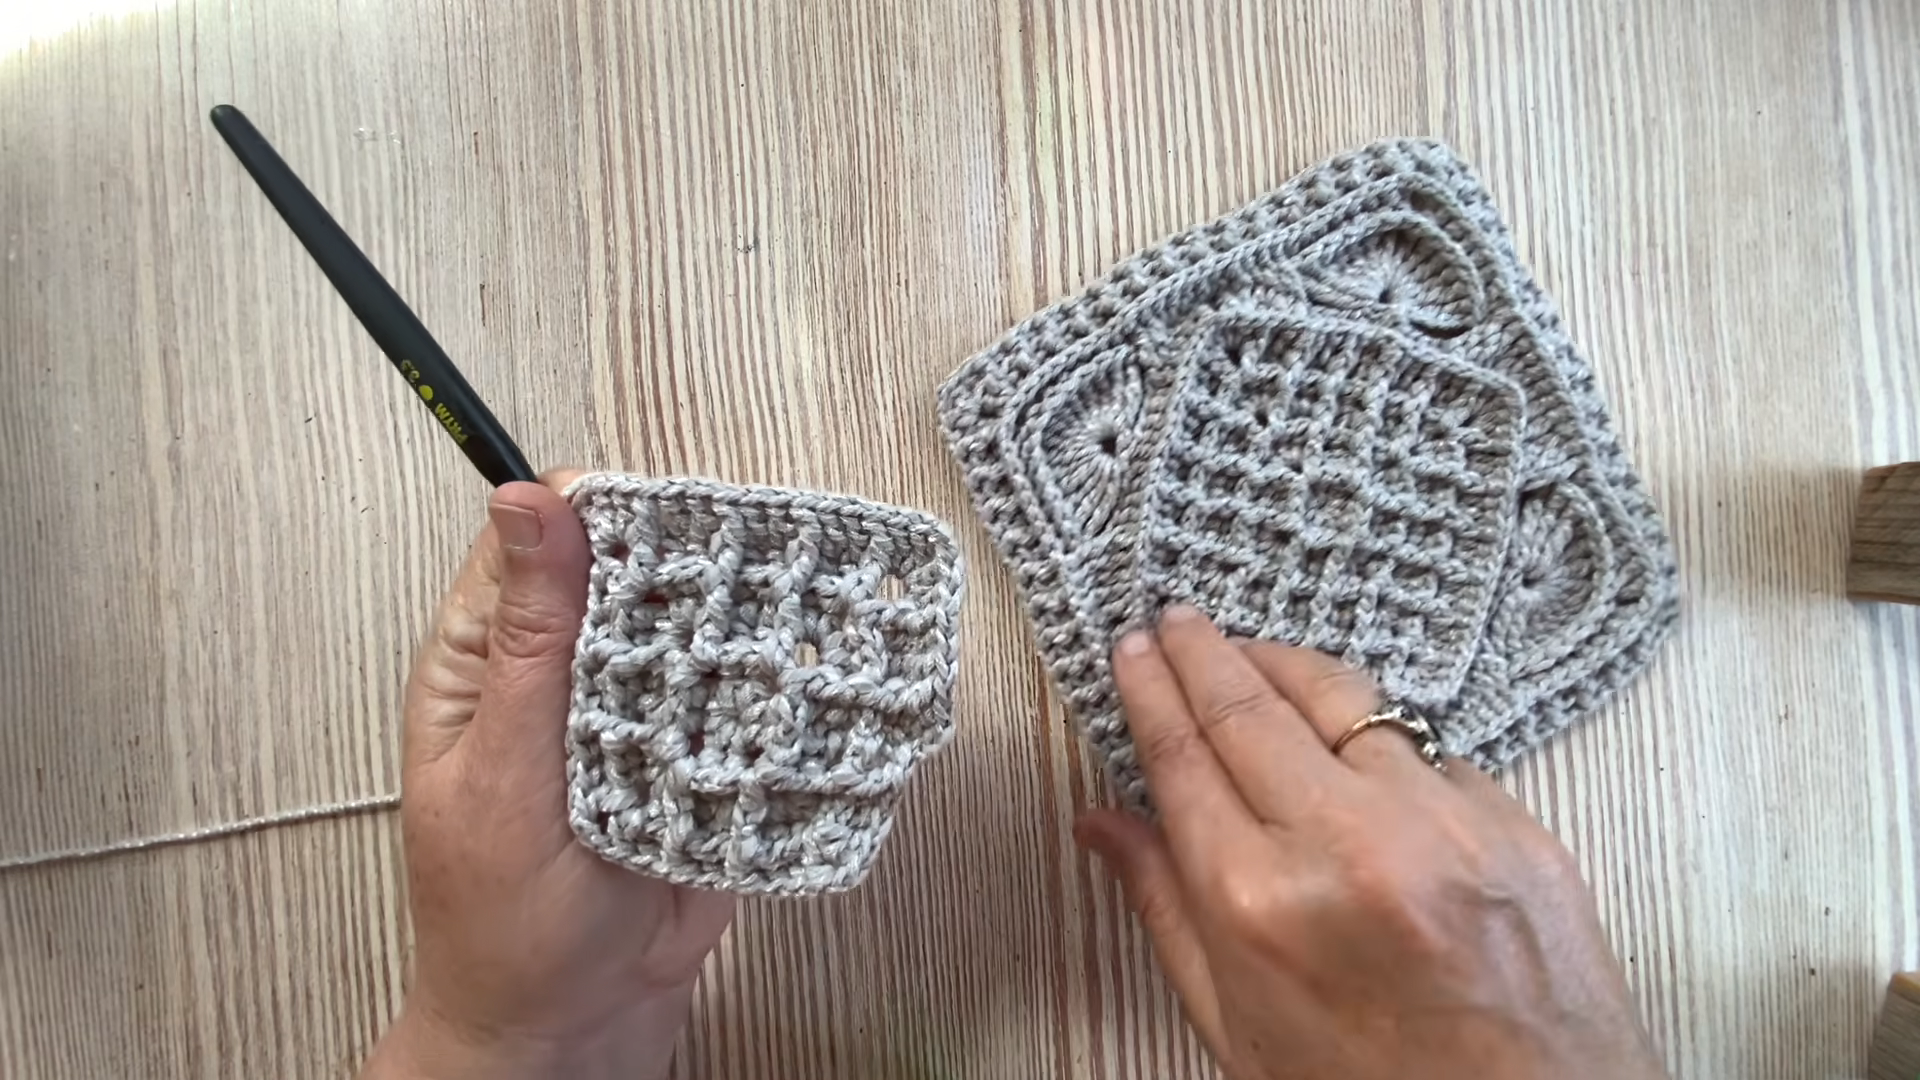
Step 4: Shape Two Squares Into Ears
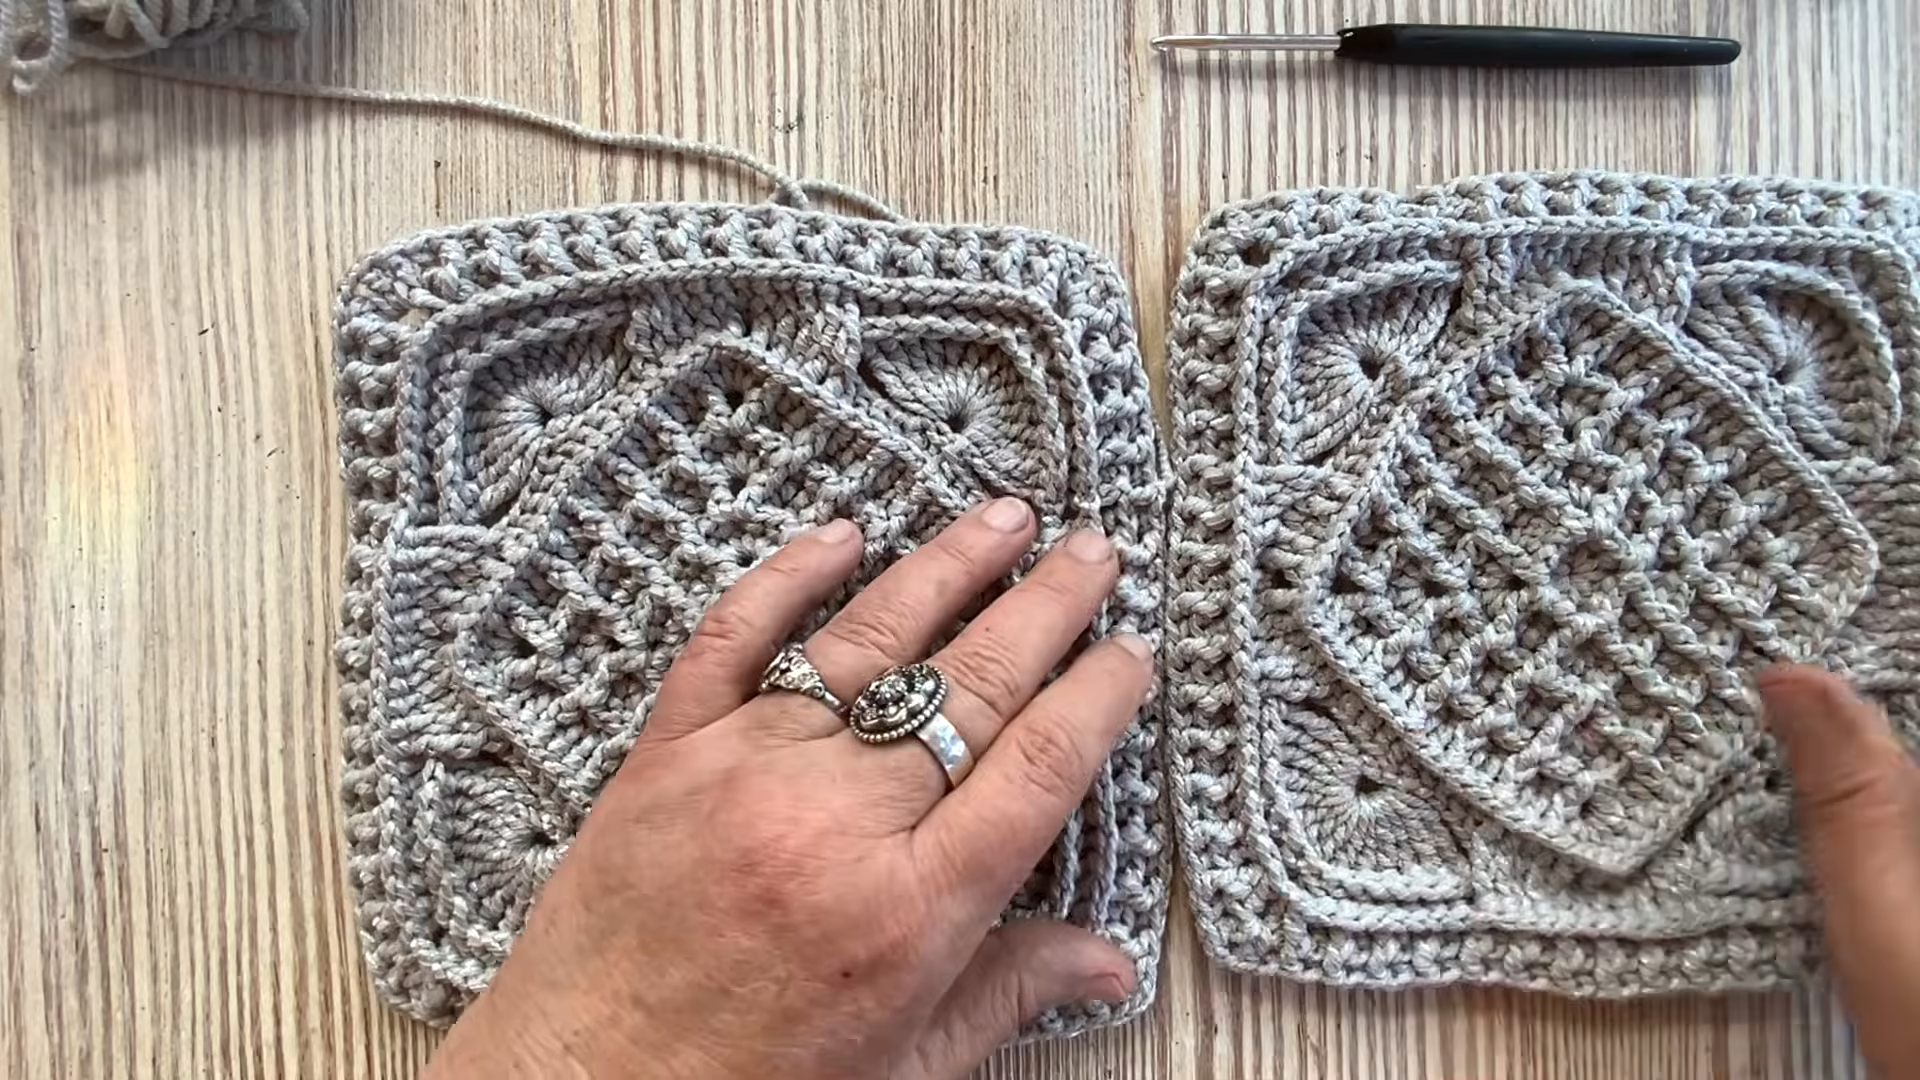
Fold two of the three squares diagonally, corner to corner, so each becomes a triangle. Line up the raw edges and seam along one folded edge using a whipstitch or single crochet seam, leaving the folded point open at the top so it stands up as an ear.
Measure now: hold the folded triangle against your fingers to gauge how pointed the ear looks a shallow fold gives a rounder, kitten-like ear, while a deeper fold makes a sharper point.
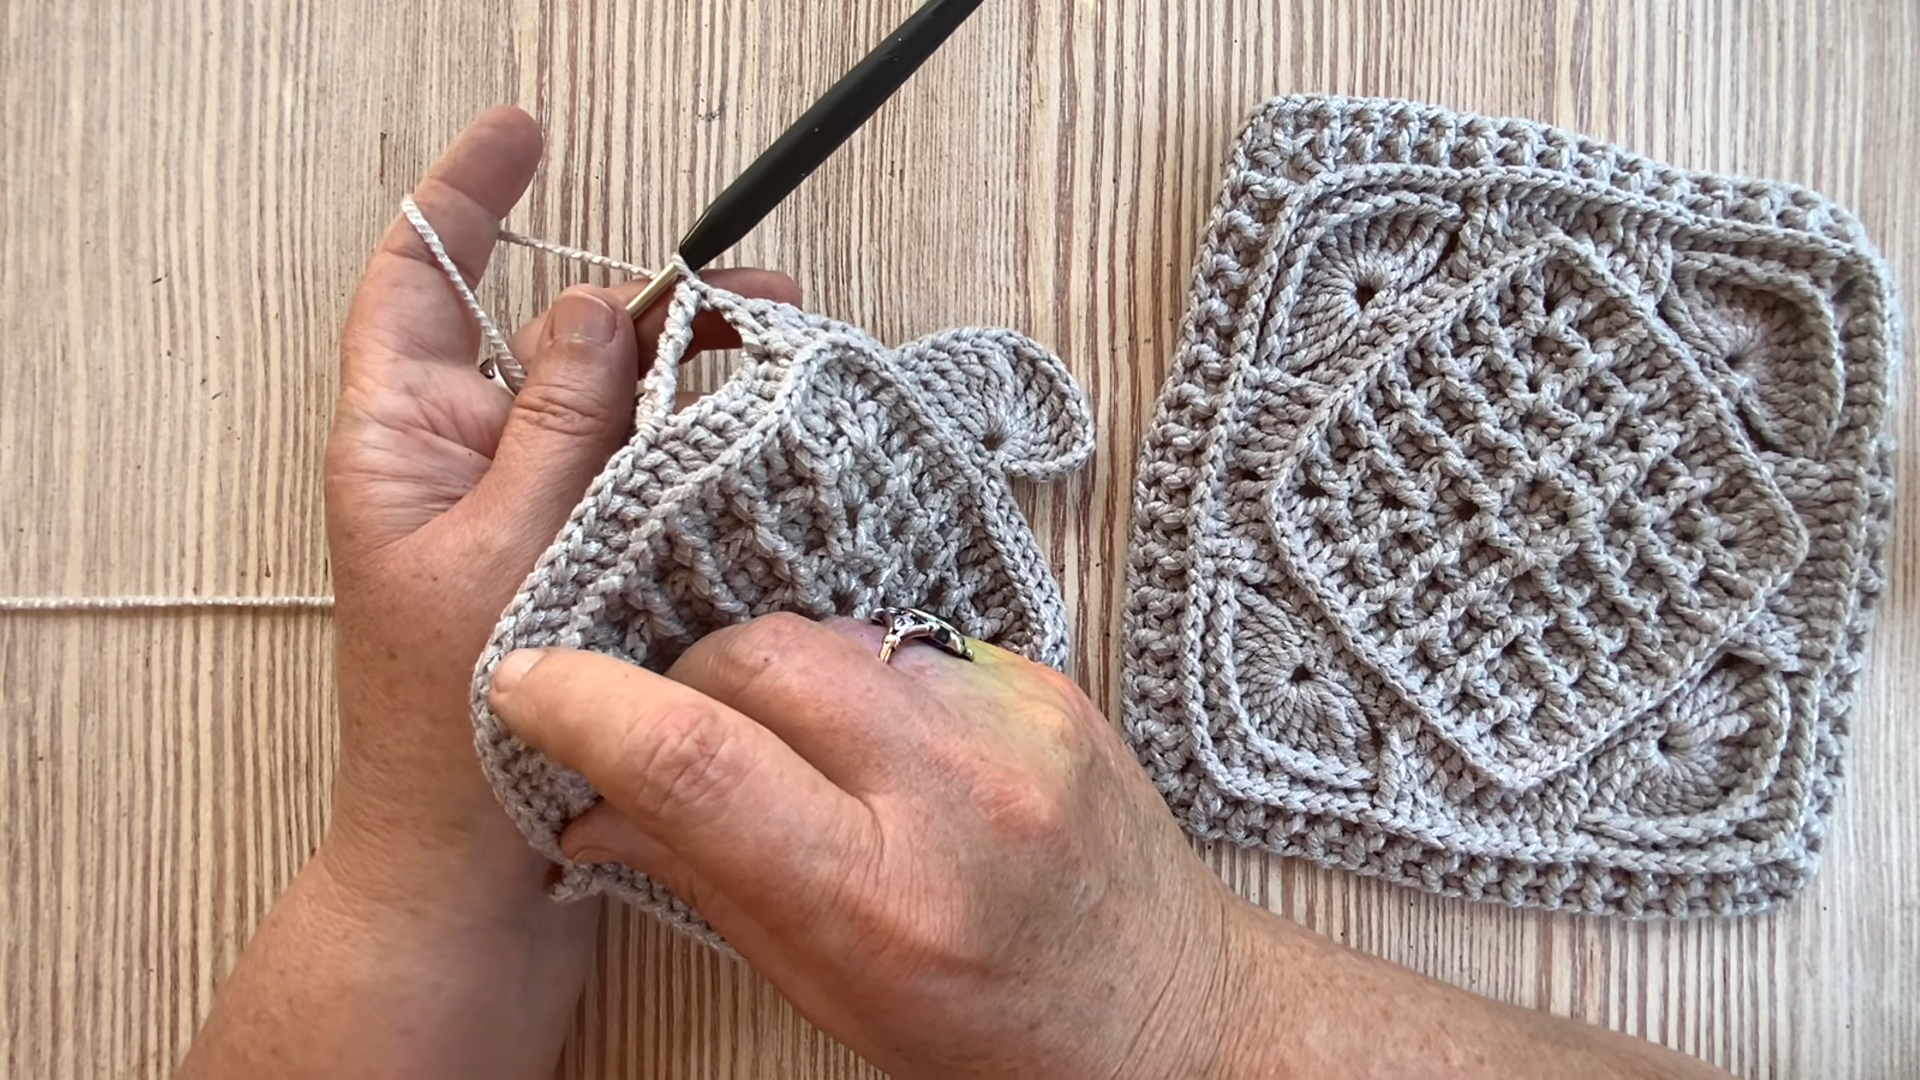
Step 5: Slip Stitch Across the Seam
Working stitch by stitch toward the opposite corner, insert the hook through the next matching pair of loops on both squares, yarn over, and pull through all loops on the hook. Repeat evenly across the whole edge.
Pro-Tip: Keep the slip stitches loose rather than snug. A tight slip-stitch seam pulls the join in and puckers the border, while a relaxed seam lies flat and barely shows from the front.
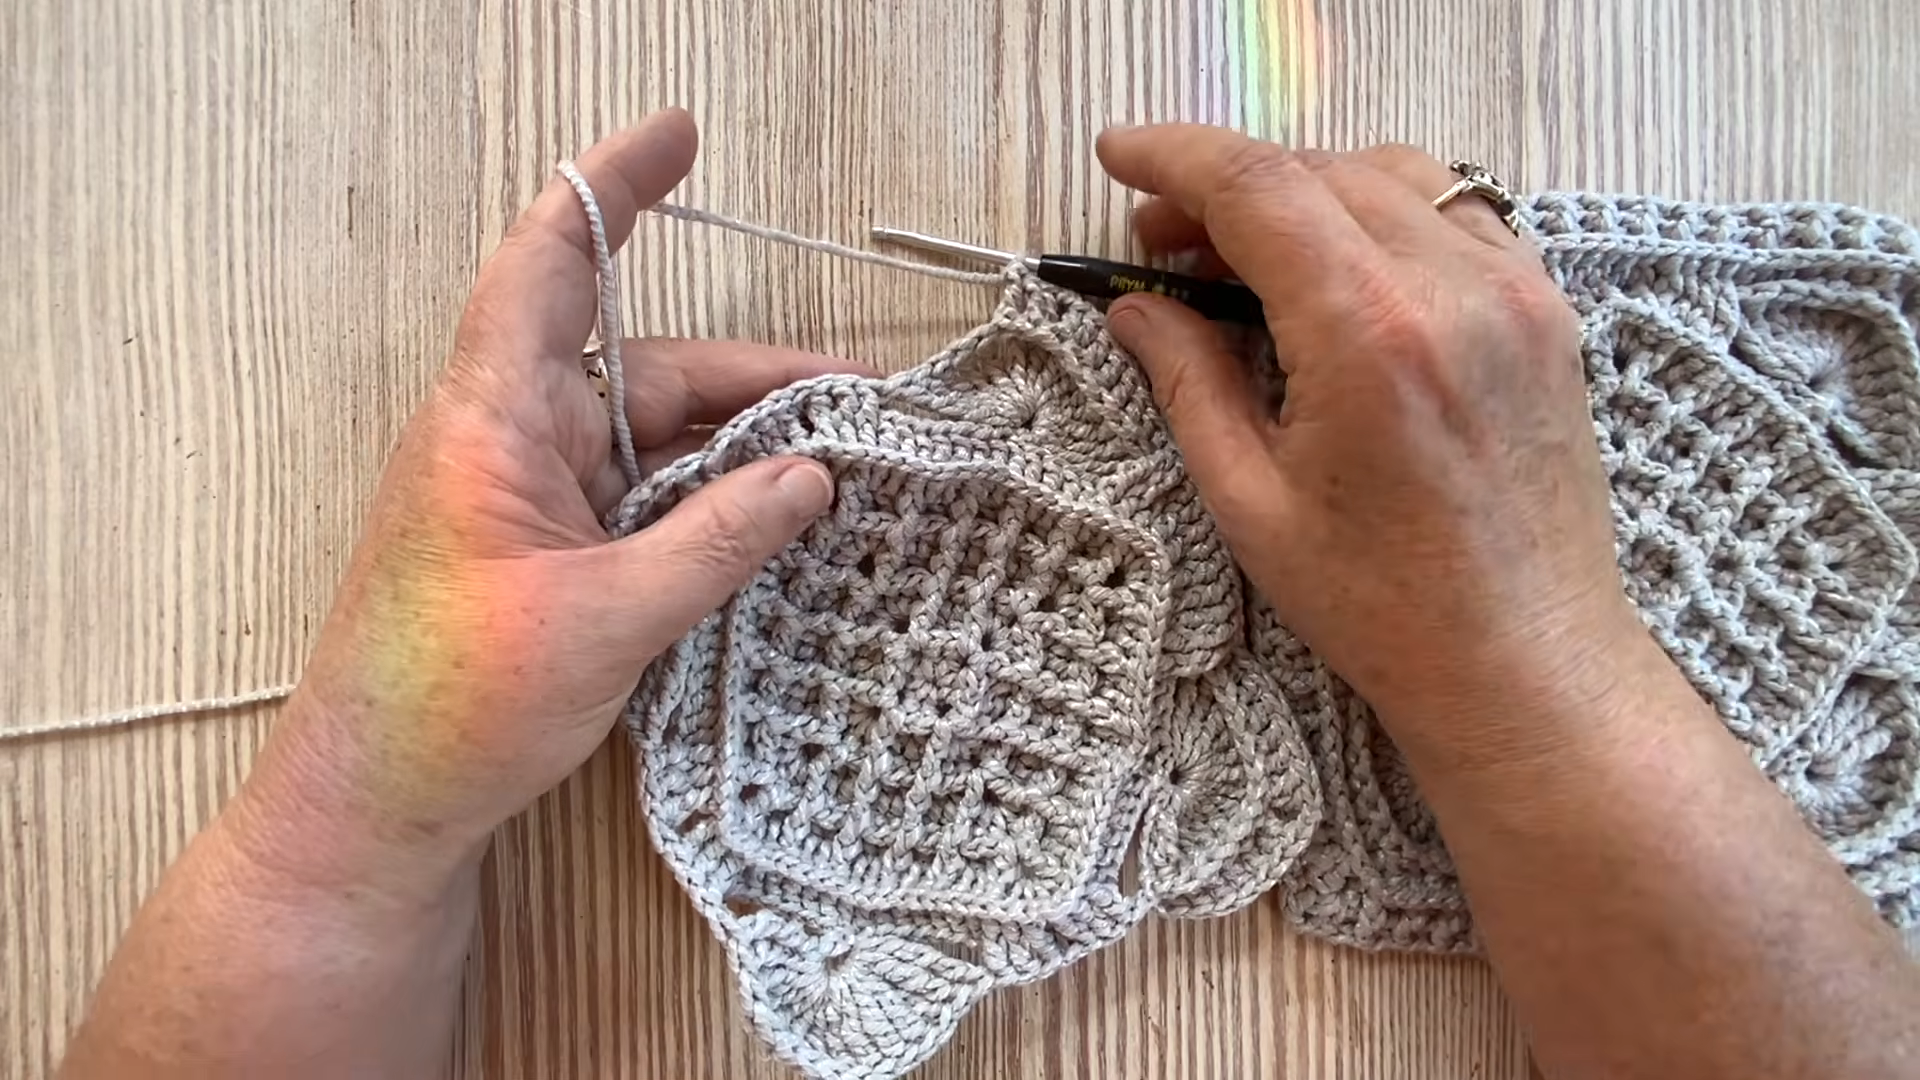
Step 6: Fasten Off and Finish
Once the last stitch pair is joined, fasten off and pull the tail through. Weave in both ends along the seam line on the wrong side so nothing shows on the front of the joined piece.
This is the same seaming method to drop into the hat article’s Assembly section wherever squares get joined want me to swap it in there now?
Assembly
Join the Ear Panels to the Back Square
Position the third (unfolded) square as the back and crown panel, then line up the two ear triangles along its top edge, spacing them evenly like a cat’s head. Seam each ear in place using the same single crochet or whipstitch method used earlier.
Close the Sides
Fold the joined piece so the side edges meet at the back, then seam from the bottom edge up toward the ears, leaving the bottom open for the head opening.
Fit check: try the half-finished hat on (or measure against a head circumference of roughly 20–22 inches for an average adult) before finishing the seam, adjusting the fold slightly if the fit runs snug or loose.
Add the Brim
Work a round or two of single crochet evenly around the bottom edge to smooth out the square corners and create a neat, stretchy brim. A round of half double crochet worked into the back loops only adds a subtle ribbed texture if you’d like more stretch.
Common Mistakes to Avoid
- Skipping a gauge swatch, which leads to squares that turn out too large or small for a comfortable fit
- Joining squares before weaving in loose ends, making the seam bulky and messy
- Folding both ear squares the same direction instead of mirroring them, so the ears end up crooked once attached
- Working the brim too tightly, causing the hat to pull in and feel restrictive
- Mixing yarn weights between squares, which throws off the whole shape
Beginner Tips for a Clean Finish
- Keep stitches slightly tighter than usual so the granny rounds hold their shape and don’t sag once the hat is worn
- Use a stitch marker in the first stitch of every round to avoid losing track of where a round starts
- Block each square lightly before joining — a quick steam or damp-towel press squares off curled edges and makes seaming far easier
- Count corner spaces at the end of every round rather than waiting until the square is finished to check for mistakes
Uses & Benefits
A granny square hat with cat ears works well as a light layer for cool mornings, a playful costume topper, or a handmade gift for cat lovers everywhere. Joined motifs keep the fabric breathable, a gentle choice for sensitive scalps or anyone wanting a soft, non-itchy accessory. Each square works up separately, so the pattern travels well for on-the-go stitching. Crafters also use leftover yarn scraps to keep costs low while producing a unique, one-of-a-kind handmade crochet idea worth gifting.
Personalization Ideas
Color Combinations
Swap the accent shades for pastel tones, jewel tones, or a favorite sports-team palette to match any mood or season.
Ear Style Variations
Adjust the diagonal fold to make ears rounder, sharper, or slightly floppy for a different animal-inspired look entirely.
Size Adjustments
Add or skip a round on each square to size the hat up for an adult or down for a toddler.
Added Embellishments
Stitch on a tiny nose and whiskers with embroidery floss, or sew a small pom-pom between the ears for extra charm.
Caring for Your Finished Hat
Hand wash the finished hat in cool water with a mild detergent, then lay it flat on a towel to dry rather than hanging it, which can stretch the crown out of shape. Store the hat flat or lightly stuffed with tissue paper between wears so the ear points hold their shape instead of flattening in a drawer.
FAQs
What is the best yarn for a granny square hat?
A medium (worsted/Aran #4) acrylic or cotton-acrylic blend holds its shape well, resists pilling, and comes in the widest range of bright colors for this kind of colorful, motif-based project.
How do I make sure my hat holds a firm, neat shape?
Work stitches slightly tighter than a typical gauge, keep tension even across all three squares, and block each piece before seaming loose stitches are the most common cause of a floppy finished cap.
How long does this project take to complete?
Most crocheters finish the three squares and assembly in around four to five hours total, though splitting the work across a few short sessions makes the project feel far less daunting.
Can this pattern be made without visible seams?
Yes joining the squares with a mattress-stitch-style whipstitch through matching stitches on each edge keeps the seam nearly invisible from the right side.
Conclusion
A handful of granny squares, a little folding, and a couple of seams are all it takes to turn a classic motif into a hat worth showing off. Grab a hook and pick a color palette. Then give this crochet pattern a try. It makes a satisfying weekend project and a fantastic handmade gift.