Free Crochet Mouse Amigurumi in Ballerina and Superhero Outfits Pattern

Pattern Overview
- Finished size: 9cm tall, worked with a 2.5mm hook and DK weight yarn throughout
- Core body parts: head, body, two arms, and two feet, all worked in single crochet rounds
- Head and body built with standard increase rounds, then shaped down with decreases before closing
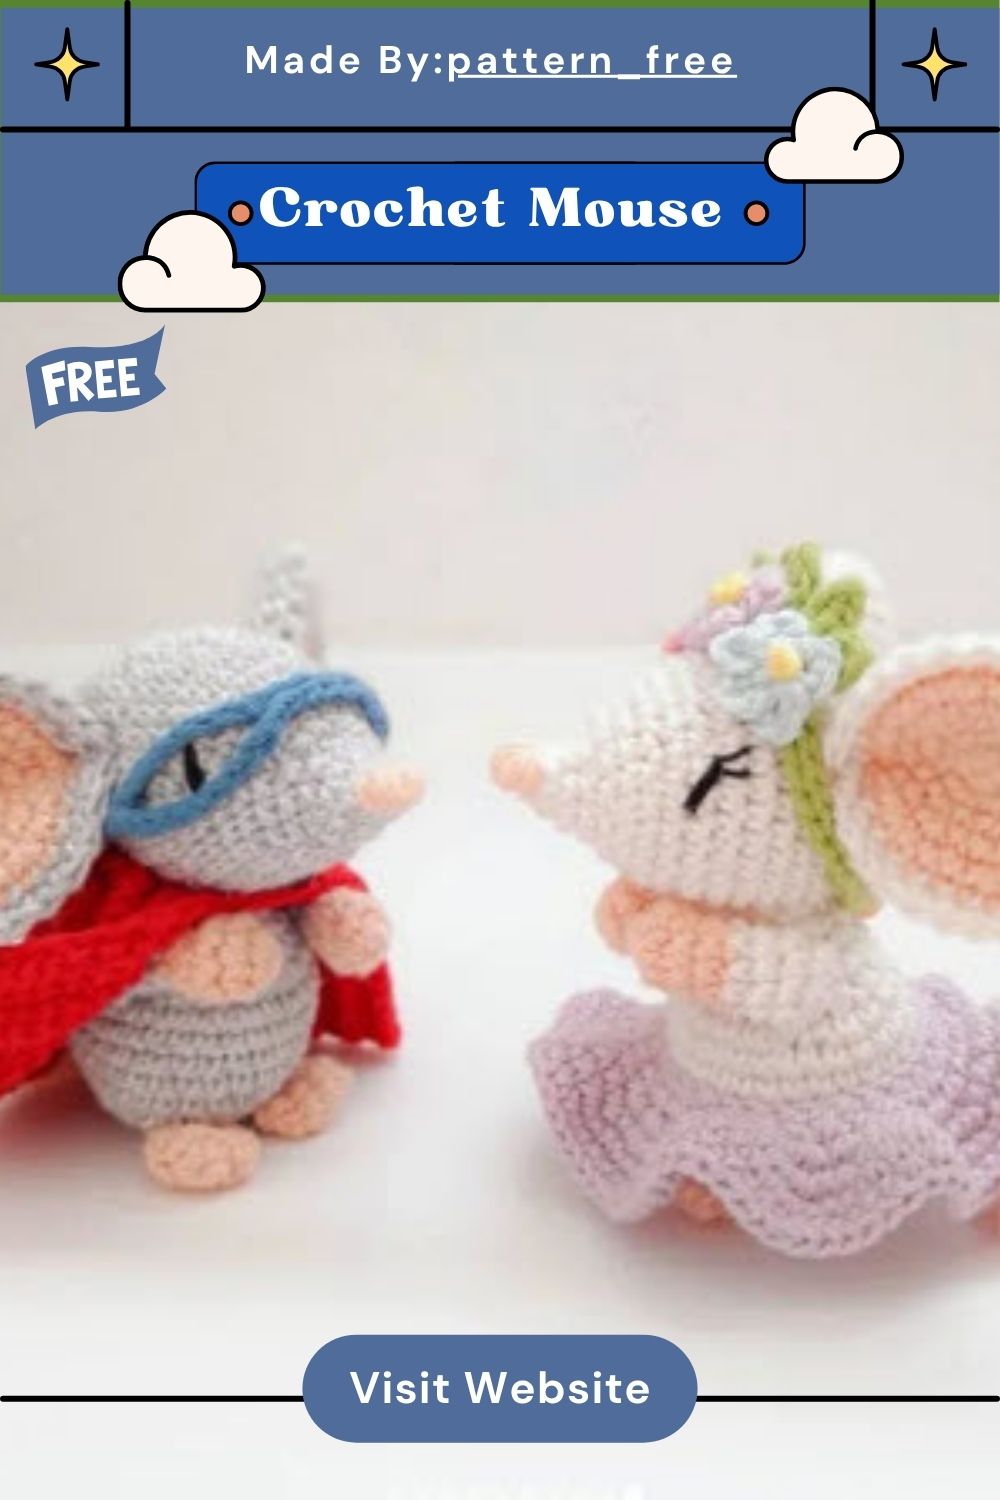
- Ears built from two joined pieces, an inner peach layer and an outer grey layer, for a rounded, dimensional shape
- A curled tail added separately using slip stitches into the back bump of a chain
- Embroidered nose and facial details added after stuffing is complete, using the closing round as a guide
- Superhero add-ons: a gathered red cape with a chain button loop, plus a simple blue face mask
- Princess add-ons: a gathered purple skirt, a three-flower crown, and a leafy headband with a button closure
- Buttons and embroidery thread used throughout for costume fastenings and facial features
- Assembly notes cover exact placement rounds for the head, ears, arms, feet, and tail
- Two distinct color palettes given, one for the superhero version and one for the princess version
- Flower crown built from three separate flowers plus a slip-stitched headband with leaf details
Special Techniques
Working through the back loop only on the cape rows creates that neat, ribbed gather along the finished edge once the long tail is pulled through. Ngl, the double-layer ear construction takes a bit of patience, joining an inner and outer piece through the back loop before single crocheting both layers together to close them flat. The arms and feet use a similar flat-close technique, folding the tube and stitching through both layers instead of stuffing them fully, which keeps the limbs soft and easy to bend into a pose. French knots form the flower centers on the crown, and a chain loop paired with a button gives both the cape and the mask their fastenings without any sewing extras needed.
Customization and Variation
- Swap grey for brown, white, or tan yarn to create a completely different mouse character
- Try small felt circles instead of embroidery thread for the eyes and nose details
- Change the cape color to match a favorite superhero palette or a child’s request
- Use pastel shades for the flower crown and skirt to suit spring or baby gifting
- Scale up with worsted weight yarn and a larger hook for a bigger cuddle-sized toy
- Skip one outfit entirely and make a simple bow-tie version for a quicker finish
- Add a tiny fabric patch or embroidered initial to the cape for a personalized touch
- Mix and match outfit pieces, pairing the flower crown with the cape for a hybrid look
- Swap the button eyes for safety eyes if the toy will go to a very young child
- Make a matching mini version using thinner yarn for a keychain-sized companion piece
Skill Level
This Free Crochet Mouse Amigurumi pattern suits confident beginners and intermediate crocheters comfortable with increases, decreases, and basic shaping. The two-piece ear join and cape gathering build new skills without overwhelming a first amigurumi project.
Common Mistakes
- Understuffing the head and body, which leaves the finished mouse looking floppy and uneven
- Losing track of the stitch marker placement before starting the nose embroidery step
- Working into both loops instead of the back loop only on the cape rows
- Attaching the ears too far apart or too close, throwing off the mouse’s expression
- Forgetting to leave long tails on the arms, feet, and tail for attaching later
- Overstuffing the arms and feet, which makes them stiff instead of soft and posable
- Rushing the ear join and missing the back loop step, leaving a gap at the base
- Skipping the stitch count checks at the end of each round, which throws off shaping later
- Gathering the cape edge too tightly, which pulls the fabric out of shape at the top
- Using yarn that’s too thick or thin for a 2.5mm hook, throwing off the finished size
Frequently Asked Questions
Can I use a different yarn weight?
Yes, though the finished size will change; switching to worsted weight yarn and a larger hook produces a noticeably bigger mouse with a chunkier finish.
How much stuffing does the Free Crochet Mouse Amigurumi need?
Firm, even stuffing works best, especially through the middle rounds of the head, so the shape holds without lumps or soft spots.
Do I need embroidery thread for the nose and eyes?
Embroidery thread gives the cleanest, most detailed finish, but small felt pieces glued or sewn on can work as a quick substitute.
Can the outfits be removed after finishing?
Both the cape and mask attach with button closures, so they can be taken off and swapped for a different look fairly easily.
Is this pattern suitable for a first amigurumi project?
With some prior single crochet experience, it works well, though total beginners may want to practice basic increases and decreases first.
Finishing Tips
- Weave in every tail securely before moving on to the next piece of the pattern
- Lightly steam or block the ears so both sides sit flat and even against the head
- Keep embroidery stitches close together for a crisp, clearly defined nose shape
- Double-check the button placement lines up with the loop on the opposite side before attaching
- Brush the yarn gently if working with a fuzzy fiber for a softer overall finish
- Pin pieces in place with stitch markers before sewing so the final pose looks balanced
- Trim stray fibers around the embroidered face for a cleaner, more polished result
Gifting Ideas
- A sweet baby shower gift paired with a small storybook about woodland animals
- A birthday present for a child who loves dress-up, costumes, and pretend play
- A keepsake ornament for mouse or animal lovers to display during the holidays
- A thoughtful handmade addition to an Easter or spring gift basket alongside candy
- A small comfort toy for a new sibling, sized just right for little hands
- A themed gift set, pairing the mouse with a matching storybook or costume accessory
Conclusion
For real, this little mouse and its matching outfits make for a satisfying weekend project with a big payoff. Switching between the cape and the flower crown keeps the pattern fresh even after making it more than once, since each version feels like a brand new toy. Low-key, it’s the kind of amigurumi that turns into a favorite keepsake the moment the last stitch is woven in, and it holds up well to years of play and cuddling. Whether it ends up on a shelf, in a gift box, or in a child’s arms, this pattern delivers a lot of charm for a fairly small amount of yarn.