Crochet Funny Century Egg Amigurumi Pattern for Creative Toy
Quirky and unusual food amigurumi always carry their own distinctive identity, and this crochet century egg is a perfect example of that playful spirit. Its dark marbled shell and translucent white part turn an unusual breakfast item into an adorable little character. Its easy shaping suits beginner crocheters, while experienced makers can get creative experimenting with color combinations. It’s a special pick for anyone who loves unique, fun, conversation-starting handmade projects.
Holding a special place in the world of quirky food amigurumi thanks to its unique, humorous shape, this crochet century egg stands out with its smoky mottled shell, jelly-like interior, chubby body, and embroidered adorable face — all coming together in a fun handmade character. This project is a perfect choice for food-themed amigurumi lovers, fans of unique designs, kids’ room decor, shelf decor, and cute handmade gifts. With easy shaping and creative color combinations, this little character adds joy and humor wherever it goes.
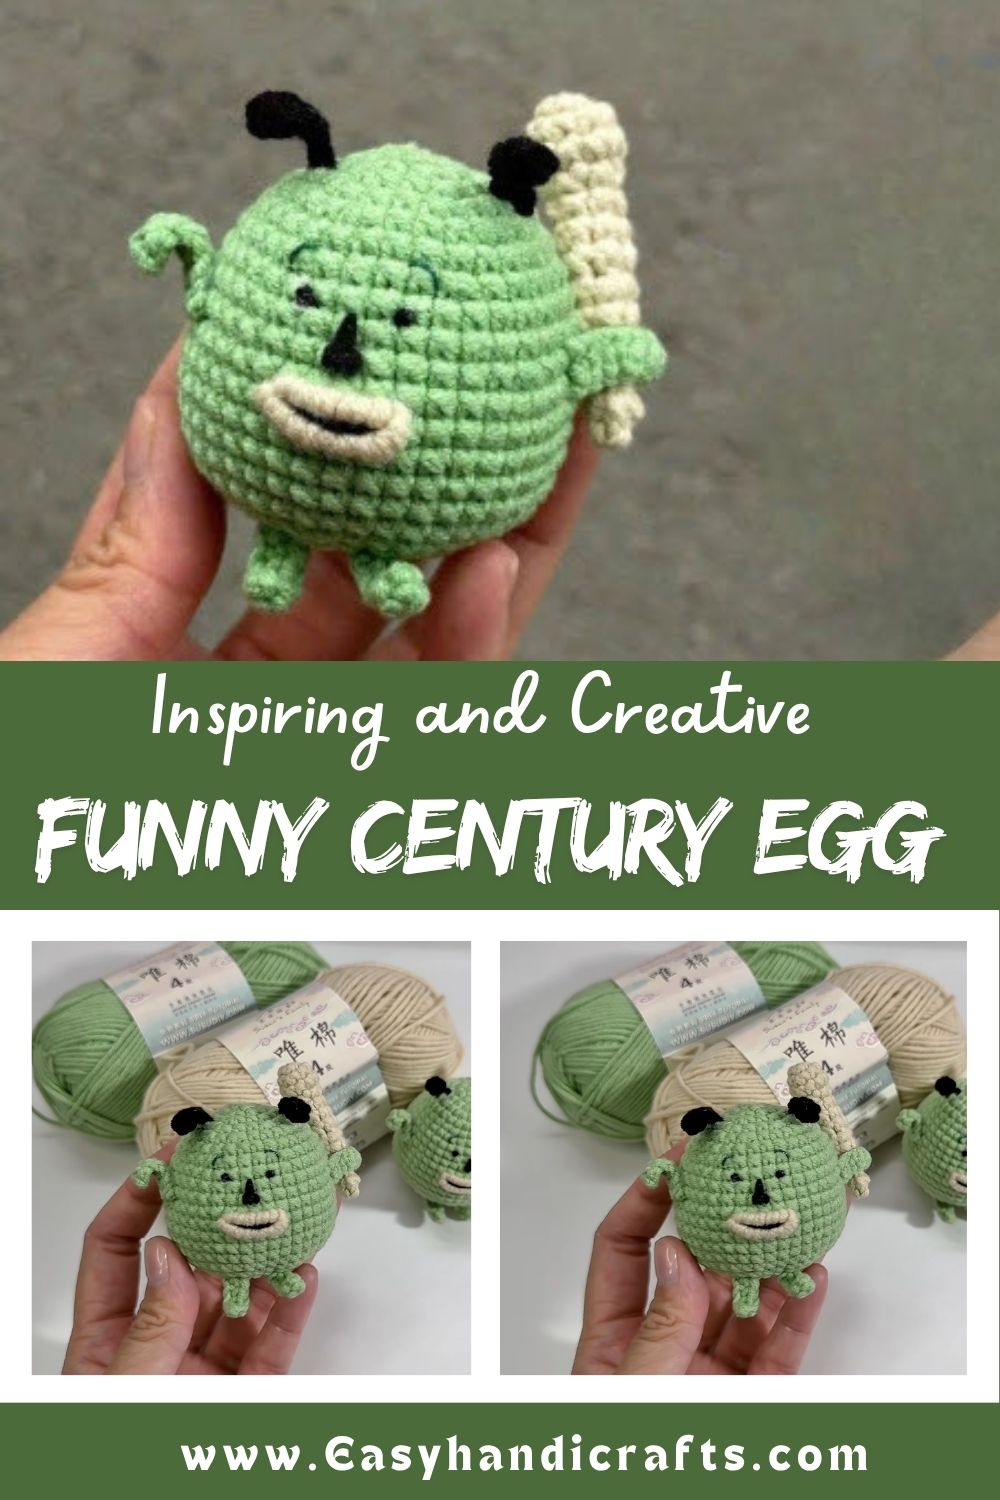
Difficulty-wise, this project sits comfortably in beginner-friendly territory. Nothing about the shaping is complicated; most of the fun comes from experimenting with yarn shades to recreate that marbled, preserved-egg texture. Crocheters who enjoy small, quick makes with big personality will find this pattern especially satisfying, and it works up fast enough for a weekend project or a last-minute gift.
Project Details
- Skill Level: Beginner to Advanced Beginner
- Finished Size: Approximately 3–4 inches tall
- Estimated Time Required: 2–3 hours
- Recommended Yarn Weight: Medium (Worsted, #4)
- Crochet Hook Size: 3.0mm–3.5mm (or size needed to achieve a tight gauge)
Materials Needed
- Worsted weight yarn in dark olive, charcoal grey, or deep brown (for the marbled shell)
- Worsted weight yarn in translucent white or pale grey (for the egg white section)
- Small amount of soft yellow or amber yarn (for the yolk detail, if adding a cracked-open version)
- 6mm safety eyes or black embroidery floss for the face
- Fiberfill stuffing
- Tapestry needle
- Stitch markers
- Scissors
- Optional: black embroidery floss for a mouth or blush marker for cheeks
Crochet Stitches and Techniques
This project relies on a handful of core amigurumi techniques, so even newer crocheters should feel confident tackling it.
- Magic Ring: Used to start each rounded piece without a visible hole
- Chain Stitch: For any small connecting pieces or loops
- Single Crochet: The primary stitch used throughout the body
- Increase: Shapes the rounded top and bottom of the egg
- Invisible Decrease: Keeps the closing rounds smooth and gap-free
- Color Changes: Essential for creating the mottled, marbled shell effect
- Fastening Off: Securing yarn ends neatly at the end of each piece
- Sewing Pieces Together: Joining any small added details, like the face or optional cracked shell
Pattern Instructions
Creating the Main Shell
Begin at the top of the egg with a magic ring, working single crochet stitches in the round. Increase evenly across the first several rounds until the piece reaches its widest point, matching the classic rounded egg silhouette. Switching yarn colors every few rounds, dabbing in small sections of grey, brown, and black recreates that speckled, preserved look far better than a single solid shade ever could.
Shaping the Body
Once the widest point is reached, work several rounds even to build up the height of the egg before starting to decrease. Keep stitch counts consistent here, since this middle section determines the overall proportions of the finished piece. A stitch marker on the first stitch of each round makes tracking progress much simpler.
Adding the Marbled Effect
For an authentic century egg look, don’t blend colors smoothly. Instead, work small clusters of two or three stitches in one shade before switching to another, leaving slightly uneven transitions. This intentional inconsistency is what gives the shell its signature mottled, almost stone-like texture.
Facial Features
Attach safety eyes a few rounds below the halfway point, spacing them apart to give the egg a wide-eyed, comical expression. A simple curved smile embroidered underneath completes the look, though a small “o” shaped mouth works nicely too if a surprised expression feels funnier. Pink blush marks on the cheeks add a bit of extra charm.
Stuffing and Closing
Stuff firmly but evenly as the decrease rounds begin, adding small amounts gradually rather than all at once. This prevents lumps and keeps the rounded shape smooth. Continue decreasing until the opening is small, then close using an invisible fastening technique so no hole remains visible.
Optional Cracked-Open Version
For a more expressive version, crochet a small oval “yolk” piece in soft yellow or amber and stitch it into a shallow indentation on the front of the shell to mimic a cracked, jiggly center. A thin outline in black or dark grey around the edge of the yolk sells the illusion of a broken shell nicely.
Final Assembly
Weave in all loose ends securely, checking that both the eyes and any embroidered features sit symmetrically. Give the finished piece a gentle shape by rolling it between your palms, which helps settle the stuffing evenly before it’s ready for display.
Tips for Success
- Keep tension consistent to avoid a lumpy or uneven shell shape
- Count stitches after every round, especially during increase and decrease sections
- Use a stitch marker to avoid losing track of round starts
- Stuff in small amounts throughout rather than stuffing all at once
- Weave in ends along the inside seam so nothing shows on the outside
- Steam-block the piece lightly if the shell looks too stiff after stuffing
Personalization Ideas
- Swap the traditional dark shell colors for pastel tones for a spring-themed version
- Add tiny arms and legs for a more character-like, animated look
- Turn it into a keychain by attaching a small clasp at the top
- Make a mini version as a stitch marker or bag charm
- Create a matching set with different facial expressions for a fun display shelf
- Add a tiny knitted or crocheted hat for extra personality
Common Mistakes to Avoid
Many beginners rush the color-blending step and end up with shading that looks too smooth rather than authentically mottled. Working in intentionally uneven clusters solves this. Another common issue is overstuffing too early, which distorts the rounded egg shape before the decrease rounds even begin. Spacing safety eyes too closely together can also make the expression look off, so double-checking placement before securing them permanently saves a lot of frustration later.
Frequently Asked Questions
Is this Crochet Funny Century Egg pattern suitable for complete beginners?
Yes, the shaping only relies on basic single crochet, increases, and decreases, making it approachable even for first-time amigurumi makers.
What yarn works best for the marbled shell effect?
Worsted-weight cotton or acrylic blends in muted, earthy tones work best since they hold their shape well and show color transitions clearly.
Can I make this without safety eyes?
Absolutely. Embroidered eyes with black floss work just as well and are a safer option for gifts intended for young children.
How long does one egg take to finish?
Most crocheters can complete one from start to finish in about two to three hours, depending on stuffing and finishing details.
Can this Crochet Funny Century Egg pattern be scaled up or down?
Yes, using a larger hook and thicker yarn creates a jumbo version, while switching to a smaller hook with fine yarn produces a mini keychain-sized egg.
What’s the best way to store finished pieces?
Keep them away from direct sunlight to prevent color fading, and store in a dust-free container if they aren’t on display.
Can I sell finished amigurumi made from this pattern?
Selling finished handmade items from an original pattern is generally fine, though it’s always worth double-checking any specific terms tied to the pattern source.
Conclusion
This Crochet Funny Century Egg proves that even the strangest food inspirations can turn into something genuinely charming once crochet hooks get involved. Its playful shell, tiny expressive face, and quick working time make it a rewarding project for makers of every skill level. Give it a try, experiment with your own color combinations, and don’t forget to share your finished creation. This little egg has a way of making everyone smile.