Charming Crochet Light Bulb Pattern for Bright Ideas
Skill Level
Beginner to easy-intermediate crocheters will feel comfortable here. Basic single crochet, increases, decreases, magic ring, and back/front loop stitching are required. No complex shaping or advanced color-change techniques appear anywhere in this project.
Materials Needed
- 2.5mm or 3mm crochet hook
- Cotton yarn in black, grey, and yellow
- Tapestry needle
- Polyester stuffing
- Scissors and stitch marker
Abbreviations
- sc – single crochet
- inc – increase (2 sc in same stitch)
- dec – decrease (invisible or standard decrease)
- BLO – back loop only
- FLO – front loop only
- sl st – slip stitch
Full Pattern Instructions
BLACK
- Round 1: Sc 6 in magic ring [6]
- Round 2: Inc in each stitch around [12]
GREY (work in BLO)
- Round 3: (Sc 3, inc) x3 [15]
- Round 4-5: Sc around, even rounds [15]
- Round 6: Sl st around [15]
YELLOW
- Round 7: Sc around, worked in FLO [15]
- Round 8: Sc around, even round [15]
- Round 9: (Sc 4, inc) x3 [18]
- Round 10: (Sc 5, inc) x3 [21]
- Round 11: (Sc 6, inc) x3 [24]
- Round 12: (Sc 3, inc) x6 [30]
- Round 13-17: Sc around, even rounds [30]
- Round 18: (Sc 3, dec) x6 [24]
- Round 19: (Sc 2, dec) x6 [18]
STUFF FIRMLY
- Round 20: (Sc, dec) x6 [12]
- Round 21: Dec x6 [6]
- Fasten off, leaving a tail. Weave through remaining stitches, pull tight, and secure.
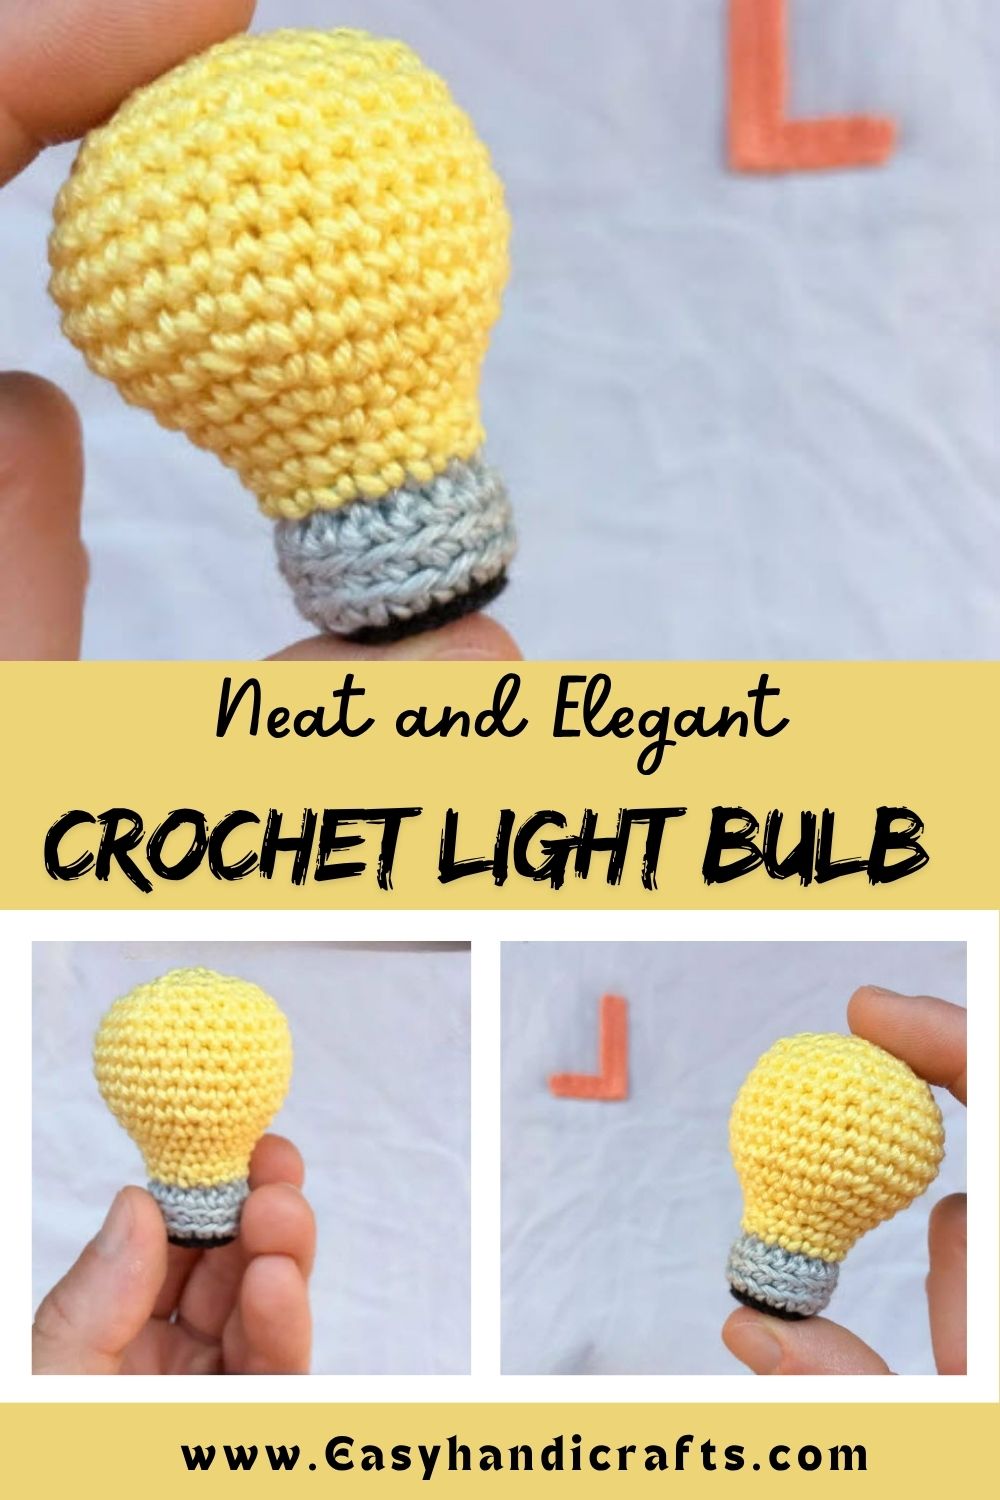
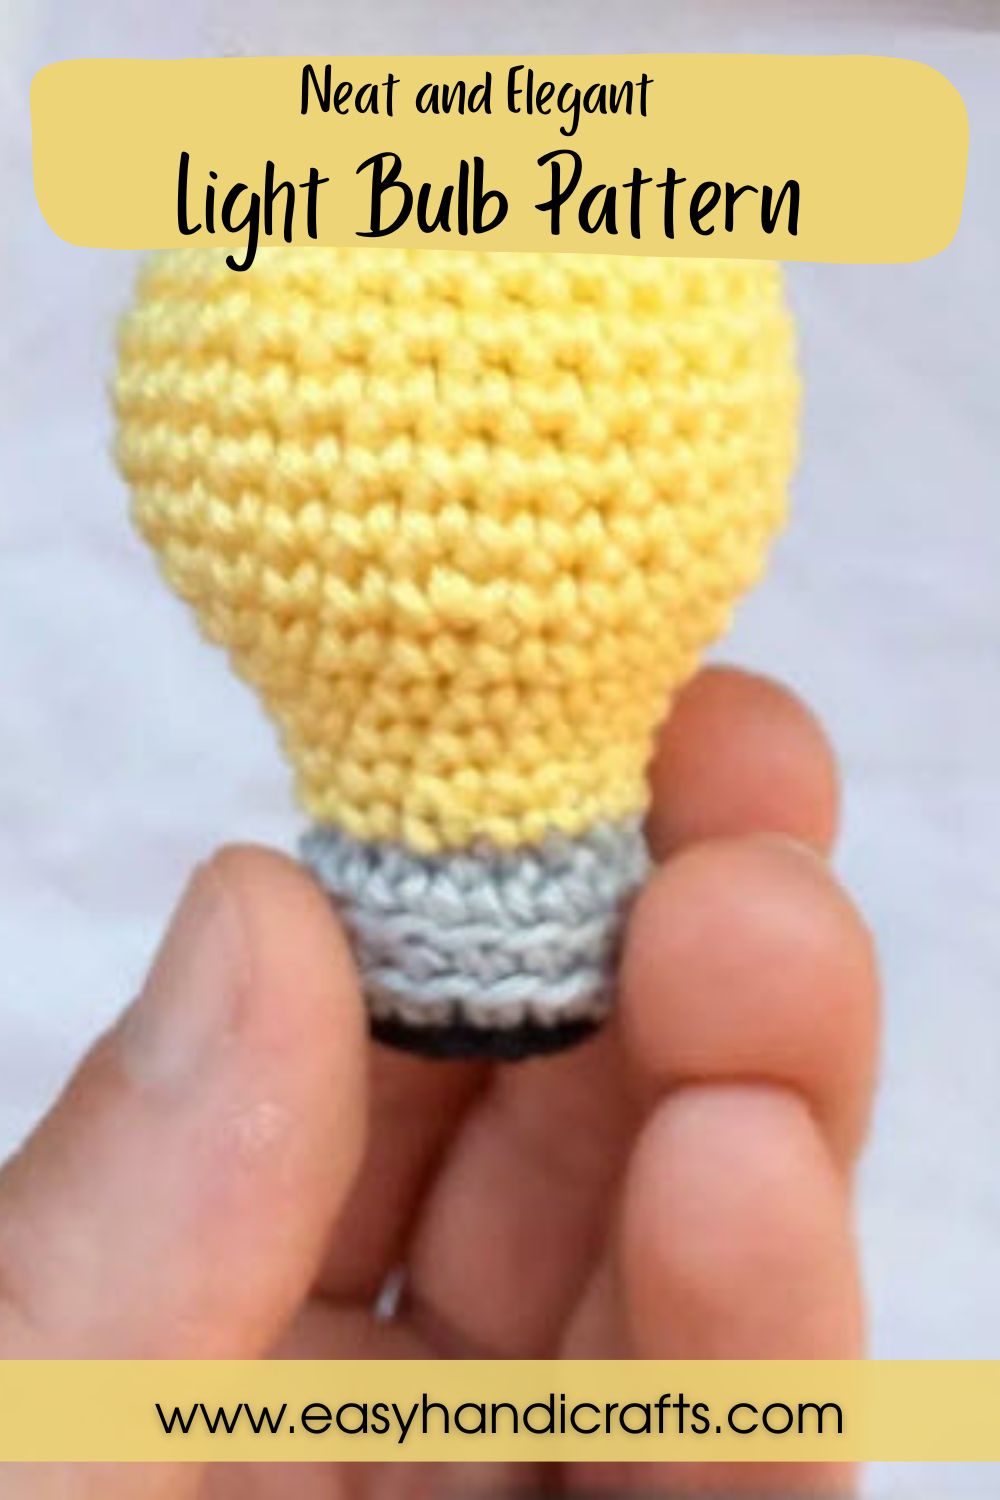
- The bulb starts at the base with black cotton, forming the classic screw-cap shape.
- Grey yarn builds the neck section, worked entirely in back loops for texture.
- Yellow yarn shapes the rounded glass body, starting in front loops for contrast.
- Increases expand the piece from 6 stitches up to 30 at its widest point.
- A steady run of even rounds keeps the widest section balanced and round.
- Decreases and stuffing close the top into a smooth, rounded dome.
- The final rounds taper gradually, giving the classic bulb silhouette its shape.
- Finished size stays compact, ideal for shelves, keychains, or photo props.
- A 2.5-3mm hook with cotton yarn keeps every stitch dense and toy-safe.
Special Techniques
- Magic ring start keeps the base tight and gap-free, unlike a chained foundation.
- Back loop only (BLO) rounds create a ridged, screw-thread illusion on the neck.
- Front loop only (FLO) rounds add a subtle seam where colors transition.
- Standard increases and decreases shape the rounded silhouette without visible jumps.
- Working color changes without cutting yarn keeps the inside of the piece neat.
- Firm stuffing before closing keeps the bulb’s dome shape crisp and lasting.
- A tapestry needle closure at the top hides the last few stitches completely.
Uses & Benefits
Trust me, this little bulb pulls double duty as decor and conversation piece. It works beautifully as a standalone ornament, a keychain charm, or a cute addition to a themed garland. Crocheters gain practice with color-blocking, loop-only stitching, and gradual shaping, all valuable skills for future crochet projects. Gift-givers love handing over something symbolic yet whimsical, especially for graduations, new job celebrations, or “you’re a bright idea” themed presents. Compact size means minimal yarn and quick turnaround.
Where Can You Use This Case?
- Desk or bookshelf accent for home offices and study spaces.
- Nursery mobile piece paired with other soft crochet shapes.
- Graduation or promotion gift symbolizing bright ideas ahead.
- Keychain or bag charm for a playful everyday accessory.
- Photo prop for creative, DIY-themed social media content.
- Teacher or mentor appreciation gift, especially for STEM-related classrooms.
- Craft fair or Etsy shop item thanks to its quick production time.
- Garland or bunting piece when made in multiples for party decor.
Why Beginners Will Enjoy This Pattern
Newer crocheters often feel intimidated by shaping and color changes, but this pattern keeps things approachable. Ngl, the repetitive increase-decrease structure makes it easy to follow without constantly checking a chart. Each color section stays short, so motivation never dips before the next milestone. Finishing a full, recognizable object within one sitting builds confidence fast. Low-key, that quick sense of accomplishment often pushes beginners straight into trying their next crochet project. The clear round-by-round instructions also mean fewer moments of confusion, which keeps frustration to a minimum throughout the whole make.
Common Mistakes
- Skipping the back-loop-only instruction, which flattens the neck’s rigid texture.
- Losing stitch count during increase rounds, causing an uneven bulb shape.
- Under-stuffing the top, leading to a saggy or lopsided dome.
- Forgetting to secure yarn tails tightly between color changes.
- Rushing the front-loop round, which blurs the color transition line.
- Using a hook that’s too large, which leaves visible gaps between stitches.
- Overstuffing early rounds, making later shaping rounds difficult to close evenly.
- Cutting yarn between colors instead of carrying it, creating extra ends to weave.
- Ignoring gauge entirely, which can leave the bulb noticeably larger or smaller than planned.
- Twisting the piece mid-round, which throws off the visible spiral of the stitches.
Helpful Beginner Tips
- Use stitch markers on round one to avoid losing track of the starting point.
- Count stitches after every increase or decrease round before moving forward.
- Weave in color-change ends as you go, not all at the finish.
- Stuff gradually while working the final rounds instead of all at once.
- Keep tension consistent, especially through the BLO and FLO sections.
- Practice a small BLO swatch first if the technique feels unfamiliar.
- Keep a small pair of scissors nearby for quick, clean color changes.
- Try the pattern in a light color first to see stitch definition clearly.
- Read through the full round before starting, so surprises never slow progress.
- Take short breaks between color sections to avoid hand fatigue and tension slips.
Assembly
- Complete the black base and grey neck sections in one continuous piece.
- Switch to yellow yarn without cutting, carrying the working yarn behind stitches.
- Add stuffing steadily once the widest yellow rounds are complete.
- Continue stuffing through the decrease rounds to maintain a rounded top.
- Check the shape from multiple angles before closing the final rounds.
- Adjust stuffing firmness near the top for a smoother, rounder finish.
- Close the final six stitches, cut the yarn, and weave in securely.
- Trim any stray fibers so the finished bulb looks clean and polished.
Tips and Tricks for Success
- Choose a slightly smaller hook than usual for tighter, gap-free stitches.
- Test gauge on a swatch if working with unfamiliar cotton yarn.
- Pin or clip color sections together beforehand to visualize the final proportions.
- Photograph progress after each color block to track shaping accuracy.
- Block the finished piece gently if the surface looks uneven.
- Store leftover yarn scraps for future mini accessories or matching charms.
- Compare your round counts against the pattern every few rows for accuracy.
- Work in good lighting so front-loop and back-loop stitches stay easy to spot.
Why This Crochet Pattern Is Trending
Crochet light bulbs have surged in popularity as crafters lean into symbolic, giftable decor pieces that photograph well for social platforms. For real, the combination of nostalgic design and modern minimalism explains much of the appeal. Small-batch makers also appreciate how quickly this pattern comes together compared to larger stuffed toys, making it a reliable seller for handmade shops and craft fairs alike.
- Symbolic gifting culture favors meaningful, easy-to-understand designs like bulbs and stars.
- Short crochet projects fit busy schedules better than lengthy toy patterns.
- Aesthetic, color-blocked crochet decor performs well across Pinterest and Instagram feeds.
Conclusion
No joke, this crochet light bulb proves that small projects can carry big personality. Between the satisfying color transitions and quick finish time, it’s a pattern worth keeping in every maker’s rotation. Whether gifted or kept on a personal shelf, this bulb brings a cheerful spark to any space. Try making a few in different yarn shades to build a fun little collection, and share the finished pieces to inspire other crafters looking for their next bright idea.
Conclusion
No joke, this Crochet Light Bulb Pattern proves that small projects can carry big personality. Between the satisfying color transitions and quick finish time, it’s a pattern worth keeping in every maker’s rotation. Whether gifted or kept on a personal shelf, this bulb brings a cheerful spark to any space. Try making a few in different yarn shades to build a fun little collection, and share the finished pieces to inspire other crafters looking for their next bright idea.