Crochet Bunny Rattle Amigurumi Pattern for Animals Lovers
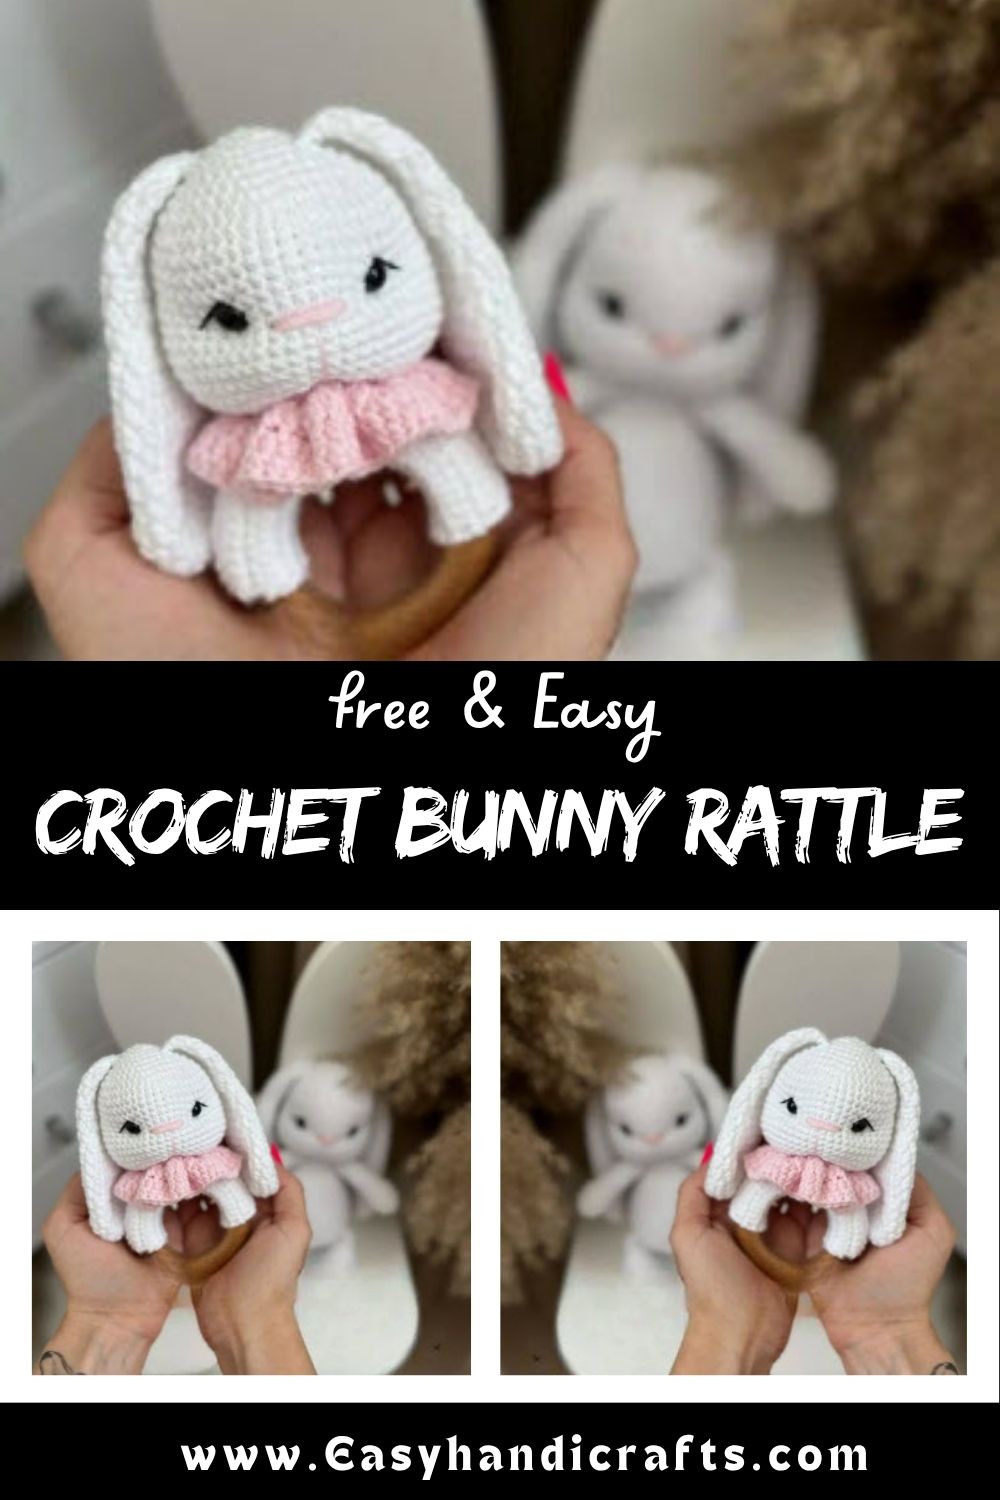
A pair of floppy ears and a soft inner jingle turn this Crochet Bunny Rattle Amigurumi into a gorgeous first toy for babies. Not gonna lie, the easy shaping and simple stitches make this pattern totally doable for beginner crocheters too. Once finished, the rattle fits beautifully into a stroller, pram, toy basket, or baby photoshoot setup.
Bunny rattle amigurumi isn’t just pretty to look at, it’s also a genuinely useful toy for little ones. This pattern brings together a soft plush head, round cheeks, and sturdy ears through simple steps, so it never feels overly complicated to make. For real, the wooden ring sets this design apart from typical amigurumi, giving it a charming rattle or teether-style vibe. Once finished, it’s a lovely choice for baby playtime, stroller attachment, toy basket, or a keepsake baby capsule gift.
Skill Level
Rated as an easy-to-intermediate project overall, this Crochet Bunny Rattle Amigurumi pattern suits crocheters comfortable with magic rings, increases, and decreases. Needle sculpting for facial features adds a fun challenge worth practicing patiently.
Pattern Overview
- A rounded amigurumi bunny head with defined cheeks and a soft muzzle
- Two floppy ears worked in half double crochet for added texture
- A hidden rattle tucked inside the head for interactive play
- A decorative collar and wooden ring edging that doubles as a teether-style handle
- Needle-sculpted facial features for a realistic, expressive look
Special Techniques
Real talk, a few techniques in this pattern make the bunny’s face come alive. The needle sculpting step pulls the cheeks and eye area inward, creating that classic soft, dimensional amigurumi expression. Working in back loops only (BLO) around round 26 creates a subtle ridge that helps the collar sit neatly. Safety eyes get placed precisely between rounds 12 and 13, so measuring the gap from the cheek increases keeps the face symmetrical.
Materials
- Fine/4ply yarn YarnArt JEANS (50g/160m), No.62 and No.74
- Black safety eyes, size 8 mm
- Toy stuffing material (synthetic filling)
- Hook 2–2.25 mm by Clover
- Wooden ring, 65–70 mm
- Round rattle, 24 mm
- Needle, scissors, and good mood!
Abbreviations
MR | magic ring SL ST | slip stitch CH | chain T-CH | turning chain SC | single crochet INC | increase (2 sc in one stitch) DEC | decrease (2 sc together) HDC | half double crochet HDCINC | half double crochet increase (2 hdc in one stitch) HDC2TOG | crochet 2 hdc together BLO | back loops only * | number of repetitions in a row/round (N) | resulting number of stitches in a round
Head
- 6 sc in a MR
- 6 inc (12)
- (1 sc, inc)*6 (18)
- (2 sc, inc)*6 (24)
- (3 sc, inc)*6 (30)
- (4 sc, inc)*6 (36)
- (5 sc, inc)*6 (42)
- (6 sc, inc)*6 (48) 9–13. 48 sc
- 10 sc, 3 inc cheek, 21 sc, 3 inc cheek, 11 sc (54) 15–20. 54 sc
- (7 sc, dec)*6 (48)
- (6 sc, dec)*6 (42)
- (5 sc, dec)*6 (36)
- (4 sc, dec)*6 (30)
Insert safety eyes between rounds 12 and 13. The distance between the extreme increases on the cheeks and the eyes is 4 sc each. Stuff the head well and insert a rattle.
- (3 sc, dec)*6 (24)
- BLO: (2 sc, dec)*6 (18)
- (1 sc, dec)*6 (12), sl st. Stuff the head with fiberfill, spreading it from the center to the sides and paying special attention to the cheeks.
Needle Sculpting. Outline the points. The first point sits between rounds 24 and 25, a little to the left of the middle of the muzzle (the middle between the eyes). After 1 sc from the first point (T1), you’ll reach point T4. Points T2, T3, T5, and T6 sit under the eyes, from the inside and outside, between rounds 13 and 14. T1–T2 marks the outer side of the left eye, T3 marks the inner side of the left eye, then T1–T4–T5 marks the outer side of the right eye, and T6 marks the inner side, connecting back to T4.
Fix with a knot and hide the ends inside the head. Bring the working thread from the tightening into the hole of the head and fix it in the back loop. Repeat the tightening only at points T1 and T4 without exiting. Exit the thread through the hole only after points T2, T3, T5, and T6, then fix the thread. Next, embroider the eyebrows and nose.
Ears (make 2)
- 6 sc in a MR. Next, work with HDC stitches!
- 6 hdcinc (12)
- (1 hdc, hdcinc)*6 (18)
- (2 hdc, hdcinc)*6 (24) 5–6. 24 hdc
- (hdc2tog, 10 hdc)*2 (22)
- 22 hdc
- (hdc2tog, 9 hdc)*2 (20)
- 20 hdc
- (hdc2tog, 8 hdc)*2 (18)
- 18 hdc
- (1 hdc, hdc2tog)*6 (12) 14–20. 12 hdc
- 6 dec (work with sc) + 1 extra sc, fold in half and crochet 3 sc through both sides, leaving a long yarn end for sewing. Sew the ears between rounds 4 and 5 of the head.
Collar
Work in front loops of round 26:
- (3 sc in one stitch)*24 (72) 2–4. 72 HDC or DC (work DC if you want the collar longer and looser, or use DC for only 2 rounds instead of 3)
Weave the ends on +3 extra sc at the end of round 4, sl st, then weave in the ends on the wrong side.
Ring Edging
- Ch31, work in rows
- 30 sc, t-ch, hide the yarn end from the beginning into the stitches 3–11. 13 rows of 30 sc (the row count may vary depending on the ring’s width; the most important thing is a tight fit against the ring so the rattle doesn’t hang loose)
Sew the edging to the ring with a needle.
Common Mistakes
- Skipping the exact eye spacing, which throws off facial symmetry
- Under-stuffing the head before inserting the rattle, causing a hollow sound
- Forgetting to work BLO on round 26, which weakens the collar’s ridge line
- Rushing needle sculpting points, leading to uneven cheek definition
- Attaching ears without matching row placement on both sides
Helpful Beginner Tips
- Count stitches after every round, especially through the increase rows
- Use stitch markers to track round 26 and the cheek increase points
- Test the rattle’s fit inside the head before closing the final rounds
- Keep tension consistent so the collar rows lie flat against the ring
- Practice needle sculpting on scrap yarn first if it’s new to you
Assembly
- Stuff the head firmly, placing the rattle centrally before closing round 27
- Complete needle sculpting before attaching ears for accurate cheek placement
- Sew both ears symmetrically between rounds 4 and 5 of the head
- Attach the collar directly onto the front loops of round 26
- Secure the ring edging tightly around the wooden ring before final stitching
- Weave in all loose ends neatly on the wrong side
Why Beginners Will Enjoy This Pattern
This Crochet Bunny Rattle Amigurumi is a fantastic confidence-builder for anyone newer to amigurumi. The stitch count stays manageable, the shaping follows a predictable rhythm, and the payoff is a genuinely huggable toy with real functionality. Watching the cheeks take shape through needle sculpting feels like a small magic trick, and the rattle adds a playful element kids actually respond to. It’s a project that teaches multiple techniques without overwhelming a first-timer.
Important Remarks
- Always supervise young children around small parts like safety eyes and rattles
- Substitute yarn weights carefully, since gauge affects the final rattle fit
- Wash toys gently by hand to preserve stitch definition and stuffing shape
- Double-check safety eye placement before securing, since removal can damage the yarn
Conclusion
Low-key, this Crochet Bunny Rattle Amigurumi delivers everything a beginner-friendly pattern should: clear shaping, satisfying texture changes, and a genuinely charming result. Whether it’s destined for a nursery shelf or a baby shower gift box, this little bunny rewards patience with a face full of personality. Pick up your hook, follow each round steadily, and enjoy watching this sweet creature come together stitch by stitch.