Crochet Flower Bun Band Floral Hair Strip Beginner
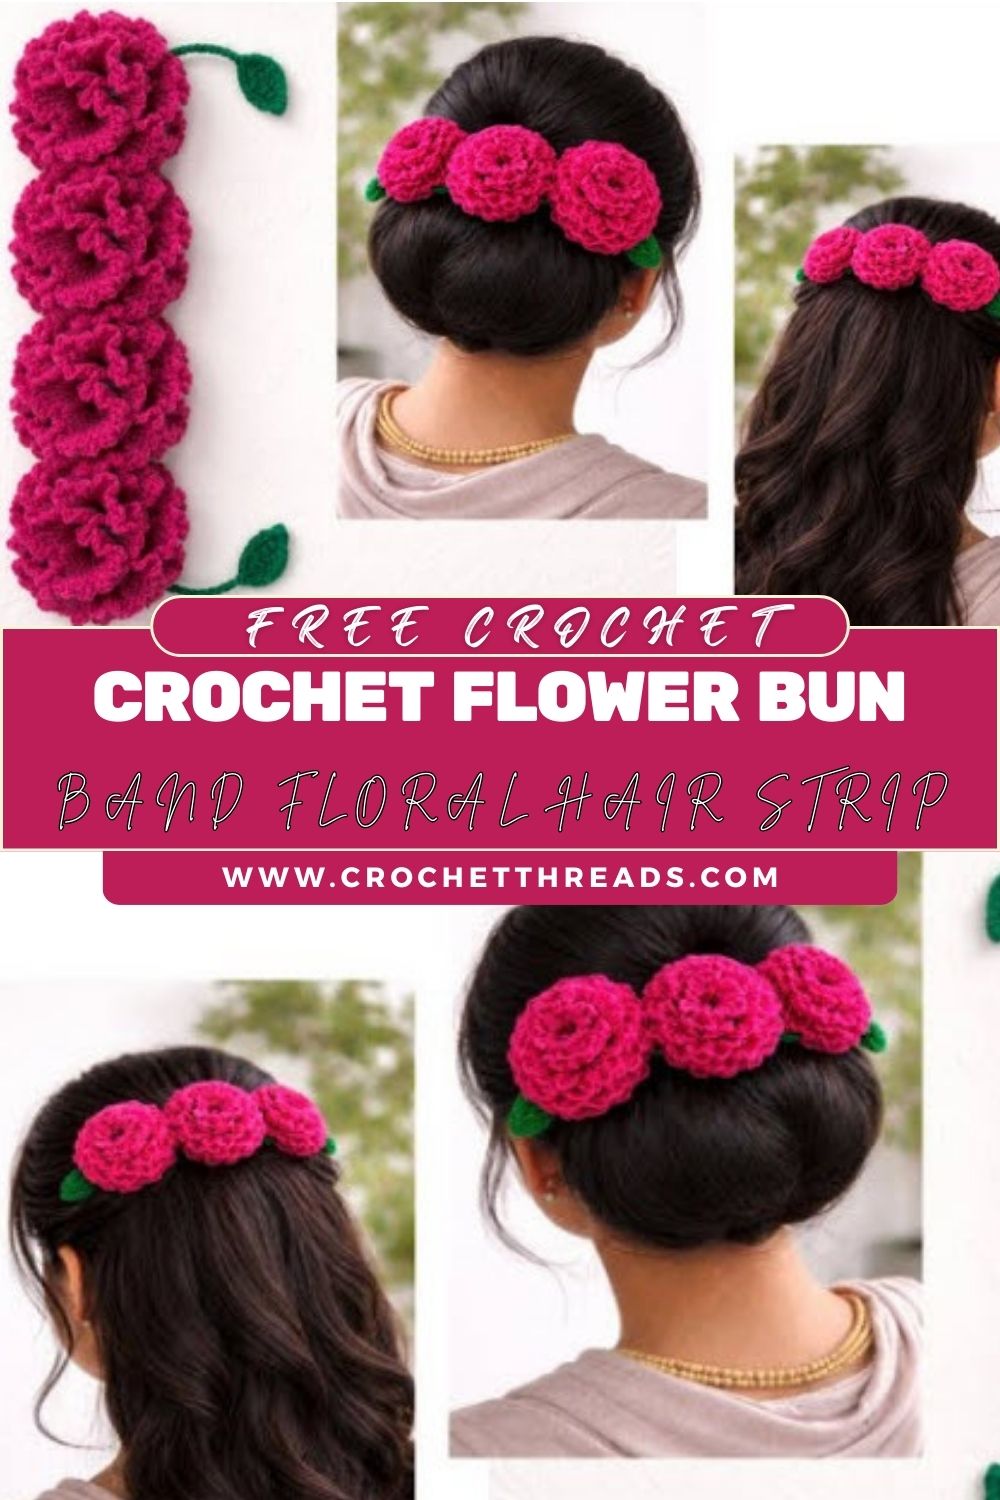
This crochet flower hair accessory is a delicate strip of 3D flowers designed as a crochet flower bun band or a wearable crochet floral headband.
It’s quick to make, easy to customize, and instantly elevates everyday hairstyles and special-event looks.
A crochet flower bun band is a flexible floral strip made from multiple small crochet blossoms joined side by side, often finished with tiny leaf accents at each end. In this step-by-step crochet flower tutorial, you’ll create layered, textured flowers and assemble them into a comfortable accessory that can wrap around a bun or sit across the head like a headband.
Handmade crochet accessories are special because they’re customizable, giftable, and one-of-a-kind. Beginners can absolutely make this project by following the repeats carefully, while intermediate crocheters will enjoy the neat construction and layered petals of this crochet hair flower pattern.
Design Overview
This accessory is built from:
- Multiple-layered crochet flowers with 3D petals (a slightly raised, textured look)
- Flowers joined into a strip, forming a flexible band
- Small leaf motifs at both ends for a finished, botanical touch
- A light, adaptable structure that can be pinned around a bun or secured to elastic/clips
- A decorative finish where petals naturally curl and overlap for a realistic flower effect
Materials Needed
- Yarn: DK/light worsted (Category 3) cotton or cotton-blend for crisp stitch definition (acrylic works too for softness)
- Crochet hook: 3.5 mm or 4.0 mm (choose smaller for tighter petals, larger for drapier flowers)
- Yarn needle (tapestry needle) for sewing and weaving ends
- Scissors
- Stitch markers (optional, helpful for marking petal starts)
- Finishing options (optional):
- Thin elastic (to make it a bun wrap or headband)
- Alligator clip(s) or a small barrette backing
- Bobby pins (easy, removable styling option)
Colour customisation: Use one colour for a classic look (white/cream for bridal), or mix 2–3 shades for an ombré floral strip (pastels, bright festival tones, or to match an outfit).
Crochet Abbreviations
- ch = chain (creates foundation and spacers)
- sl st = slip stitch (joins rounds, moves position)
- sc = single crochet (tight, sturdy stitches)
- hdc = half double crochet (medium height, smooth shaping)
- dc = double crochet (taller petals, more drape)
- tr = treble crochet (extra height for dramatic petal tips)
- inc = increase (2 stitches in the same stitch/space)
- rep = repeat (follow the same sequence again)
Skill Level & Time
- Skill level: Confident beginner to intermediate
- Time: About 60 120 minutes, depending on how many flowers you make (3–5 flowers is typical)
Pattern Notes
- Flowers are made separately, then joined into a strip.
- The band length is adjustable: add or remove flowers to fit buns, braids, or head sizes.
- You can customise the size by adjusting the yarn/hook sizes and adding/removing petal layers.
- Petals naturally cu. This is part of the 3D look.
- Leaves are optional but give the ends a neat, finished appearance.
Step-by-Step Pattern
Part A Flower Centre
You can use a magic ring (recommended) or a chain-ring.
Round 1 (centre):
- Make a magic ring.
- Ch 1, work 6 sc into the ring.
- Pull the ring tight to close.
- Sl st to the first sc to join. (6 sc)
Round 2 (base for petals):
- Ch 1.
- Inc in each stitch around (2 sc in each sc).
- Sl st to join. (12 sc)
Tip: Keep the centre; this helps the heels sit nicely and prevents a hole.
Part B First Petal Layer (6 petals)
We’ll create petals using chain spaces anchored with slip stitches.
Round 3 (petal loops):
- Sl st in next st, ch 3, this forms one loop.
- Rep from * to * around to create 6 loops total (you’ll use every other stitch).
- After the 6th loop, sl st to the starting point to join.
You should now have 6 ch-3 loops around the centre.
Round 4 (work petals into loops):
Into each ch-3 loop, work:
- (sc, hdc, 2 dc, hdc, sc)
Sl st to the next loop and repeat for all 6 petals.
This gives a neat first layer with gentle curl and a defined edge.
Part C Second Layer (Optional for Fullness)
This layer sits behind the first for a fuller, more 3D flower.
Backing setup: Turn the flower slightly so you can work behind the first petals (into the remaining stitches of Round 2 or into spaces between petal bases).
Round 5 (second-layer loops):
- Working behind petals: Sl st between two first-layer petals (at the base), ch 4
- Rep around to create 6 ch-4 loops (positioned behind the first petals).
- Join with a sl st.
Round 6 (second-layer petals):
Into each ch-4 loop, work:
- (sc, hdc, dc, tr, dc, hdc, sc)
This creates a taller, layered petal that peeks out from behind.
Optional: For an even fuller flower, make the second layer in a slightly different colour for contrast.
Part D Make Multiple Flowers
For a bun band or short floral strip, make 3–5 flowers, keeping yarn, hook, and tension consistent so the sizes match.
- 3 flowers: minimal, elegant bun wrap
- 4 flowers: balanced strip (great for most buns)
- 5 flowers: fuller statement piece or short headband section
Set finished flowers aside and decide your final arrangement before joining.
Part E Leaves (Make 2 Leaves)
Make one leaf for each end of the strip.
Leaf pattern:
- Ch 9.
- Starting in the 2nd ch from the hook:
- sc, hdc, dc, dc, tr, dc, hdc, sc (working along the chain)
- Ch 1, rotate to work down the other side of the chain:
- sc, hdc, dc, tr, dc, hdc, sc (place stitches into the remaining loops to mirror shape)
- Sl st at the base to finish.
Fasten off, leaving a long tail for sewing.
Optional: Add a stem by chaining 6 10 and sl st back down the chain.
Part F Joining Flowers (Sewing or Crochet Join)
Option 1: Sewing Join (clean + flexible)
- Lay the petals in a line, with the edges of adjacent petals slightly overlapping.
- Thread a yarn needle with matching yarn.
- Stitch through the back of the petal bases (not the petal tips) so stitches are hidden.
- Use 3–5 small stitches per join,n secure but not stiff.
Spacing tip: Keep joins at the flower base area so petals stay free and 3D.
Option 2: Crochet Join (quick)
Hold two flowers WS together at the base:
- Insert the hook through a back stitch on each flower base.
- Sl st to join, then sl st 2–3 more times through nearby stitches to secure.
- Fasten off and repeat for each connection.
Flexibility tip: Don’t over-join. Too many stitches will make the strip rigid.
Part G Finishing
- Attach leaves: Sew one leaf to each end of the flower at the base edge.
- Weave in ends neatly on the back.
- Shape petals: Gently pinch and curl petals upward with your fingers to enhance the 3D look.
- Optional blocking: Light steam blocking (especially for cotton) can refine shape—avoid flattening the petals.
- Add attachment of choice:
- Bobby pins: simplest—pin through the flower base
- Clip/barrette: sew a small backing to the centre back flower
- Elastic: sew elastic to the two ends (behind leaves) for a secure bun wrap/headband
Customization Ideas
- Colour variations: all-white bridal, pastel gradient, bold festival mix, or match school uniforms/outfits
- Add beads or pearls: sew a pearl cluster in each flower centre for a dressy finish
- Change the format:
- Longer strip → crochet floral headband
- Add ties → hair vine
- Add a central statement flower → tiara-like look
- For different wearers: tiny flowers for babies, medium for girls, fuller layered flowers for brides
Common Mistakes to Avoid
- Uneven flower sizes: switching hook size or tension mid-project makes the strip look inconsistent
- Joining too tightly can cause puckering and discomfort when worn
- Wrong hook size: too large = floppy petals; too small = stiff, tight centre
- Loose magic ring: leaves a hole in the centre (pull tight and secure)
- Uneven petals: missing stitches in a petal sequence change shape. Count your stitches in each loop
Beginner Tips
- Practice the magic ring once or twice before starting the final flower.
- Use a stitch marker to mark the first stitch of rounds if you lose your place easily.
- Keep the petals consistent by repeating the same stitch order for each loop.
- If your petals look flat, try going down 0.5 mm in hook size or using cotton yarn for better structure.
Styling Ideas
Wear your crochet flower hair accessory in multiple ways:
- Around a bun: wrap the strip and pin at both ends (leaves make a neat finish)
- With braids: tuck flowers along a side braid or crown braid for a romantic look
- Half-up hairstyles: pin the strip above a half-up twist for instant detail
- Special occasions: perfect for weddings, parties, Eid, birthdays, and photoshoots, especially with pearl centres or metallic thread accents
Conclusion
This crochet flower hair accessory is a beautiful, practical project that looks impressive without being complicated. Make it into a crochet flower bun band, extend it into a crochet floral headband, or customize the colours and embellishments to suit any event. Try one strip, then experiment with different flower sizes and leaf shapes to create your signature style.