Cute Crochet Black Bird Doll Amigurumi Pattern
A cute, compact, quick-to-finish black crochet bird amigurumi pattern for anyone who loves that classic grumpy-cute vibe (often compared to a Badtz Maru–inspired look). This bird doll tutorial keeps things simple: a round body, bold eyes, and tiny wings, so you get tons of personality without complicated shaping.
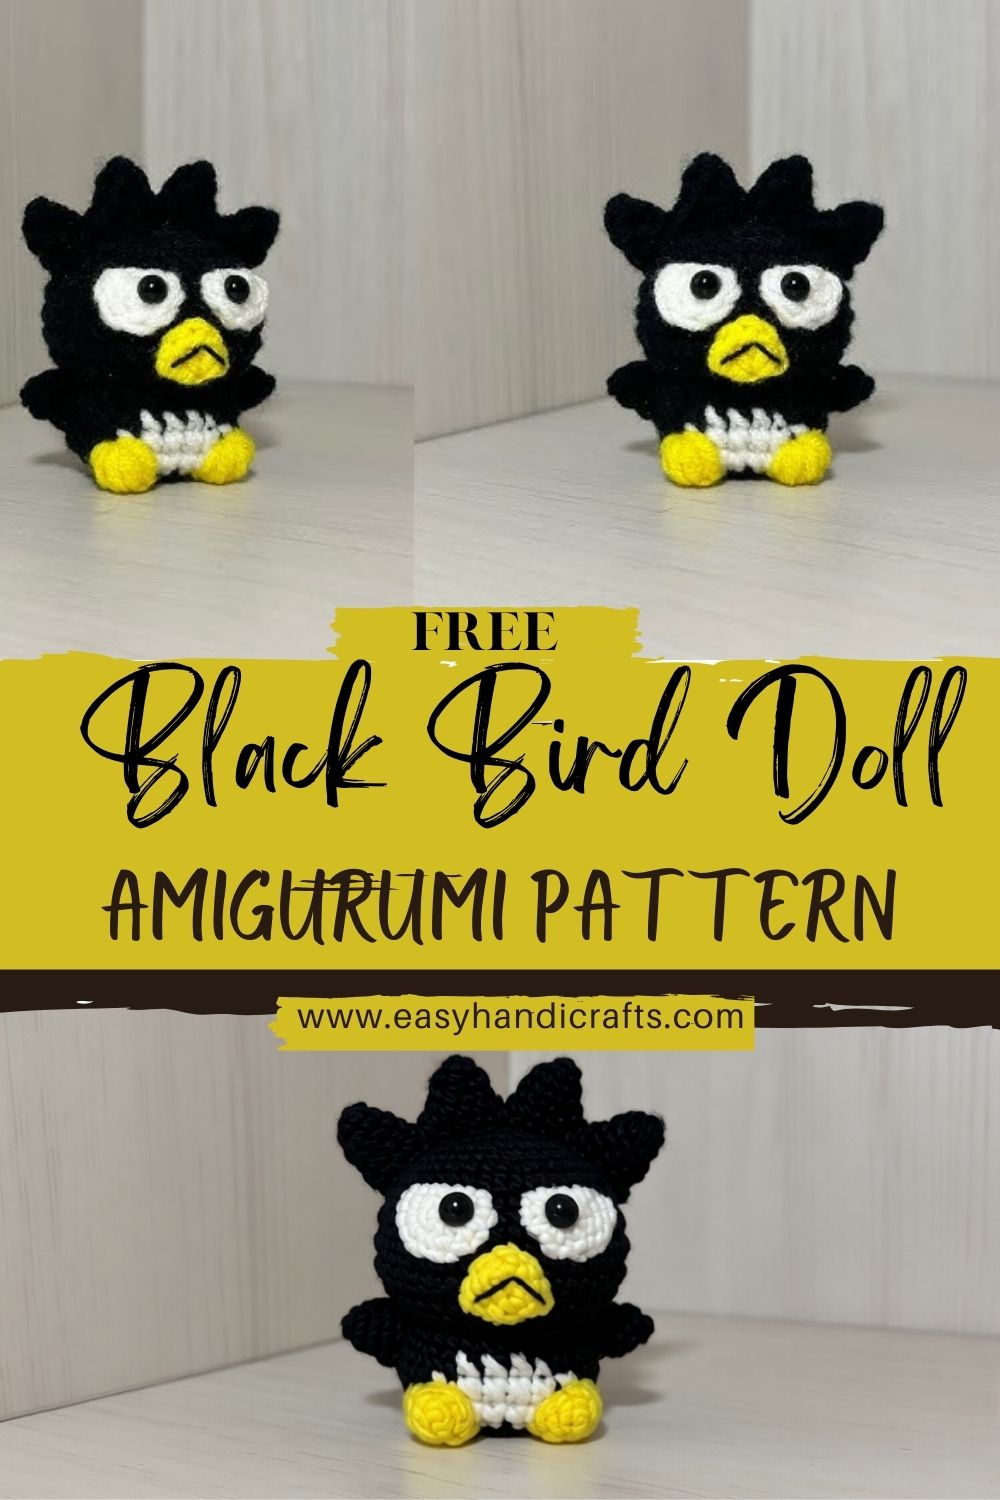
What makes this black bird amigurumi so fun is the high character-to-effort ratio: minimal parts, easy assembly, and instant expressiveness. The design includes a smooth, round black body, a white belly patch, oversized white eyes, a tiny yellow beak, bright yellow feet, and signature spiky feather-like points on top.
It’s an ideal project for confident beginners: the core is simple single crochet in the round, with small add-ons that teach basic shaping and assembly. It also makes a fantastic handmade gift, desk buddy, or craft fair product, small, recognizable, and irresistibly cute.
Materials Needed
- Black yarn (main body)
- White yarn (eyes + belly patch)
- Yellow yarn (beak + feet)
- Crochet hook (match your yarn; typically 2.5–4.0 mm for amigurumi)
- Fiberfill stuffing
- Yarn needle (tapestry needle)
- Stitch marker
- Scissors
- Safety eyes (optional) (you can use felt/embroidered eyes instead)
- Black embroidery thread (for detailing, lashes/outline, or facial accents)
Tip: For amigurumi, use a hook slightly smaller than your yarn label suggests to keep stitches tight.
Stitch Abbreviations
- MR – Magic Ring (adjustable ring to start crocheting in the round)
- sc – single crochet
- inc – increase (2 sc in the same stitch)
- dec – decrease (single crochet decrease; use invisible decrease if possible)
- sl st – slip stitch
- ch – chain
- BLO / FLO – back loop only / front loop only (used for shaping edges; optional in this pattern)
Finished Doll Description
Your finished amigurumi will be a small, round black bird with:
- A compact round body/head combo (one main piece)
- Big, expressive white eyes (either crocheted circles or safety eyes set into white patches)
- A small yellow beak centered between the eyes
- Tiny black wings are attached to the sides
- Chunky yellow feet to help it sit upright
- A neat white belly patch on the front
- Cute spiky top feathers that give it personality and a recognizable silhouette
Step-by-Step Crochet Pattern
Notes Before You Start
- Work in continuous rounds (spiral), unless stated otherwise.
- Use a stitch marker to mark the first stitch of each round.
- Numbers in parentheses are stitch counts at the end of each round.
- Size will vary depending on yarn/hook; with DK/worsted yarn, expect a palm-sized doll.
A) Head and Body (Black Yarn)
Shape/Construction: One simple round “ball” that forms both head and body—easy and beginner-friendly.
What it should look like: A smooth, firm sphere/egg shape that can sit once feet are attached.
- R1: MR, 6 sc (6)
- R2: inc around (12)
- R3: (sc, inc) around (18)
- R4: (2 sc, inc) around (24)
- R5: (3 sc, inc) around (30)
- R6: (4 sc, inc) around (36)
- R7: (5 sc, inc) around (42)
- R8–R13: sc around (42)
- R14: (5 sc, dec) around (36)
- R15: (4 sc, dec) around (30)
- R16: (3 sc, dec) around (24)
- R17: (2 sc, dec) around (18)
Start stuffing firmly here (keep it round, not lumpy). - R18: (sc, dec) around (12)
Add more stuffing—avoid overstuffing (it can stretch stitches). - R19: dec around (6)
- Fasten off, close the opening, and weave in the end.
Beginner guidance: If your stitches look gappy, go down a hook size or tighten your tension.
B) Belly Patch (White Yarn)
Shape/Construction: A simple oval/rounded patch sewn onto the front.
What it should look like: A soft white “tummy” area that contrasts with the black body.
- R1: MR, 6 sc (6)
- R2: inc around (12)
- R3: (sc, inc) around (18)
- R4: (2 sc, inc) around (24)
- R5: sc around (24)
Fasten off with a long tail for sewing.
Tip: If you want a smaller belly, stop at Round 4.
C) Eyes (White Yarn + Optional Safety Eyes)
You have two common options:
Option 1: Crocheted White Eye Circles (Beginner-friendly)
Make 2 in white:
- R1: MR, 6 sc (6)
- R2: inc around (12)
- R3: (sc, inc) around (18)
Fasten off, leave a sewing tail.
To finish:
- Either embroider black pupils using embroidery thread, or sew a small black felt circle in the center.
Option 2: White Eye Patches + Safety Eyes (Cuter “pop” look)
Make the same white circles as above, then insert safety eyes through the centers before attaching them to the body (only if making for older kids/adults—avoid for babies).
D) Beak (Yellow Yarn)
Shape/Construction: Tiny triangle/cone-like piece.
What it should look like: A small bump between the eyes.
- R1: MR, 4 sc (4)
- R2: (sc, inc) around (6)
- R3: sc around (6)
Fasten off, leave a long tail. Lightly stuff (optional) for added dimension.
Beginner note: Keep it small—an oversized beak changes the whole expression.
E) Wings (Black Yarn)
Make 2.
Shape/Construction: Small, rounded teardrop/half-oval.
What it should look like: Tiny “flippers” that sit on the sides.
- R1: MR, 6 sc (6)
- R2: (sc, inc) around (9)
- R3: sc around (9)
- R4: (sc, dec) around (6)
Fasten off, leave a tail for sewing. Do not stuff.
Tip: Flatten them slightly before sewing so they sit neatly against the body.
F) Feet (Yellow Yarn)
Make 2.
Shape/Construction: A small base that helps the doll sit; simple and sturdy.
What it should look like: Rounded little feet (you can embroider toe lines if you want).
- R1: MR, 6 sc (6)
- R2: inc around (12)
- R3: sc around (12)
- R4: (2 sc, dec) around (9)
Fasten off, leave a long tail. Lightly stuff to give them shape, then flatten slightly.
Optional detail: Use black embroidery thread to stitch 2–3 short toe lines.
G) Top Spikes (Feathers) (Black Yarn)
Shape/Construction: Quick spiky points made with chains and slip stitches.
What it should look like: Three little spikes centered on the top of the head.
Method:
- Identify the top center of the head. Insert hook and pull up a loop of black yarn.
- Spike 1: ch 4, sl st back into 2nd ch from hook, sl st in next ch, sl st in next ch. Sl st into the head where you started.
- Spike 2: Move 1 stitch over, repeat ch 4 spike, sl st into head.
- Spike 3: Move 1 stitch over; repeat.
Fasten off, secure inside the body.
Beginner guidance: If the spikes curl, use slightly looser chains or gently block them with your fingers.
H) Assembly (How It Comes Together)
What it should look like: A balanced face and symmetrical parts—this is where the personality appears.
Before sewing, pin pieces in place (or use spare yarn to tack them temporarily).
Assembly Instructions (Clear Placement Guide)
Place and Attach the Eyes
- Position the eyes on the front upper half of the body.
- Keep them fairly close together for a cute, expressive look.
- Sew each white eye circle securely with small stitches around the edge.
- If adding pupils (embroidered/felt), do it before final sewing if that’s easier.
Attach the Beak (Center)
- Center the beak between and slightly below the eyes.
- Sew neatly around the base so it sits slightly raised.
Sew the Belly Patch
- Place the white belly patch on the lower front half of the body.
- Sew around the edge using even whip stitches for a clean outline.
Attach Wings Symmetrically
- Place wings on the left and right sides, slightly below eye level.
- Make sure they match height and angle on both sides before sewing.
Attach Feet Evenly
- Place the feet at the lower front underside so the doll can sit.
- Sew firmly; feet take the most handling and help with balance.
Shape and Secure Top Spikes
- If you crocheted spikes directly onto the head, tug gently to even them out.
- Secure the yarn ends inside with a knot, then weave in.
Finishing Tips
- Keep stitches even: consistent tension makes the body smoother and more “store-bought” looking.
- Avoid overstuffing: too much stuffing can show between stitches and distort the round shape.
- Sew symmetrically: measure placement by counting stitches from the center line.
- Hide yarn ends cleanly: weave through several stitches inside the body, then trim.
- Shape the face: lightly squish and sculpt with your hands after assembly to settle stuffing and refine the expression.
Beginner Tips
- Always use a stitch marker—it prevents accidental increases/decreases.
- Count stitches every round, especially on the main body (it fixes most “my shape looks weird” issues).
- Crochet tightly to avoid stuffing gaps.
- Pin parts before sewing so you can adjust placement and get a cuter face.
Customization Ideas
- Make it a keychain: add a small loop on top (embroider a loop or crochet a chain and attach a keyring).
- Create a mini version: use thinner yarn and a smaller hook, or stop increasing earlier.
- Change facial expressions: eyebrows, sleepy lids, or a tiny smirk can totally change the vibe.
- Use plush yarn to make it extra cuddly (just use larger eyes/patches so the face still reads clearly).
- Add blush or accessories: felt cheeks, a tiny scarf, or a mini hat for seasonal versions.
Why You’ll Love This Pattern
This cute black bird amigurumi is fun because the face comes together quickly and looks expressive right away. It’s quick because the body is a single main piece with small add-ons. It’s giftable for birthdays, stocking stuffers, and desk decor. And it’s visually appealing thanks to the bold black-and-white contrast with sunny yellow details.
Conclusion
If you’ve been wanting a black crochet bird amigurumi pattern that’s beginner-friendly but still full of personality, this little bird is a perfect pick. Take your time with placement, enjoy the assembly stage, and don’t be afraid to customize the expression to make it your own.