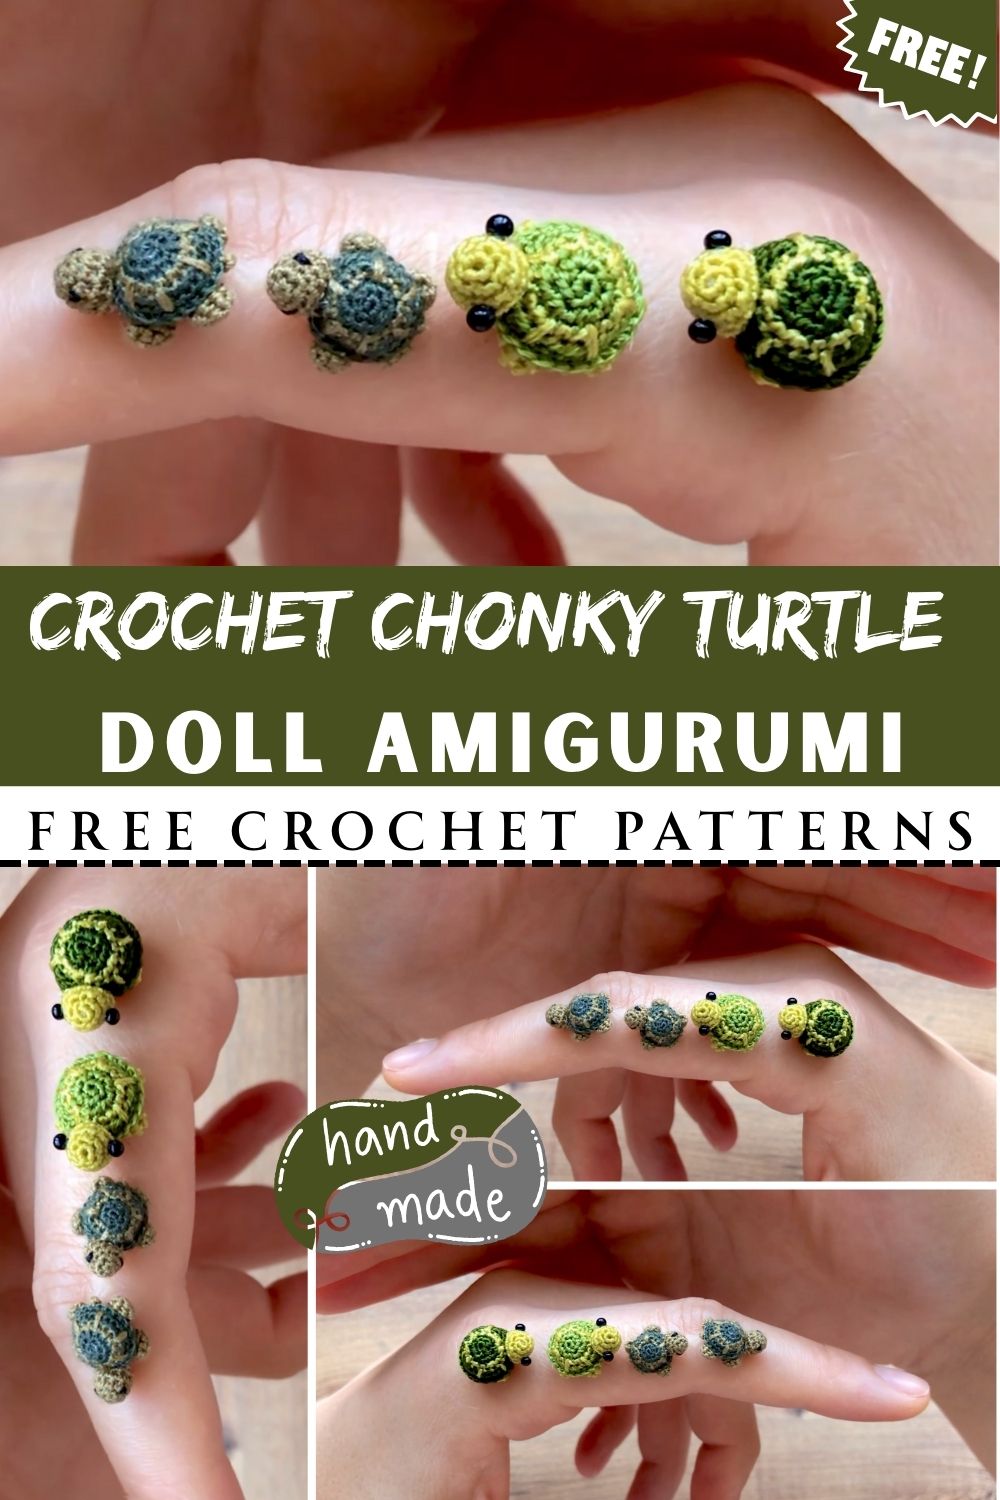
Wondrous Crochet Chonky Turtle Doll Amigurumi Pattern
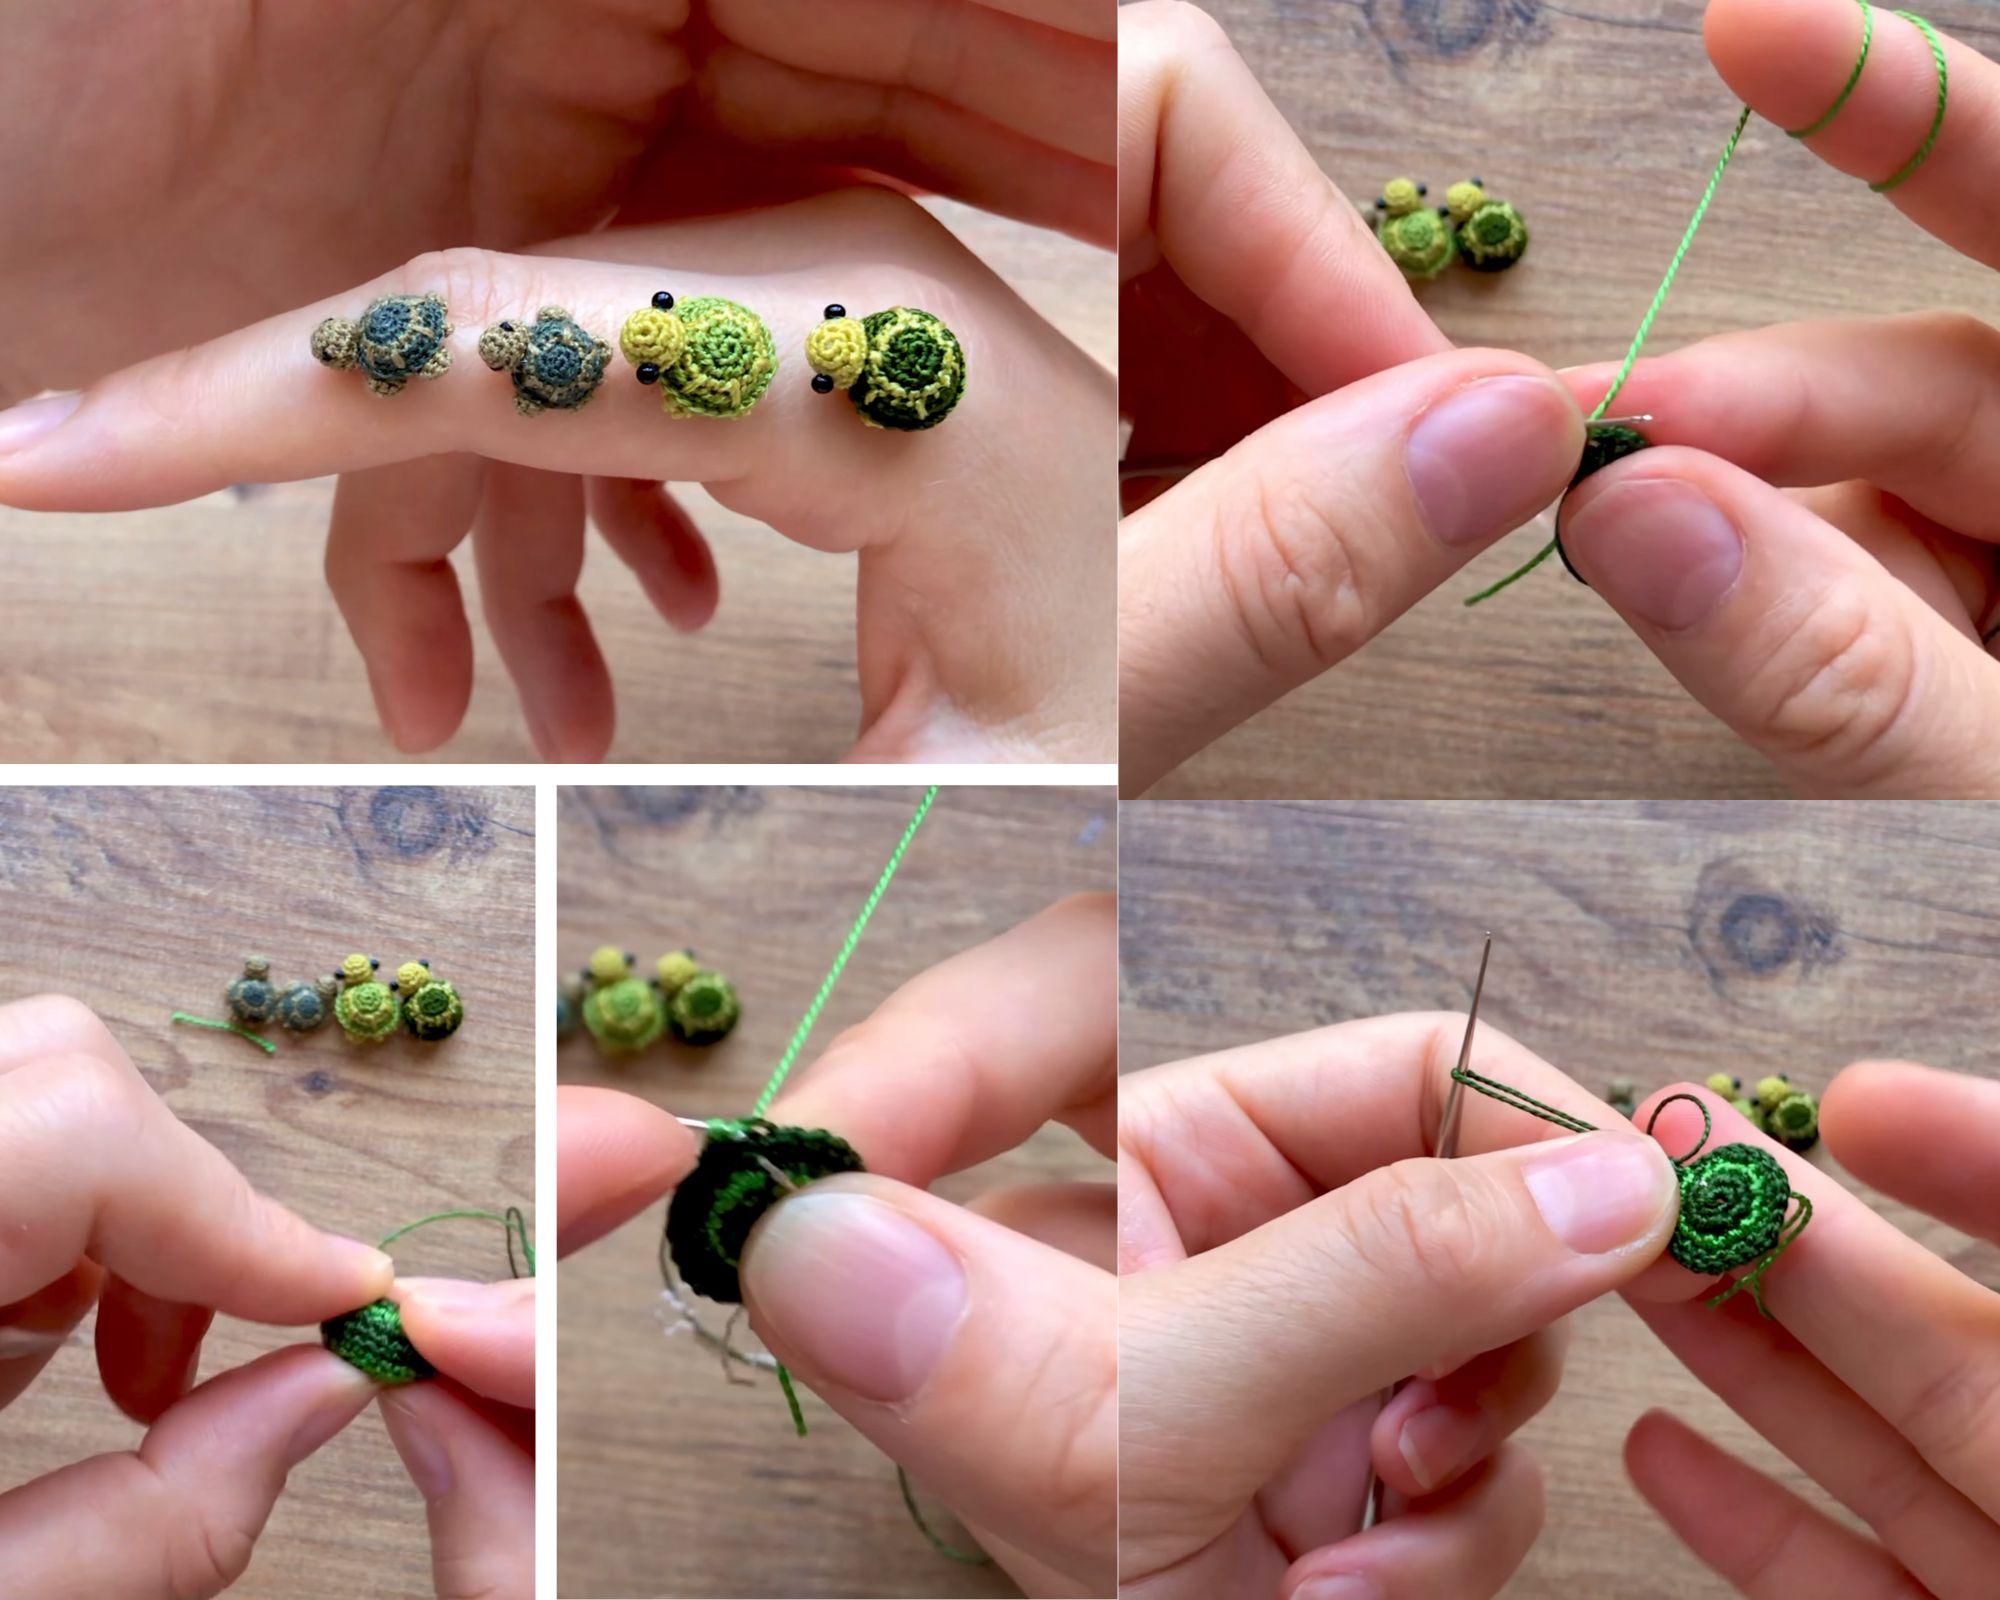
Artistic yarn, a tiny hook, and a turtle that fits in the palm, this little project is pure joy. The Crochet Chonky Turtle Doll Amigurumi is small, round, and irresistibly squishy-looking.
Soft green shades and a spiral-style shell give it that handmade, nature-inspired charm. Anyone who loves a mini turtle crochet pattern or a tiny turtle amigurumi will have a blast making a whole collection.
Mini amigurumi animals are popular for a simple reason: they’re quick, cute, and satisfyingly giftable. A tiny turtle feels extra special because it’s already a small creature in real life, making a miniature version turns it into the perfect pocket buddy. One afternoon of crocheting can produce a sweet little keepsake that looks adorable on a desk, shelf, or craft cart.
This beginner-friendly crochet turtle uses basic stitches and simple shapes that repeat in a calming rhythm. The pattern is built from simple rounds (mostly single crochet), with gentle increases and decreases to create that chunky, rounded look. No complicated colorwork is required, but it still looks detailed thanks to the shell texture.
What makes this chonky turtle design special
This turtle is designed to be very tiny and collectible, with:
- a round, chunky body
- a spiral or swirled shell look
- a small, rounded head
- tiny legs/flippers that keep the silhouette super cute
Using nature-inspired greens (sage, olive, moss) makes it feel soothing and earthy. The size also means it’s great for using up leftover yarn.
How to use your tiny turtle
A small turtle crochet doll like this is perfect as:
- a tiny gift or stocking stuffer
- a keychain-style charm (add a ring!)
- a bag charm or zipper pull
- a desk buddy to sit near a monitor or notebook
- a handmade keepsake tucked into a care package
Materials Needed
- Yarn (worsted weight / #4)
- Shell: 10–15 g (greens like olive, fern, or moss)
- Body/base: 10–15 g (lighter green like sage, mint, or pistachio)
- Optional contrast: a few yards for shell swirl or small accents (cream, tan, or darker green)
- Hook: 3.25 mm or 3.5 mm (use a smaller hook for tighter stitches)
- Stuffing: small handful of polyester fiberfill
- Eyes: 6 mm safety eyes, small black bead eyes, or embroidered eyes
- Yarn needle: for sewing pieces and weaving ends
- Scissors
- Stitch marker: locking marker or scrap yarn
- Optional accessory hardware: keychain ring or lobster clasp + jump ring
Beginner note: Tight stitches matter more than speed. Choose a hook size that gives you a firm fabric, so stuffing won’t show.
Skill Level and Size
- Skill Level: Easy Beginner
- Finished Sizeze: about 2–2.75 in (5–7 cm) long, depending on yarn and hook
- Estimated Total Time: 60–120 minutes (faster after the first one)
Abbreviations
- MR = magic ring
- sc = single crochet
- inc = increase (2 sc in one stitch)
- dec = decrease (invisible decrease recommended)
- sl st = slip stitch
- ch = chain
- FO = fasten off
Time Planning at a Glance
- Shell: 20–35 min
- Head: 10–15 min
- Legs (4): 10–20 min
- Assembly: 15–25 min
- Finishing: 5–10 min
Step-by-Step Pattern Instructions
Before you start: small amigurumi notes
- Work in continuous rounds unless noted.
- Place a marker in the first stitch of each round.
- Stuff gradually—tiny pieces shape best when stuffed in small pinches.
Shell (rounded chunky spiral look)
This shell is designed to feel plump and rounded, with a subtle swirl/spiral vibe. You can make it a single color or vary shades for a “spiral” effect.
Round 1: MR, 6 sc (6)
Round 2: inc in each st (12)
Round 3: (sc, inc) repeat around (18)
Round 4: (2 sc, inc) repeat around (24)
Round 5: (3 sc, inc) repeat around (30)
Round 6: (4 sc, inc) repeat around (36)
Texture option for a spiral feel
For rounds 7–8, work sc in the back loop only (BLO). This creates gentle ridges that read as shell texture without extra complexity.
Round 7: sc around (36)
Round 8: sc around (36)
Round 9: (4 sc, dec) repeat around (30)
Round 10: (3 sc, dec) repeat around (24)
Round 11: (2 sc, dec) repeat around (18)
FO leaving a long tail for sewing. Lightly stuff the shell so it stays domed.
Color idea: Switch from dark green to lighter green at Round 7 to mimic a soft spiral highlight.
Bottom Body/Base (supports the shell)
The base is slightly flatter, so the turtle sits nicely but is still rounded enough to feel chonky.
Round 1: MR, 6 sc (6)
Round 2: inc in each st (12)
Round 3: (sc, inc) repeat around (18)
Round 4: (2 sc, inc) repeat around (24)
Round 5: sc around (24)
Round 6: (2 sc, dec) repeat around (18)
Start stuffing lightly.
Round 7: (sc, dec) repeat around (12)
Add a little more stuffing—aim for a soft, rounded “bean” shape.
Round 8: dec around (6)
FO and close the opening. Weave in the end.
Tip: The base should feel like a tiny cushion that the shell can sit on.
Head (tiny, rounded shape)
Round 1: MR, 6 sc (6)
Round 2: inc in each st (12)
Round 3: (sc, inc) repeat around (18)
Round 4: sc around (18)
Round 5: (sc, dec) repeat around (12)
Stuff firmly but not hard—keep it smooth.
Round 6: dec around (6)
FO leaving a tail for sewing.
Legs (make 4 tiny flippers/feet)
Keep these small and simple,e so they match the miniature style.
For each leg:
Round 1: MR, 5 sc (5)
Round 2: inc in each st (10)
Round 3: sc around (10)
Flatten the piece and sl st across the opening to close (about 5 sl st).
FO leaving a sewing tail.
Alternative super-tiny legs: MR 4 sc, sc around once, then flatten and sl st closed.
Tail (optional)
A tiny tail adds charm and takes seconds to add.
Tail: ch 2, sc in 2nd ch from hook.
FO leaving a small tail for sewing.
Eyes and Face Details (cute and simple)
- Place eyes on the head between Rounds 3–4, about 4–5 stitches apart.
- For a sweet expression, aim slightly wider rather than too close together.
- Optional: embroider a tiny smile with the body color or a darker green—keep it subtle so it doesn’t overwhelm the face.
Safety note: Safety eyes aren’t recommended for children under 3. For baby-safe makes, embroider eyes with black thread/yarn.
Assembly (bringing the turtle together neatly)
1) Attach the head to the base
Pin the head to the front of the base so the turtle looks like it’s peeking out. Sew in place with small stitches. Add a pinch of stuffing right before closing if the head needs a touch more roundness.
2) Add legs
Arrange two legs on each side of the base. Position them slightly forward rather than perfectly centered—this tends to look cuter on mini turtles. Sew each leg securely.
3) Sew on the tail (optional)
Attach the tail at the back center of the base, low and tiny.
4) Attach the shell
Center the shell on top of the base. Use pins or stitch markers to hold it in place. Sew around the edge using a whip stitch or mattress stitch.
As you sew, adjust the stuffing so the shell stays domed and the turtle remains nicely rounded.
5) Final shaping
Gently roll the turtle in your hands to even out the stuffing. If it wobbles, press the base down with your fingers to flatten it.
Keychain option: Before finishing the shell seam, insert a loop of yarn at the top center (or stitch through the shell with a strong thread) and attach a jump ring.
Beginner Tips
Keep stitches neat on tiny rounds.
Use a hook that feels slightly small for your yarn. Tight stitches make the fabric smooth and prevent stuffing from peeking through.
Stuff in small pinches
Mini amigurumi look best when stuffed gradually. Add a tiny bit, shape, add a tiny bit more. Overstuffing can stretch stitches and make the turtle look bumpy.
Even eye placement trick
Insert one eye, count stitches to where the second eye should go, then step back and look at the face from the front before locking both in place.
Balance matters
If the turtle tips forward, move the head slightly higher or flatten the base a bit more. If it tips backward, place the head a touch lower and closer to the base’s front edge.
Common Mistakes to Avoid
- Using too large a hoo: creates gaps and visible stuffing
- Loose tension: the shell won’t look as smooth or “chonky.”
- Uneven stuffing: causes lopsided bumps (especially on the shell dome)
- Limbs placed too low or too far bac: can make the turtle look awkward
- Shell and base not aligned: always pin before sewing to keep it centered
Creative Variations
Nature-inspired colorways
- Sage green turtle: pale body + soft sage shell
- Dark forest turtle: deep green shell + muted olive body
- Pastel baby turtle: mint body + creamy shell swirl
Style upgrades
- Striped or spiral shell: change colors every 1–2 rounds for a gentle swirl look
- Keychain version: add a lobster clasp and keep stuffing slightly firmer
- Gift topper turtle: stitch a small loop on the belly to tie onto ribbon
- Tiny desk pet: skip the keychain hardware and flatten the base more so it sits steady
Extra cute details
A tiny blush stitch (just a speck of pink embroidery) or a single white highlight stitch on each eye can make the face feel extra bright. Keep it minimal for the mini scale.
Finishing Touches
Weave in ends slowly and neatly, as projects show up messier with messy ends. Run yarn tails through the body, pull gently, and trim close so the ends hide inside. Check that eyes are secure (or embroidery is tight), then shape the turtle with your fingertips: round the shell dome, smooth the head, and lightly flatten the base so it sits.
For gifting, tuck the turtle into a small box or an organza bag with a handwritten tag. For display, place it near plants, books, or a cozy craft corner. These little collectibles love to be seen.
Conclusion for ( Crochet Chonky Turtle Doll)
Soft, chonky, and palm-sized, this Crochet Chonky Turtle Doll Amigurumi is the kind of project that turns a handful of yarn into instant happiness. Make one as a tiny treasure, then keep going with different greens, different shell swirls, and suddenly you’ve got a whole crew of miniature turtle friends ready for gifting, clipping onto bags, or keeping you company on your desk.