Free Crochet Silly Dwarf Snow White Amigurumi Pattern
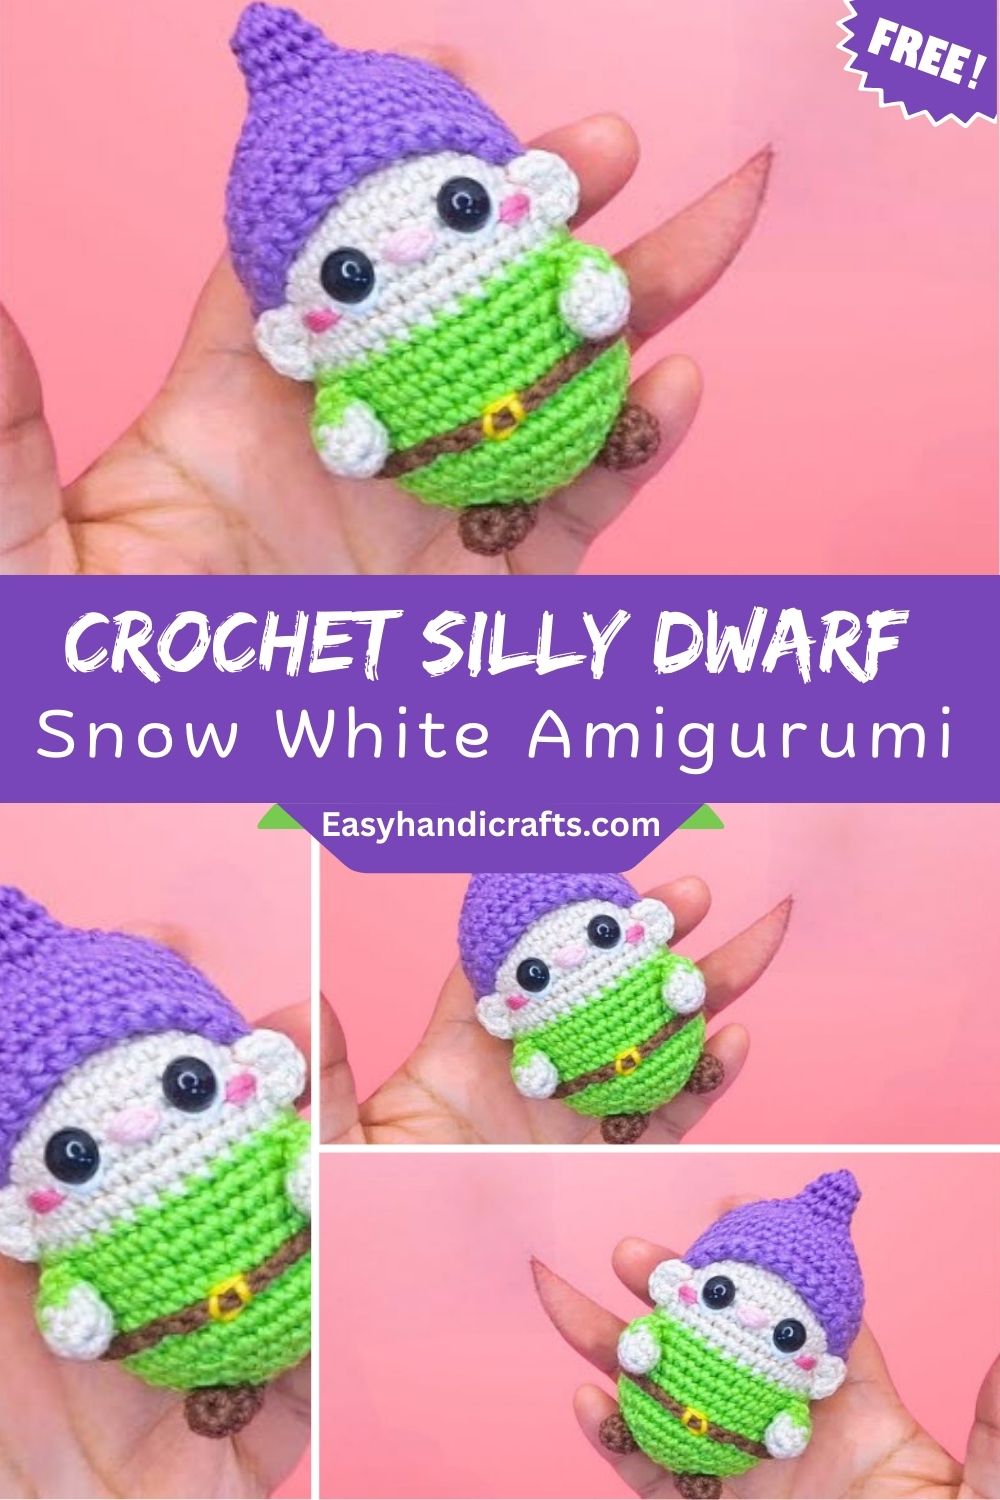
Unlike complicated doll patterns with dozens of tiny pieces, this project keeps things simple. The body, hat, beard, and facial features come together through straightforward single crochet rounds, so you spend less time counting stitches and more time enjoying the process.
Skill Level
This pattern sits comfortably in the beginner to intermediate range. If you already know how to work a magic ring, single crochet, and basic increases or decreases, you will have no trouble finishing this dwarf in a weekend. Complete beginners can also attempt it, though having a little amigurumi experience will make shaping the hat and beard much smoother.
Gathering Your Materials
Every great amigurumi starts with the right supplies on the table, so before your hook touches yarn, let’s talk about what you’ll need for this beginner crochet project.
Yarn
- Worsted weight (medium 4) cotton or acrylic yarn
- Skin tone color for the face and hands
- A bright color such as red, blue, or green for the hat and outfit
- White or cream for the beard
- Black for small facial details (optional, or use embroidery)
Hook
- 3.5mm to 4mm crochet hook (choose based on your yarn thickness; a smaller hook keeps stitches tight so stuffing doesn’t peek through)
Extra Tools
- Stuffing (polyester fiberfill works best)
- Yarn needle for sewing pieces together
- Stitch markers to track your rounds
- Safety eyes (10-12mm) or black embroidery thread for the eyes
- Small amount of pink yarn or blush for cheeks (optional)
Why This Tutorial Stands Out
What makes this particular guide worth following is how approachable it feels from start to finish. There’s no overwhelming jargon, no confusing charts, and no rushed explanations. Every round builds naturally on the last, so even if you’ve never made a character doll before, you can follow along without getting lost. The pattern also strikes a nice balance between simplicity and personality, giving your finished dwarf real character without demanding advanced techniques.
Stitches and Abbreviations Used
Before diving into the instructions, here is a quick reference for the stitches you’ll use throughout this crochet tutorial:
- MR – Magic Ring
- ch – Chain
- sc – Single Crochet
- inc – Increase (2 sc in same stitch)
- dec – Decrease (invisible decrease preferred)
- st(s) – Stitch(es)
- rnd – Round
- BLO – Back Loop Only
- FLO – Front Loop Only
- sl st – Slip Stitch
Step-by-Step Crochet Instructions
Making the Head and Body
- Start with a magic ring, work 6 sc into it (6 sts).
- Rnd 2: Inc in each stitch around (12 sts).
- Rnd 3: (sc, inc) repeat around (18 sts).
- Rnd 4: (2 sc, inc) repeat around (24 sts).
- Rnd 5: (3 sc, inc) repeat around (30 sts).
- Rnd 6-10: sc around without increasing (30 sts) — this builds the roundness of the head.
- Begin decreasing gradually: (3 sc, dec) repeat around, continuing to decrease each round until the opening is small.
- Insert safety eyes before closing, then stuff firmly.
- Close the gap and fasten off, weaving in the tail neatly.
For the body, repeat a similar increase pattern starting from a magic ring, but stop increasing once you reach around 24-28 stitches, then work even rounds until you reach your desired height. Change to your chosen outfit color partway through for a two-toned look.
Crafting the Hat
- Start with a magic ring, 6 sc (6 sts).
- Increase every round for the first 3-4 rounds to create the base flare.
- Once wide enough to fit the head, switch to straight rounds and let the hat naturally curl into a pointed tip by decreasing gradually toward the top.
- Fasten off and leave a tail for attaching.
Adding the Beard
Work small rows of single crochet in white or cream yarn, building up rows so the beard has texture and fullness. A loop stitch or simple fringe technique also works beautifully here if you want extra dimension.
Assembling Your Dwarf
Sew the head onto the body, attach the hat at a slightly tilted angle for a playful look, and stitch the beard just below the face. Add small arms and feet using the same magic ring method scaled down, then secure everything with a yarn needle.
Helpful Beginner Tips
- Always count your stitches at the end of each round before moving forward.
- Use a stitch marker on the first stitch of every round so you never lose your place.
- Stuff a little at a time rather than all at once, this keeps the shape even and prevents lumps.
- Keep tension slightly tighter than usual amigurumi work so stuffing doesn’t show through gaps.
Common Mistakes and How to Fix Them
Mistake: The head looks lopsided.
Solution: Check that increases are spaced evenly around each round, not clustered together.
Mistake: Stuffing pokes through the stitches.
Solution: Switch to a smaller hook size or tighten your tension slightly.
Mistake: The hat doesn’t sit properly on the head.
Solution: Make sure the hat’s opening matches the head’s circumference before sewing it on.
Mistake: Losing track of rounds.
Solution: Place a stitch marker at the start of every round and move it up as you go.
Customization Ideas
One of the best parts of amigurumi is making a pattern your own. Try these fun variations:
- Swap the outfit color to represent a different dwarf personality
- Add a tiny embroidered patch or button on the hat
- Give your dwarf a small pickaxe or lantern accessory made from felt or extra yarn
- Use a fuzzy yarn for the beard to add texture
Size and Color Suggestions
Using worsted weight yarn with a 3.5mm hook typically produces a dwarf around 6-8 inches tall, perfect for shelf display or gifting. For a chunkier, huggable version, switch to bulky yarn and a 5mm hook. As for colors, deep reds, forest greens, and mustard yellows give that classic storybook feel, while pastel shades create a softer, nursery-friendly version.
Frequently Asked Questions
Is this pattern suitable for complete beginners?
Yes, as long as you know basic single crochet and increases, you can follow along comfortably.
How much yarn do I need?
A small amount of each color goes a long way. One skein of worsted weight yarn is usually more than enough for one dwarf.
Can I make this Free Crochet Silly Dwarf bigger?
Absolutely. Simply switch to a thicker yarn and larger hook, and adjust the number of rounds accordingly.
What if I don’t have safety eyes?
Black embroidery thread works perfectly as a substitute and gives a soft, handmade look.
How long does this Free Crochet Silly Dwarf project usually take?
Most crocheters finish within a weekend, spreading the work across a few relaxed sessions.
Conclusion
Bringing this Free Crochet Silly Dwarf to life is more than just following a crochet tutorial; it’s a chance to create something genuinely charming with your own two hands. Whether you’re a beginner exploring amigurumi for the first time or an experienced maker looking for a quick, joyful project, this pattern offers the perfect mix of simplicity and personality. Once you finish stitching that final round, you’ll have a cheerful little companion ready to sit proudly on your shelf or become a treasured handmade gift.