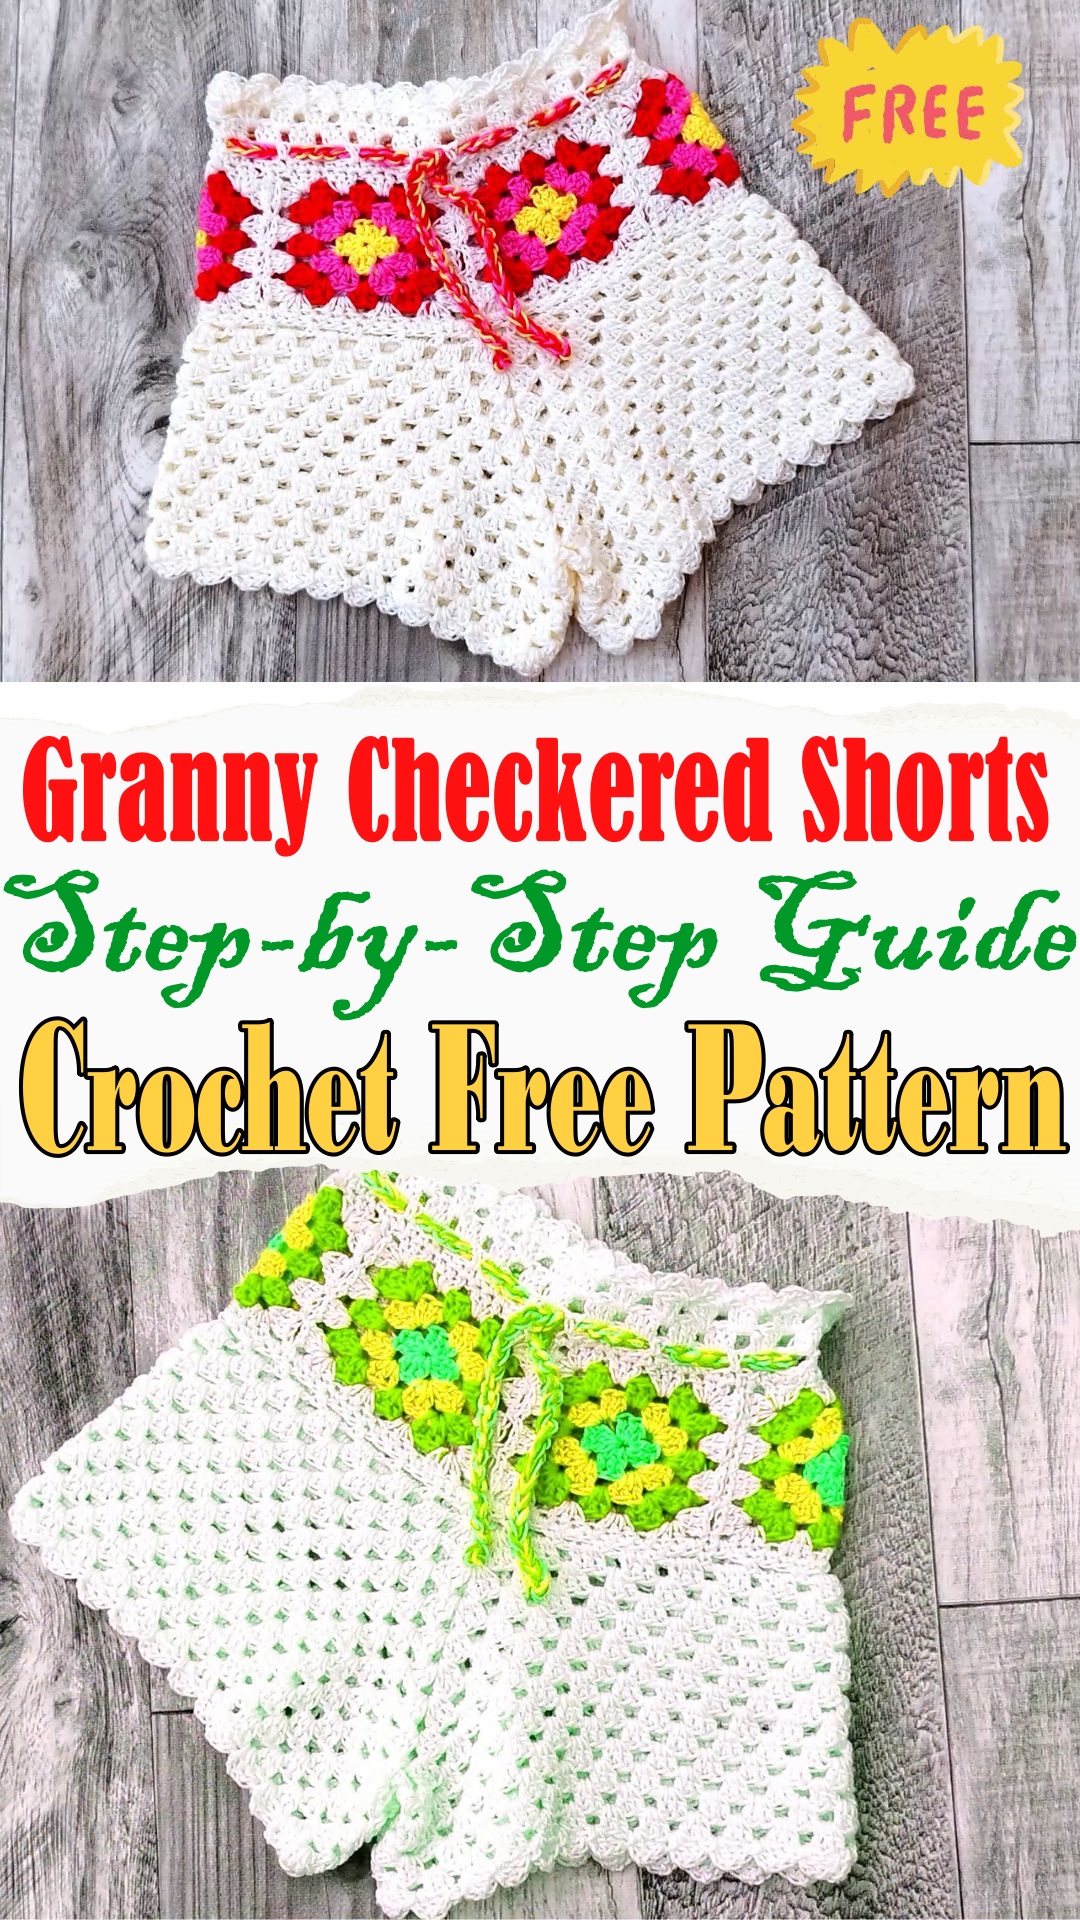
Step-by-Step Guide to Crochet Classic Granny Checkered Shorts
Granny square crochet patterns have long charmed crafters with their simplicity and versatility. These timeless designs are experiencing a resurgence, blending vintage allure with modern fashion trends. Granny-style checkered shorts are the perfect summer project, offering a stylish and playful twist on the Crochet Classic Granny Checkered Shorts. Their unique blend of retro charm and contemporary flair makes them a must-have for any summer wardrobe.
Uses
These versatile granny checkered shorts are perfect for a variety of settings. Whether you’re heading to the beach, lounging at home, enjoying casual summer outings, or dancing at a music festival, these shorts provide comfort and style. Their breathable nature makes them ideal for warm weather, and their customizability means you can create a pair that perfectly suits your personal taste.
Materials Needed
To create your pair of granny checkered shorts, gather the following supplies:
-
Yarn: Choose two contrasting colors for the classic checkered look. Options include black and white, pastel tones, or bold brights.
-
Crochet Hook: Size H/8 (5 mm) is typically recommended, but adjust as needed for your tension.
-
Scissors
-
Tapestry Needle: For weaving in ends and joining squares.
-
Measuring Tape: To ensure accurate sizing.
Step-by-Step Instructions
Step 1: Crochet Individual Granny Squares
Begin by crocheting individual granny squares. Each square forms a part of the checkered pattern, so consider alternating your chosen colors for a striking effect. For beginners, start with a basic granny square pattern, focusing on building uniform squares.
Step 2: Join the Squares to Form the Short Panels
Once your squares are ready, arrange them to form the front and back panels of your shorts. Join the squares using a slip stitch or a single crochet stitch, ensuring the seams are neat and secure.
Step 3: Shape and Assemble the Shorts
With the panels complete, shape and assemble the shorts by joining the sides and the inseam. Focus on aligning the squares for a consistent checkered pattern.
Step 4: Add a Waistband
Create a waistband by crocheting a band that fits comfortably around your waist. You can include a drawstring for added adjustability or keep it simple for a cleaner look.
Step 5: Finishing Touches
Add any finishing touches to your shorts, such as hemming or edging to prevent fraying. If desired, add a lining for additional comfort.
Tips & Customization Ideas
-
Color Changes: Experiment with different color combinations to create a unique look.
-
Adjusting Size: Alter the number of squares or rows to adjust the size and length of the shorts or to create a high-waisted style.
-
Beginner Tips: Keep tension consistent to avoid uneven squares, and take your time when joining squares to ensure a seamless finish.
Conclusion
Creating your own pair of crochet granny checkered shorts is a delightful summer project. Handmade crochet clothing adds a personal touch to any wardrobe, allowing you to showcase your style and creativity. So grab your crochet hook and yarn, and embrace the joy of crafting your own summer fashion staple.