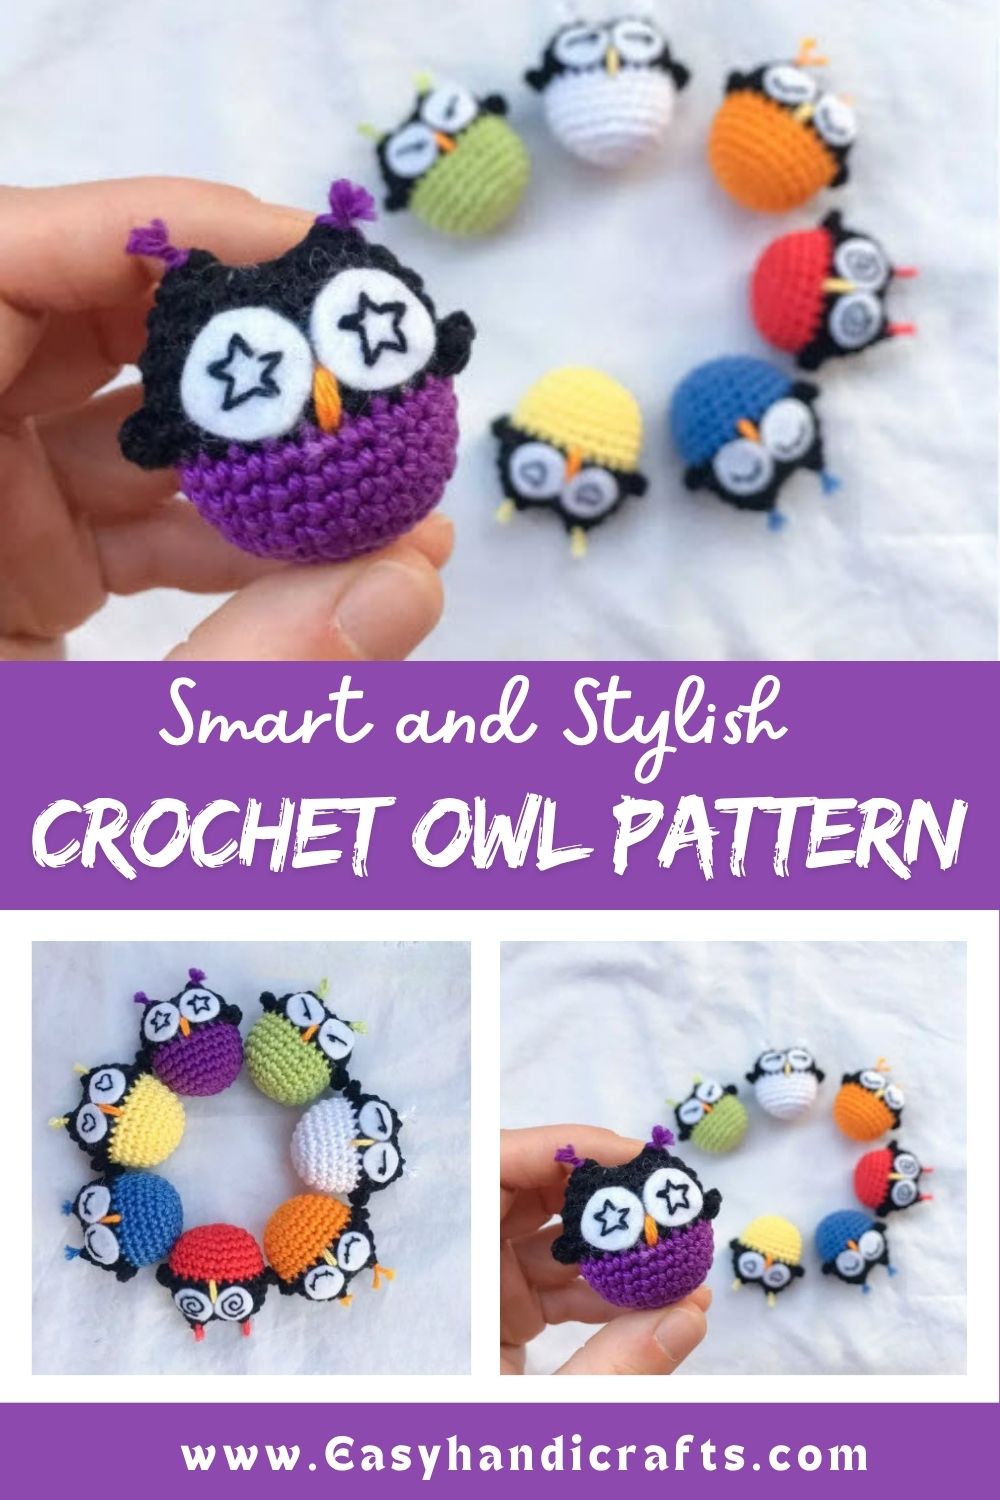
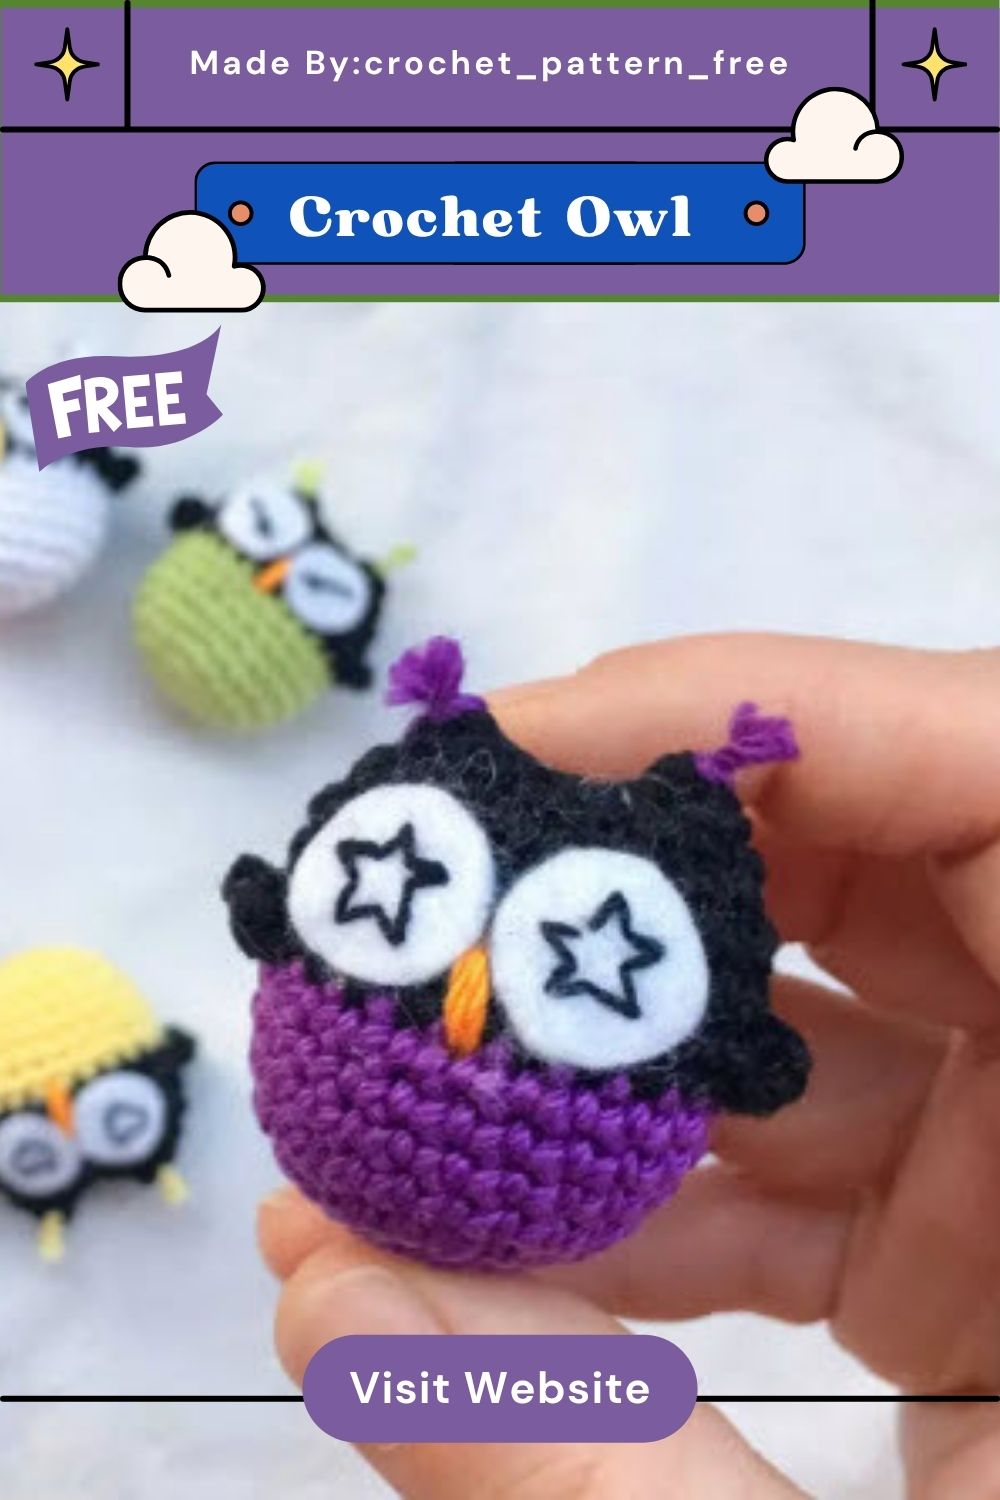
Free Crochet Owl Amigurumi Pattern with Colorful Plumage
What You’ll Need
- Crochet hook 2.5/3 mm
- Cotton yarn in two colors
- Yarn needle
- Stuffing
- White felt
Abbreviations (US Terms)
- ch = chain
- st = stitch
- sl st = slip stitch
- sc = single crochet
- dc = double crochet
- hdc = half double crochet
- FLO = front loop only
- BLO = back loop only
Pattern Overview
- Worked entirely in continuous rounds using amigurumi basics: single crochet, increases, and decreases
- Body shaped from a magic loop, growing outward in the first four rounds before working straight
- Wings created through a front-loop-only technique combined with half double crochet clusters
- Back-loop stitching used to define the wing edges and separate them from the body
- Body decreased and closed off after stuffing, then finished with felt facial details
- Two contrasting cotton yarn colors used to highlight the plumage effect
Special Techniques
- Front Loop Only (FLO): Worked at the wing points to create a raised, feathered look
- Back Loop Only (BLO): Worked on the following round to define the wing shape from underneath
- Color changing mid-round: Switching from the base color to black without breaking the stitch flow
- Same-stitch clusters: Working single crochet, half double crochet, half double crochet, and single crochet all into one stitch to shape the wing tips
Skill Level
Rated as beginner-friendly, this owl amigurumi asks only for basic single crochet, increases, and decreases, plus a front-loop and back-loop technique that newer crocheters pick up within a round.
Pattern Instructions
- sc6 in magic loop [6]
- inc x6 [12]
- (sc, inc) x6 [18]
- (sc2, inc) x6 [24] 5–8. [24] Change color, use black
- sc6, sc-hdc-hdc-sc in the same st FLO, sc10, sc-hdc-hdc-sc in the same st FLO, sc6 (this forms the wings)
- [24] Work the 7th and 17th stitches of round 9 in BLO 11–13. [24]
- (sc2, dec) x6 [18]
- (sc, dec) x6 [12]
Common Mistakes
- Forgetting to switch to front-loop-only stitching before starting the wing cluster in round 9
- Mixing up which stitches belong to the wing cluster versus the standard single crochet stitches
- Losing track of the 7th and 17th stitch placement when working the back-loop round
- Overstuffing the body before closing, which distorts the rounded owl shape
- Rushing the color change and leaving a loose or visible join at the switch point
- Skipping stitch markers during the increase rounds, leading to a lopsided body shape
- Sewing the felt eyes on before checking their placement against the black section
- Pulling embroidery stitches too tight, causing the felt circles to pucker or curl
Uses and Benefits
Amigurumi owls like this one serve far more purposes than simple decoration. Finished pieces make charming nursery accents, thoughtful handmade gifts, or cozy additions to a bookshelf display. Because the pattern works up quickly, it also doubles as an excellent stash-buster project for leftover cotton yarn in two contrasting colors. Crafters selling handmade goods often find owls appeal to buyers drawn to woodland or nature themes, making this pattern a practical addition to any maker’s shop lineup, season after season.
Helpful Beginner Tips
- Use a hook one size smaller than recommended for the yarn weight to keep stitches tight and hide stuffing
- Count stitches at the end of every round before moving forward, especially through the increase rounds
- Mark the beginning of each round with a stitch marker to avoid losing track of the spiral
- Keep two yarn tails on hand for embroidering the beak and side tufts later
- Practice the front-loop-only cluster on a scrap swatch before attempting round 9 on the actual piece
- Work in good lighting when switching between front-loop and back-loop stitches, since the difference can be subtle
- Weigh out yarn for both colors beforehand to avoid running short mid-project
Pattern Instructions
This owl amigurumi is worked as a single continuous piece, starting from the base and building upward through the body, wings, and top closing. There is no separate head piece; the body and head form together as one shape, with the felt eyes and embroidered beak added afterward during assembly.
Starting the Base (Rounds 1–4)
- sc6 in magic loop [6]
- inc x6 [12]
- (sc, inc) x6 [18]
- (sc2, inc) x6 [24]
Building the Body (Rounds 5–8)
5–8. [24]
Forming the Wings (Rounds 9–10)
Change color, use black
- sc6, sc-hdc-hdc-sc in the same st FLO, sc10, sc-hdc-hdc-sc in the same st FLO, sc6 (this forms the wings)
- [24] work the 7th and 17th stitch of round 9 in BLO
Continuing the Body Toward the Head (Rounds 11–13)
11–13. [24]
Closing the Top (Rounds 14–15)
- (sc2, dec) x6 [18]
- (sc, dec) x6 [12]
Assembly
- Stuff the body firmly but evenly, paying close attention to the rounded base for stability
- Cut the working yarn, leaving a long tail for sewing the two flattened sides closed
- Sew the top opening shut using a mattress stitch for a seamless finish
- Cut two small circles from white felt for the eyes
- Embroider the pupils directly onto the felt circles before attaching them
- Glue the finished felt eyes onto the black portion of the head
- Embroider a small triangular beak beneath the eyes using contrasting yarn
- Add two small yarn tufts to the sides of the head using two strands of cotton yarn
- Trim any loose ends close to the body once all pieces are secured
- Fluff the tufts gently with a pin to give them a soft, feathered look
Why Beginners Will Enjoy This Pattern
- Requires only stitches already familiar from most starter amigurumi patterns
- Introduces front-loop and back-loop techniques in a low-pressure, forgiving project
- Small overall size means less yarn commitment and a faster finish
- Clear round-by-round structure removes guesswork from shaping the wings
- Felt detailing offers a simple, low-skill way to add personality to the face
- Finishes quickly enough to keep motivation high from start to end
- Builds confidence with color changes before tackling more complex multi-color amigurumi
Where Can You Use This?
- Nursery shelves and gender-neutral baby room decor
- Handmade gift bundles paired with baby blankets or books
- Craft fair and online shop inventory for woodland-themed sellers
- Classroom reading corners as a soft, huggable prop
- Autumn and Halloween seasonal displays alongside other forest creatures
- Keychain or bag charm variations when worked at a smaller scale
- Baby shower centerpiece decor paired with matching crochet accessories
Tips and Tricks for Success
- Choose two yarn colors with strong contrast so the wing detail stands out clearly
- Block the finished piece lightly if the stitches appear uneven after stuffing
- Store extra stuffing near the workspace to top off firmness before the final seam
- Photograph the piece in natural light if planning to list it for sale
- Keep a spare stitch marker nearby since amigurumi rounds are easy to lose track of
- Test a small swatch of the wing cluster stitch combination before committing to the full round
- Compare the two finished wings side by side to catch any sizing mismatch early
Why This Crochet Pattern Is Trending
Free Crochet Owl Amigurumi continues gaining traction across crochet communities, and this particular design explains why. The colorful plumage effect achieved through front-loop and back-loop stitching gives the wings a raised, feather-like texture that photographs beautifully for social media, while the compact size keeps the project approachable for makers short on time.
- Woodland and nature-themed nursery decor remains a popular home styling choice
- Quick-finish amigurumi patterns fit well into busy crafting schedules
- Textured wing detailing offers a fresh visual twist on a classic animal design
Conclusion
This Free Crochet Owl Amigurumi pattern blends simple technique with striking visual detail, making it a rewarding project for makers at nearly any skill level. The colorful plumage effect, achieved through nothing more than a thoughtful color change and basic stitch combinations, proves that beginner-friendly patterns can still produce genuinely eye-catching results. Whether stitched as a gift, a shop item, or a shelf decoration, this little owl brings warmth and character to any space it lands in.