Handcrafted Crochet Red Panda Plushies That Bring Joy
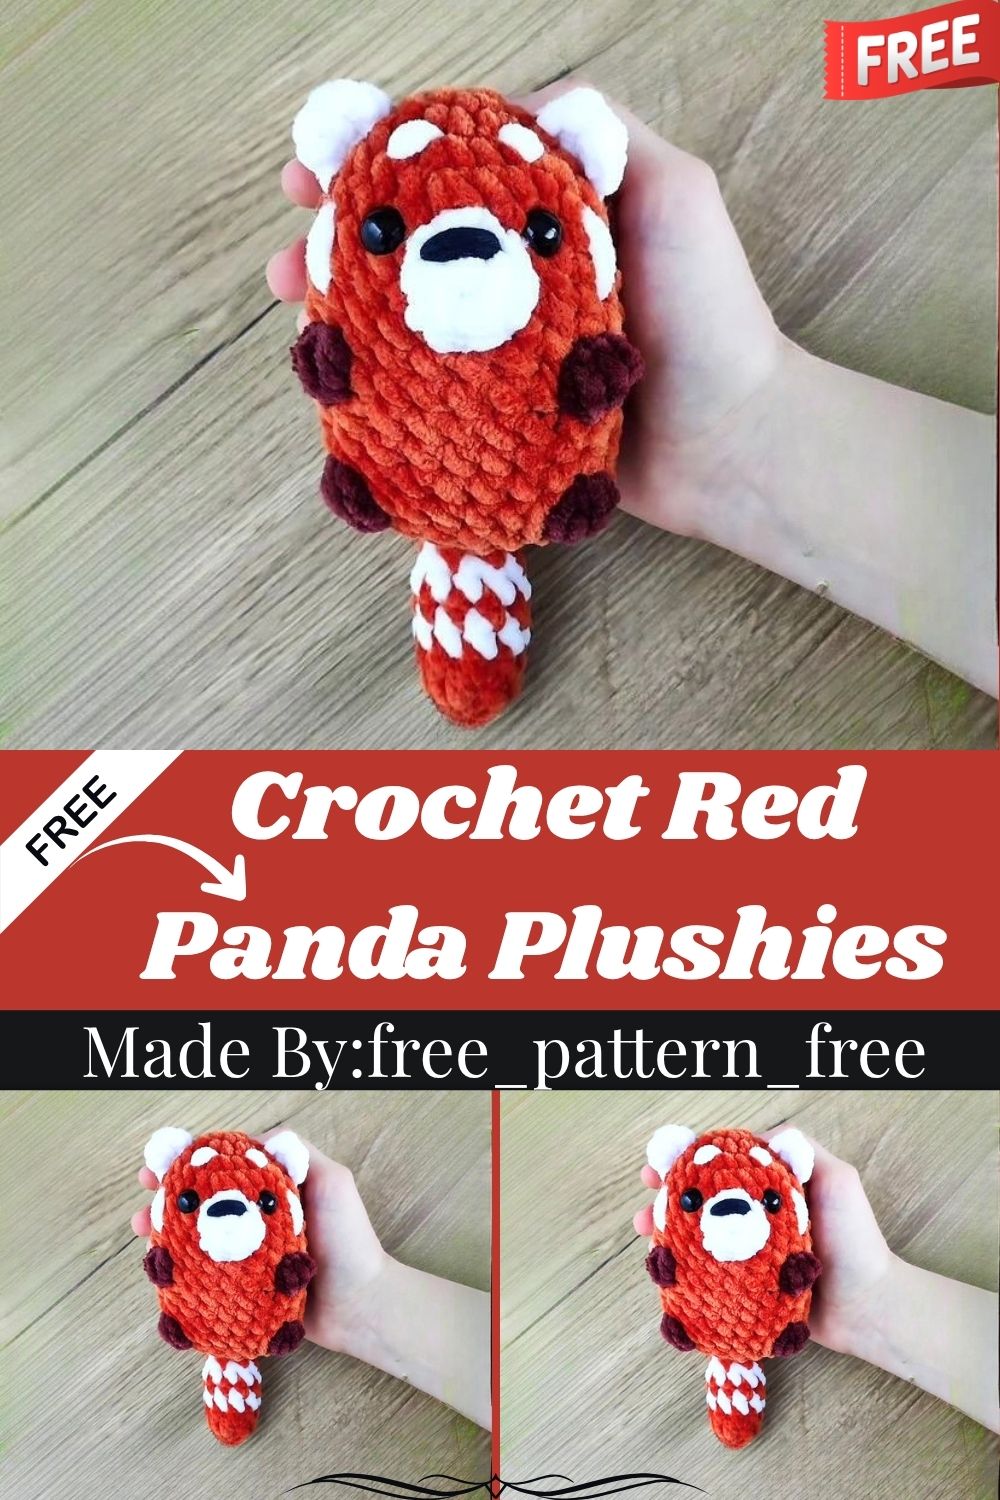
Chenille yarn gives this red panda plushie a velvety texture that feels irresistible to touch. Low-key, the color-changing tail alone makes this project worth trying at least once. Grab orange, brown, and white yarn, then let’s bring this fluffy critter to life.
Red panda plushies stand out from typical amigurumi animals thanks to bold color blocking and a striking striped tail. Honestly, super bulky chenille yarn speeds up every round while adding a soft, plush finish that thin cotton yarn simply can’t match. Bobble stitches shape the front legs directly into the body, skipping separate limb pieces entirely. Safety eyes, a rounded white muzzle, and small hdc ears complete a face that looks surprisingly expressive for such a simple stitch count.
Skill Level
This pattern suits beginners comfortable with single crochet, increases, decreases, and basic color changes. Ngl, the bobble stitch technique takes a round or two to feel natural, though it stays approachable overall.
Pattern Overview
- Continuous-round amigurumi worked in US crochet terminology
- Chenille yarn body with bobble-stitch front legs built directly into the shape
- Color-changing striped tail alternating orange and white sections
- Small white muzzle and simple hdc ears for facial detail
- Safety eyes placed early in the body for accurate spacing
- Minimal piece count keeps assembly quick compared to multi-limb patterns
Abbreviations
- R – round
- MR – magic ring
- st(s) – stitch(es)
- ch – chain
- sl st – slip stitch
- sc – single crochet
- hdc – half double crochet
- inc – increase
- dec – decrease
- cc – color change
- BO – bobble stitch
- (x) – total stitch count for the round
- FO – fasten off
Materials Needed
- Super bulky #6 chenille yarn in orange, brown, and white
- Black acrylic yarn for facial embroidery
- Crochet hook, 5mm
- Sewing needle
- Safety eyes, 10mm
- Scissors
- Stitch marker
- Toy stuffing (fiberfill)
Special Techniques
- Bobble stitch legs: working a bobble stitch directly into the body rounds shapes front legs without extra sewn-on pieces.
- Continuous color changes: switching yarn colors mid-round on the tail creates clean stripes without visible jog lines.
- Early eye placement: setting safety eyes on rounds 5–6 keeps spacing accurate before the body narrows further.
- Chain-based ears: working ears from a simple chain, rather than a magic ring, saves time on small detail pieces.
Full Pattern Instructions
Body (start with orange yarn)
- R1: 6sc in MR (6)
- R2: inc x6 (12)
- R3: (sc, inc) x6 (18)
- R4: (2sc, inc) x6 (24)
- R5–R8: 24sc around, 4 rounds
Bobble stitch (BO): yarn over, insert hook into the next stitch, pull up a loop, yarn over, pull through 2 loops. Repeat this four times total, then yarn over and pull through all 5 loops.
- R9: 8sc, BO (brown), 6sc, BO (brown), 8sc (24)
Attach safety eyes between rounds 5–6, spaced 4 stitches apart.
- R10–R13: 24sc around, 4 rounds
Crochet the second set of legs next, aligning them with the first bobble stitches. Tension may shift placement by a stitch or two, which stays within normal range.
- R14: 9sc, BO (brown), 6sc, BO (brown), 7sc (24)
- R15: (2sc, dec) x6 (18)
Stuff the body tightly at this stage.
- R16: (sc, dec) x6 (12)
- R17: dec x6 (6)
Finish stuffing, then fasten off and close the hole.
Muzzle (white yarn)
- R1: 6sc in MR (6)
- R2: (sc, inc) x3 (9)
Cut the yarn, leaving a long tail for sewing.
Ears (make 2, white yarn)
Chain 2, then in the second chain from the hook work: sc, 2 hdc, sc. Cut the yarn, leaving a long tail for sewing.
Tail (start with orange yarn, stuff as you go)
- R1: 6sc in MR (6)
- R2: (sc, inc) x3 (9)
- R3: 9sc around (9)
- R4: color change to white, 9sc around (9)
- R5: color change to orange, 9sc around (9)
- R6: color change to white, 9sc around (9)
- R7: color change to orange, (sc, dec) x3 (6)
- R8: color change to white, 6sc around (6)
- R9: color change to orange, 6sc around (6)
Finish stuffing, then cut the yarn, leaving a long tail for sewing.
Assembly
- Sew the white muzzle onto the front of the head, centered below the eyes
- Attach both ears above the eyes, spaced evenly across the head
- Embroider small facial details using black acrylic yarn for the nose and mouth
- Sew the striped tail onto the lower back of the body
- Check that both bobble-stitch leg pairs sit symmetrically before final sewing
Common Mistakes
- Misaligning the second set of bobble-stitch legs with the first pair
- Placing safety eyes too late, after the body narrows past round 6
- Rushing color changes on the tail, leaving visible gaps between shades
- Understuffing the body before closing round 17, leaving a soft dent
- Sewing ears unevenly, throwing off the panda’s overall expression
Uses & Benefits
Chenille red panda plushies work well beyond typical amigurumi display shelves. Real talk, the velvety texture makes this plush especially appealing for tactile-sensitive gift recipients. Sellers on handmade marketplaces find bold color blocking photographs strongly against neutral backgrounds. Parents appreciate a soft, chemical-free toy alternative once safety eyes are secured properly. The finished piece also works well as a themed nursery accent, a nature-lover’s gift, or a standout addition to a handmade animal collection.
Helpful Beginner Tips
- Practice the bobble stitch separately before working it into the body rounds
- Use a stitch marker consistently to track round starts across color changes
- Keep chenille yarn tension slightly looser than cotton yarn for smoother stitches
- Test eye and ear placement with pins before sewing anything permanently
- Weigh both ears and both leg bobbles to confirm even sizing
Where Can You Use This Pattern?
- Nature-themed nursery decor paired with woodland accents
- Handmade shop listings, since chenille texture stands out in photos
- Birthday gifts for red panda or wildlife enthusiasts of any age
- Classroom or library displays tied to animal or conservation themes
- Photography props for outdoor or nature-inspired photo sessions
Why Beginners Will Enjoy This Pattern
Low-key, chenille yarn’s thickness means fewer rounds overall compared to thinner amigurumi patterns. Each section, body, muzzle, ears, and tail, stays short enough to finish in one sitting without losing motivation. The bobble stitch introduces a new skill in a low-pressure way, since only a few stitches use it. A compact piece count also keeps the final assembly simple for first-time crafters.
Tips and Tricks for Success
- Keep a consistent tension throughout color changes to avoid visible stripe gaps
- Use a scrap of contrasting yarn to mark bobble stitch placement in advance
- Sew the muzzle before the ears to center facial features correctly first
- Stuff the tail gradually while crocheting for even shape from top to bottom
- Photograph each finished piece to compare proportions before final assembly
Why This Crochet Pattern Is Trending
Red panda plushies keep gaining popularity as crafters look for animal patterns beyond typical bears and bunnies. For real, chenille yarn’s rising popularity across social media adds extra appeal to any pattern using it.
- Bold, distinctive coloring makes this plush stand out in a crowded amigurumi market
- Chenille yarn’s soft texture photographs beautifully for shop listings and social posts
- Wildlife-themed plushies appeal to a growing niche of nature and animal lovers
Conclusion
Crafting this chenille red panda plushie combines bold color work with a genuinely soft, huggable finish. No joke, the compact piece count and simple bobble stitch detail make it approachable for beginners chasing a standout project. Whether gifted, sold, or displayed at home, this red panda brings a playful, distinctive charm to any collection.