Crochet Heart Pillow Pattern For Cozy Corners
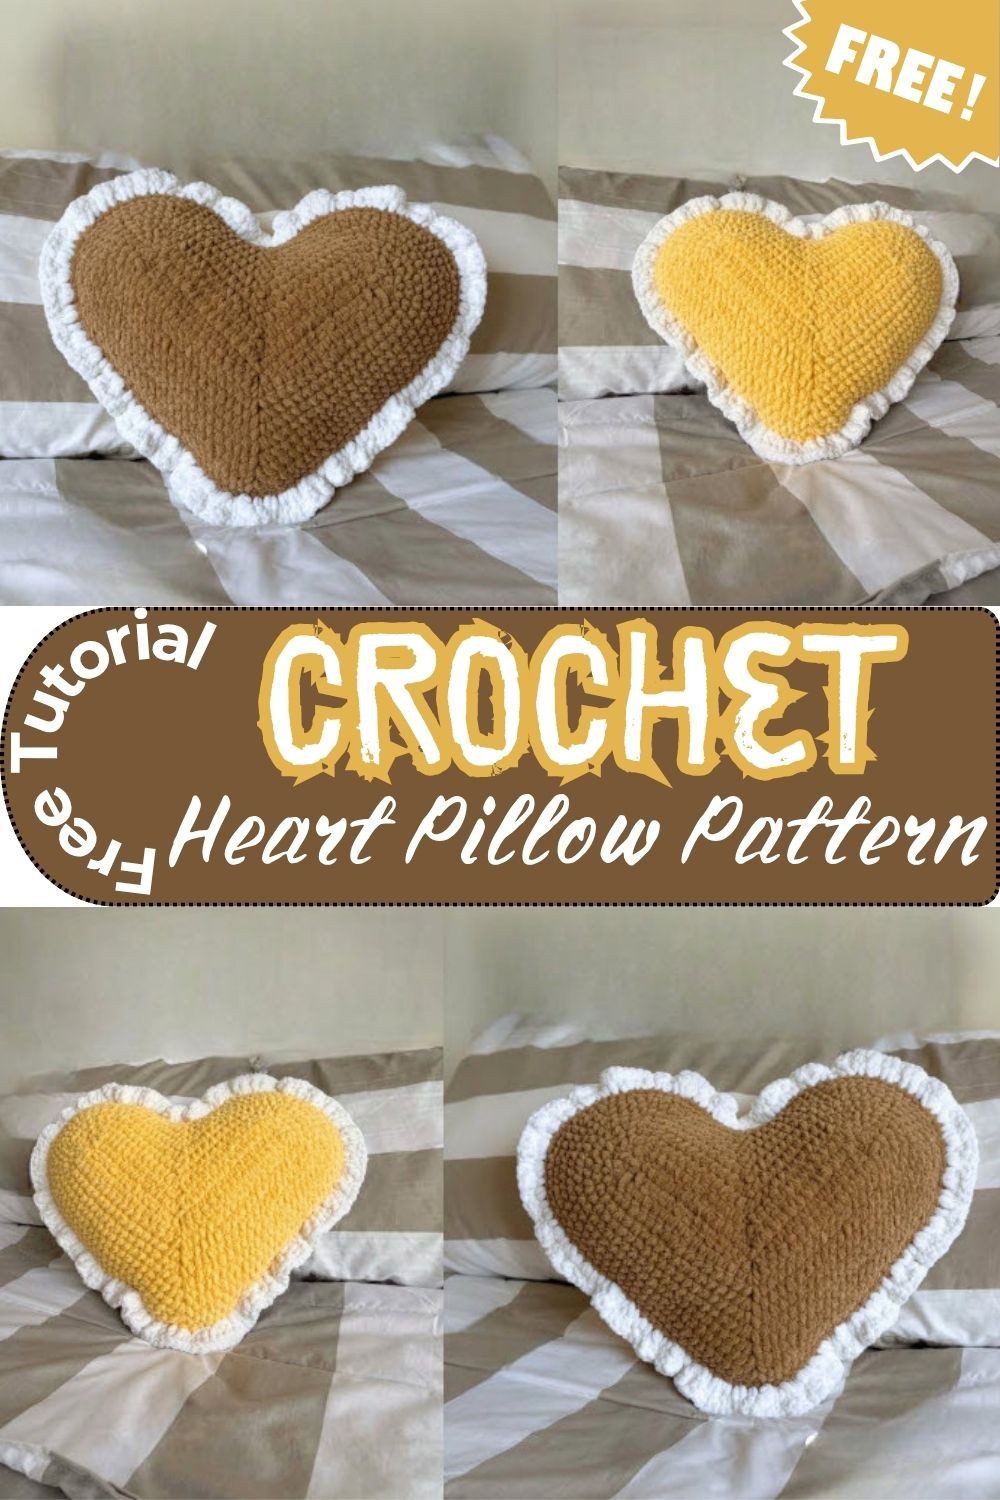
This crochet heart pillow pattern is a charming, cozy project that works as home decor and as a handmade gift. It has a classic heart shape with gently rounded edges and a puffed, plush feel that is soft and comfortable to hold. A subtle stitch pattern adds depth and softness, and it turns a simple heart into something special.
The design is meant to feel like a warm hug, so it gives comfort as well as decoration. You can place it in the living room, on a bed in the bedroom, or on a sofa as a decorative cushion. It also makes a lovely gift for Valentine’s Day or a birthday, or just because. A smaller one can even travel with you as a companion.
Ever wondered how a heart ends up this plump and soft? This pattern walks you through two matching panels and a ruffled white border, so you can finish a cozy cushion that feels like a hug.
Size, Yarn and Construction of Your Heart Pillow
You can make this pillow in different sizes to match your needs. A bigger one suits a couch, a medium one fits a bed, and a small one is easy to pack for travel. The pillow is worked mainly in the round, which keeps the shape smooth and helps the heart hold its form. The pattern is easy to follow, so you can move along without stress. For yarn, pick one that is soft and has a little body, neither too stiff nor too floppy. The right yarn makes your stitches stand out and helps the pillow keep its shape. A textured yarn adds a nice feel when you touch it.
Make Your Crochet Heart Pillow One of a Kind
The best part of this pattern is how easy it is to change. Try different colours to match your room or the person you are gifting it to. Switch the yarn type or play with different textures to see what you like best. With a little creativity, you can turn this simple heart into a one-of-a-kind pillow that feels warm, cozy and truly yours.
Crochet Heart Pillow Pattern Overview and Materials
- Project: Plush 3D Heart Cushion (Cojín Corazón)
- Skill Level: Beginner-Friendly
- Terminology: US Terminology
- Finished Dimensions (Large Size): Approx. 14 in W × 13 in H (35 cm × 33 cm)
Materials and Tools for Your Heart Pillow
- Super bulky chenille yarn (5 mm thickness)
- Colour A for the first panel: 1 skein, approx. 100g to 120g
- Colour B for the second panel: 1 skein, approx. 100g to 120g
- Colour C for the border: contrasting white/cream chenille, approx. 50g
- 6.0 mm crochet hook
- Synthetic fiberfill, approx. 300g
- 4 to 6 stitch markers
- Tapestry needle
- Hot glue gun (optional, for securing yarn tails inside)
Because chenille hides its stitches, markers save you from guessing where a round starts.
Heart Pillow Abbreviations Used in This Pattern
ch / chs: chain/chains
st / sts: stitch/stitches
sl st: slip stitch
sc: single crochet (US)
dc: double crochet (US)
inc: increase (2 sc in the same st)
triple inc: triple increase (3 sc in the same st/space)
dec: decrease (sc 2 sts together using front loops only)
FLO: front loop only
Pattern Notes Before You Start Your Heart Pillow
- This pattern uses US terminology.
- For a clean, even edge, work into the back vertical bar of the foundation chain.
- Both panels use the same pattern.
- Round 3 starts with turning the work.
- Finally, stitch markers mark the round start, the bottom centre, and the centre decrease.
Crochet Heart Pillow Pattern: First Heart Panel
Foundation Chain and Base for the Heart Panel
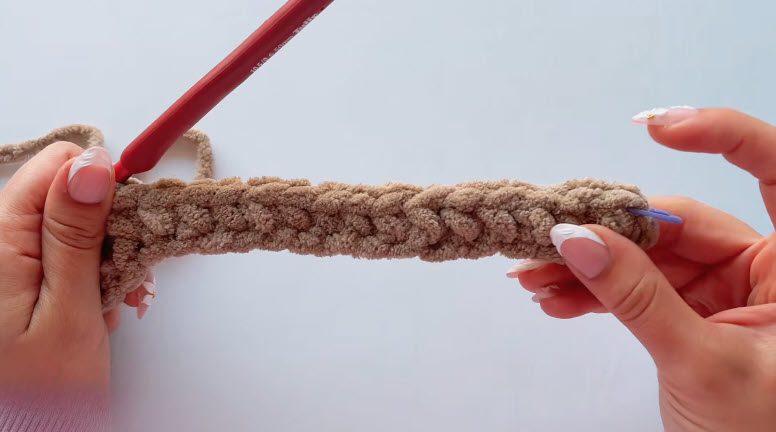
To begin, make a slip knot and chain 31. Remember to work into the back vertical bar of the chain for a clean, even edge.
Next, skip the 1st ch from the hook. After that, work 1 sc into the back bar of each of the next 15 chs (Chs 2–16), and place a stitch marker in the 1st sc.
Then, ch 1 for the bottom centre point and skip the next chain (Ch 17). Place a stitch marker in this ch-1 space.
From there, crochet 1 sc in each of the next 13 chs (Chs 18–30). In the last chain (Ch 31), make a triple inc (3 sc in the same space) and place a marker in the middle sc of this triple inc.
Now turn to the opposite side of the foundation chain and make 13 sc. Skip 1 st, then work 1 dec (FLO) across the next 2 sts and place a marker in this centre decrease.
Afterwards, make 13 sc up to the final chain space. In that space, work 1 inc (2 sc in the same space). Finally, sl st into the first marked st to close Round 1.
Round 2 of the Heart Pillow Panel in Colour A
Use Colour A and work continuous joined rounds. First, complete Round 1 as described in the foundation chain section above.
Round 2: Sl st to join and ch 1. Then make a triple inc (3 sc) in the same space and place a marker in the 1st st of the round. Next, crochet 15 sc down to the bottom centre ch-1 marker.
After that, remove the marker and work (1 sc, 1 ch, 1 sc) into the centre ch-1 space, then replace the marker in the new ch-1 space. Continue with 15 sc. At the upper lobe curve, make a triple inc, 1 sc, and another triple inc.
Next, make 12 sc up to the center decrease, skip 1 st, work 1 dec (FLO) and place the centre marker. Then crochet 12 sc, a triple inc, 1 sc and a triple inc. Finally, sl st to close Round 2.
Round 3 of the Heart Pillow Panel
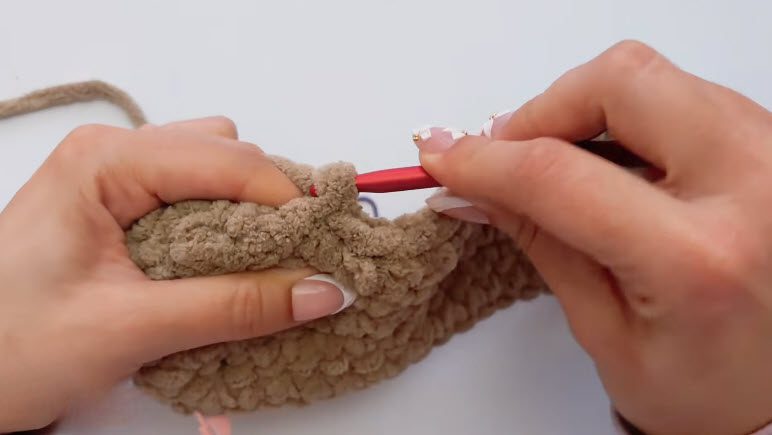
Round 3: Sl st to join, ch 1 and turn your work. Then work 1 sc in the base of the sl st (place a marker) and 1 sc in the same space as your 1st inc. Add 1 inc in the next st for 2 increases in total.
Next, crochet 13 sc, skip 1 st, work 1 dec (FLO) and place the centre marker. After that, make 13 sc, followed by 3 increases over the next 3 sts (2 sc in each st).
Then, make 17 sc to the bottom centre marker and work (1 sc, 1 ch, 1 sc) in the centre ch-1 space. Replace the marker in the ch-1 space. Finally, crochet 17 sc, make 3 increases over the next 3 sts and sl st to close Round 3.
Round 4 for the Heart Pillow Lobes
Round 4: Sl st to join and ch 1. For the right lobe, work (1 sc, inc) 3 times across the curve. Then make 12 sc down to the centre decrease, skip 1 st, work 1 dec (FLO) and place the center marker.
Next, crochet 12 sc up the left side. For the left lobe, work (inc, 1 sc) 3 times across the curve. After that, make 17 sc to the bottom centre marker and work (1 sc, 1 ch, 1 sc) in the centre ch-1 space, replacing the marker.
Finally, make 17 sc up the opposite side and work 1 inc in the final stitch to complete the lobe sequence. Sl st to close Round 4.
Round 5 for a Rounder Heart Cushion
Round 5: Sl st to join and ch 1. For the right lobe, work 1 inc, then (2 sc, inc) 2 times across the curve. Next, crochet 13 sc down to the centre decrease, skip 1 st, work 1 dec (FLO) and place the centre marker.
Then, make 13 sc up the left side. For the left lobe, work (1 inc, 2 sc) 3 times across the curve. After that, make 18 sc to the bottom centre marker and work (1 sc, 1 ch, 1 sc) in the center ch-1 space, replacing the marker.
Finally, crochet 18 sc up the opposite side and work 2 sc in the final sts to complete the sequence. Sl st to close Round 5.
Round 6 and the Growing Heart Shape
Round 6: Sl st to join and ch 1. For the right lobe, work (3 sc, inc) 2 times across the curve. Next, make 14 sc down to the center decrease, skip 1 st, work 1 dec (FLO) and place the centre marker.
Then, crochet 14 sc up the left side. For the left lobe, work (3 sc, inc) 3 times across the curve. After that, make 19 sc to the bottom centre marker and work (1 sc, 1 ch, 1 sc) in the centre ch-1 space, replacing the marker.
Finally, make 19 sc up the opposite side and work 1 inc in the final st to complete the repeat. Sl st to close Round 6.
Rounds 7 to 9 of the Heart Pillow Panel
Round 7: Sl st to join and ch 1. Then work (2 sc, inc, 4 sc) 3 times across the lobe curves. Next, make the straight-side scs and (1 sc, 1 ch, 1 sc) at the bottom centre ch-1 space. Finally, crochet the straight side scs up the opposite side, mirror the increase sequence and sl st to close Round 7.
Round 8: Sl st to join and ch 1. First, work (5 sc, inc) 2 times at the start of the round across the right lobe. After that, make the straight side scs, the bottom centre (1 sc, 1 ch, 1 sc) and the straight side scs again.
Then, work (5 sc, inc) 2 times across the left lobe and finish the final section with 1 inc in the last st. Sl st to close Round 8.
Round 9: Sl st to join and ch 1. Next, work (4 sc, inc, 4 sc) 3 times across the lobe curves. After that, make the straight side scs and the bottom centre (1 sc, 1 ch, 1 sc). Finally, mirror the sequence on the opposite side and sl st to close Round 9.
Rounds 10 to 12 and the Final Panel Edge
Round 10: Sl st to join and ch 1. To start, work 3 sc, 1 inc, 6 sc and 1 inc. Then make the straight side scs and the bottom centre (1 sc, 1 ch, 1 sc).
Finally, finish the round with 3 sc and 1 inc in the final sts, which merges with the starting 3 sc to form a full 6-sc repeat. Sl st to close Round 10.
Round 11: Sl st to join and ch 1. Next, work (7 sc, inc) 3 times across the upper lobes. After that, make the straight sides and the bottom centre (1 sc, 1 ch, 1 sc). Then mirror the sequence, finish with 1 inc in the last st and sl st to close Round 11.
Round 12 (Final Panel Edge): Sl st to join and ch 1. Then work 1 sc in every stitch around the entire perimeter, without increases or decreases. Finally, fasten off Colour A, leave a 6-inch tail and weave it in securely.
Second Panel for Your Crochet Heart Pillow Pattern
Now repeat the foundation chain and base, then Rounds 1 through 12 of the first panel, using Colour B. Do not alter any stitch counts or sequences, since both panels must be exact mirror matches. Finally, fasten off Colour B and weave in the end.
Border, Stuffing and Final Assembly of the Heart Pillow
Aligning the Two Heart Panels
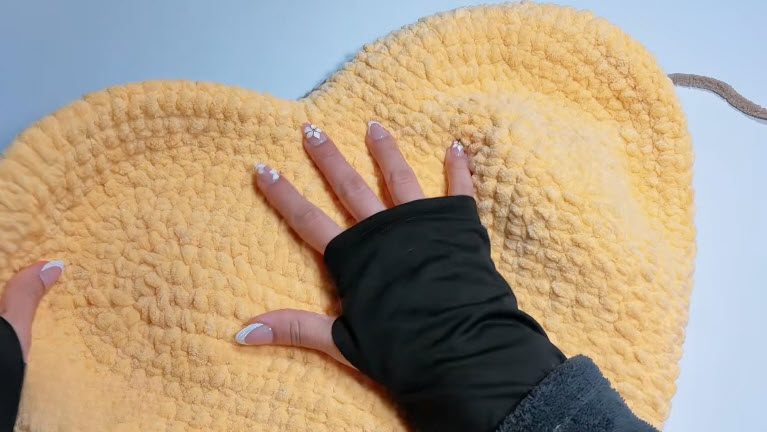
First, stack the Colour A and Colour B panels with the wrong sides facing inward. Then align the edges, top lobes and bottom points stitch for stitch.
Edging and Joining Border in Colour C
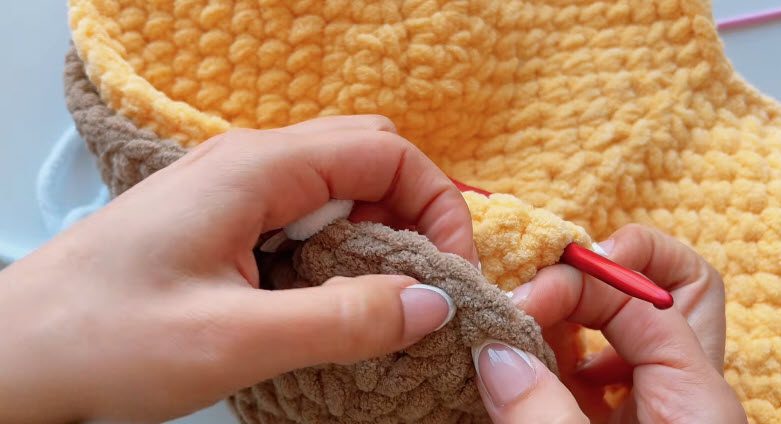
To start the border, join Colour C with a slip knot at the bottom centre point, going through both panels at once. Next, ch 2 (this counts as the 1st dc) and work 2 dc into the same space.
After that, make 3 dc into every single crochet stitch base around the perimeter, through both layers. As a result, you get a ruffled flounce.
Top Centre Cleft Exception on the Heart Cushion
However, the top centre cleft between the lobes works a little differently. Here, make 3 plain dc (1 dc in each of 3 sts) without cluster increases, which keeps the indentation sharp. Then resume the 3-dc clusters.
Stuffing Your Heart Pillow
Stop the border when approximately 3–4 inches remain unjoined near one lobe. Next, add fiberfill gradually, in small amounts. Fill the top two lobes firmly first, then stuff the body and the bottom point until the heart looks plump and symmetrical.
Final Assembly and Closing
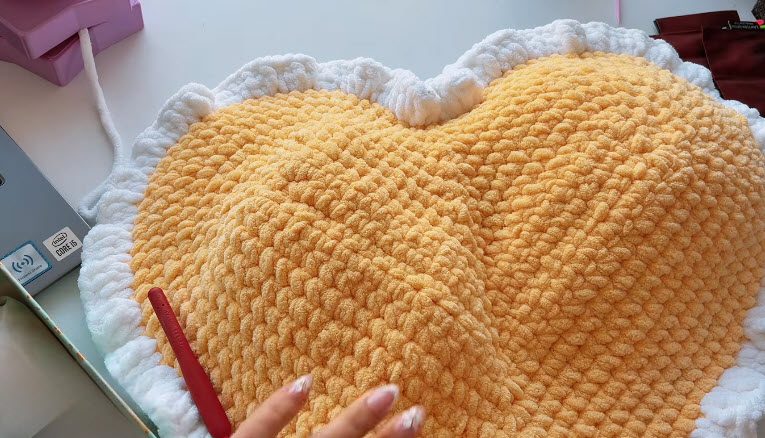
Finally, resume the border across the open edge, going through both layers, until you reach the starting point. Sl st into the top of the starting ch-2 and fasten off Colour C. Then thread the tail onto a tapestry needle and weave it inside. A drop of hot glue on the end knot is optional.
Helpful Tips for This Crochet Heart Pillow Pattern
- Keep markers in from the start, since chenille hides stitches.
- Fill the lobes first, and add fiberfill in small amounts.
- Also, work in good light and keep your tension relaxed.
Bonus: Easy Care Tips for a Chenille Heart Cushion
Chenille is soft but delicate, so gentle care keeps your cushion looking fresh. Spot clean with a damp cloth whenever you can. Also, let it air-dry away from direct heat, and fluff it with your hands afterwards to bring back that plump shape.
Styling and Gifting Ideas for Your Heart Pillow
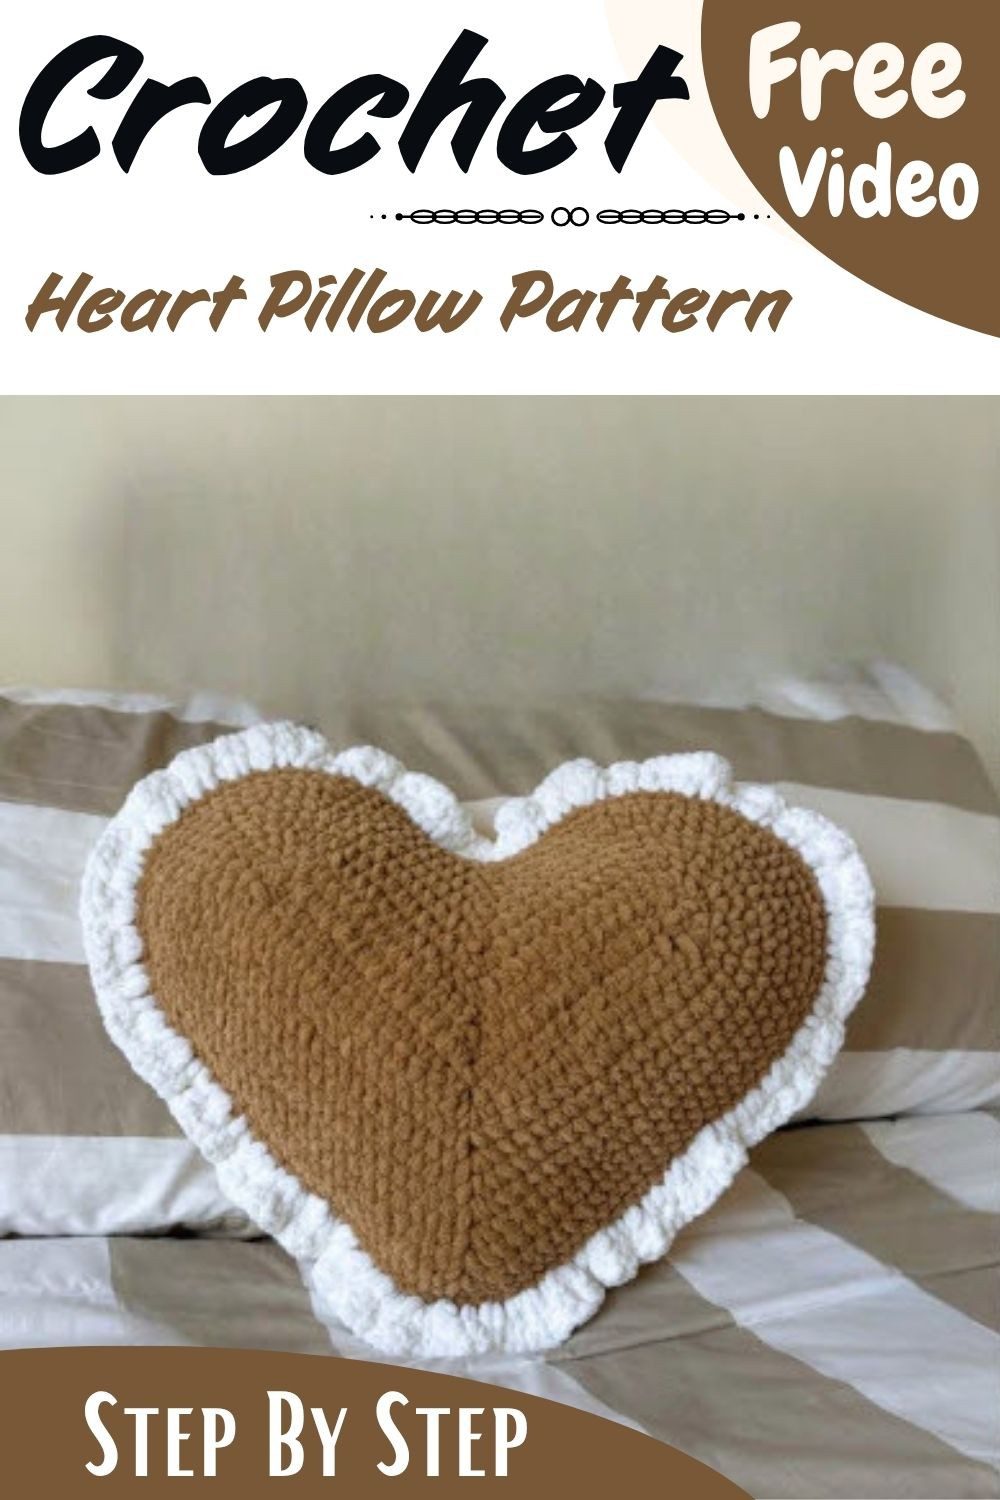
- Lean it on striped bedding, like in the photos.
- Likewise, choose Colour A and Colour B to suit the person you are gifting.
Crochet Heart Pillow Pattern FAQs
Is this crochet heart pillow pattern beginner friendly?
Yes, the original pattern lists it as beginner-friendly.
What gauge should I get for the heart pillow?
Gauge is not specified in the original pattern.
How much fiberfill do I need?
You need approx. 300g.
Do both heart panels match?
Yes, they use the same pattern and must match exactly.
My Honest Take on This Crochet Heart Pillow Pattern
Honestly, this crochet heart pillow pattern looks way harder than it actually is. I thought so too when I first saw it. Just take it slow and keep your stitch markers in, because they’ll save you a lot of headaches. Don’t rush the stuffing either, since a little at a time gives you a nice, even shape.
And when you get to the white ruffle, that’s where it all clicks. You’ll see it start to look like the real thing, and you’ll be smiling. You’ve got this, so go grab your hook and enjoy it!