Sunshine Crochet Happy Dwarf Doll Amigurumi Pattern
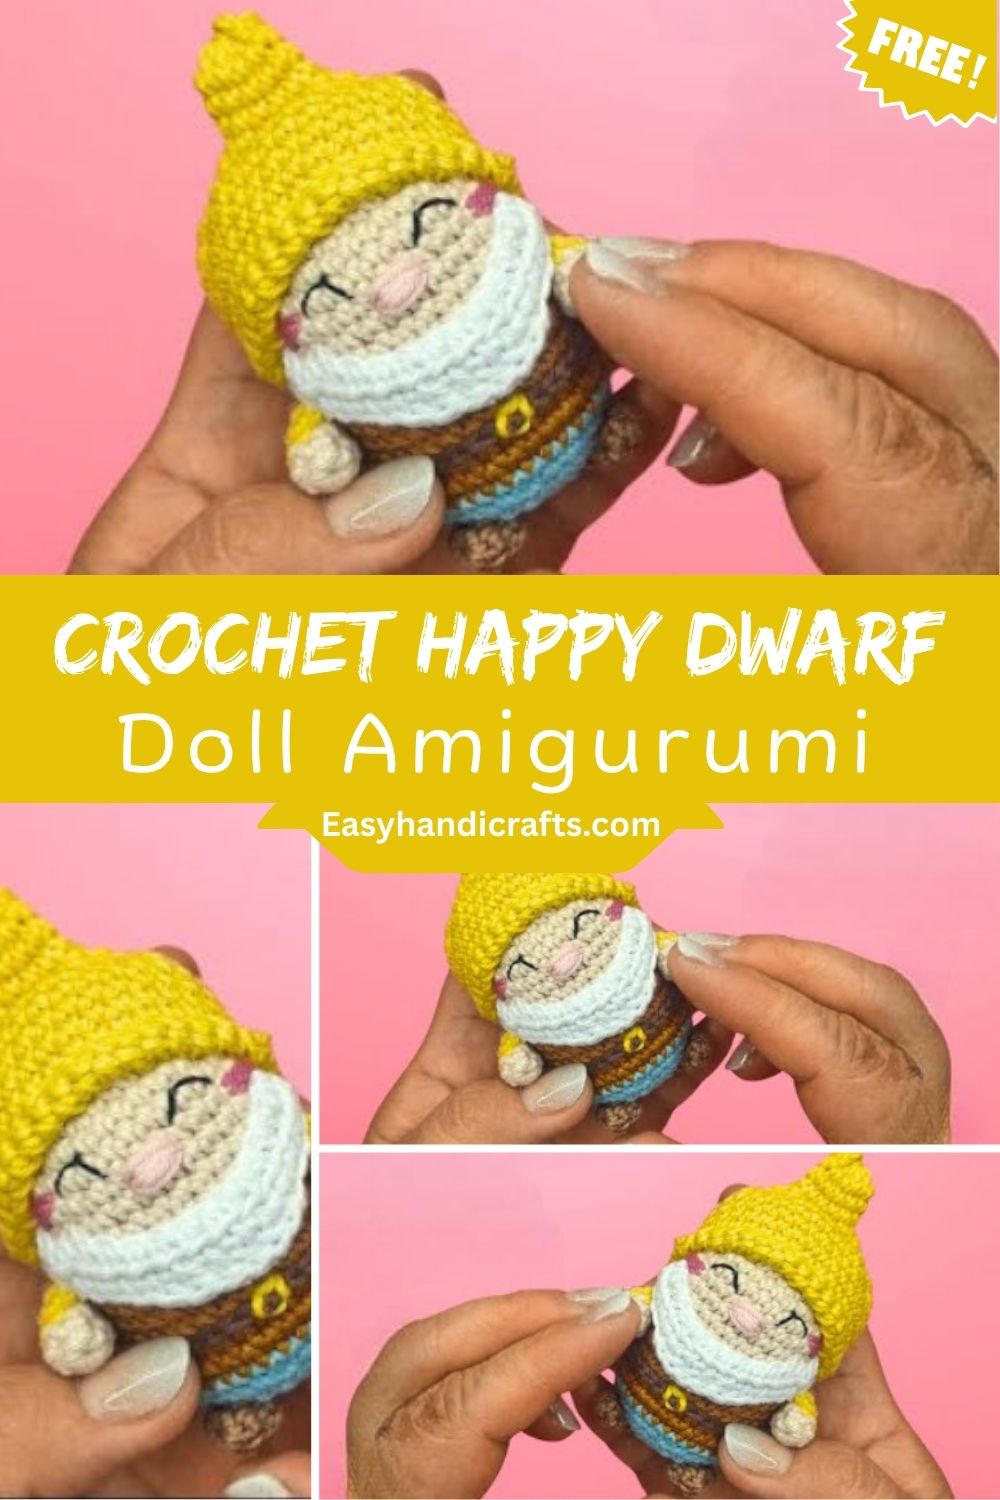
This Sunshine Crochet Happy Dwarf Doll Amigurumi Pattern brings together bright yellow tones, a cozy pointed hat, and a scruffy little beard for a doll full of personality. It’s a fun, quick project that adds warmth and character to any handmade collection.
Grab your hook, because this Crochet Happy Dwarf Doll project takes shape fast once you get rolling. You’ll work mostly in single crochet, shaping a round head and a slightly narrower body through steady increase and decrease rounds, then top it all off with a little cone-shaped hat and a scrappy beard that gives him his signature look. This pattern is especially great for anyone wanting a quick, gift-worthy amigurumi that also doubles perfectly as a keychain or bag charm.
Once assembled, he’s small enough to clip onto a bag, dangle from a keychain, or just sit on a shelf looking pleased with himself.
Skill Level: Beginner to Intermediate
Don’t worry if you’re still fairly new to amigurumi; this pattern doesn’t demand anything fancy. As long as single crochet and magic rings feel comfortable in your hands, the shaping rounds here (a bit of increasing, a bit of decreasing) won’t trip you up much. Anyone who’s finished even one small crochet animal before should breeze through this.
What You’ll Need Before Starting
Nothing here is hard to find, but it helps to lay everything out before you begin so you’re not digging through your stash mid-project.
Yarn
- A soft yellow or golden shade for the hat and trim
- Cream or light beige for the face and hands
- Brown or gray for the beard
- A splash of extra color (red, teal, mustard — your call) if you want a scarf or little vest detail
Everything Else
- A 2.5mm–3.0mm crochet hook, sized to match your yarn
- 6mm or 8mm safety eyes
- Polyester fiberfill for stuffing
- A yarn needle, for sewing all the pieces together
- Small, sharp scissors
- Stitch markers, so you don’t lose count halfway through a round
- A keychain ring or clasp, if you’re planning to turn this into a bag charm
The Stitches and Techniques You’ll Use
- Magic ring, to start each piece without leaving a hole at the center
- Single crochet, which carries almost the entire pattern
- Increasing, working two stitches into one to widen a round
- Decreasing, pulling stitches together invisibly to taper the shape
- Sewing pieces together, joining the hat, beard, and any extras once everything’s stuffed.
Putting the Pattern Together, Step by Step
Shaping the Head
Begin with your magic ring and increase gradually until the round starts curving into a sphere. Once you’ve reached the widest point, work several plain rounds to give the head some height before decreasing back down toward the opening. Stuff firmly as you close it up since the face is what people notice first, tight, even stitches really matter here.
Working the Body
The body isn’t too different from the head, just a touch taller and a little narrower through the middle. Start from a magic ring, increase out to your desired width, then crochet straight rounds until the body reaches the length you want. A short decrease section at the top closes things off and readies it for joining to the head.
The Beard, Hat, and Any Extra Bits
- Beard — worked as small clusters or short rows in brown or gray, tacked onto the lower face for that classic gnome-like texture
- Hat — a simple cone built from continuous increases off a magic ring, narrowing to a point near the top
- Ears (optional) — flat little circles or shallow domes, stitched onto the sides of the head if you’d like a slightly more whimsical version
Giving Him a Face
Position the safety eyes before you stuff the head, spacing them so the expression feels balanced rather than lopsided. A bit of pink thread or light blush stitching for the cheeks goes a long way, and a tiny embroidered nose or smile using scrap yarn really brings the face to life.
Assembling the Doll
Lay all your finished pieces out first so you can see how everything will sit before you start sewing. Attach the head to the body, checking that it sits straight rather than tilted. The hat looks best angled slightly to one side rather than dead-center — it gives the doll a bit more personality. Sew the beard on just under the face, and if you’re adding arms or a nose bump, secure those last with a tight whip stitch.
Wrapping It Up
Weave in any loose ends carefully so nothing unravels down the road. Planning to turn him into a keychain? Attach the ring through a sturdy loop at the top of the hat, or loop it through the back of the body using strong yarn or a small jump ring.
A Few Tips That Actually Help
- Don’t loosen up your stitches. Amigurumi needs tension on the tighter side; otherwise, stuffing pokes through the gaps.
- Mark every round. It sounds unnecessary until you lose track thirty rounds in a stitch marker takes two seconds and saves a headache.
- Stuff gradually, not all at once. Small amounts added as you crochet keep the shape smooth; cramming it all in at the end usually leaves lumps.
Ways to Make Him Your Own
- Swap the palette entirely a blue and white winter version, or a green spring one with tiny floral touches
- Add small accessories like a scarf, a satchel, or a mini mushroom charm hanging off his belt
- Go smaller with thinner yarn and a tighter hook for a pocket-sized keychain variation
Questions People Often Ask
What yarn works best for amigurumi?
Cotton or a cotton-blend in worsted weight tends to hold its shape better than most alternatives, which matters a lot for a doll that needs to stay firm. Acrylic is a solid budget option too, and it comes in the kind of bright, saturated colors that suit character dolls like this one.
How do I keep my finished plush firm instead of floppy?
It comes down to two things: tight stitches and generous stuffing. Sizing your hook slightly smaller than the yarn label suggests helps close up gaps naturally, and adding stuffing in small pinches (rather than one big handful) keeps the shape even without weak spots.
How long does this whole project usually take?
Most people finish somewhere between 3 and 5 hours, though that varies with experience. If you’re newer to amigurumi, the shaping rounds might slow you down a little, but plenty of crocheters knock this out in a single evening once they’re comfortable with the stitches.
Final Thoughts
This little Crochet Happy Dwarf Doll is one of those projects that feels bigger than the time it actually takes; a handful of hours turns into a doll with real personality. Whether he ends up as a gift, a keychain, or just another face on your amigurumi shelf, he’s a satisfying make for anyone past the total-beginner stage. Pick your colors, cast on that magic ring, and let him take shape.