Crochet Floral Mesh Shrug Pattern with Blooming Motifs
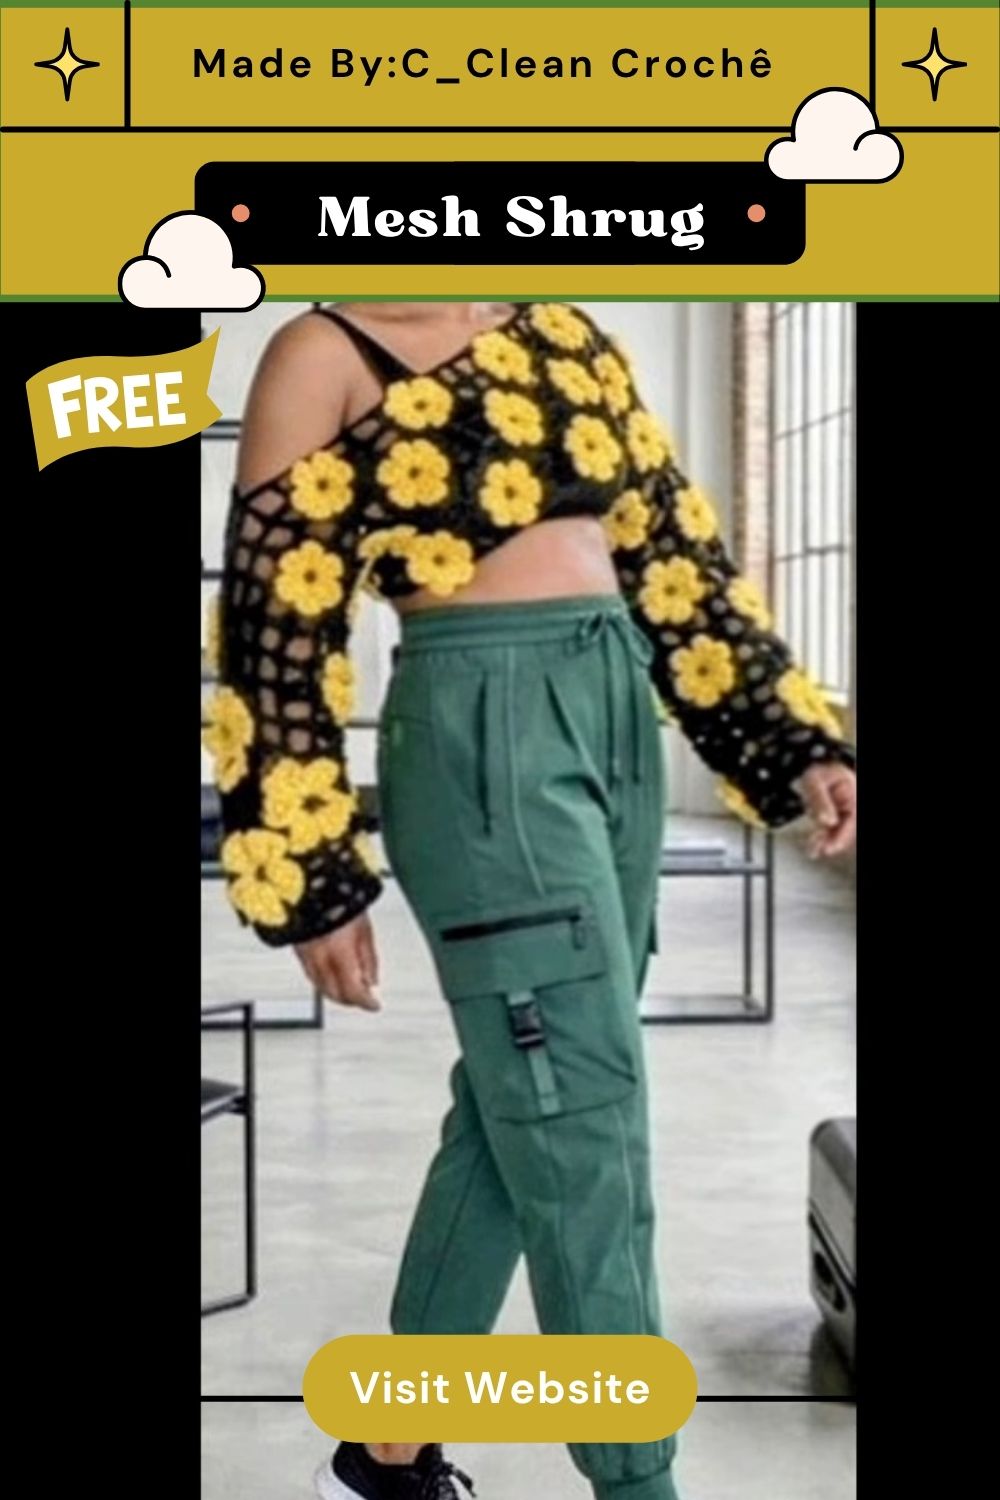
A mesh-style shrug works up in an open, net-like pattern that drapes beautifully over shoulders and layers well on top of tank tops or fitted outfits. It’s especially great for anyone wanting a light, lovely, stylish layer without added warmth or bulk. The loosely worked piece stays breezy, making it perfect for spring evenings, beach cover-ups, or an extra layer in an air-conditioned office.
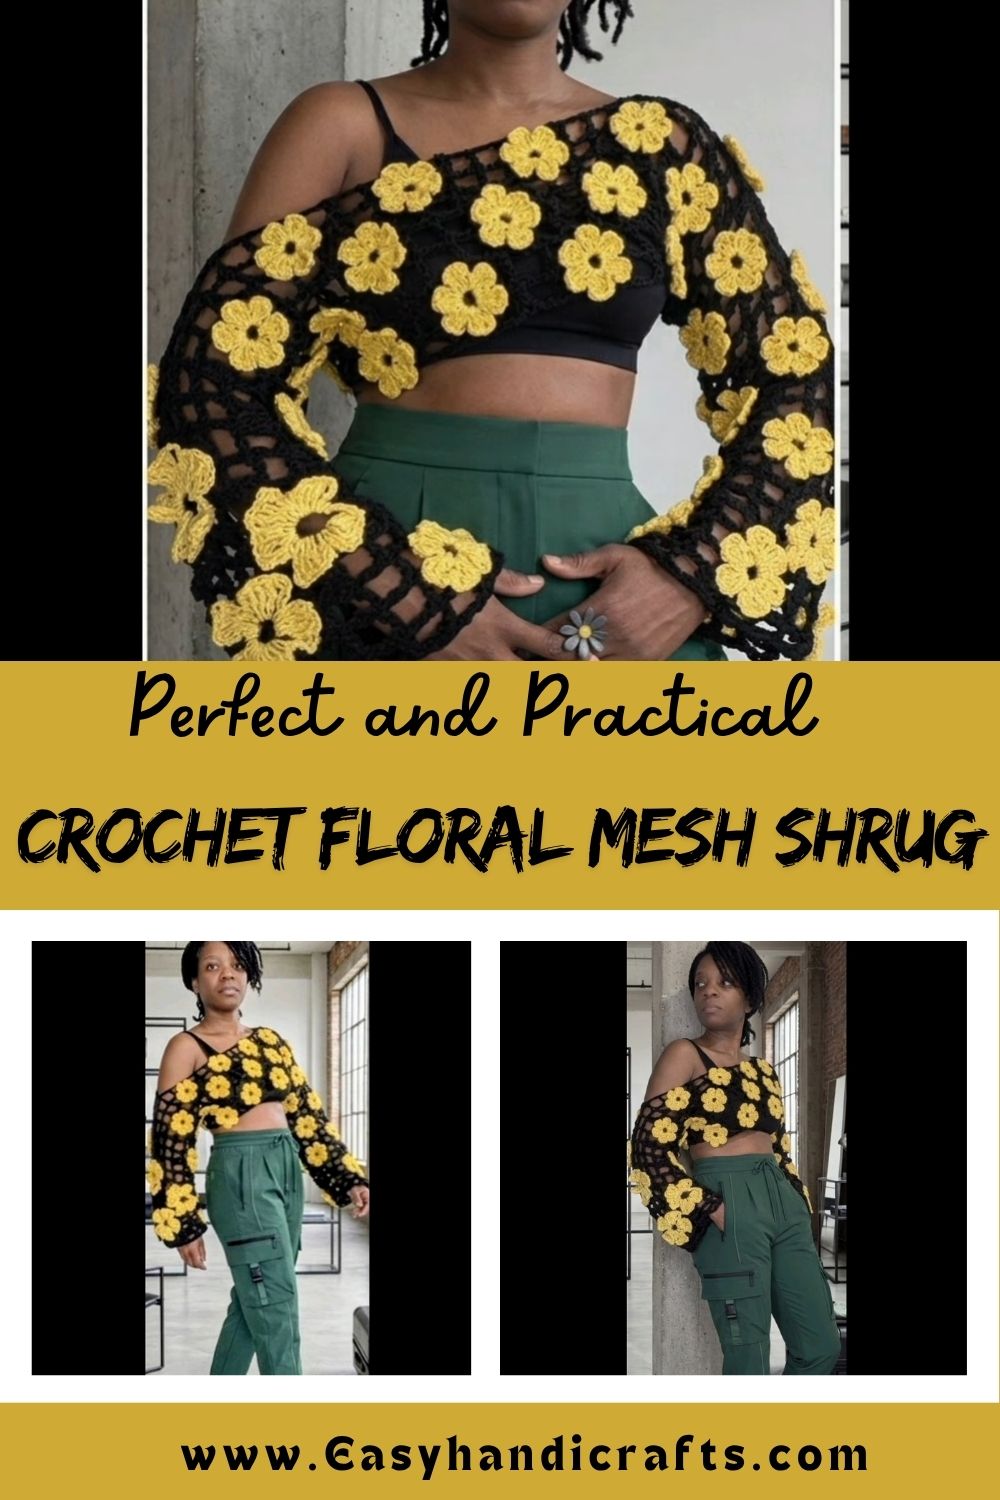
Adding floral shapes turns a simple mesh base into a real statement piece. The contrast between the open, airy body and bold, colorful blooms gives it a boutique-style finish that looks far more elevated than the effort it actually takes.
Skill Level
Beginner to Intermediate. The mesh body relies on a simple repeating stitch, so newcomers can follow along with basic chain and single crochet skills. The floral motifs require a bit more patience with petal shaping, which is where some prior practice helps, but nothing here is out of reach for a motivated beginner.
Materials and Tools You’ll Need
- Worsted weight yarn in a dark shade (black, navy, or charcoal work well for the mesh base)
- A contrasting yarn color for the floral motifs (yellow, coral, or white are popular choices)
- A crochet hook sized to match your yarn weight (a 5mm or 5.5mm hook is a common choice for this style)
- Scissors
- A yarn needle for weaving in ends and attaching motifs
- Stitch markers (optional, but helpful for tracking rows)
- A tape measure to check shrug width and sleeve length
Key Techniques Used in This Pattern
- Foundation chain: Sets the width of your shrug before the mesh pattern begins.
- Mesh or net stitch: A repeating combination of chain spaces and single stitches that creates the open, airy look.
- Row counting: Keeping track of repeats so both sleeve panels match in size.
- Motif making: Crocheting small floral pieces separately using rounds of petals.
- Attaching motifs: Sewing or crocheting the finished flowers onto the mesh fabric in a balanced, natural arrangement.
Step-by-Step Guide
Step 1: Start With a Slip Loop
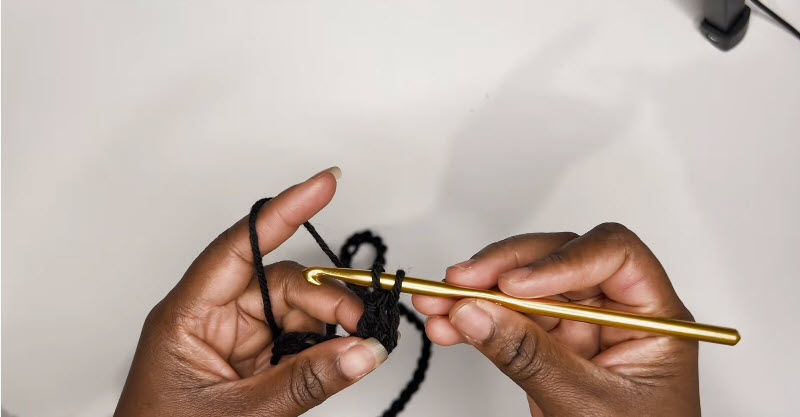
Begin by making a slip knot and placing it on your hook. Hold the working yarn between your fingers so it feeds smoothly, and keep the hook angled comfortably in your other hand. This loop is the anchor point for every stitch that follows, so make sure it sits snug but not tight around the hook.
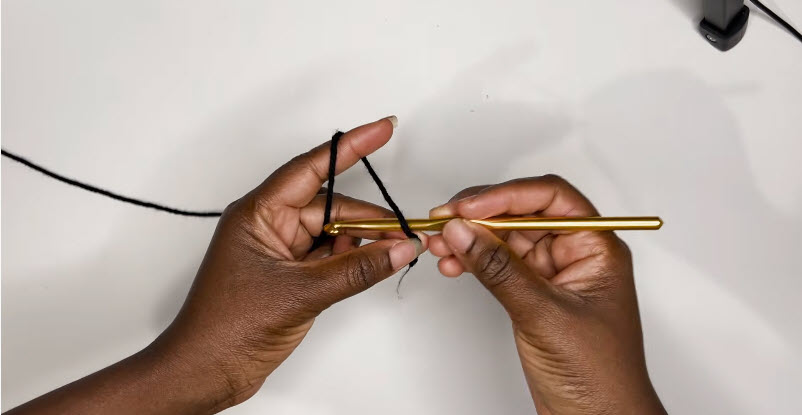
Step 2: Build the Foundation Chain
Yarn over and pull through the loop on your hook to begin chaining. Repeat this motion steadily to build a foundation chain long enough for your shrug’s width. Keep your tension even here, since a chain that’s too tight will pucker the mesh later, while a loose chain can make the first row uneven.
Step 3: Begin the Mesh Pattern
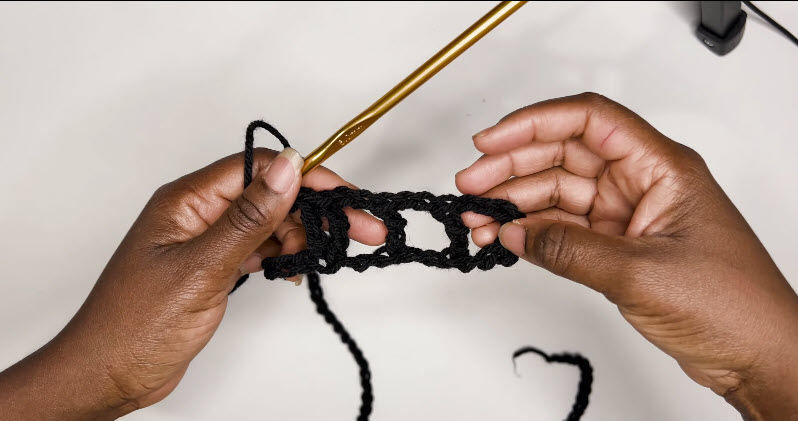
Once your chain is ready, start working the mesh stitch into it. This usually means alternating a single crochet with a small chain space, repeating across the row. This combination is what creates the signature open, net-like texture. Work slowly through the first row so you get a feel for the rhythm before picking up speed.
Step 4: Continue Building the Mesh Body
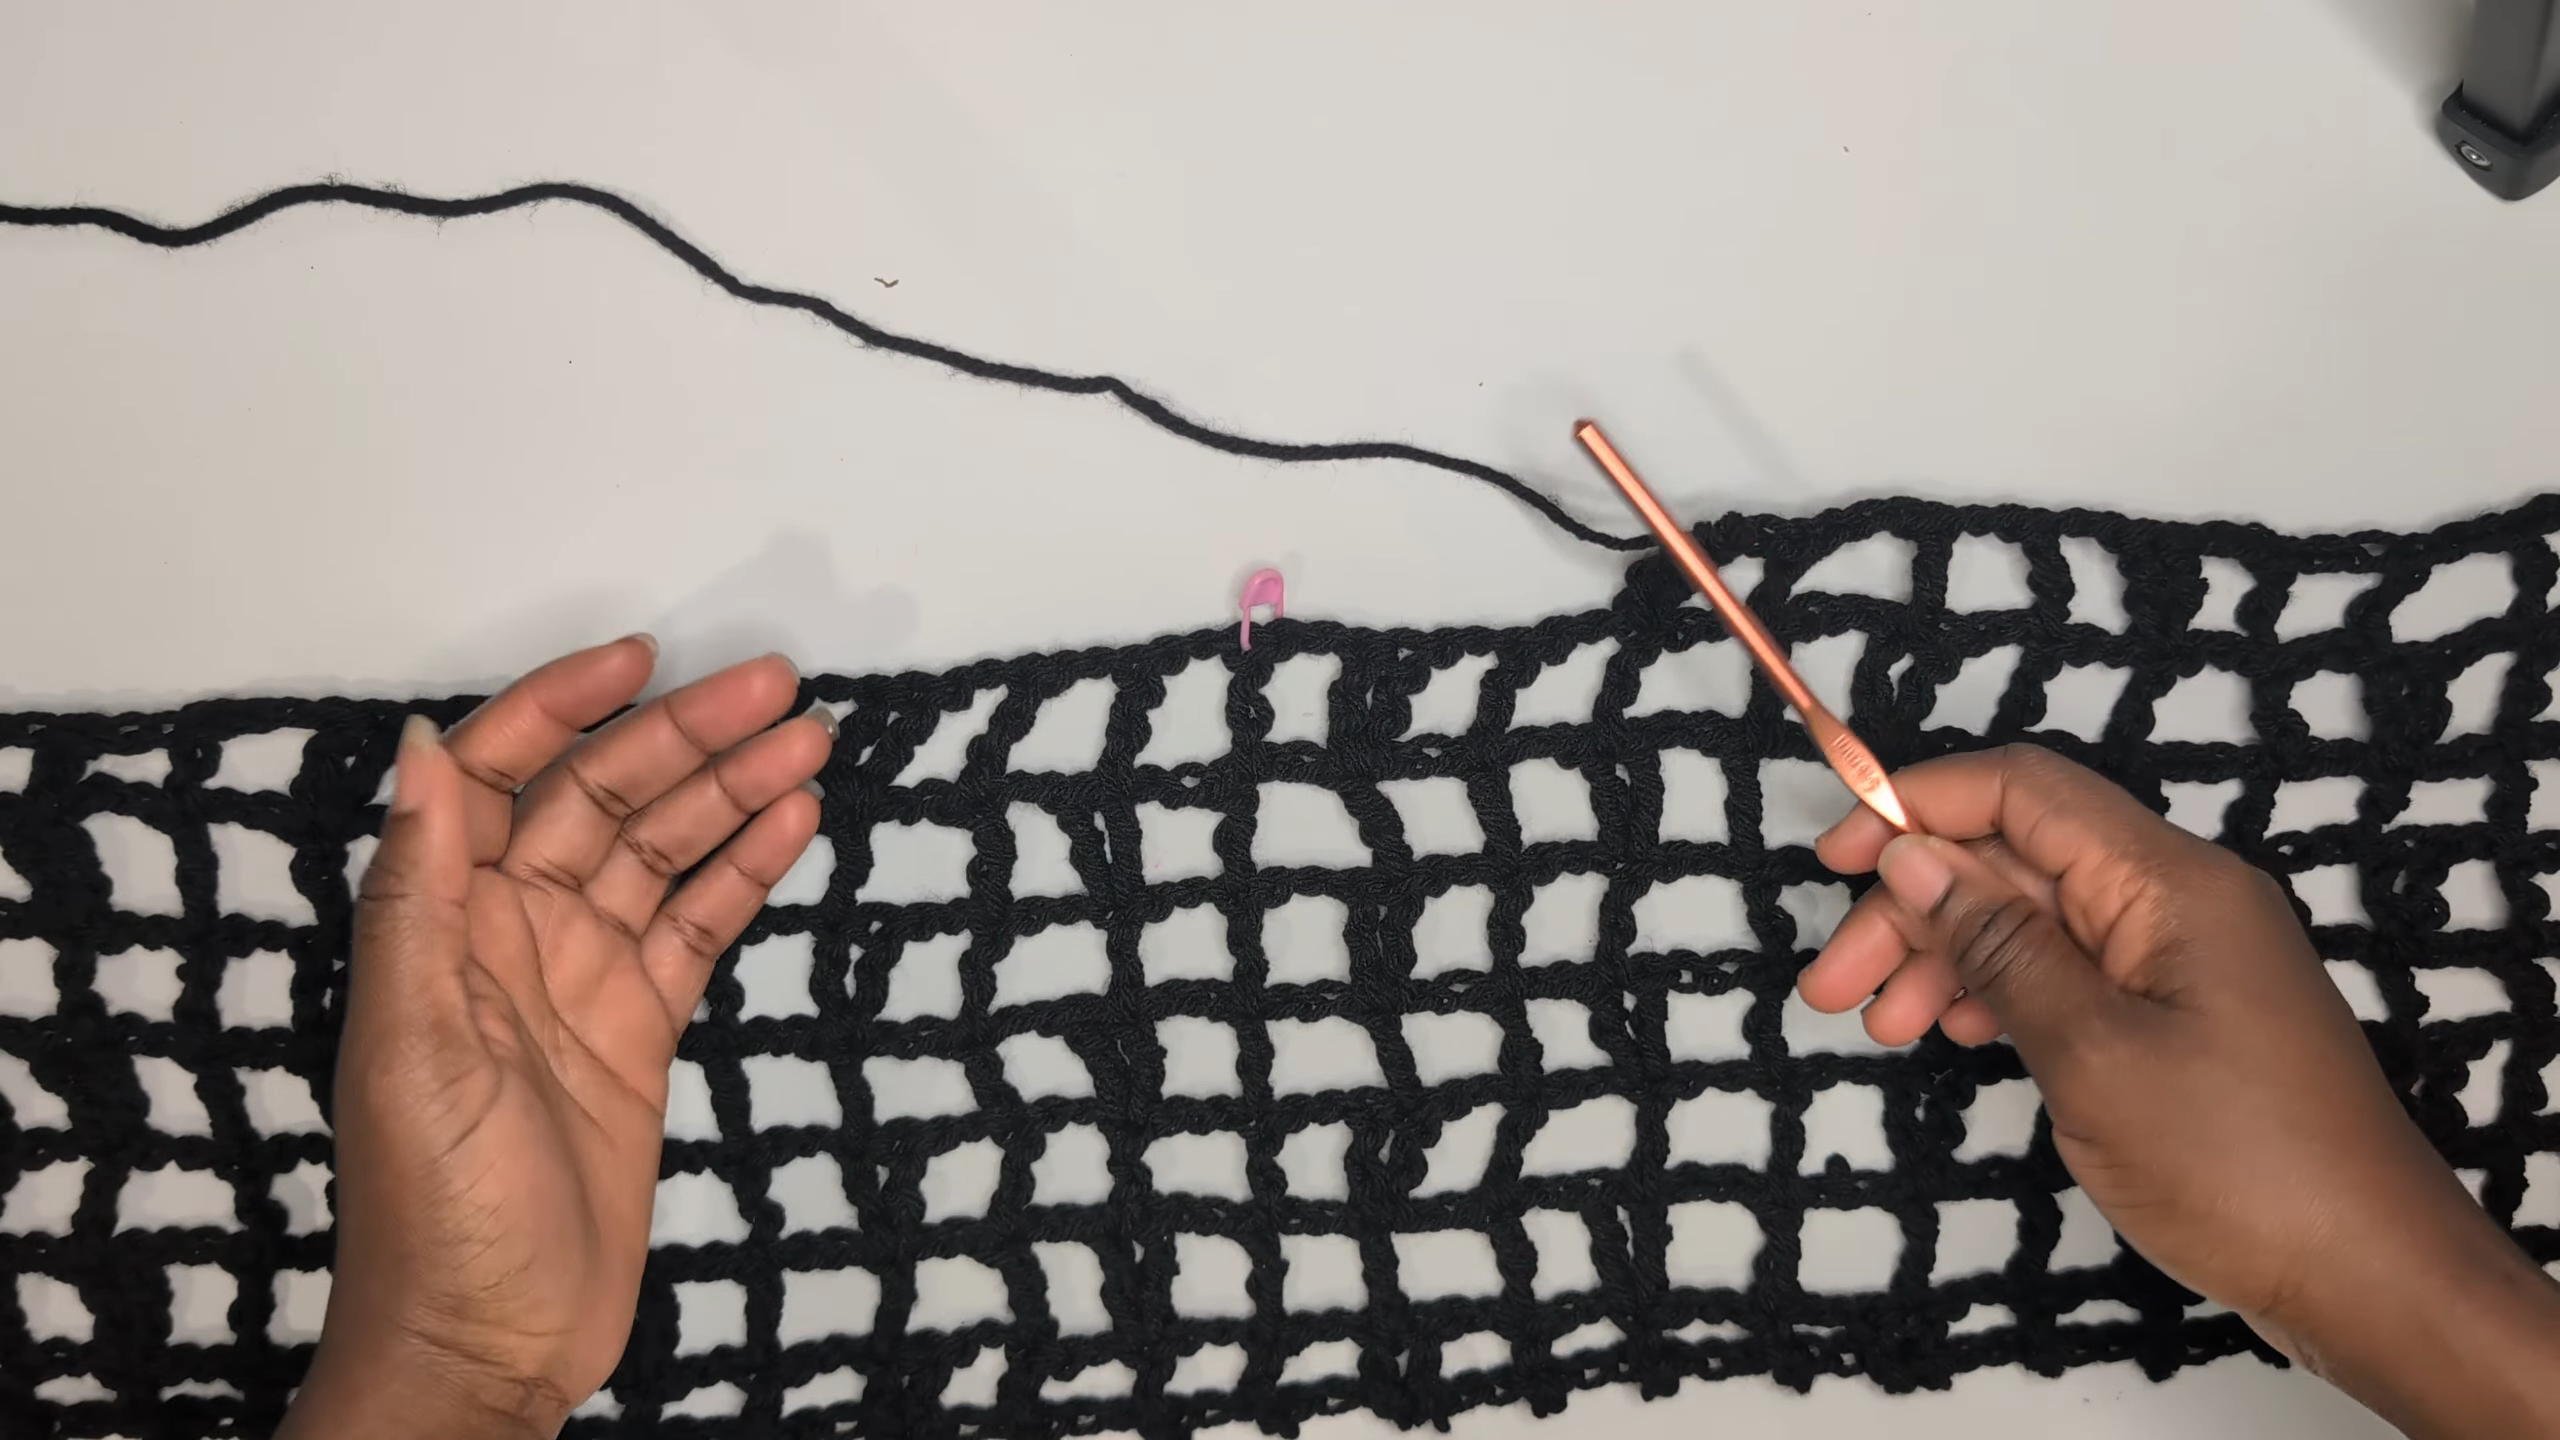
Keep repeating the mesh pattern row after row, turning at the end of each one. As the fabric grows, you’ll see the open squares of the net stitch line up neatly, forming the wide rectangular panel that becomes the body of your shrug. Check your work every few rows to make sure the edges stay straight and the square openings stay consistent in size.
Step 5: Add the Blooming Floral Motifs
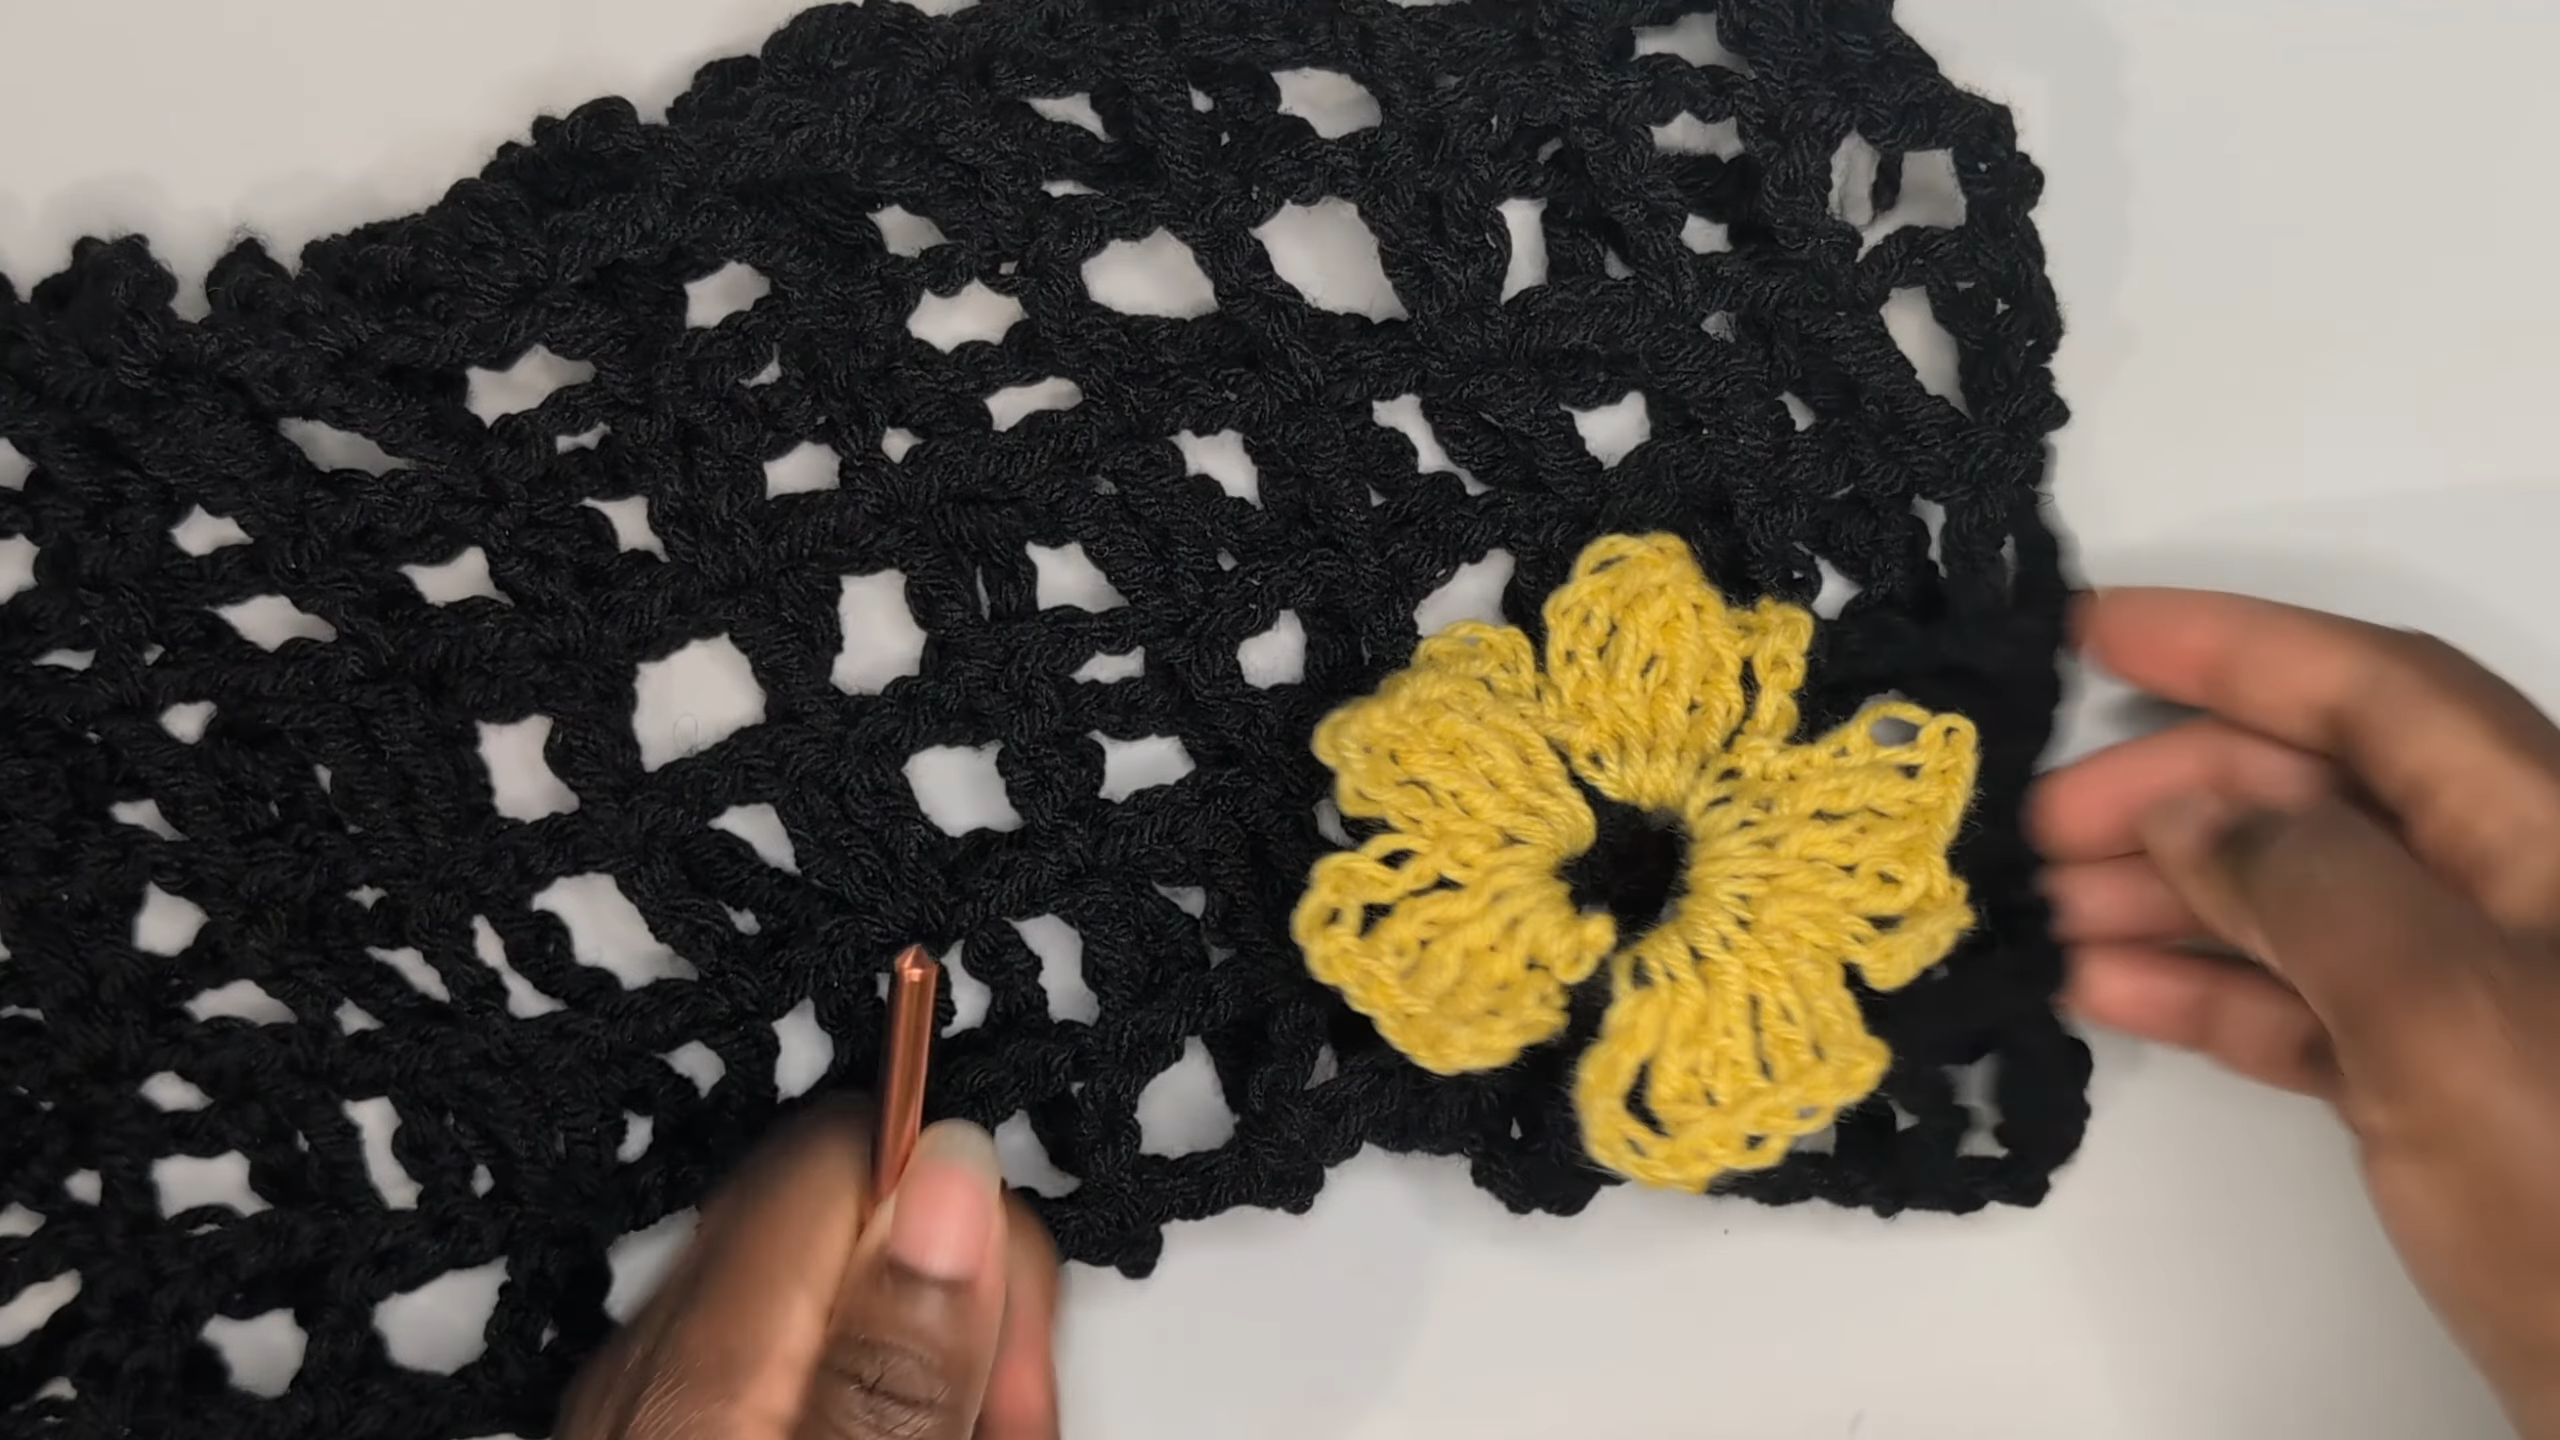
With your mesh panel complete, it’s time to bring in color. Crochet your floral motifs separately using a contrasting yarn, working rounds of petals until each flower is full and even. Once finished, position the flowers along the mesh fabric where you want them to stand out most, then stitch each one securely in place using a yarn needle and matching thread. Cluster a few blooms together near a corner or scatter them along an edge for a more organic look.
Helpful Tips for Beginners
- Practice the mesh repeat on a small swatch before starting the full shrug so the rhythm feels natural.
- Count your chain spaces at the end of every row to catch mistakes early.
- Use a lighter-colored yarn for your first attempt if working with black feels hard on the eyes.
- Block your finished mesh panel lightly to help the squares lay flat and even.
- Keep your motifs uniform in size by using the same yarn weight and hook throughout.
Common Mistakes to Avoid
- Skipping a stitch count check, which leads to a shrug that’s wider on one side than the other.
- Pulling the foundation chain too tight, causing the first row to curl.
- Attaching motifs before the mesh piece is fully blocked, which can leave flowers sitting unevenly once the fabric relaxes.
- Using yarn that’s too thin for the hook size, resulting in a mesh that looks flimsy instead of structured.
- Rushing the petal rounds on the motifs, which often leads to uneven, lopsided flowers.
Customization Ideas
- Swap the floral motifs for simple leaves or geometric shapes for a more modern look.
- Try a two-tone mesh body using stripes instead of a solid dark color.
- Add fringe or a scalloped edge along the shrug’s bottom hem for extra texture.
- Use metallic or glitter-thread yarn for the flowers to create an evening-wear version.
- Adjust the mesh width to turn the same pattern into a wrap, poncho, or long vest.
Frequently Asked Questions
Q: How much yarn do I need for this shrug?
A: This depends on your size and gauge, but most adult shrugs use around 2–3 skeins of worsted weight yarn for the mesh body, plus a small amount of contrasting yarn for the motifs.
Q: Can I make this shrug without floral motifs?
A: Yes. The mesh panel looks great on its own and works as a simple, minimalist cover-up if you’d rather skip the floral detailing.
Q: What size hook works best for the mesh stitch?
A: A 5mm to 5.5mm hook paired with worsted weight yarn usually gives the best balance of drape and openness, though this can vary by personal tension.
Q: How do I keep both sleeve panels the same size?
A: Count your rows and stitches carefully, and consider using a stitch marker at the start of each row so you always know exactly where you are.
Q: Is this Crochet Floral Mesh Shrug suitable for warm weather?
A: Absolutely. The open mesh design allows airflow, making it a comfortable layer for warm evenings or as a light cover-up over summer outfits.
Q: Can beginners really finish this Crochet Floral Mesh Shrug project?
A: Yes, especially if you’re comfortable with basic chains and single crochet. The floral motifs are the only part that may need a little extra practice.