Make This Crochet Desk Runner, HandBag Pattern
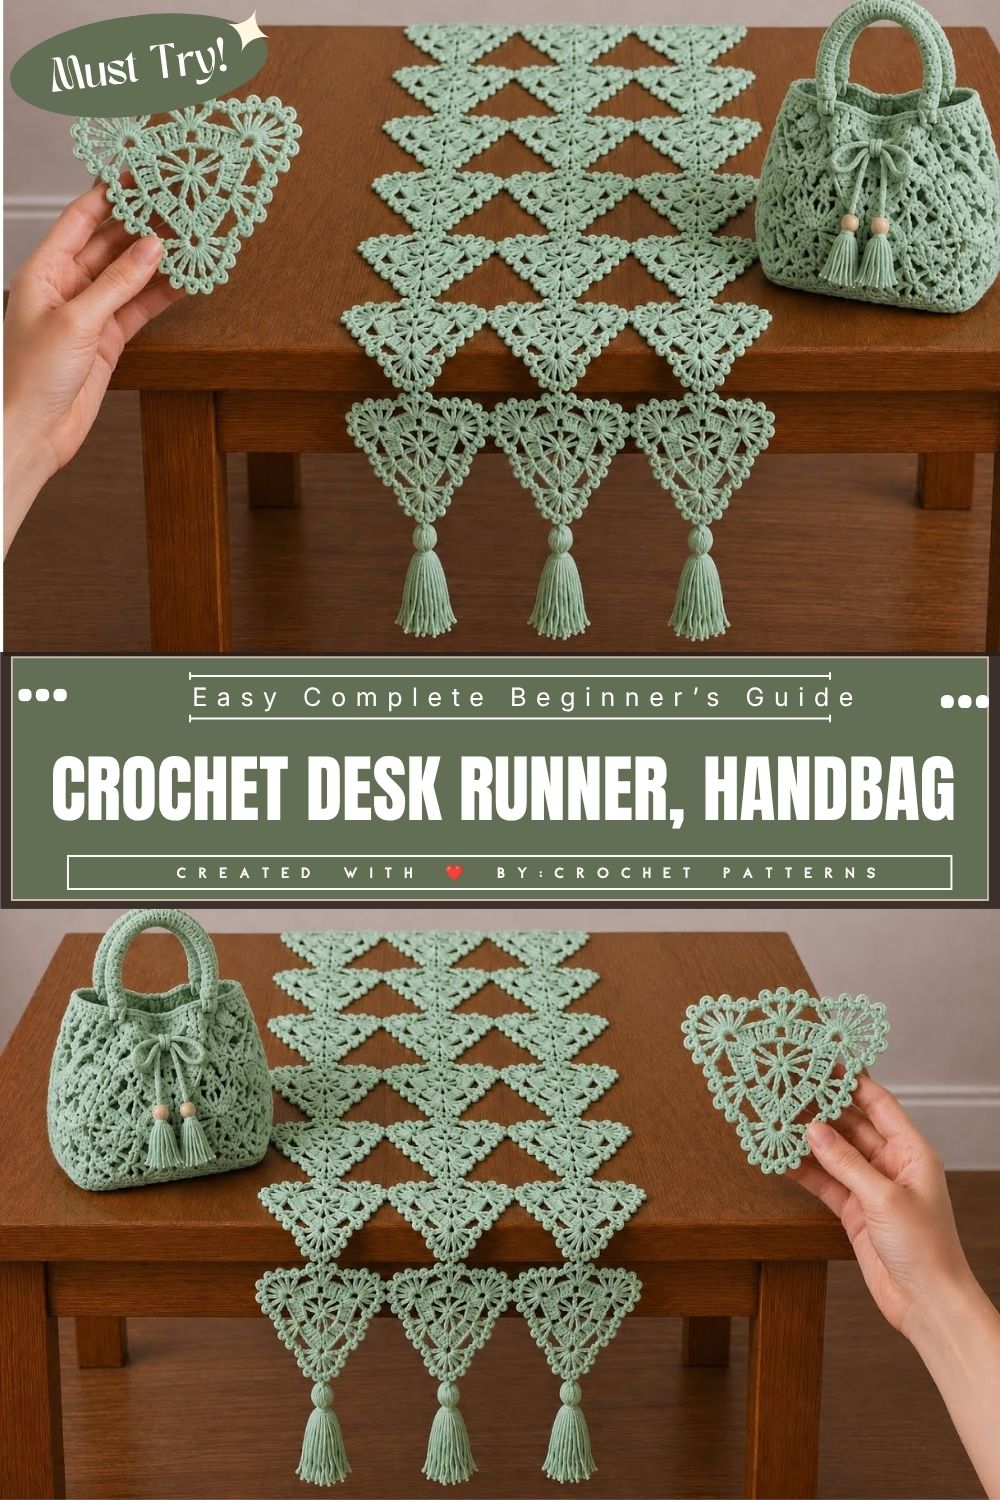
Three sharp points and an open lace center give the little motif its distinct charm, and the Make This Crochet Desk Runner, Handbag and Coaster Pattern turns that single triangle shape into three completely different handmade cozy home decor projects.
What makes the project stand out is a single adaptable crochet triangle motif that changes purpose depending on how you finish it. One motif becomes a coaster, several joined edge to edge build a table runner, and stiffened panels combine into a lined handbag, making the pattern practical for gifts, home decor, or a quick weekend accessory anyone can crochet.
Pattern Overview
The triangle motif starts at a center ring and grows outward in rounds, ending with a scalloped shell edge. Left alone, it works as a single coaster. Sewn or slip stitched to matching motifs along the sides, it forms a strip long enough for a table runner. Stiffened and lined, a pair of motif clusters becomes the front and back panel of a small handbag.
Style and Look
Open, lacy stitchwrk gives the motif a doily like texture that suits farmhouse, cottagecore, or boho styling. The sample shown uses a soft sage cotton, though the openwork pattern reads just as well in cream, blush, or a deeper botanical green for a different seasonal look.
Skill Level
Comfortable for confident beginners and intermediate crocheters who already know a magic ring, chain, slip stitch, and double crochet. The increase rounds and shell edging add a bit of counting, so a crocheter who has finished at least one motif or granny square pattern will pick it up quickly.
Materials
- Medium weight cotton yarn, one hundred percent cotton for the cleanest stitch definition
- Crochet hook sized to your yarn
- Tapestry needle
- Scissors
- Stitch markers
- Cotton fabric lining for the handbag version
- Magnetic snap or button closure for the handbag
- Bag handles or crocheted chain straps
- Fabric stiffener or spray starch for the runner and handbag panels
Yarn Weight
Light worsted or DK weight cotton gives crisp stitch definition and holds its shape well for a runner or bag panel. A finer fingering weight cotton thread produces a more delicate motif that works beautifully as a standalone coaster.
Yarn Quantity
Totals depend entirely on how many motifs your finished piece needs, so plan from the motif itself rather than a single fixed yardage figure. Weigh or measure how much yarn one finished motif takes, then multiply by the number of motifs required. A coaster needs just one motif, a runner needs a strip of several motifs joined along their sides, and a handbag needs two matching motif clusters, one for the front panel and one for the back.
Hook Size
A hook close to size E, about three and a half millimeters, pairs well with DK weight cotton. Drop to a smaller hook near two and a half millimeters when working with fingering weight thread, since a tighter stitch keeps the mesh from sagging on a small coaster.
Gauge
Because the project relies on joined, repeated motifs rather than a single fitted piece, exact gauge matters less than consistency between motifs. Keep tension even across every triangle so corners and edges line up cleanly when pieces are joined. If an early motif comes out noticeably larger or smaller than the rest, switch hook size slightly rather than fighting your own tension to compensate.
Additional Supplies
- Fabric lining cut to match your handbag panel size
- Magnetic snap or sturdy button for closure
- Purchased handles or a crocheted chain strap
- Tapestry needle for weaving ends and joining motifs
- Stitch marker to track the start of each round
- Fabric stiffener for a runner that needs to lie flat or a bag panel that needs to hold shape
Abbreviations
ch = chain sl st = slip stitch sc = single crochet dc = double crochet sp = space rnd = round st or sts = stitch or stitches rep = repeat
Important Stitches
Magic ring, chain space, double crochet cluster, shell stitch, picot, slip stitch join.
Before You Start
Wind your yarn into a manageable ball and work one test motif first to confirm gauge and tension before committing to a full set. Decide up front whether you are making a single coaster, a full length runner, or a pair of handbag panels, since that decision determines how many motifs to plan for.
How the Piece Is Constructed
Every version of this pattern begins with the same triangle motif, worked in rounds from a center ring outward and finished with a shell edge. From there, construction branches three ways: a finished motif left as is becomes a coaster, several motifs joined side by side become a runner, and two matching motif clusters lined and assembled become a handbag.
Step by Step Pattern
Step 1: Start the Center Ring
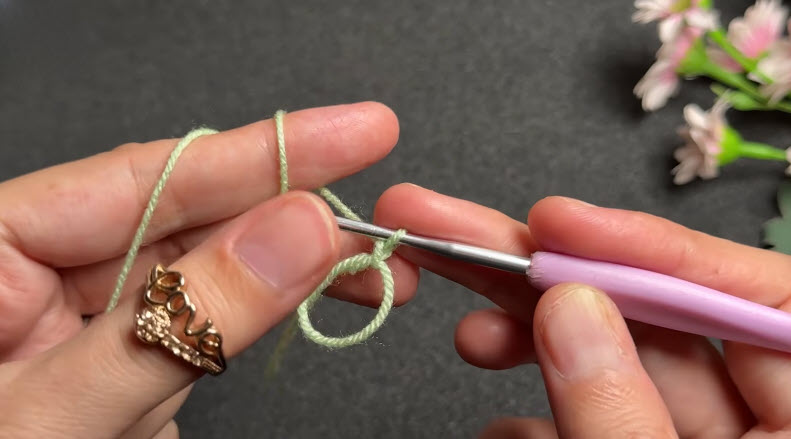
Wrap the yarn around your fingers to form a loop, holding the tail steady against your palm. Insert the hook through the loop the way shown in the first photo, ready to pull up the first stitches of a magic ring.
Step 2: Work the First Round into the Ring
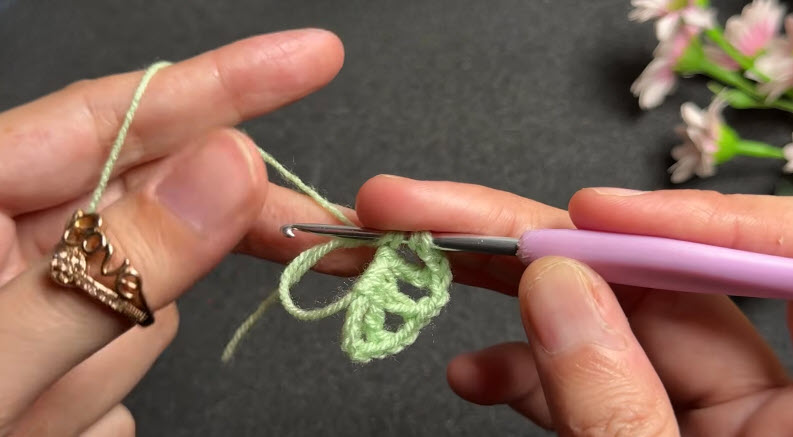
Pull the working yarn through the loop and work your first cluster of stitches around the ring, keeping the tail free so the center can be tightened later. A small cluster of petal-like stitches forms around the ring, matching the second photo.
Step 3: Build the Second Round
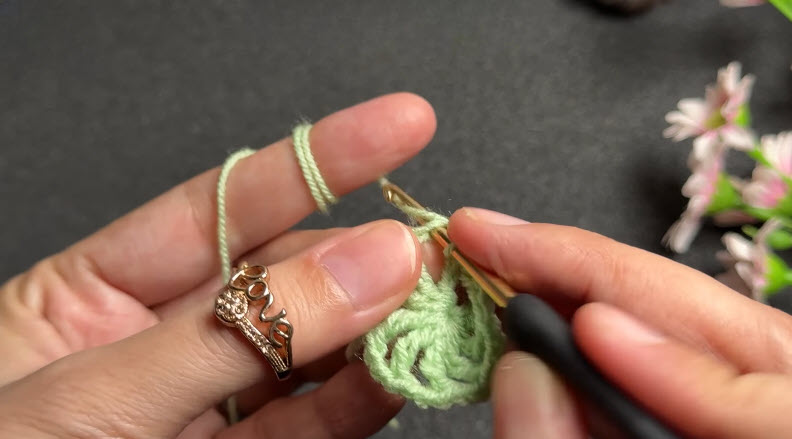
Attach the new round into the spaces created by the first, adding chain spaces between clusters as the shape begins to widen. The motif starts to lift off the ring and take on early definition, as pictured in step three.
Step 4: Shape the Triangle Corners
Continue working around the motif, increasing at three evenly spaced points to begin forming the corners of the triangle. Chain spaces run along each developing side, giving the motif its first clearly triangular outline.
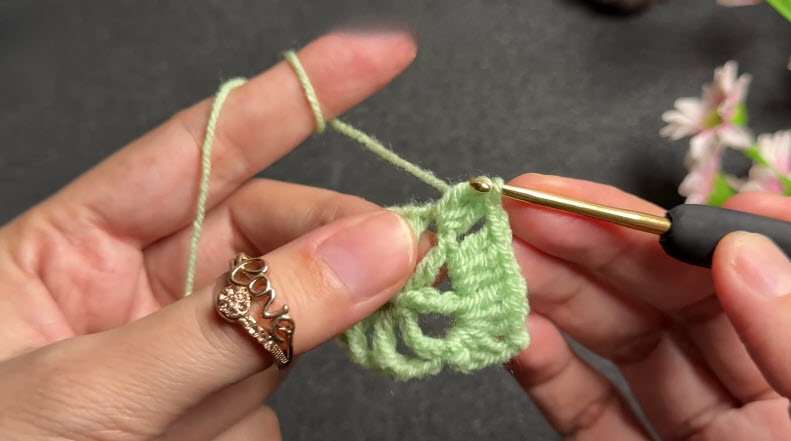
Step 5: Complete the Center Motif
Once the increase rounds are finished, the piece holds a clear triangle shape with a star or flower design radiating from the center ring. Hold the motif up and check that all three corners and sides look even before moving on.
Pro Tip: Count your chain spaces along each side of the triangle before starting the shell edging. Uneven spacing at that stage is the most common reason a finished triangle ends up lopsided once the edging is added.
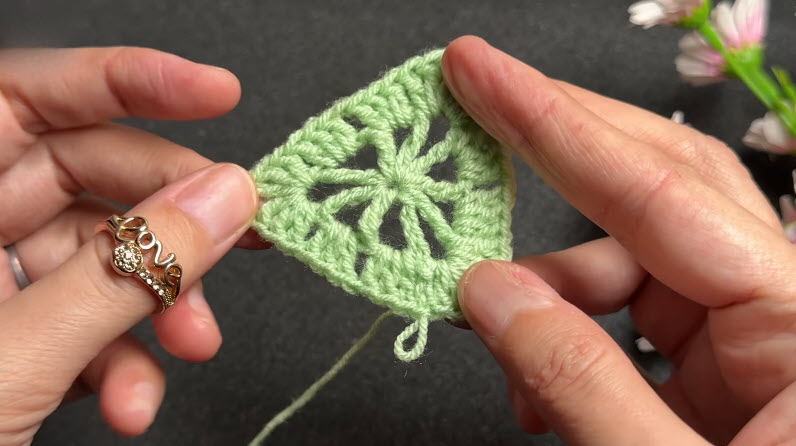
Step 6: Add the Shell Edging Round
Work a final round of shell stitches around the entire perimeter of the triangle, creating the scalloped trim visible in the sixth photo. Keep shell placement even along each side so the trim matches at all three corners.
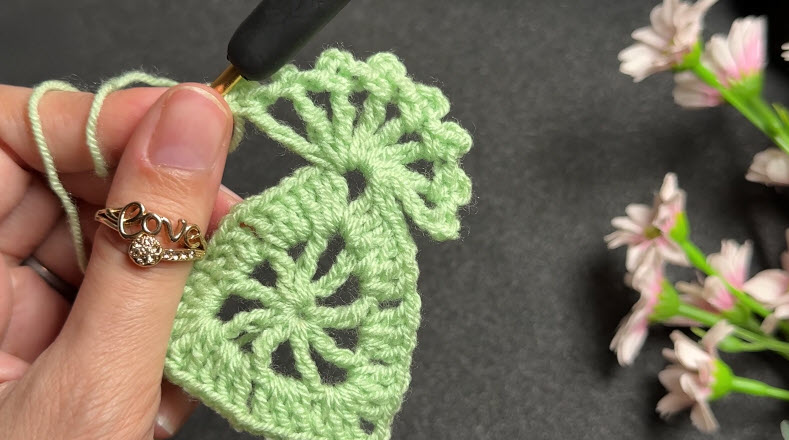
Step 7: Finish and Fasten Off
Fasten off once the shell round is complete and weave in both ends securely. The finished triangle motif, shown fully flat in the last photo, is now ready to use on its own as a coaster or as a building block for the runner and handbag.
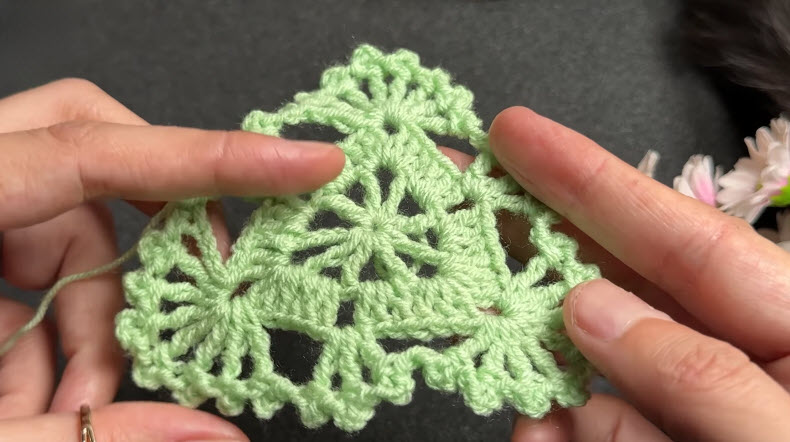
Step 8: Make Additional Motifs to Match
Repeat steps one through seven to work as many additional motifs as your project needs, using the same yarn, hook, and tension every time so each triangle finishes at a matching size.
Common Mistakes
- Losing track of the stitch count during an increase round, which throws off the triangle shape
- Uneven tension between separate motifs, leading to mismatched sizes once it is time to join
- Skipping the blocking step before joining, which leaves a wavy, uneven runner
- Attaching handbag lining before confirming both panels match in size and shape
Troubleshooting
Uneven Triangle Corners
Problem: The triangle corners come out uneven. Why it happens: Increase stitches were placed inconsistently around the three corner points. How to recognize it: One or two corners look sharper or wider than the others when the motif lies flat. How to fix it: Recount stitches at each corner point every round and mark the corner stitch with a stitch marker to keep placement consistent.
Stitch Counts Drifting in the Center Rounds
Problem: Stitch counts drift in the tiny center rounds. Why it happens: It is easy to miscount stitches worked into a small magic ring or first round. How to recognize it: The center ring looks lopsided or the first round has an uneven number of petals. How to fix it: Count stitches out loud or mark every few stitches with a scrap of contrasting yarn until the round is complete.
Curling Edges
Problem: Edges curl instead of lying flat. Why it happens: Tension is too tight, or the piece has not been blocked yet. How to recognize it: The motif rolls at the outer edge rather than sitting flat on a table. How to fix it: Loosen tension slightly on the outer rounds and block the finished motif with steam or a light wet block.
Motifs That Do Not Match
Problem: Motifs do not match each other. Why it happens: Hook size, yarn tension, or even yarn dye lot changed partway through the project. How to recognize it: One motif measures visibly larger or the color looks slightly different once pieces sit side by side. How to fix it: Keep a single ball of yarn and hook dedicated to the project and compare every new motif against the first one before setting it aside.
Loose Handbag Lining
Problem: Handbag lining pulls loose from the crochet panel. Why it happens: Stitching between fabric and yarn was too sparse or placed too close to the fabric edge. How to recognize it: Gaps appear between lining and crochet fabric after light use. How to fix it: Re stitch the lining with closer, smaller stitches and anchor corners with a few extra reinforcing stitches.
Yarn Substitution Changing the Look
Problem: Substituted yarn changes the look of the motif. Why it happens: A bulkier yarn hides the open lace detail, while crochet thread can feel fragile for a bag that gets daily use. How to recognize it: Chain spaces look tight and solid rather than open, or the fabric feels delicate under normal handling. How to fix it: Stick with a medium weight cotton for runner and bag versions, and reserve finer thread for coasters that see lighter handling.
Finishing
Weave in every loose end along the back of the work rather than trimming them short, and give the finished piece a final light block so the lace pattern sits open and even.
Assembling the Handbag Safely
Reinforce every point where a handle or strap meets the bag body with a few extra stitches, since that area takes the most repeated stress. Check that a magnetic snap sits flat against the lining rather than the crochet fabric, which helps it stay secure over time.
Washing and Care
Cotton pieces generally hand wash well in cool water and should be laid flat to dry rather than wrung out, which helps the lace pattern keep its shape. A coaster may tolerate a gentle cycle inside a mesh bag, while a lined handbag is best spot cleaned to protect the fabric lining and any hardware.
Styling Ideas
A finished runner suits a dining table or console table for a relaxed, textured look. A handbag pairs naturally with a matching lining fabric chosen to fit your outfit or the season. A set of coasters makes an easy handmade gift alongside a mug or a small potted plant.
Color Palette Ideas
Since the same motif works across three different projects, color choice can tie them together as a set. A soft sage paired with cream gives a botanical, calm look, while a mix of blush and terracotta motifs feels warmer for a gift set. For a bolder runner, alternate two shades of the same color family motif by motif along the strip.
FAQs
Can I use the same motif for all three projects?
Yes, the triangle motif from steps one through seven is identical for the coaster, runner, and handbag. Only the finishing and joining steps change depending on which project you are making.
What yarn weight works best for a handbag panel?
Medium weight cotton, such as a DK or light worsted weight, gives the panel enough structure to hold its shape once lined and stiffened.
How many motifs do I need for a table runner?
It depends on your table length and how large each motif finishes at your gauge. Measure one finished motif, then calculate how many joined side by side will reach the length you want.
Can I substitute crochet thread instead of yarn?
Yes, crochet thread works well for a coaster and produces a finer, more delicate motif, though it is a less durable choice for a handbag that sees regular handling.
How do I keep the triangle from curling?
Block every motif with steam or a light wet block before joining, and avoid working the outer rounds with overly tight tension.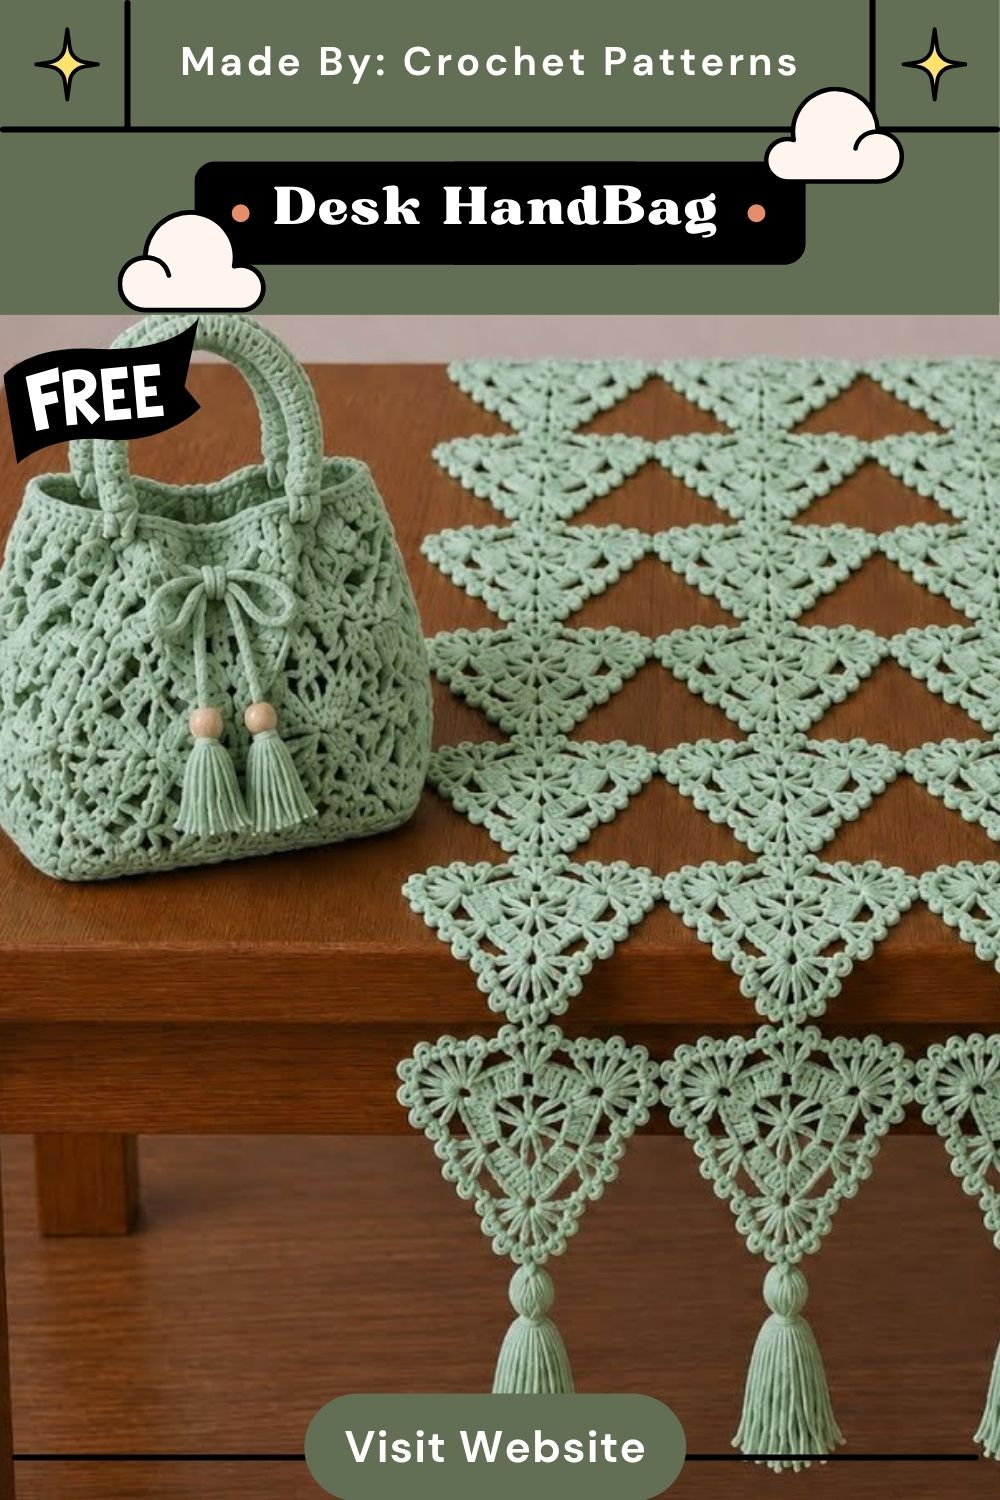
final words
One triangle motif, worked from a simple ring outward, turns into three finished pieces: a quick coaster, a joined table runner, or a lined handbag panel. Master the stitch counts and shell edging once, and every future motif comes together faster. Pick a color palette, gather cotton yarn, and start your first triangle motif today, one round at a time.