Crochet Lightweight Polo Collar Sweater Pattern
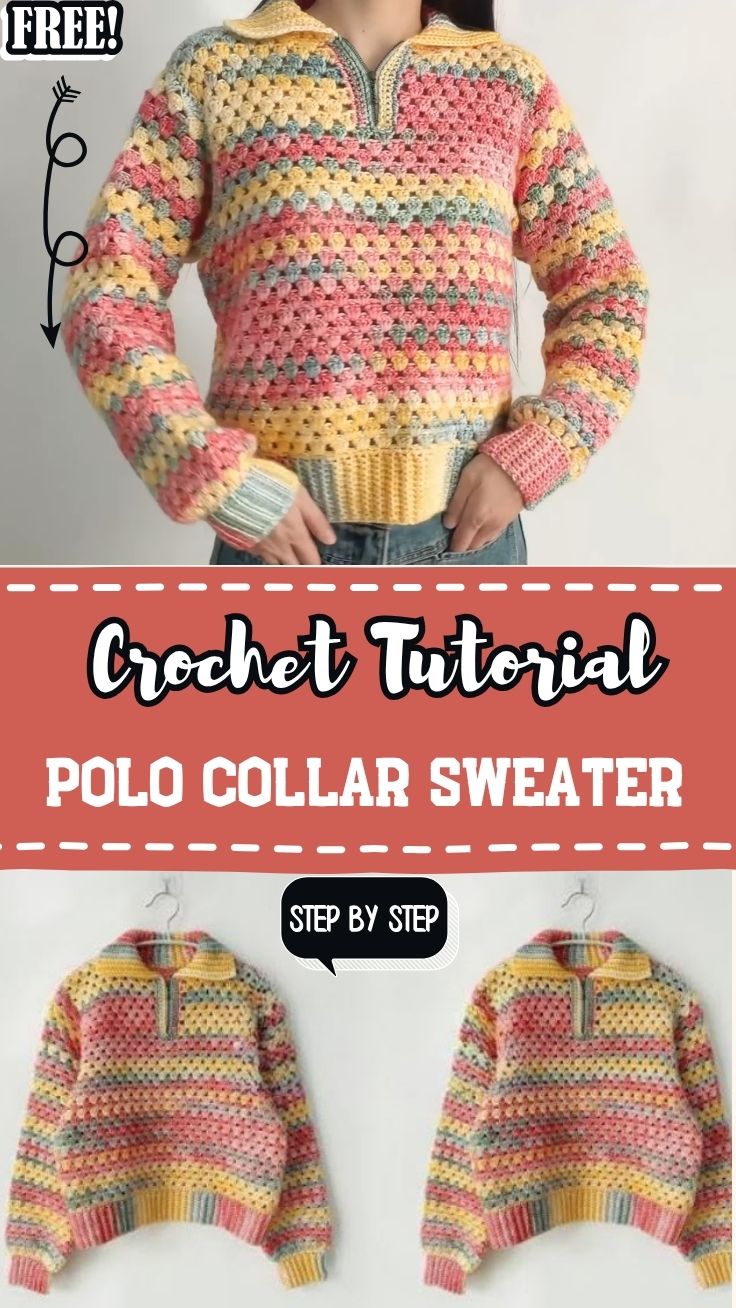
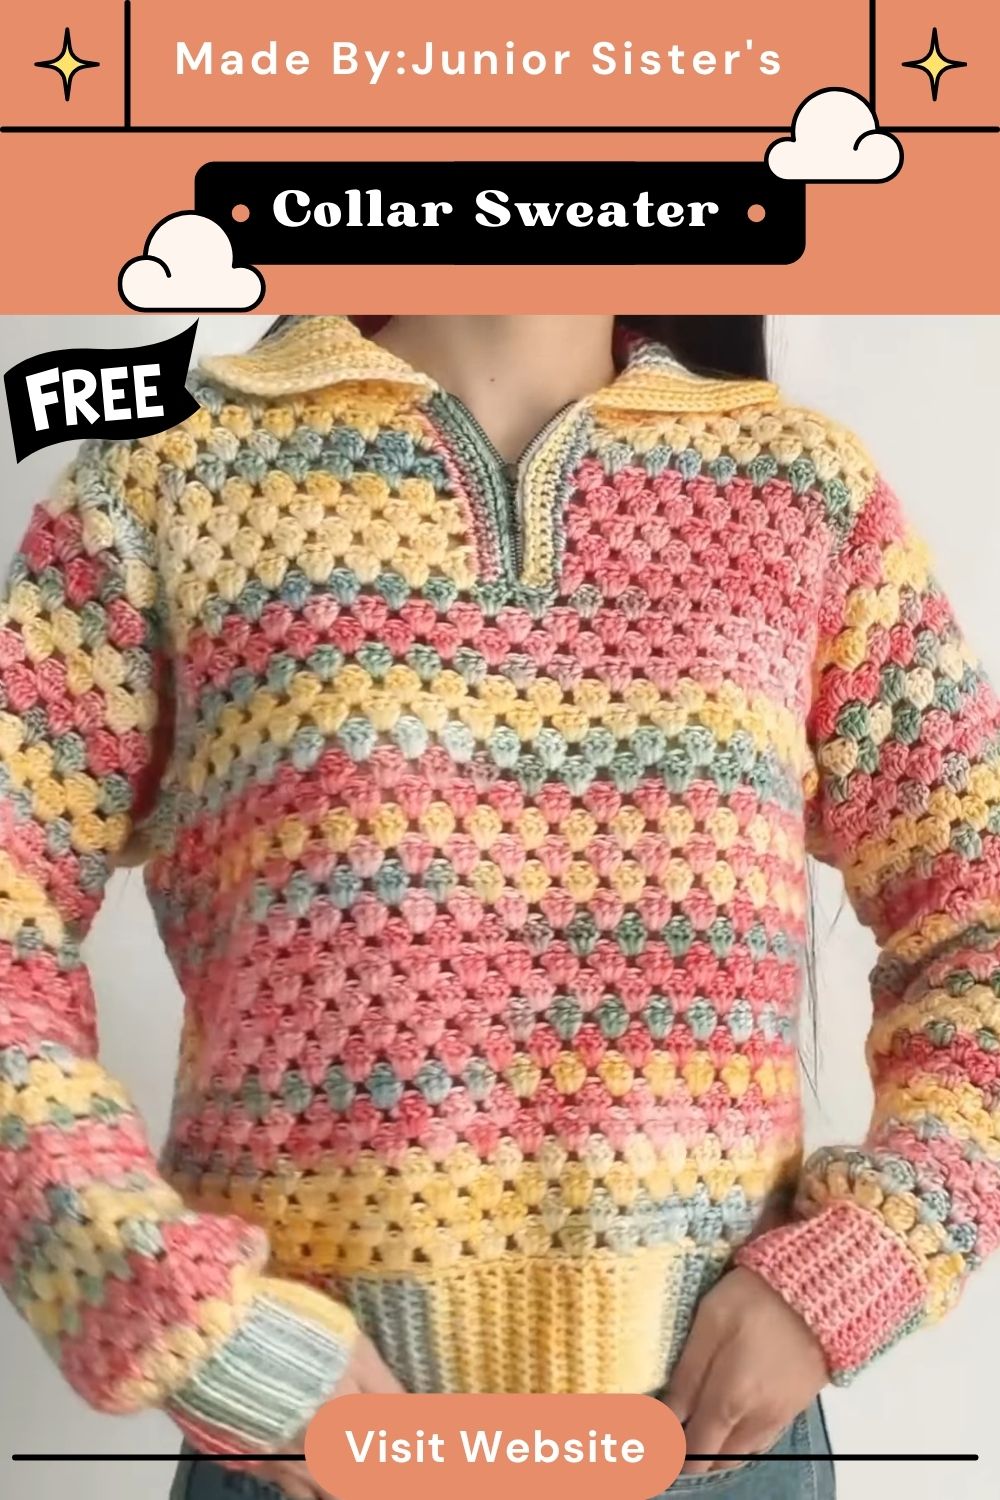
Coral, butter yellow, sage, and blue stripes run across the granny-style front of the Crochet Lightweight Polo Collar Sweater Pattern, sitting above a vertical ribbed hem and framing a neat U-shaped placket opening at the center.
The front of this Crochet Lightweight Polo Collar Sweater starts as a narrow ribbed strip, which is turned sideways so the body can grow straight out of its edge. Open clusters keep the fabric airy, making it a true granny stitch sweater, while the framed opening gives the crochet polo sweater its shirt-like look. Photo-by-photo steps and fit checks follow.
Pattern Overview
The sweater combines three kinds of fabric in one garment. A dense ribbed band forms the hem. Open granny-style clusters build the body. A narrow solid border frames the placket at center front.
The band isn’t sewn on afterward. It’s made first, turned so its ridges stand vertically, and the body is crocheted directly into its long edge. That means no hem seam and a clean transition between textures.
The collar completes the polo look, but the supplied photos end at the finished front panel, before the collar goes on.
Materials
- Yarn in several coordinating colors (coral pink, butter yellow, cream, sage green, and soft blue appear in the photos)
- Crochet hook with a handle marked 8/0, Japanese sizing that corresponds to 5 mm
- Yarn needle
- Scissors
- Stitch markers
Yarn weight, fiber, and quantity aren’t confirmed in the available material.
Yarn Selection
The yarn in the photos has a soft, slightly fuzzy halo, and the colors sit close together in tone, so the stripes blend rather than contrast sharply.
If you substitute yarn, remember the sweater uses two very different fabrics. A yarn that looks crisp in the ribbing may feel stiff in the clusters. A very slippery yarn may make the band lose its ridges. Swatch a few rows of each before committing.
Hook Size and Gauge
The hook shown is marked 8/0. No gauge is supplied, so make a swatch of both the band and the granny section with your chosen yarn. Measure after the swatch rests flat for a few minutes. Your gauge decides how many band rows and cluster rows you’ll need for your size.
Before You Start
- Take your bust measurement and compare it with a top whose fit you like.
- Decide your stripe order before starting.
- Keep a marker handy for the first stitch of the base row.
- Plan where to hide ends. The granny fabric has gaps, so tails need to sit inside clusters.
Construction and Instructions (Photo by Photo)
Exact stitch counts and row counts aren’t included in the supplied material. Use the video tutorial for numbers, and use the notes below to understand each stage.
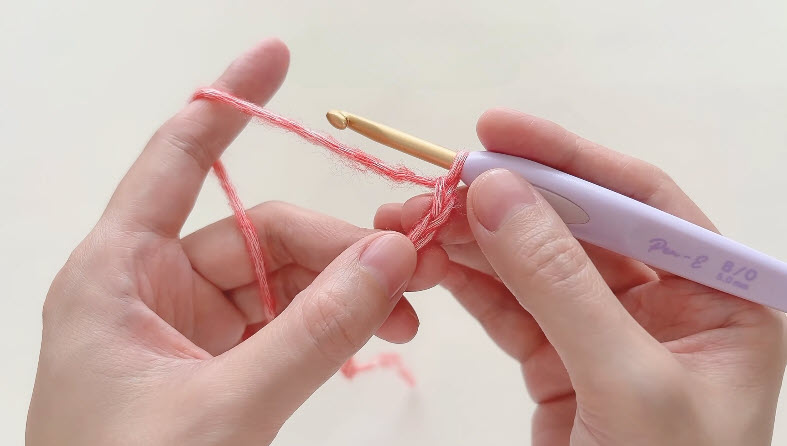
1: The Foundation Chain
The first photo shows the starting chain being worked with coral yarn, the working strand wrapped over the left index finger.
Instructions:
- Make the foundation chain to the length given in the video.
- Keep the chain relaxed so the first row goes in easily.
- Remember this chain sets the band’s width once turned, which becomes the depth of your hem.
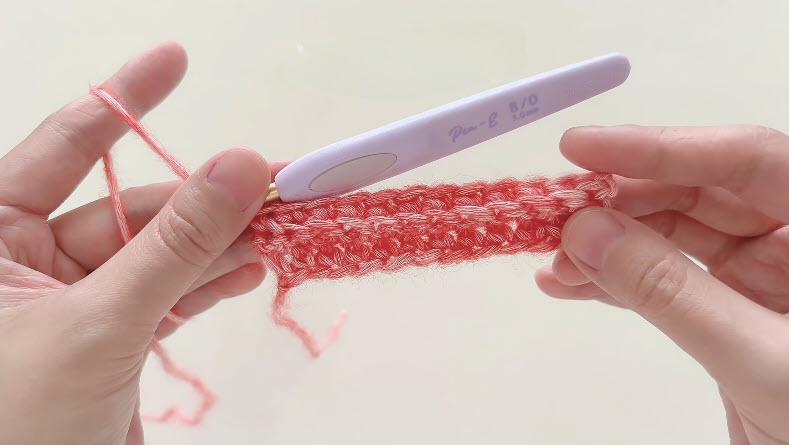
2: Building the Ribbed Band
A short strip of rows has formed, with a raised line along each row.
Instructions:
- Work back and forth in rows on the chain.
- Count stitches at the end of every row for the first few rows.
- Continue until the band is long enough to span the panel width.
- Add color changes as you go if you’re striping the band.
Checkpoint: Both long edges should stay parallel. A slanting edge means a stitch was gained or lost.
3: Turning the Band and Working the Base Row
The band is now turned so its ribs run vertically, and cream yarn is worked along the long edge.
Instructions:
- Rotate the band so the ridges stand upright.
- Join the new color at one end of the long edge.
- Work evenly into the row ends along the full edge.
- Place a marker in the first stitch.
Checkpoint: Lay the band flat. The base row shouldn’t ruffle or pinch the ribbing.
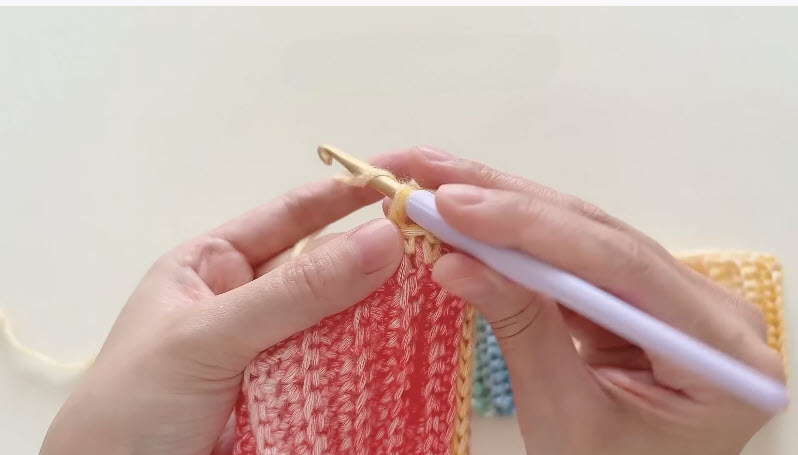
4: First Granny Clusters
Pink clusters are being worked into the yellow row above the striped ribbing.
Instructions:
- Work the first cluster row into the base row, following the spacing in the video.
- Leave the small gaps between clusters that give the fabric its open look.
- Count clusters at the end of the row.
Checkpoint: If the band edge waves, clusters are too close. If it pulls in, they’re too far apart.
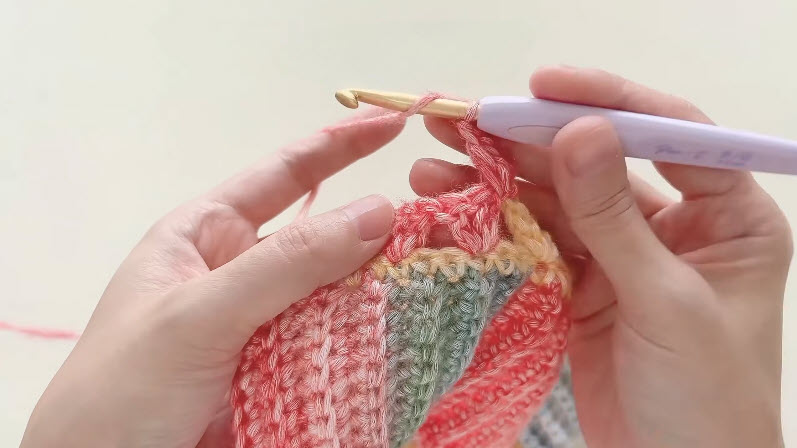
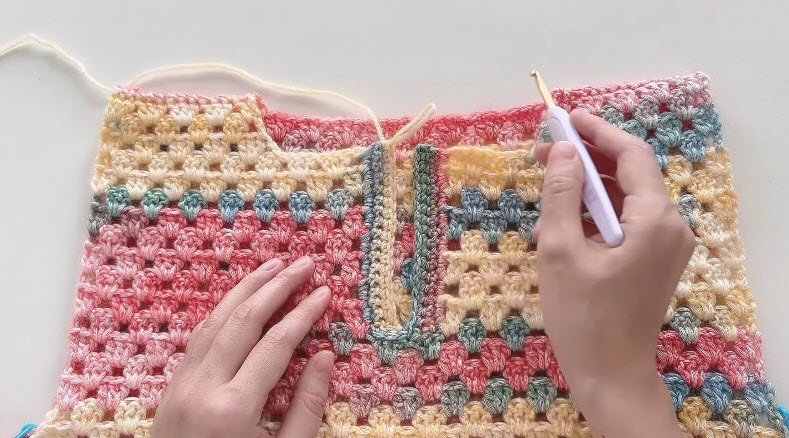
5: The Finished Front Panel
The front panel is complete, with horizontal color stripes, a U-shaped placket bordered in green, cream, and blue, and a stepped neckline on both sides.
Instructions:
- Continue cluster rows, changing colors by row.
- Open the placket at the point shown in the video.
- Work the narrow border around the opening, following the rounded bottom.
- Shape the neckline evenly on both sides.
- Leave yarn tails at the top for later seaming.
Checkpoint: The opening should sit centered, and both neckline steps should match.
Pro Tip: Lay the panel flat every few cluster rows. Straight side edges and level stripes are much easier to protect early than to fix at the neckline.
Sizing and Fit Guidance
No size range is supplied. Before starting the body, lay a well-fitting top flat and measure its width across the chest. Compare that with your band length. A granny fabric can relax after blocking or wearing, so compare against a rested swatch rather than a freshly worked one.
Check fit again before neckline shaping. Hold the panel against your chest to see where the placket falls.
Common Mistakes and Troubleshooting
Slanting band
- What it looks like: One edge of the band is longer than the other.
- Check: Stitch counts at row ends.
- Fix: Rip back to where the slant began and rework.
Rippling hem
- What it looks like: The band waves after the first cluster row.
- Check: Stitches in the base row and cluster spacing.
- Fix: Rework the base row with fewer stitches, then match the video spacing.
Puckered placket
- What it looks like: The border curls or pulls the clusters inward.
- Check: Border tension compared with body tension.
- Fix: Rework the border more loosely.
Visible tails in gaps
- What it looks like: Yarn ends showing through the open spaces.
- Fix: Reroute ends through the clusters themselves.
Color Variations
The photo palette uses soft, closely related tones. For a bolder crochet collared sweater, try high-contrast stripes, keeping the placket border in a color from the body so it looks planned. For a calmer look, work the band and border in one color and stripe only the body.
FAQs
What hook is used?
The hook in the photos is marked 8/0, which equals 5 mm.
Is the hem sewn on?
No. The body is crocheted directly into the band’s long edge.
Can I change the stripes?
Yes. Plan the order before the first cluster row.
Where does the collar go?
Around the neckline and placket. The collar steps are covered in the video.
Bonus Section: Checking the Placket Before Adding the Collar
Lay the front flat. Measure from each side of the opening to the side edge of the panel; the numbers should match. The rounded bottom should sit centered, and both neckline steps should be the same depth. Correcting the placket now saves undoing the collar later.
Finishing
Weave in all ends, keeping them inside clusters or within the ribbing. Seam shoulders and sides according to the video, then add the collar. Care depends on your yarn, so follow its label.