Crochet Coffee Cup Amigurumi Pattern for Decorative Fun
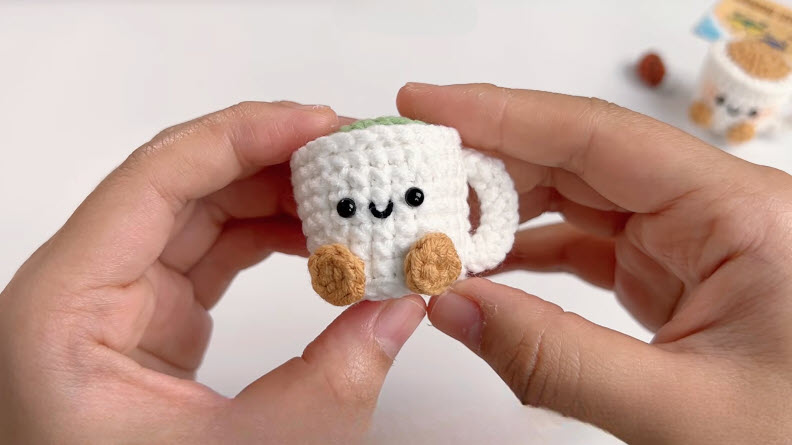
Coffee lovers and crochet enthusiasts finally have a project made just for them. This tiny Crochet Coffee Cup Amigurumi combines a cheerful face, a fluffy green topping, and warm cookie-colored feet into one adorable keepsake. Beginners will enjoy the simple shaping, while experienced makers can turn it into a quick gift or a fun addition to their handmade collection. Grab a hook and a couple of yarn colors, and let this pattern bring a smile to your crafting table.
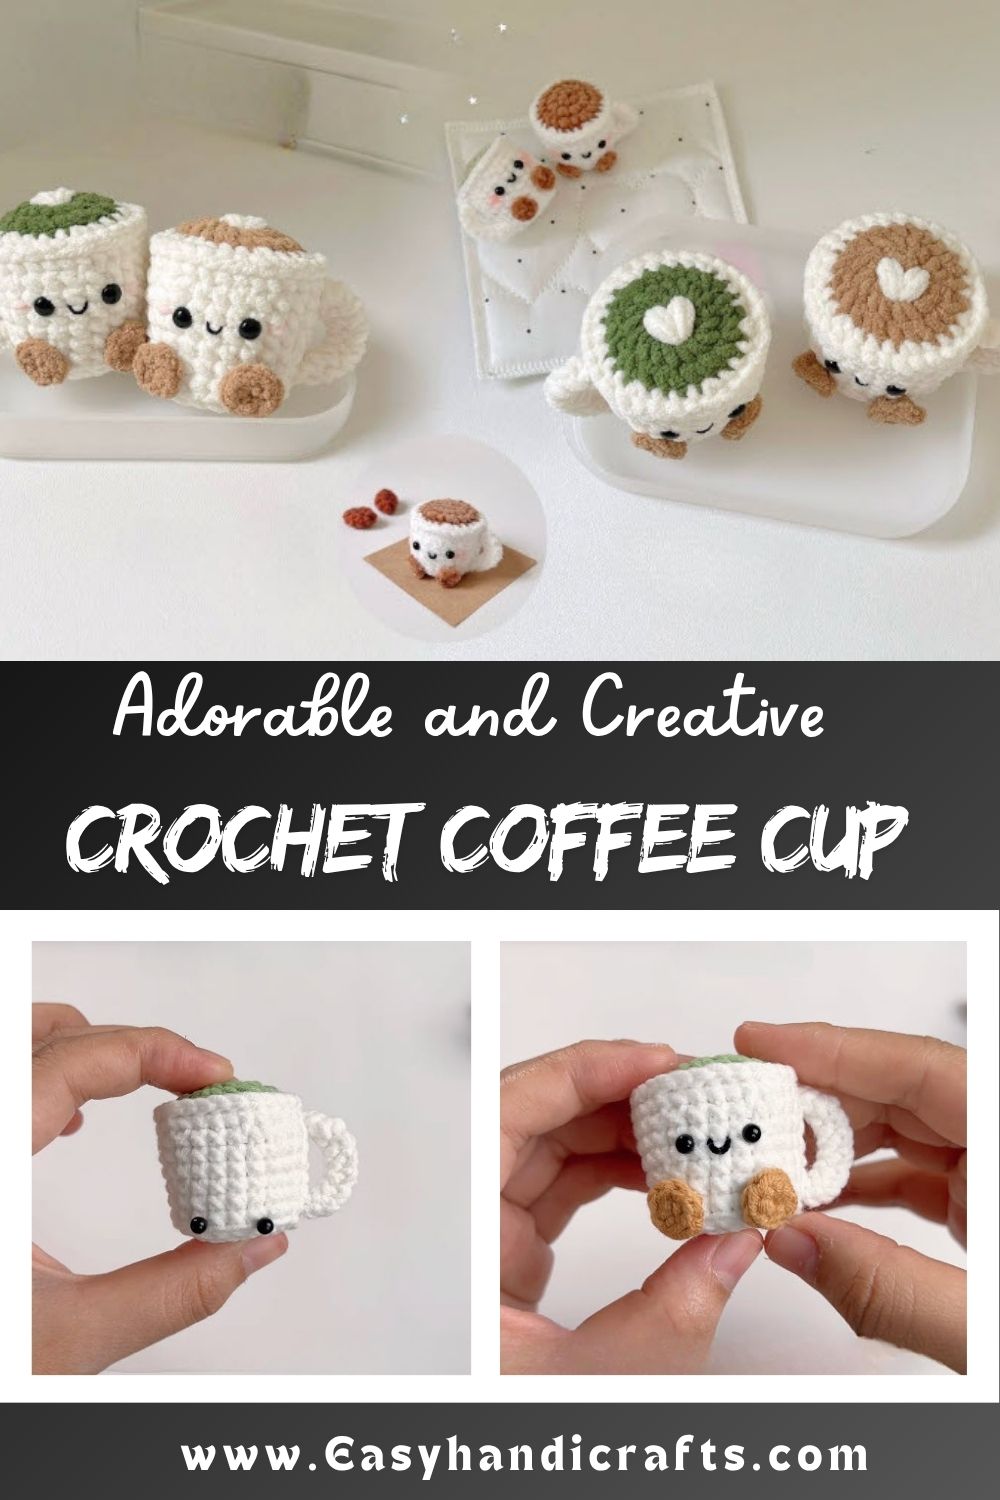
Difficulty stays approachable throughout the whole project. Basic stitches carry most of the work, and shaping happens gradually through simple increases and decreases. Anyone comfortable with a magic ring and single crochet can finish this pattern in a single relaxed evening, making it a satisfying quick win for a crochet basket full of amigurumi.
Project Details
- Skill Level: Beginner to Beginner-Intermediate
- Finished Size: Approximately 2 to 2.5 inches tall (size varies based on yarn weight and tension)
- Estimated Time Required: 1.5 to 2 hours
- Recommended Yarn Weight: DK or Worsted weight (Category 3 or 4)
- Crochet Hook Size: 2.5mm to 3.0mm (choose a hook one or two sizes smaller than recommended for the yarn to keep stitches tight)
Materials Needed
- White yarn (for the cup body)
- Green yarn (for the coffee/topping detail)
- Tan or light brown yarn (for the feet)
- Small amount of black yarn or embroidery thread (for the facial features)
- Crochet hook (2.5mm–3.0mm)
- Fiberfill stuffing
- Tapestry needle
- Stitch markers
- Scissors
- Safety eyes (optional, if you prefer them over embroidered eyes)
Crochet Stitches & Techniques
This pattern relies on a handful of amigurumi essentials:
- Magic Ring (MR): Forms the tight, adjustable starting loop for each round piece.
- Chain Stitch (ch): Used minimally, mainly for the handle foundation.
- Single Crochet (sc): The main stitch used throughout the cup and topping.
- Increase (inc): Two single crochets worked into one stitch to widen the round.
- Invisible Decrease (inv dec): Keeps decrease rounds smooth and avoids visible gaps.
- Color Changes: Switching from green to white creates the layered coffee-cup look.
- Fastening Off: Securing the yarn at the end of each piece.
- Sewing Pieces Together: Attaching the handle, feet, and topping to the main cup body.
Only these techniques appear in the pattern, so newer crocheters won’t need to learn anything unfamiliar before starting.
Pattern Instructions
Making the Coffee Topping
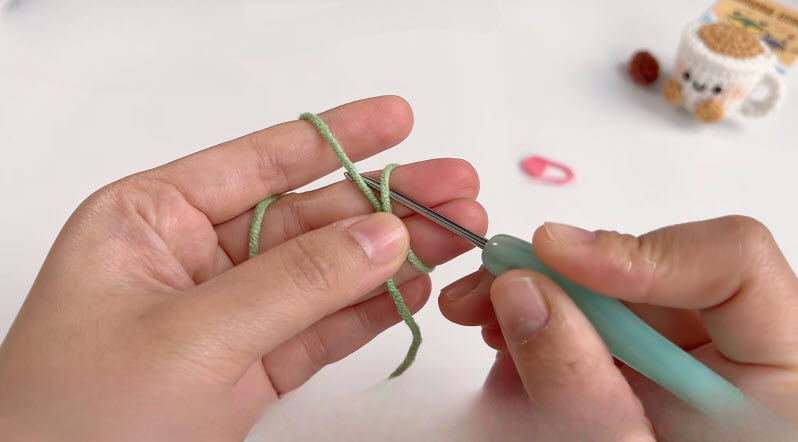
Start with green yarn and form a magic ring, working six single crochets into it before pulling the loop closed. Place a stitch marker in the first stitch of the round to track your progress, since amigurumi work in a continuous spiral rather than joined rounds.
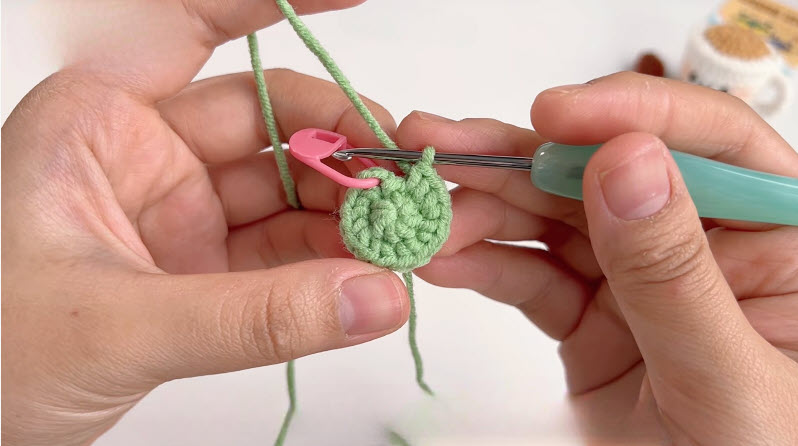
Increase evenly across the next round to bring the stitch count up, then work one or two rounds even (without increasing) so the topping forms a slightly domed shape. Stuffing at this stage stays light, since this piece sits on top of the cup rather than forming a full sphere.
Crocheting the Cup Body
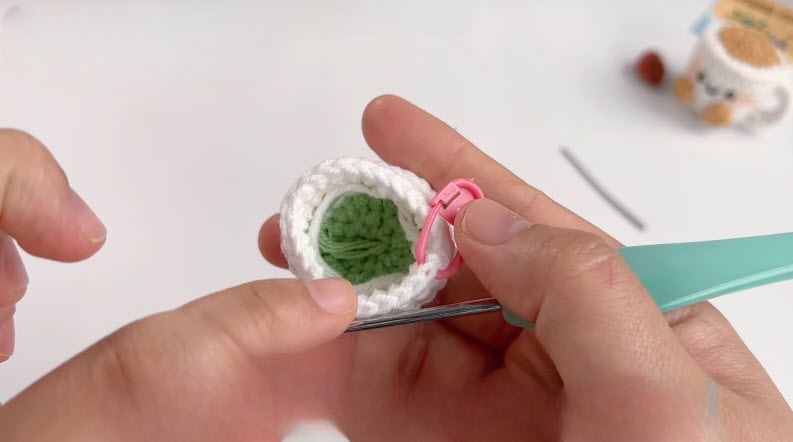
Switch to white yarn once the green topping reaches your desired width. Continue working in the round, keeping stitches snug so the fabric stays dense enough to hold stuffing without gaps showing through. The transition between green and white forms naturally along the color-change round, giving the piece its signature “coffee peeking over the rim” look.
Work several rounds even to build the height of the cup. Add stuffing gradually as you go rather than waiting until the piece closes, since amigurumi pieces are much easier to fill evenly in stages. Decrease gently toward the base so the bottom of the cup sits flat and stable.
Making the Handle
Chain a short foundation length, then single crochet back along the chain to create a small curved strip. Leave a long yarn tail for sewing, since this piece attaches directly to the side of the finished cup body.
Crafting the Feet
Using tan yarn, form two small magic rings and work a couple of rounds to create rounded, flattened feet. Light stuffing keeps them slightly puffy without losing their flat base shape. Leave tails on both pieces for attaching later.
Facial Features
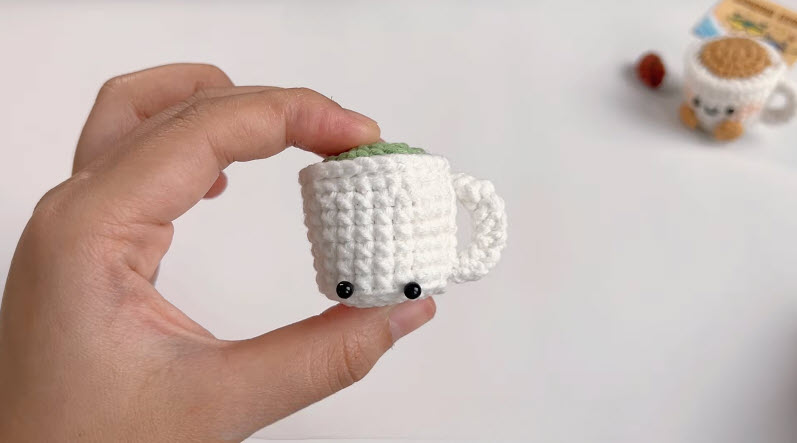
Position the eyes first, spacing them evenly across the front of the cup before securing safety eyes or embroidering them in place. A simple curved smile stitched in black yarn beneath the eyes finishes the expression and gives the cup its cheerful personality.
Joining All Pieces
Pin the handle against one side of the cup before stitching it firmly in place, checking that it curves outward naturally rather than sitting flat. Attach both feet along the bottom front of the cup, spacing them so the finished piece can stand upright on its own.
Final Assembly
Sew the green topping onto the top of the white cup body, tucking any visible color-change stitches under the seam for a clean finish. Weave in every loose end using a tapestry needle, checking the whole piece for stray tails before setting it down as complete.
Tips for Success
- Count stitches at the end of every round to catch mistakes early.
- Use a stitch marker consistently, since amigurumi rounds have no natural stopping point.
- Stuff in small amounts throughout the project rather than all at once.
- Pull yarn tails to the inside of the piece before trimming to hide them completely.
- Keep tension even across rounds so the cup shape stays symmetrical.
- Block or lightly steam the finished piece if the stitches look uneven.
Personalization Ideas
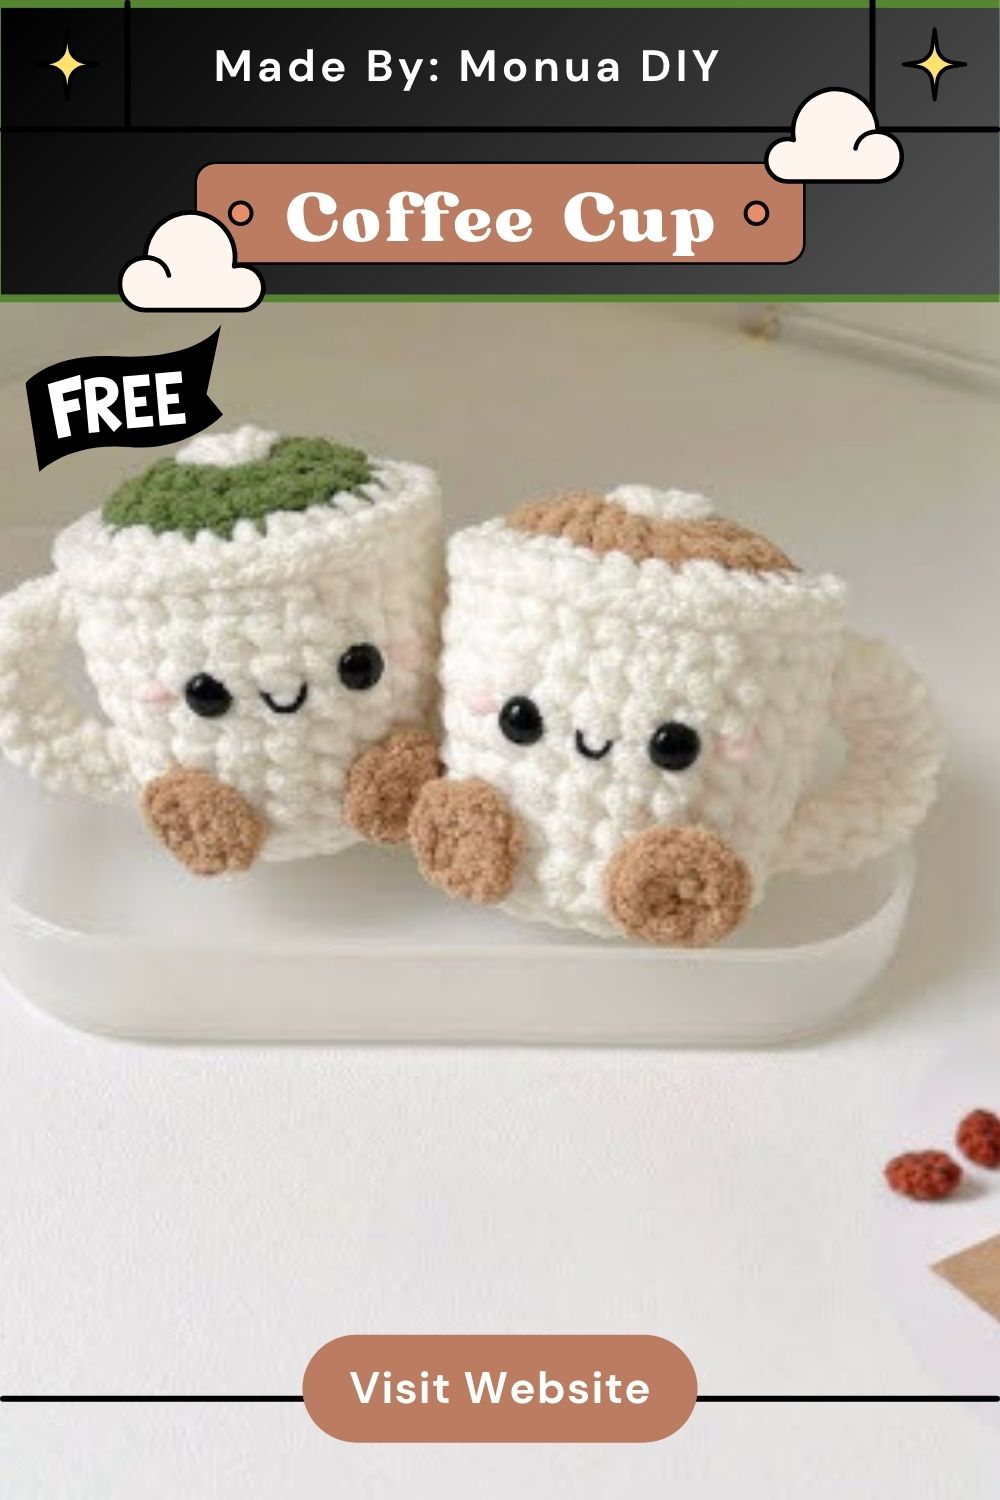
Swapping the green topping for brown or cream yarn instantly turns this into a latte or hot chocolate version. Holiday makers might enjoy a red-and-white candy cane color scheme for a festive twist, while pastel shades work beautifully for a springtime batch. Facial expressions offer another easy customization, since a wink, a sleepy look, or wide surprised eyes each give the cup a different personality.
Turning this pattern into an ornament only requires a small loop of yarn or ribbon sewn to the top before gifting. A keychain version works the same way with a jump ring and clasp attached through the handle. Making a jumbo size using bulky yarn and a larger hook creates a fun standalone plushie, while a mini version using thread-weight yarn makes an adorable addition to a dollhouse collection.
Common Mistakes to Avoid
Skipping stitch markers often leads to losing track of the round, which throws off the entire shaping sequence. Loose tension between stitches creates visible gaps once stuffing gets added, so checking tightness throughout the project saves frustration later. Rushing the color change between green and white sometimes leaves a messy line rather than a crisp transition, so working that round slowly and carefully makes a noticeable difference in the finished look.
Overstuffing before closing the final round can distort the cup’s shape, while understuffing leaves the piece looking flat and lifeless. Finding that middle ground takes a little practice but becomes second nature after a project or two.
Frequently Asked Questions
What yarn weight works best for this Crochet Coffee Cup Amigurumi pattern?
DK or worsted weight yarn gives the cleanest stitch definition for a piece this small, though other weights can work with hook size adjustments.
Can I use safety eyes instead of embroidering the face?
Absolutely. Safety eyes give a polished look and work well for anyone who prefers not to embroider, though embroidered features are safer for gifts intended for very young children.
How much yarn do I need for one coffee cup?
A small amount of each color goes a long way, since the finished piece measures only a couple of inches tall. Leftover scraps from other amigurumi projects often work perfectly here.
Why does my cup look lopsided?
Uneven tension or missed increases usually cause this. Counting stitches every round helps catch the issue before it affects the overall shape.
Can beginners really finish this pattern?
Yes, this project stays beginner-friendly throughout, relying on stitches most new crocheters already know or can pick up quickly.
How do I keep the color change looking neat?
Switch colors on the last pull-through of the final stitch before the change, and keep tension consistent on the first round of the new color.
Can I make this Crochet Coffee Cup Amigurumi pattern without safety eyes?
Certainly. Embroidered features work just as well and avoid the need for extra hardware, making the project fully beginner-supply-friendly.
Conclusion
Few amigurumi patterns pack this much charm into such a small finished size. Between the smiling face, the layered coffee topping, and the tiny feet, this Crochet Coffee Cup Amigurumi makes a delightful gift, a shelf decoration, or a fun practice project for building amigurumi confidence. Give it a try, experiment with different color combinations, and share the finished cup with fellow crocheters who appreciate a project full of personality.