Why Crochet Elephant Plushies Make Perfect Handmade Gifts
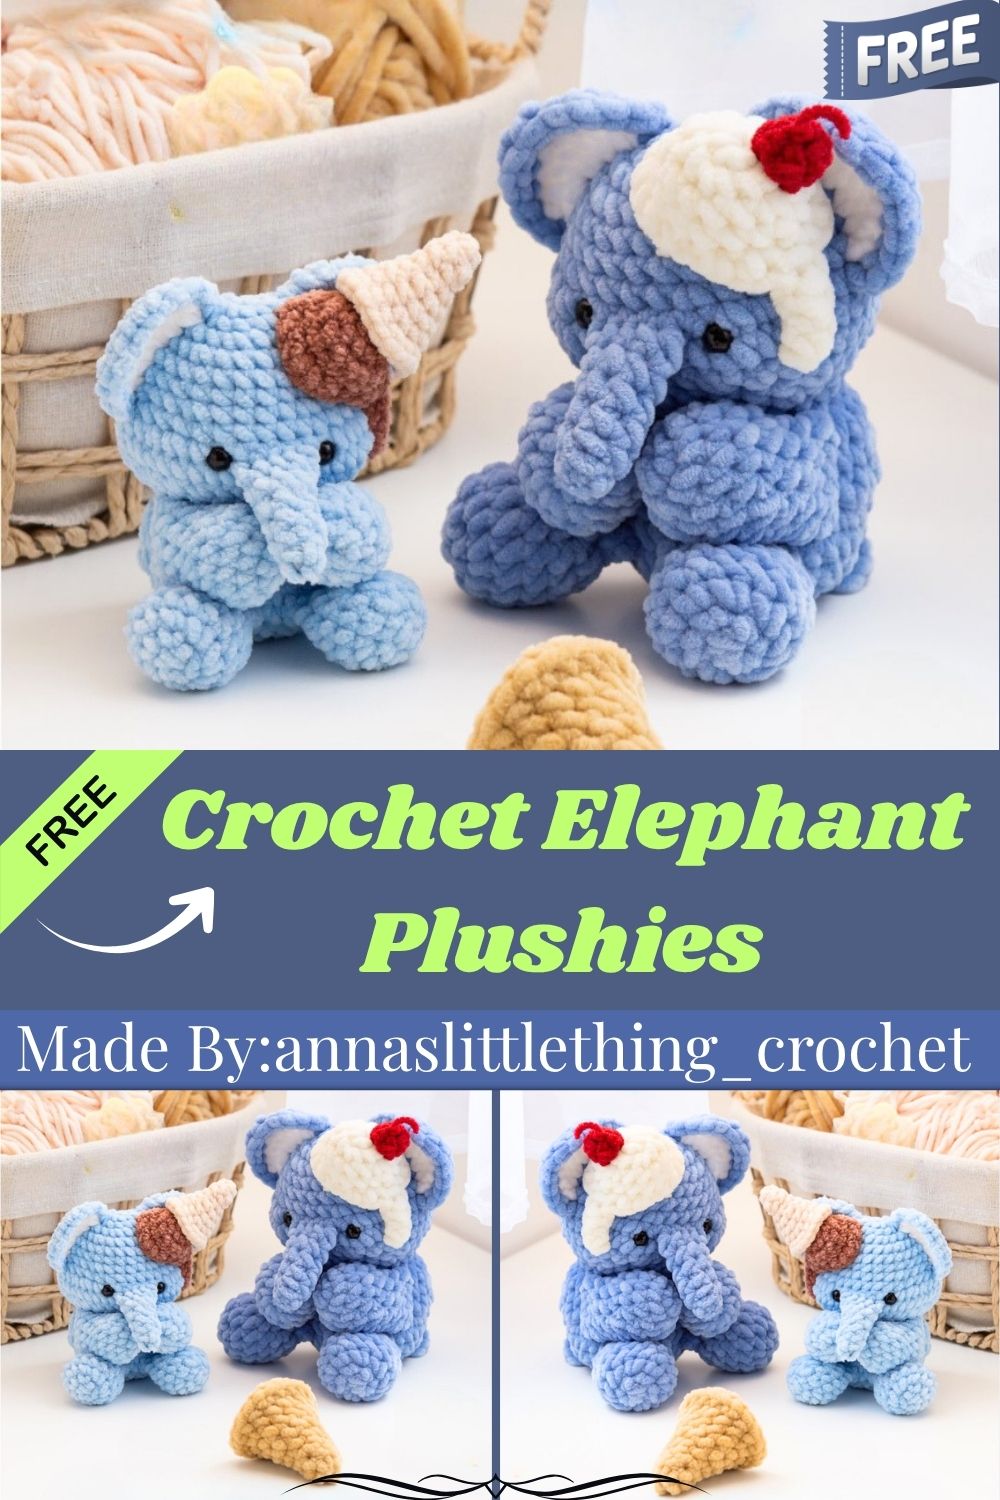
Chenille yarn turns this crochet elephant into one of the softest amigurumi projects you’ll ever make. Rounded ears, tiny stitched hands, and a plush little trunk give it real personality. Trust me, this design earns its spot in any handmade gift lineup.
Few materials feel as satisfying to work with as chenille yarn, and this elephant plushie makes the most of that softness. The pattern moves through classic amigurumi shaping while adding a couple of standout touches, including legs and a nose attached directly mid-round instead of sewn on afterward. A color-changed ear detail and two size options round out the design, letting makers choose between a compact keepsake and a larger display piece. Once stuffed and finished, the plush has a rounded, huggable weight that feels far more premium than a typical beginner toy.
Materials
- Finished size: Small Emett: 9 x 10 cm | Big Emett: 11 x 16 cm
- #4-6 weight chenille yarn (Colors: Light Blue, White, Chocolate Brown, Red, Beige)
- 3.5mm or 5mm crochet hook
- 7mm or 9mm safety eyes
- Fiberfill stuffing
- Stitch markers
- Yarn needle
- Scissors
Abbreviations
MR: Magic Ring R: Round/Row Ch: Chain St(s): Stitch(es) Sl st: Slip Stitch Sc: Single Crochet Hdc: Half Double Crochet Dc: Double Crochet Dec: Decrease Inc: Increase
Emett
All parts of Emett are worked in light blue yarn. All parts are worked in continuous rounds, except for the ears and tail, which are worked in rows.
Nose
R1: 4 sc in a MR [4] R2: (1 sc, 1 inc) x2 [6] R3-R4: 6 sc for 2 rounds [6] R5: (2 sc, 1 inc) x2 [8] R6: 8 sc [8]
Stuff the nose lightly. Fold the piece in half, ch 1, turn, insert the hook through both layers, and make 4 sc across. Leave a short tail as it will be crocheted into the head. F/O.
Head and Body
Start from the top and work your way down.
R1: 6 sc in a MR [6] R2: 6 inc [12] R3: (1 sc, 1 inc) x6 [18] R4: (1 sc, 1 inc, 1 sc) x6 [24] R5: (3 sc, 1 inc) x6 [30] R6-R7: 30 sc for 2 rounds [30] R8: (4 sc, 1 inc) x6 [36]
When connecting the nose, place the wrong side facing you and insert the hook through both layers of the nose and the head. Hide the yarn tail as you go. You need to connect the nose during R9.
R9: 3 sc, 3 inc, 1 sc, 4 sc (connect with the nose), 1 sc, 3 inc, 21 sc [42] R10: 42 sc [42] R11: 3 sc, 3 dec, 6 sc, 3 dec, 21 sc [36]
Insert the eyes between R9-R10, with a spacing of 4-5 sts.
R12: (2 sc, 1 dec, 2 sc) x6 [30] R13: (3 sc, 1 dec) x6 [24] R14: (1 sc, 1 dec, 1 sc) x6 [18]
Stuff with fiberfill.
R15 (FLO): (1 sc, 1 inc, 1 sc) x6 [24]
The sections positioned at the center front in R16, R18, R19, and R20 should be adjusted as needed.
R16: 12 sc, (1 hdc, 1 hdc inc) x6 [30] R17: 30 sc [30] R18: 12 sc, (1 hdc, 1 hdc dec) x6 [24] R19: (1 sc, 1 inc) x6, 12 sc [30] R20: 3 sc, 5 sc (connect with the leg, same method as the nose, with the stitch marker facing up), 2 sc, 5 sc (connect with the leg), 15 sc [30]
Remove the stitch markers from the legs.
R21: (3 sc, 1 dec) x6 [24] R22: (1 sc, 1 dec, 1 sc) x6 [18]
Stuff with fiberfill again.
R23: (1 sc, 1 dec) x6 [12] R24: 6 dec [6]
F/O and close the hole.
Ear
Using white and light blue yarn, start with the white yarn. Work in rows.
Right Ear
Insert the hook into R8 of the head, 7-8 sts away from the eye.
R1: Ch 1, 1 sc in the same st (on R8), 1 hdc (on R7), 1 dc inc (on R6), 1 dc inc (on R5), 1 hdc (on R4), 1 sc (on R3) [8] R2: Turn, 8 sc, sl st in the starting point on R8 [8]
Change to light blue yarn. F/O the white yarn, hiding the tail as you go in R3.
R3: Turn, 2 sc on the white side, 1 sc, 2 hdc, 2 dc inc, 2 hdc, 1 sc, 2 sc on the white side, sl st on R3 [14]
F/O and weave in the ends.
Left Ear
Insert the hook into R3 of the head, 7-8 sts away from the eye.
R1: Ch 1, 1 sc in the same st (on R3), 1 hdc (on R4), 1 dc inc (on R5), 1 dc inc (on R6), 1 hdc (on R7), 1 sc (on R8) [8] R2: Turn, 8 sc, sl st in the starting point on R3 [8]
Change to light blue yarn. F/O the white yarn, hiding the tail as you go in R3.
R3: Turn, 2 sc on the side, 1 sc, 2 hdc, 2 dc inc, 2 hdc, 1 sc, 2 sc on the side, sl st on R8 [14]
F/O and weave in the ends.
Hands (Make 2)
R1: 6 sc in a MR [6] R2: 6 inc [12]
In R3, place a stitch marker on the 2nd inc; this marks the center of the hand.
R3: 3 inc, 9 sc [15] R4: 15 sc [15] R5: (1 sc, 1 dec) x5 [10] R6-R7: 10 sc for 2 rounds [10] R8: (3 sc, 1 dec) x2 [8]
Crochet 1-2 sts until the stitch marker from R3 aligns with the opposite side. Stuff with fiberfill. Fold the piece in half, ch 1, turn, insert the hook through both layers, and make 4 sc across. F/O and leave a long tail for sewing.
Assembly
With the stitch markers facing up, starting from the seam between the head and body, sew downward for 4 sts. Each hand is placed 1 st to the side of the leg, along the same vertical line. The two hands are 9 sts apart. Remove the stitch markers.
Tail
Insert the hook into R19.
R1: Ch 4, insert the hook into the 2nd st from the hook and make 3 sc [3]
Sl st into the starting point on R19. F/O and weave in the ends.
Pattern Overview
- Finished plush comes in two sizes, small (9 x 10 cm) and big (11 x 16 cm), depending on the chenille yarn weight used
- Worked mostly in continuous rounds with the ears and tail crocheted flat in rows
- Nose and legs are connected directly into the head and body while crocheting, skipping separate sewing
- Two-tone ears use a white-to-light-blue color change for a soft, realistic finish
- Hands are stitched on separately using a long tail left after finishing
- Materials needed: chenille yarn in light blue, white, chocolate brown, red, and beige, a 3.5mm or 5mm hook, 7mm or 9mm safety eyes, fiberfill, stitch markers, a yarn needle, and scissors
Special Techniques
Chenille yarn behaves differently than standard cotton or acrylic, so tension control matters more here than usual. Connecting the nose and legs mid-round, instead of sewing them on afterward, keeps the seams nearly invisible on the finished plush. The ear construction uses a color change from white to light blue partway through, worked in rows rather than rounds, which takes a bit more attention to stitch placement. Front loop only shaping on the body creates a subtle ridge line that helps define where the head transitions into the lower body.
Skill Level
This pattern fits crocheters who already feel comfortable with increases, decreases, and basic shaping. The mid-round leg and nose attachments add a moderate challenge, real talk, so complete beginners may want a simpler amigurumi first.
Common Mistakes
- Losing track of stitch counts during the leg and nose attachment rounds
- Using standard yarn instead of chenille, which changes the finished size and texture significantly
- Placing the safety eyes unevenly, which shifts the entire facial expression
- Skipping the stitch marker step for the hands, making the center point hard to find later
- Understuffing the body before closing the final rounds, leaving a soft, uneven shape
- Rushing the ear color change, which can leave visible gaps at the transition point
Uses & Benefits
A crochet elephant plushie like this one suits nurseries, baby showers, and handmade gift shops equally well. Its rounded shape and soft chenille texture make it especially appealing for younger recipients, while the detailed ear and leg construction gives collectors something more refined than a basic amigurumi shape. Makers benefit from practicing mid-round attachment techniques, color changes, and flat-row crochet all within a single project. For anyone selling handmade toys, the finished size options also make it easy to offer both a small keepsake version and a larger display piece from one pattern.
Helpful Beginner Tips
- Keep chenille yarn tension slightly looser than usual, since it doesn’t have as much natural give
- Mark the start of every round, especially through the nose and leg attachment sections
- Test the eye placement with removable pins before inserting the safety eyes permanently
- Work the ears slowly through the color change row to keep the transition clean
- Stuff the body in stages rather than all at once, checking the shape as you go
Where Can You Use This?
This plushie suits a nursery shelf, a baby gift basket, a handmade toy shop listing, or a keepsake piece for elephant-themed collectors and décor.
Why Beginners Will Enjoy This Pattern
Beginners tend to enjoy this pattern because the chenille yarn hides minor stitch inconsistencies, honestly making the finished plush look polished even while new techniques are still being practiced.
Tips and Tricks for Success
- Choose a hook size suited to chenille yarn, since standard sizing charts don’t always apply
- Keep a small tracker for round counts, especially through the longer body sections
- Practice the mid-round leg attachment on scrap yarn first if it feels unfamiliar
- Use good lighting when placing safety eyes to keep the expression symmetrical
- Block the ears lightly after finishing if the color change row curls
Why This Crochet Pattern Is Trending
Soft chenille amigurumi has grown popular for its plush, huggable texture, and elephant designs in particular keep appearing across handmade marketplaces and Pinterest boards. Trust me, the mid-round assembly technique used here also appeals to more experienced makers looking for a project that feels a step above basic amigurumi shaping.
- Chenille yarn gives a noticeably softer, more premium feel compared to standard acrylic amigurumi
- The two-size option (small and big Emett) appeals to both gift buyers and collectors
- Seamless nose and leg attachment techniques attract crocheters wanting cleaner, more polished results
Conclusion
No joke, this crochet elephant plushie earns its popularity through soft chenille texture and thoughtful construction details like the mid-round leg and nose attachments. It works equally well as a gentle nursery gift or a more refined collector’s piece, depending on size and finishing choices. For anyone looking to build on basic amigurumi skills while creating something genuinely giftable, this pattern delivers a rewarding result worth the extra attention it asks for.