Free Crochet Christmas Tree Ornament Pattern for Beginners
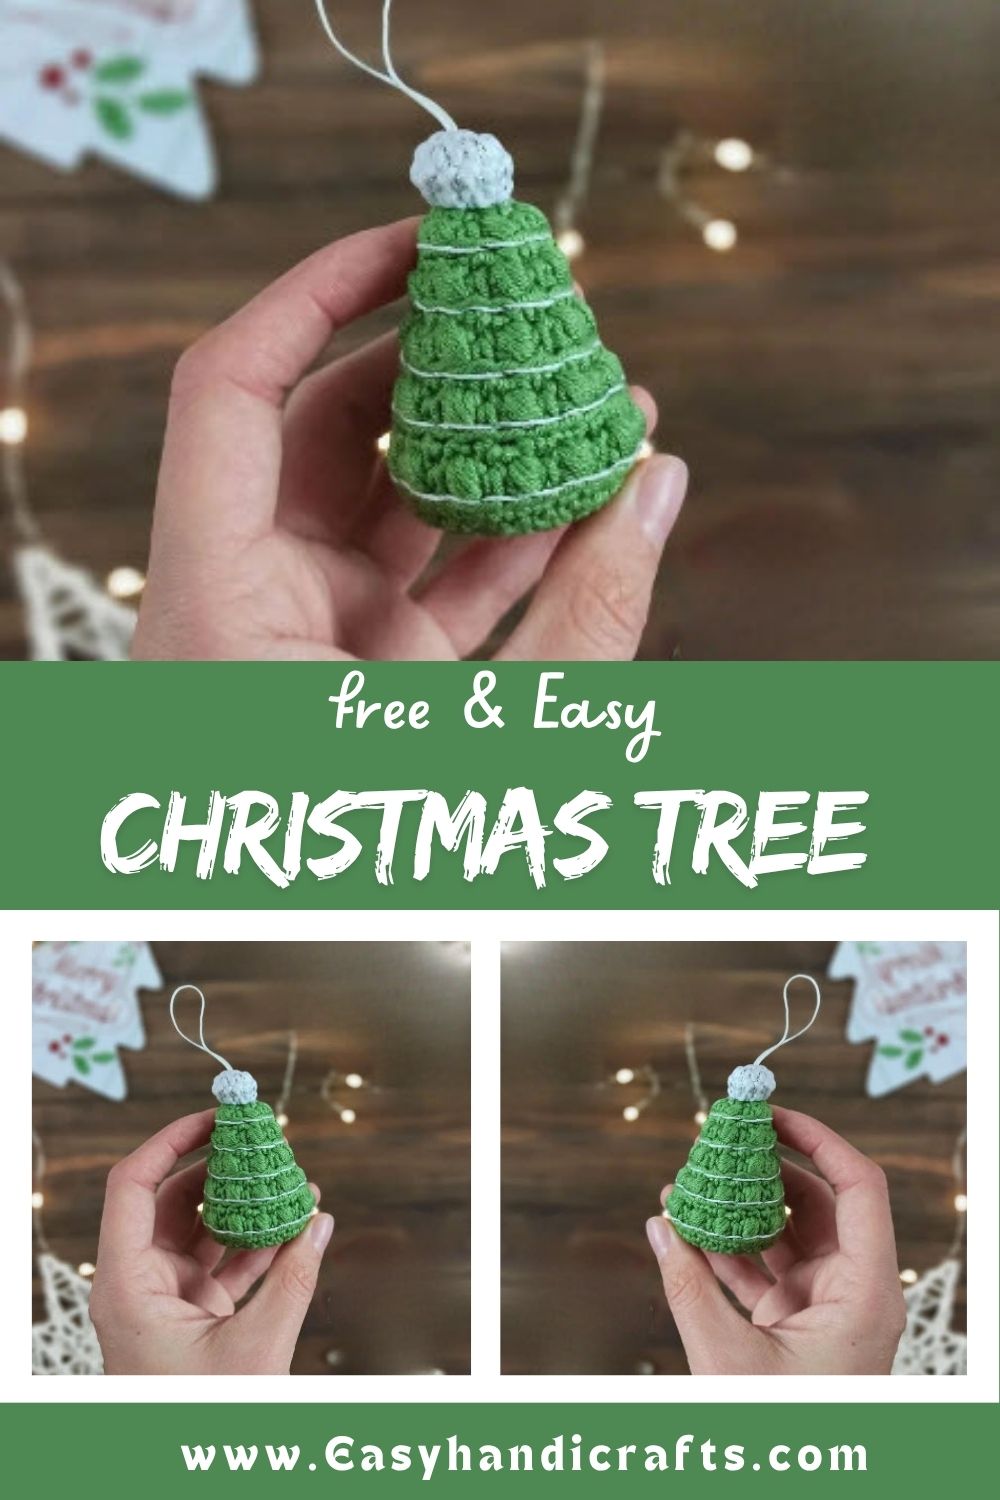
Christmas decor feels even more special when it includes small, handmade details. A design resembling snow-covered little branches, paired with the charming texture of puff stitches, makes this Free Crochet Christmas Tree Ornament Pattern a lovely choice.
This ornament adds beauty to a Christmas tree, festive garland, or mantel decor, and becomes a cherished handmade keepsake you can reuse year after year.
Fluffy branches, a two-tone color palette, and a beginner-friendly stitch count make this ornament pattern surprisingly quick to finish. Soft cotton-acrylic yarn keeps every stitch crisp and holds its shape well once stuffed, so the tree stands upright without flopping over. Every round below walks through exact stitch counts, from the white base to the tapered green top, giving crocheters of any skill level a clear path to a finished holiday keepsake.
Overview
Mint-green branches sit atop a soft white base, creating a tree roughly palm-sized once finished. Ornaments like these work well on a mini tabletop tree, tucked into a gift box, or clipped onto a bag as a festive charm. The shaping uses back loop and front loop stitches to build texture, plus a fun puff stitch that gives the branches their fluffy, snow-dusted look.
Skill Level
Beginner to confident beginner. Anyone comfortable with single crochet, increases, and decreases can manage this Free Crochet Christmas Tree project. The puff stitch takes a little practice, but trust me, after two or three attempts your fingers pick up the rhythm fast.
Materials You’ll Need
- YarnArt Jeans yarn, 50g/160m, in green and white
- 2.5 mm crochet hook
- Stuffing material
- Scissors, yarn needle, and a stitch marker
Yarn weight matters here. YarnArt Jeans has a cotton-acrylic blend that holds its shape nicely, which keeps the tree standing upright instead of flopping over once stuffed.
Abbreviations Used in This Pattern
- mc = magic circle
- ch = chain
- sc = single crochet
- ss = slip stitch
- inc = 2 sc in the next stitch
- dec = single crochet 2 stitches together
- (12) = number of stitches you should have at the end of the round
- (…)*6 = repeat whatever is between the brackets the stated number of times
- PS = puff stitch with 3 stitches
- FLO = front loop only
- BLO = back loop only
- F.O. = fasten off
Step-by-Step Pattern
Start with the white base, which forms the trunk-like foundation the green branches will sit on top of.
White Yarn Section
1: 6 sc in mc
2: (inc)*6 (12)
3: 12 sc
4: (dec)*6 (6)
Switch over to green once the white base is complete, since this is where the branch shaping really begins.
Green Yarn Section
5: FLO (inc)*6 (12)
6: (sc, PS)*6 (12)
7: BLO (2 sc, inc)*4 (16)
8: (sc, PS)*8 (16)
9: BLO (3 sc, inc)*4 (20)
10: (sc, PS)*10 (20)
11: BLO (4 sc, inc)*4 (24)
12: (sc, PS)*12 (24)
13: BLO (5 sc, inc)*4 (28)
14: (sc, PS)*14 (28)
15: BLO 28 sc
Add a hanging loop now if you’d like to turn this into an ornament rather than a standalone decoration.
16: (5 sc, dec)*4 (24)
17: 2 sc, dec, (4 sc, dec)*3, 2 sc (20)
18: (3 sc, dec)*4 (16)
19: sc, dec, (2 sc, dec)*3, sc (12)
Stuff the tree firmly before closing it up, since the shape locks in once the final rounds pull tight.
Round 20: (dec)*6 (6)
Tighten the last six stitches, fasten off, and weave the tail through the top before hiding it inside the stuffing.
Special Techniques
The puff stitch drives the texture on this tree. Working it correctly takes patience the first few rounds. A quick video demonstration helps a ton if reading written steps alone feels tricky, since watching the yarn wraps in motion clears up most confusion instantly.
Front loop and back loop stitches also play a big role here. Alternating between FLO and BLO rounds creates a subtle ridge that mimics real pine branch layers, adding dimension without needing extra colors or embroidery.
Pro Tip
Chain a small loop before starting round fifteen if hanging is the goal, since attaching a loop afterward often distorts the neat rows you already carefully stitched into place.
Helpful Tips
- Keep tension consistent, especially during the puff stitch rounds, so branches stay even in size.
- Count stitches after every round; amigurumi shaping falls apart quickly if a stitch gets missed.
- Stuff a little at a time rather than all at once for smoother, rounder shaping.
- Use a stitch marker on round one to track where each round begins.
Common Mistakes to Avoid
Skipping the stitch count check trips up plenty of beginners. Numbers in parentheses exist for a reason, so pause after each round and confirm the total matches.
Rushing the puff stitch also causes trouble. For real, loose puff stitches lose their poofy texture, while overly tight ones distort the surrounding rounds. Aim for medium tension throughout.
Forgetting the hanging loop is another common slip. Add it during round 15, before the tree begins narrowing, or the ornament ends up without a way to hang.
Customization and Variations
Swapping yarn colors opens up plenty of creative directions. A white tree with silver accents suits a winter wonderland theme, while deep red or gold gives a more traditional holiday feel.
Size adjustments work too. Thicker yarn paired with a larger hook produces a chunkier tree perfect for shelf display, while thinner thread creates delicate ornaments suited for tiny branches.
Consider adding a small star or pom-pom topper for extra flair, or attach a jute string loop instead of yarn for a rustic, farmhouse-style finish.
Finishing Tips
Weave in every loose end carefully, tugging gently to check nothing slips loose over time. A light steam from a distance helps the stitches settle and evens out any uneven tension without flattening the puff stitch texture.
Gifting Ideas
Bundle a few finished trees together in a small drawstring pouch for a thoughtful stocking stuffer. They also make lovely additions to holiday cards, gift toppers, or teacher appreciation bundles during the festive season.
Frequently Asked Questions
Can I use a different yarn brand?
Yes, any DK-weight cotton-acrylic blend works, though gauge may shift slightly, which changes the finished size a little.
How long does one tree take to finish?
Most crocheters finish a single tree in one to two hours, puff stitches included.
Do I need to stuff it heavily?
Firm stuffing works best. Light stuffing leaves the shape soft and prone to collapsing over time.
Can this pattern be made without the puff stitch?
Substituting regular single crochet works fine, though the branches lose some of their textured, snowy look.
Conclusion
Small projects like this Free Crochet Christmas Tree prove that big holiday charm doesn’t require hours of work. Between the simple materials, clear stitch counts, and beginner-friendly shaping, this pattern fits easily into a busy December schedule. Whether displayed on a mini tree, clipped onto a gift bag, or gifted as a set, these little ornaments bring genuine festive warmth. Give the puff stitch a try, keep tension steady, and enjoy watching a ball of yarn transform into a tiny holiday keepsake worth reusing every year.