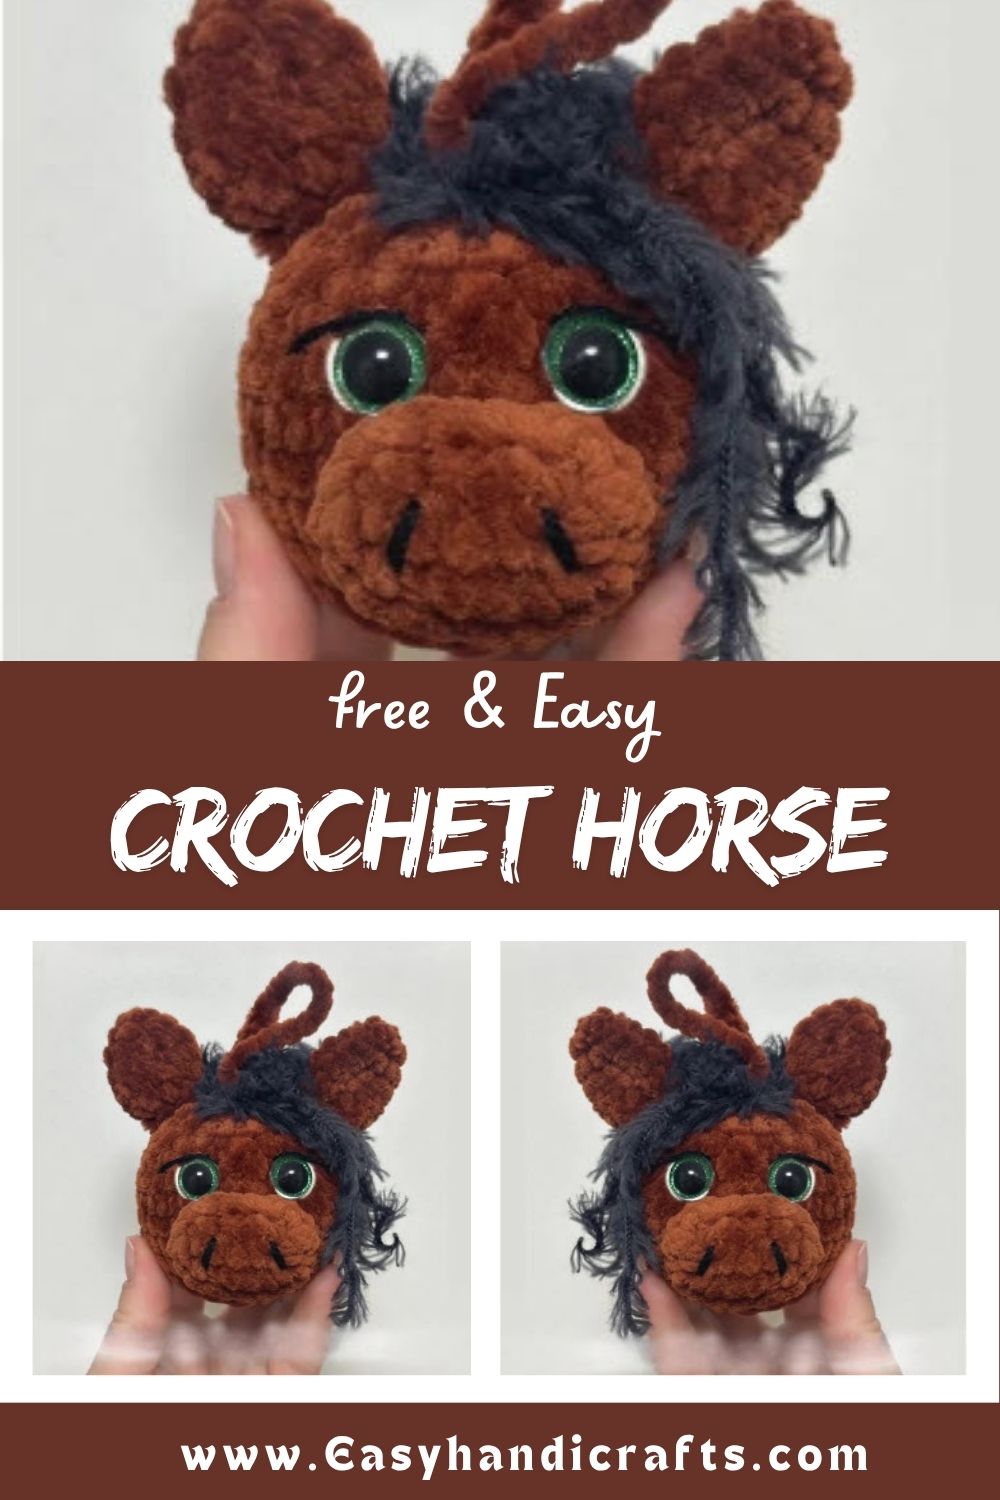
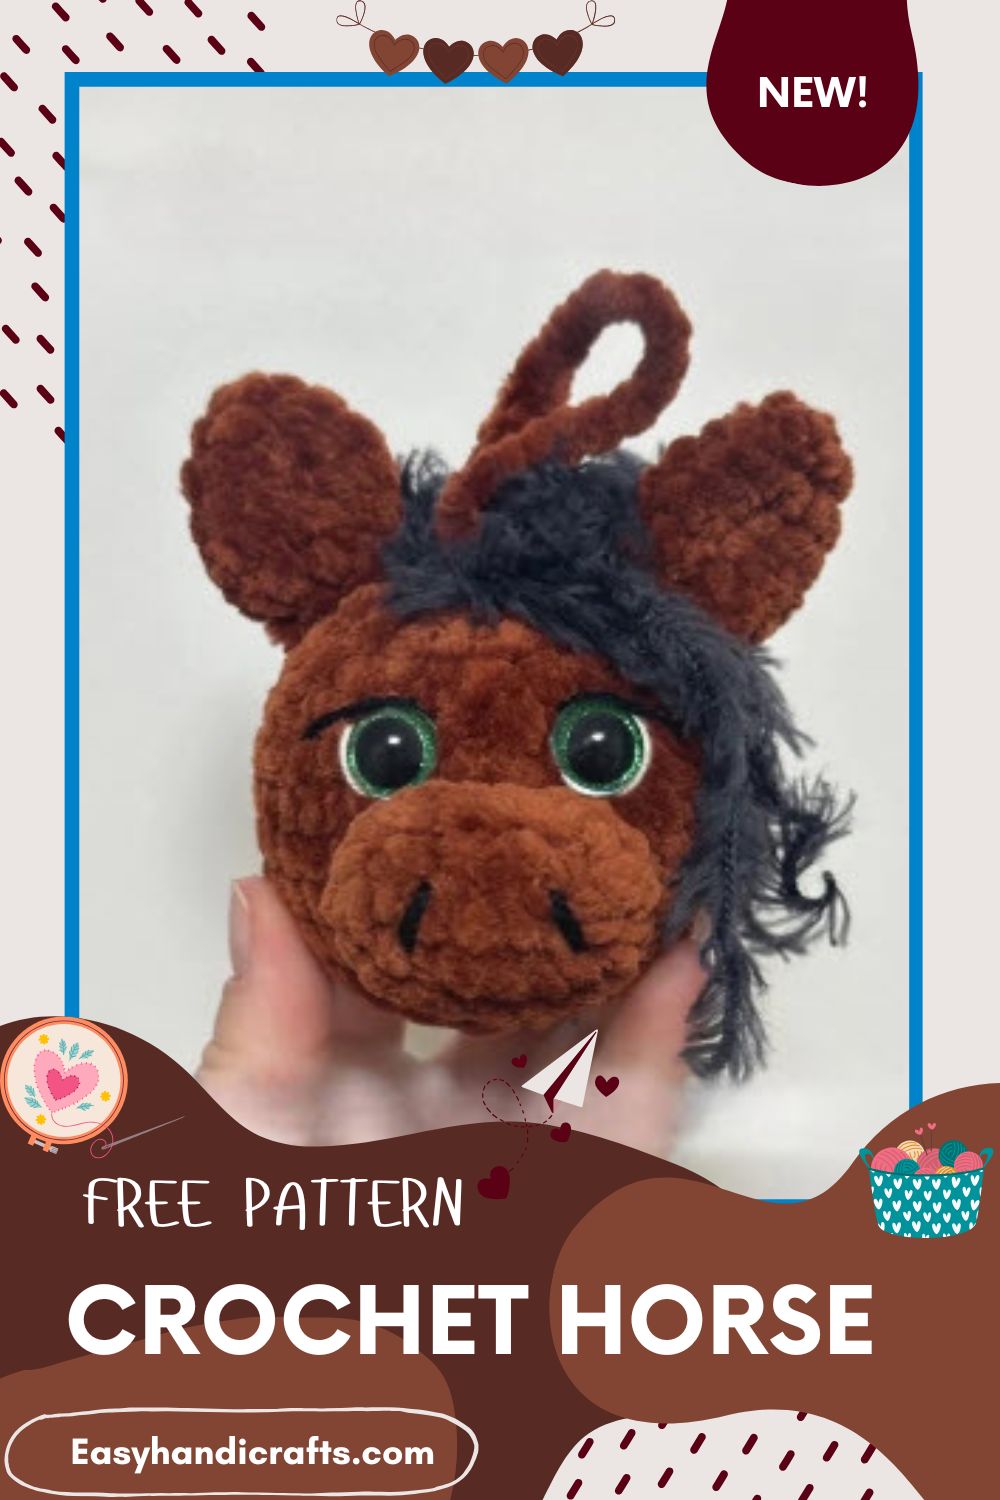
Handmade Crochet Horse Ornament Pattern with Easy Instructions
Crochet horses carry a soft, old-fashioned charm that suits any Christmas tree. This tiny Crochet Horse Ornament Pattern stitches up fast and stays beginner-friendly throughout. A handful of yarn turns into a keepsake worth treasuring, season after season after season.
A little horse ornament hanging on the tree feels personal in a way store-bought baubles never do. This pattern keeps the shape simple, so the focus stays on neat stitches and a friendly face. The body starts as one rounded ball, then ears and a muzzle bring it to life. Honestly, it comes together quicker than expected. By the end, you hold a charming handmade keepsake worth showing off.
Skill Level
This Crochet Horse Ornament Pattern fits confident beginners and anyone comfortable with basic amigurumi. You only need increases, decreases, and steady tension to shape the rounded body and finish the small features cleanly.
Pattern Overview
Here is a quick look at what this little horse involves before you start hooking.
- The body forms a single rounded ball worked in continuous rounds
- The ears and muzzle knit up separately, then sew onto the head
- A short chain loop sits on top, so the ornament hangs from any branch
- Safety eyes and light embroidery give the face its gentle expression
- The whole project uses one color, with optional contrast for the muzzle
- Stuffing stays light, which keeps the ornament soft and easy to hang
- The project finishes in one short sitting, so it suits last minute gifts too
Materials and Abbreviations
Gather these basics before you begin, and keep your hook size matched to your yarn.
- Worsted or sport weight yarn in your chosen horse color
- A small amount of contrast yarn for the muzzle, if you like
- Crochet hook one size smaller than the yarn label suggests
- Two safety eyes, around six millimeters
- Polyester fiberfill for light stuffing
- Tapestry needle, scissors, and stitch markers
Abbreviations used throughout:
- KA means magic ring
- sc means single crochet
- ch means chain
- inc means increase
- dec means decrease
- The number in brackets shows your stitch count
Step-by-Step Instructions
Work in continuous spiral rounds and mark the first stitch of each round. Keep your tension firm, so the stuffing never peeks through the fabric.
Body and Head
The body and head form one shape, so the horse stays simple and sturdy.
- 6 sc in KA
- 6 inc (12)
- (1 sc, inc) x 6 (18)
- (inc, 2 sc) x 6 (24)
- (3 sc, inc) x 6 (30)
- (inc, 4 sc) x 6 (36)
- 36 sc
- 36 sc
- 36 sc
- 36 sc
- (dec, 4 sc) x 6 (30)
- (3 sc, dec) x 6 (24)
- (dec, 2 sc) x 6 (18)
- (1 sc, dec) x 6 (12)
- 6 dec (6)
Place the safety eyes between rounds 10 and 11. Keep the distance between the legs at 6 sc for balance. Stuff the body firmly, then cut the thread and pull the last hole closed. A gentle tug shapes a slight tightening around the eyes and muzzle area.
Hanging Loop
The loop lets your finished horse hang neatly from the tree.
Attach the yarn to the top of the ball. Chain 20 stitches, then join back to your starting point. Cut the thread and tuck the tail inside the toy, so nothing shows.
Ears
Both ears follow the same short pattern, so make two.
- 6 sc in KA
- (1 sc, inc) x 3 (9)
- (inc, 2 sc) x 3 (12)
- 12 sc
- 12 sc
- 6 dec (6)
Fold each ear in half and work 3 sc across the open edge. This closes the ear and gives it a soft, natural fold. Sew the ears onto rounds 13 and 14, spaced evenly on the head.
Muzzle
The muzzle adds a friendly face, so take your time here.
- 5 ch, then from the 2nd loop: inc, 2 sc, 4 sc in 1 loop, 2 sc on the other side, inc (12)
- 2 inc, 2 sc, 4 inc, 2 sc, 2 inc (20)
- 20 sc
- 2 dec, 2 sc, 4 dec, 2 sc, 2 dec (12)
Fasten off and cut the yarn. Stuff the muzzle very lightly, then sew it onto the front of the ball. Embroider the white details and the small arrows to finish the face.
Special Techniques
A few small habits make this horse look polished rather than lumpy.
- Use the magic ring instead of a chain start, so the body has no center gap
- Mark your first stitch each round, since the spiral hides where rounds begin
- Stuff in small amounts as you close the body, which keeps the shape even
- Sculpt the face with a light tug after placing the eyes for that gentle dent
- Match your embroidery floss tension to the fabric, so the arrows lie flat
- Work the muzzle oval slowly, since the chain start needs even spacing on both sides
- Close the ears with that final fold and 3 sc for a clean, sturdy edge
Each technique sounds small on its own. Together, they raise the finish from cute to genuinely professional looking.
Common Mistakes to Avoid
Trust me, these little slips trip up most makers at least once.
- Skipping stitch markers, which makes the round count drift off quickly
- Stuffing too tightly near the top, so the hanging loop pulls and sags
- Placing the eyes before round 10, which sets them too low on the face
- Sewing the ears too close together, which flattens the horse silhouette
- Pulling the final hole closed before the body is fully stuffed
- Using a hook too large, which leaves gaps where the fiberfill shows through
- Rushing the muzzle stuffing, which leaves the front looking flat and lifeless
Most of these fixes cost nothing but a little patience. Slow, even rounds beat fast, messy ones every single time.
Assembly
Now bring all the pieces together into one tidy ornament.
- Stuff and close the body first, then shape the face with a soft tug
- Attach the hanging loop at the very top, centered over the head
- Fold and finish both ears, then pin them across rounds 13 and 14
- Sew the ears down with small, even stitches, so they sit upright
- Stuff the muzzle lightly and sew it to the front of the ball
- Embroider the whites and arrows last, once every piece feels secure
Take your time pinning before you sew anything down. A quick test placement saves you from having to unpick crooked ears later.
Important Remarks
A few final notes keep your horse looking its best on the tree.
- Weave in every yarn tail fully, so no ends loosen over time
- Keep stuffing light, since a soft ornament hangs better than a dense one
- Test the loop length on a real branch before hiding the tail inside
- Choose felt or embroidered eyes for a home with young children
- Block the finished piece gently if any rounds look slightly uneven
- Store the ornament in a soft pouch between seasons to protect the shape
- Swap the body color each year, so your tree builds a small horse herd over time
For real, this pattern scales beautifully into a set. Make one in white, one in brown, and one in gray for a charming trio.
Conclusion
This Crochet Horse Ornament Pattern proves that a small project can still feel special. The body works up in one smooth ball, and the ears and muzzle add just enough character. Low-key, it makes a thoughtful handmade gift for anyone who loves the holidays. Hang it on your tree, tuck it into a gift box, or share the pattern with a crafting friend. Either way, you end up with a charming little horse that carries real handmade warmth.