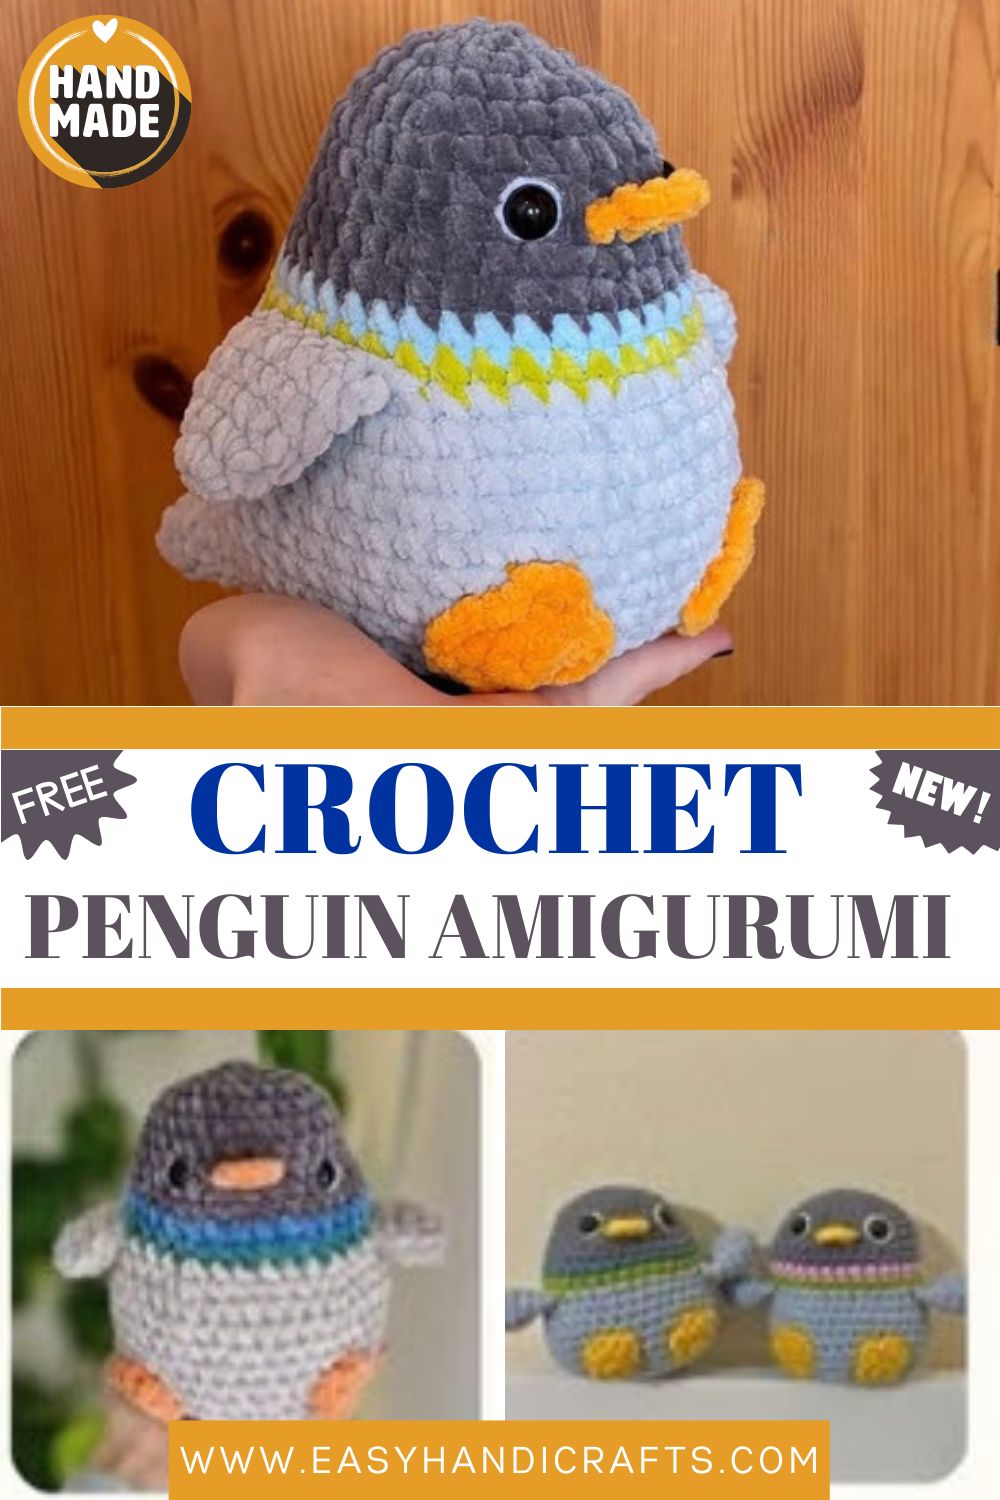
Peaceful Crochet Penguin Amigurumi Pattern for Cuteness Overload
Meet your next favourite crochet project! This adorable penguin amigurumi is beginner-friendly, quick to stitch, and absolutely irresistible from beak to tail.
Making a stuffed animal by hand hits differently than buying one. This little crochet penguin pattern stands about 14 cm tall and has more personality than something twice its size. The steps are straightforward enough that even a first-timer can follow along without losing their mind. Finish it, stuff it, sew on the eyes, and suddenly you have made something you actually want to keep. Whether you are new to amigurumi crochet or just looking for a quick and satisfying project, this small crochet penguin is worth every stitch.
SKILL LEVEL
PATTERN NOTES
MATERIALS
- Safety eyes (12mm)
- Stuffing
- Scissors
- (White) felt
- Crochet hook (5mm recommended)
- Needle and stitch marker
- Ami-Sticks
- Yarn colors: dark grey, light grey, blue, green, orange
ABBREVIATIONS
- MR: Magic ring
- SC: Single crochet
- INC: Increase
- DEC: Decrease (invisible decrease used)
- slst: Slip stitch
- f.o.: Fasten off
- DC: Double crochet
BEAK (in orange)
R1: 6 SC in MR (6)
Fasten off. Do not slip stitch into the first stitch. The beak will be directly crocheted onto the body.
FEET — Make 2 (in orange)
R1: 8 SC in MR (8) R2: (slst in the next stitch, chain 1, DC in the next stitch, chain 1, slst in the same stitch) x 3, slst x 2
Fasten off, leave a tail for sewing.
WINGS — Make 2 (in light grey)
R1: 6 SC in MR (6) R2: (SC, INC) x 3 (9) R3: (2 SC, INC) x 3 (12) R4-5: SC around (12)
Fold in half and do 6 SC along the top to close the wing. Fasten off, leave a tail for sewing.
TAIL (in light grey)
R1: 4 SC in MR (4) R2: (SC, INC) x 2 (6) R3: (2 SC, INC) x 2 (8) R4: (3 SC, INC) x 2 (10) R5: (4 SC, INC) x 2 (12) R6: (5 SC, INC) x 2 (14) R7: (6 SC, INC) x 2 (16)
Fasten off, leave a tail for sewing.
BODY
Start in dark grey:
R1: 6 SC in MR (6) R2: INC x 6 (12) R3: (SC, INC) x 6 (18) R4: (2 SC, INC) x 6 (24) R5: (3 SC, INC) x 6 (30) R6-7 (2 rounds): SC around (30) R8: 14 SC, 3 SC through body and beak, 13 SC (30) R9: (4 SC, INC) x 6 (36) R10: SC around (36)
Add 12mm safety eyes between R7 and R8, 2 stitches away from the beak on each side. You can also add coloured felt with a diameter of 14mm under the eyes.
Begin stuffing and continue throughout the remaining rounds.
R24: (3 SC, DEC) x 6 (24) R25: (2 SC, DEC) x 6 (18) R26: (SC, DEC) x 6 (12) R27: DEC x 6 (6)
Fasten off, weave in ends, and close the hole.
SEWING AND ASSEMBLY
- Sew the wings right under R12, one stitch away from the eye on each side.
- Sew the feet between R18 and R21, in line with the eyes. Attach the top point of the feet on R18 and the bottom on R21.
- Sew the tail between R18 and R21 in the centre of the back.
COMMON MISTAKES TO AVOID
- First, skipping the stitch marker: Always use a stitch marker to track where each round begins. Losing your place in continuous rounds is the most frequent beginner error.
- Next, overstuffing or understuffing: Too much stuffing creates lumps and distorts the shape, while too little makes the penguin look flat. Fill gradually and check the shape as you go.
- Additionally, attaching safety eyes too late: Always insert safety eyes before closing the head area. Once the opening becomes too small, adding them later becomes impossible.
- Moreover, not leaving a long enough tail: When fastening off the beak, wings, tail, and feet, always leave a tail of at least 20 cm for sewing. Short tails make clean attachment very difficult.
- Furthermore, tension inconsistency: Try to keep your tension even throughout. Loose tension creates gaps in the fabric that expose the stuffing inside.
- Finally, incorrect beak attachment: The 3 SC through the body and beak is a unique technique. Take your time with this step and refer to the picture guide to ensure correct placement.
FINISHING TIPS
- First, weave in all ends carefully using a tapestry needle. Pull the yarn through several stitches in different directions so the ends do not come loose over time.
- Next, use a lint roller or a soft brush to gently fluff the yarn and give your penguin a neat, polished look after assembly.
- If needed, if the felt eye backing tends to shift, place a tiny drop of fabric glue between the felt and the body before pressing the safety eye through.
- For a cleaner finish on the feet, use a pin to hold them in position before sewing to check placement symmetrically.
- Finally, once fully assembled, gently reshape the penguin by hand until the proportions look balanced and the little guy can stand on his own.
CUSTOMIZATION AND VARIATIONS
- Change the yarn colors: Swap the blue and green stripes for any colors you love. A pastel rainbow version, a tuxedo look, or a holiday red-and-white edition all work beautifully.
- Add a scarf or hat: Use contrasting yarn to crochet a tiny scarf or beanie. A simple rectangle with fringe makes a quick scarf.
- Try different eye sizes: Go slightly larger for a cartoon look or use embroidered eyes for a baby-safe version.
- Make a keychain: Use a smaller hook and thinner yarn, then attach a keyring before closing for an adorable bag charm.
- Embroider details: Add a little smile below the beak or small cheek blushes using embroidery thread.
- Create a family: Add extra increase rounds to make a larger version and pair it with a smaller one for a parent-and-chick duo.
GIFTING IDEAS
- For a baby shower gift: Use soft, baby-safe yarn and embroidered eyes for a version that is safe for infants.
- For a birthday present: Additionally, tuck the finished penguin in a gift box with a handwritten note and personalize the stripe colors.
- For holiday decoration: You can also attach a ribbon loop before closing and hang it on a Christmas tree as a keepsake ornament.
- For a care package addition: Moreover, pop the penguin into a care package for a friend who needs a little comfort and warmth.
- For a craft fair or small shop: Finally, this penguin is a great addition to any handmade market stall display several together for maximum cuteness impact.
CONCLUSION
And just like that, your little penguin is ready to waddle into the world! Ultimately, every stitch you put into this project is a small act of creativity and care. Whether you made this for yourself, a loved one, or a tiny customer at your craft stall, I hope the process brought you as much joy as the finished piece. Additionally, if you have any questions, feel free to reach out. Finally, tag me in your finished plushies I would love to see them.