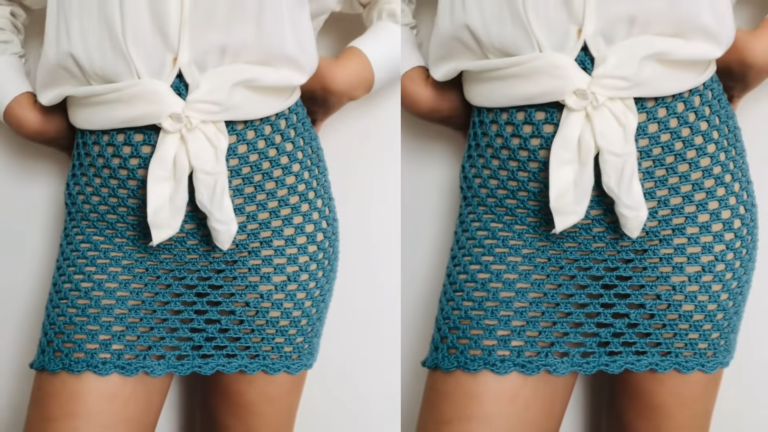
Fantastic Crochet Circle Skater Flowy Skirt Pattern for Absolute Beginners
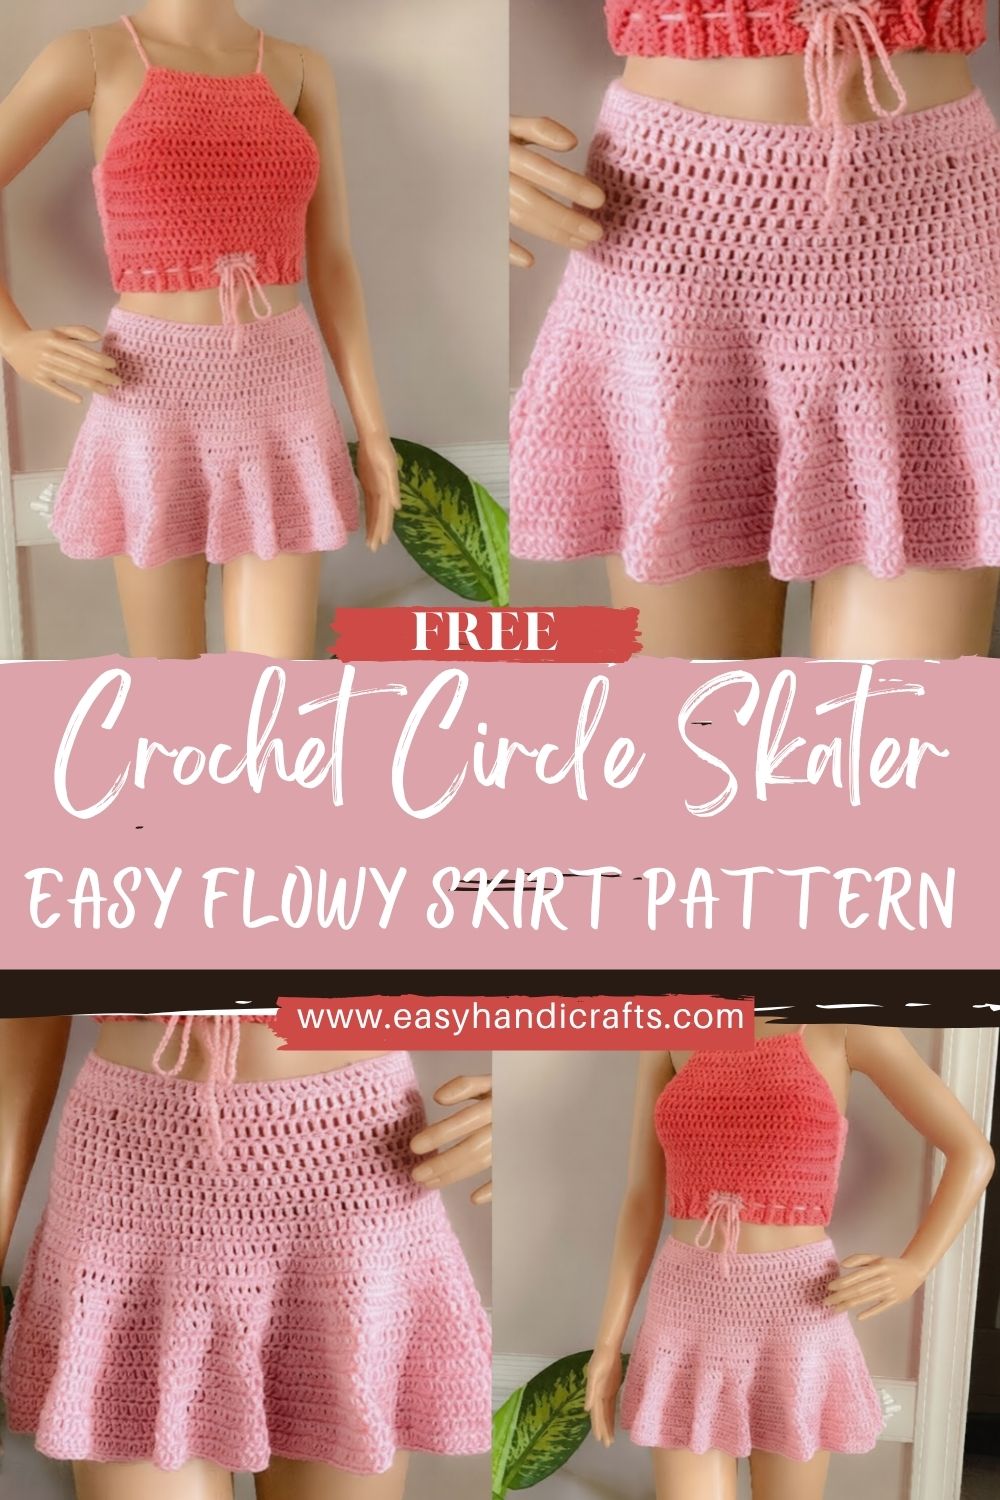
Creating this Fantastic Crochet Circle Skater Flowy Skirt Pattern for Absolute Beginners is a beautiful way to combine comfort, style, and creativity. The soft, flowy shape of the skirt gives it a light and feminine feel, while the simple crochet stitches make it easy to follow even if you’re just starting.
It’s the kind of project that looks impressive but is actually very relaxing to make, especially as you watch the skirt gently flare out with each round.
Materials Needed
- Lightweight cotton or acrylic yarn (DK or worsted weight):
- DK weight: 350–550 g (approx. 1100–1800 m depending on size and length)
- Worsted weight: 450–700 g (approx. 800–1400 m depending on size and length)
- Crochet hook: 4.0 mm–5.0 mm (choose based on yarn label and desired drape)
- Elastic band: 1 piece, 1 inch (2.5 cm) wide, cut to waist measurement minus 1–2 inches (2.5–5 cm)
OR drawstring: 55–80 inches (140–200 cm) if preferred - Stitch markers: 2–6
- Yarn needle: 1
- Scissors: 1
- Measuring tape: 1
Optional (but helpful):
- A small amount of matching sewing thread for securing elastic ends
- A lightweight lining fabric for extra coverage (especially with open stitches)
Skill Level
Beginner / Easy
Making Time (Overview)
Approximately 5–8 hours
Meanwhile, yarn thickness and skirt length can increase or decrease the total time.
Instructions
Stitch Notes (Simple + Beginner-Friendly)
- This skirt uses basic stitches: chain (ch), single crochet (sc), half double crochet (hdc), double crochet (dc), and slip stitch (sl st).
- For the smoothest drape, dc is a great choice for the main skirt.
- For a tighter, more structured look, hdc works beautifully.
Next, use stitch markers often because they make counting easier and prevent uneven flare.
Body (Waistband & Base)
Making time: 90–150 minutes
1) Create the waistband
First, measure the waist where the skirt will sit (high waist and natural waist feel different). Next, decide the waistband height:
- 2–3 inches (5–7.5 cm) = clean and simple
- 3–4 inches (7.5–10 cm) = snug, supportive waistband
Step-by-step:
- Ch enough to match the waistband height (example: ch 12–18, depending on yarn and desired height).
- Next, Row 1: sc in 2nd ch from hook, sc across.
- After that, Row 2: ch 1, turn, sc in back loop only (BLO) across.
- Continue Row 2 until the band length fits around the waist snugly (not loose).
Meanwhile, BLO rows create a ribbed look that stretches softly.
2) Build waistband rows for stretch
- Keep crocheting ribbing rows until the band wraps comfortably around the waist.
- Next, check fit by wrapping it around and gently stretching it—this mimics real wear.
- After that, stop when it measures about 1–2 inches (2.5–5 cm) smaller than the waist measurement (elastic will help too).
3) Join a round
- Align the short ends of the waistband.
- Next, sl st or sc through both layers to seam it into a ring.
- After that, turn the seam to the inside.
Finally, add a stitch marker at the seam; this becomes the “start” point.
Skirt Expansion (Main Flowy Section)
Making time: 210–300 minutes
This section creates the signature circle flare. First, stitches are placed evenly around the waistband edge, and next, increases are spaced out so the skirt expands smoothly.
1) Start increasing rounds
- Attach yarn at the waistband seam.
- Next, Round 1 (setup): work dc evenly around the waistband edge.
- If the waistband is ribbed, place 1 dc into the end of each row.
- Meanwhile, if the edge starts to ripple, skip a stitch every so often.
- However, if it feels tight, add an extra stitch every few rows.
- After that, join with sl st (or work continuously if preferred).
Beginner-friendly tip: count the stitches on Round 1 and write down the number. Next, it becomes easier to plan increases evenly.
2) Shape the skirt for a smooth circle
A circle skirt grows best when increases are balanced. First, increase slowly; next, spread the increases evenly across the round.
Use this simple increase rhythm:
- Round 2: (dc 5, inc) repeat around
- Round 3: (dc 6, inc) repeat around
- Round 4: (dc 7, inc) repeat around
- Round 5: (dc 8, inc) repeat around
Meanwhile, “inc” means 2 dc in the same stitch.
After that, check the fabric:
- If it ruffles, reduce increases (increase less often).
- If it cups upward, add increases (increase a little more often).
3) Length adjustment (keep going until it feels right)
Once the flare looks smooth, the skirt can grow without a heavy increase.
- Next, work 2–6 rounds of dc with no increases.
- After that, add a gentle increase round again if more swish is desired.
- Continue until the skirt reaches the preferred length:
- Mini: 12–15 inches (30–38 cm)
- Above knee: 16–18 inches (40–46 cm)
- Midi: 24–30 inches (61–76 cm)
Finally, try it against the body as it grows. Next, adjustments become much easier than waiting until the end.
Additional Parts for ( Crochet Circle Skater Flowy Skirt )
Drawstring / Elastic Adjustment
Making time: 20–45 minutes
A secure waist makes the skirt comfortable. First, decide between elastic or drawstring, and next, set up a clean channel.
Option A: Elastic (secure and easy)
- Cut elastic to waist minus 1–2 inches (2.5–5 cm).
- Next, thread the elastic through the waistband using a safety pin.
- After that, overlap the ends by 1 inch (2.5 cm) and sew securely.
- Finally, stitch the elastic join area to the waistband interior, so it stays flat.
Option B: Drawstring (adjustable and cute)
- Create a channel: weave a chain space around near the top of the skirt (or waistband base).
- Next, make a drawstring: ch 140–200 (depending on size), then sl st back for thickness if desired.
- After that, thread it through and tie a bow at the front.
Meanwhile, drawstrings are great for gifting because they fit and stay flexible.
Decorative Edge / Hem
Making time: 20–40 minutes
The hem is where everything looks finished. First, choose a simple border for a clean style, or next, use scallops for a softer look.
Option A: Simple clean hem
- Round 1: sc around evenly.
- Round 2: reverse single crochet (crab stitch) for a polished edge, or another sc round.
Option B: Scalloped hem
- Round 1: sc around.
- Round 2: (skip 2 stitches, 5 dc in next stitch, skip 2 stitches, sl st in next stitch) repeat around.
After that, smooth the scallops with fingers so they sit evenly.
Face & Assembly
Making time: 20–40 minutes
Even without a “face,” assembly is still important for a clean finish.
- Join all sections neatly: confirm the waistband seam is strong and comfortable.
- Next, secure the waistband properly: the elastic should sit flat and not twist.
- After that, check the flare: lay the skirt flat and make sure the hem spreads evenly in a circular shape.
- Finally, weave in every end securely, especially near the waist, where stress is highest.
Beginner-friendly guidance: place stitch markers at quarter points (front, back, left, right). Next, increases can be spaced evenly between those markers for a smoother circle.
Special Features
- Texture: Soft and breathable fabric that feels comfortable in warm weather
- Design: Flowy circular silhouette that moves beautifully while walking
- Style: Feminine, lightweight, and easy to dress up or down
Sizing Tips
Sizing is all about three things: waistband fit, increase rate, and yarn choice.
- Waistband:
First, make it snug because ribbing stretches with wear. Next, an elastic or drawstring keeps it secure. - Increases:
After that, more increases create more flare. Meanwhile, fewer increases create a slimmer A-line shape. - Yarn + hook:
Finally, DK yarn with a larger hook creates a lighter drape, while worsted yarn with a smaller hook makes a thicker skirt with more structure.
Finishing Tips
- First, keep stitch tension consistent so the skirt doesn’t twist.
- Next, check the waistband stretch before fully finishing the top edge.
- Meanwhile, weave yarn ends through multiple stitches to lock them in place.
- After that, lay the skirt flat and adjust the hem with gentle smoothing.
- Finally, block lightly if needed so the circle shape looks even and flowy.
Common Mistakes to Avoid
- Uneven increases cause waves or odd corners, so place markers and count repeats carefully.
- Too-tight waistband: comfort matters, so test the stretch before joining.
- Loose edges: a floppy hem can look messy, so use a simple stabilizing sc round first.
- Incorrect measurements: measure waist and desired length before starting, and re-check during progress.
Variations & Customization Ideas
- First, try pastel shades for a soft summer look, or next, choose bold colors for statement outfits.
- After that, change the length: mini for playful styling, midi for everyday comfort, or long for beachy vibes.
- Meanwhile, add lace rounds every few inches for a light, airy feel.
- Finally, pair it with a matching crochet crop top or a simple bralette-style top for a coordinated set.
Tutor Suggestions for ( Crochet Circle Skater Flowy Skirt )
- First, measure the waist carefully and write it down before crocheting.
- Next, use stitch markers for quarter points so increases stay balanced.
- Meanwhile, check fit often by wrapping the waistband and laying the skirt flat.
- After that, practice steady tension, because even stitches create the prettiest drape.
- Finally, take time to clean the hemmed edges to make the whole skirt look professional.
Conclusion
A Crochet Circle Skater Flowy Skirt is a beautiful beginner-friendly garment that feels wearable, practical, and genuinely fun to make. First, the ribbed waistband builds a strong foundation, and next, the circular increases create that signature swish and movement. Finally, with simple customization in color, length, and edging, this skirt can become a favorite handmade piece that brings creativity and confidence to everyday style.