Free Crochet Cherry Crossbody Handbag Pattern
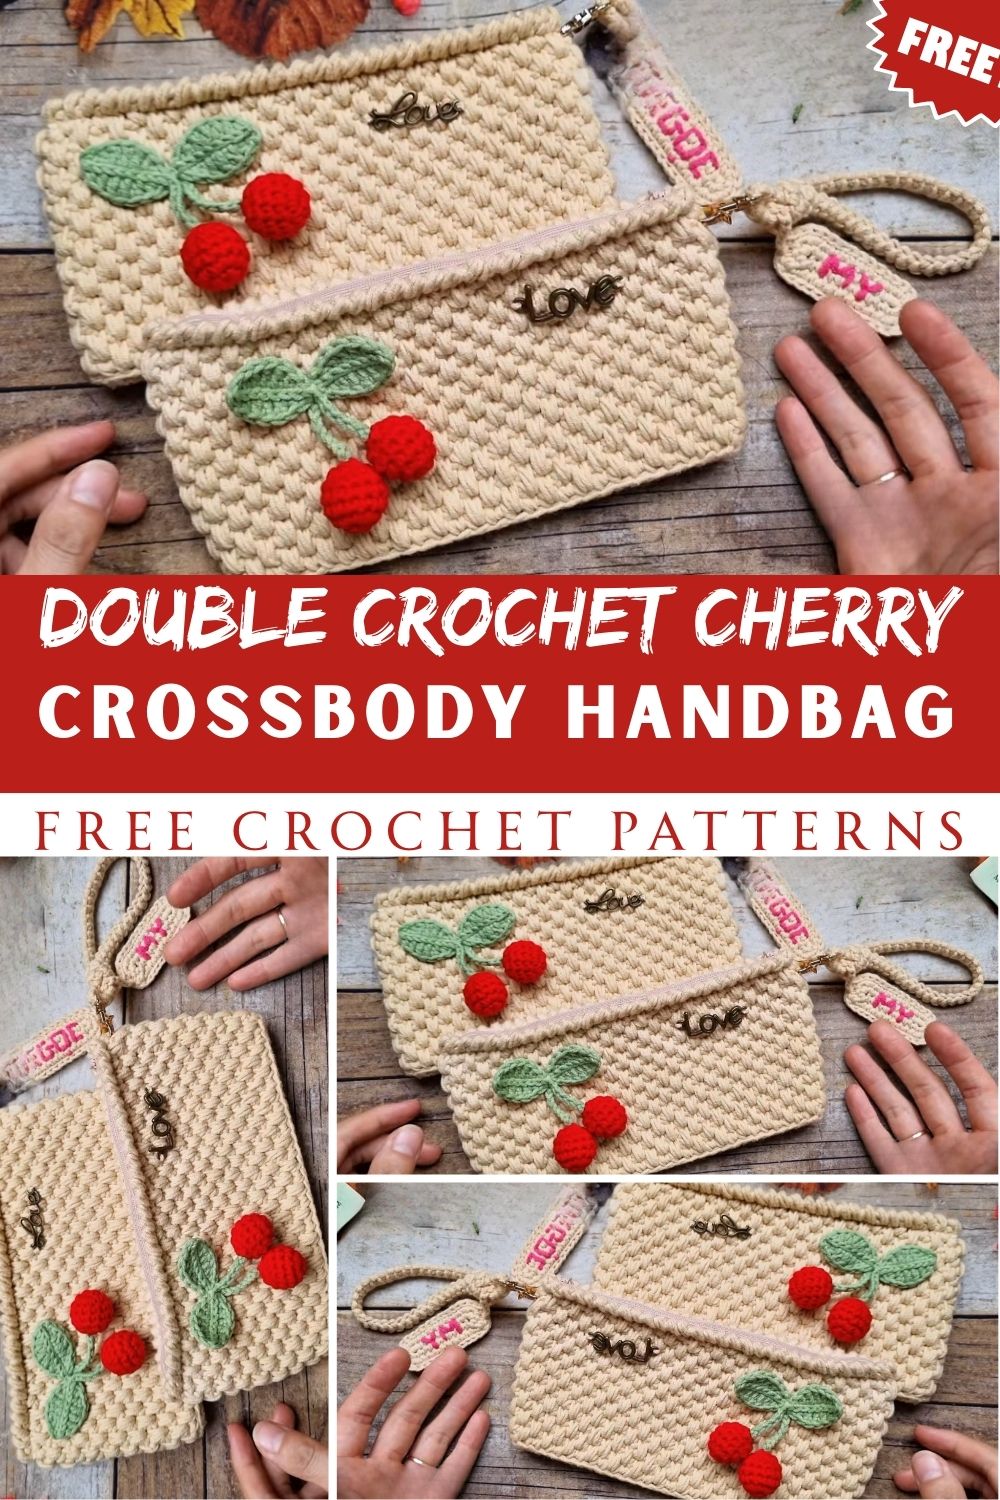
Cherry Crossbody Bag turns a simple round pouch into a charming fashion accessory with a cherry-inspired flap and lovely front details. Pairing deep red with green stems and leaves gives it a fresh, playful fruity look that pairs easily with everyday casual wear.
This small project makes a great weekend build and suits anyone drawn to handmade fashion accessories, distinctive bags, and cherry-themed designs. It also makes a unique handmade gift for everyday use, summer outings, or any cherry lover in your life.
Skill Level
This project is best suited for Beginner to Intermediate crocheters. The main body uses basic stitches worked in the round, while the cherry details introduce a bit of shaping and color changing. Anyone comfortable with single crochet and simple increases will manage this pattern without much trouble.
Materials and Tools
Gather everything before you start so your project flows smoothly.
- Worsted weight cotton yarn in red (main cherries)
- Small amount of green yarn (stems and leaves)
- A neutral or contrasting color for the main bag body (tan, cream, or black work well)
- Crochet hook sized to match your yarn weight (usually 3.5mm–4mm)
- Stitch markers
- Yarn needle for weaving in ends
- Fiberfill or scrap yarn for lightly padding the cherry shapes
- Bag lining fabric (optional, for extra durability)
- Sewing needle and thread (if adding lining)
- Magnetic snap or button closure
- Adjustable crossbody strap (crocheted or purchased chain strap)
Key Techniques Used in This Pattern
Understanding these core techniques ahead of time will make the process much smoother.
Working in the Round
The bag body is built using continuous rounds, which means no joining slip stitches between rounds. This creates a smooth, seamless surface that looks clean on both sides.
Color Changes
The cherry motifs require clean color transitions between red and green. Learning to change colors without visible gaps keeps the fruit shapes crisp and well-defined.
Shaping with Increases and Decreases
The rounded cherry shapes rely on gentle increases at the top and decreases toward the bottom, giving them a realistic, plump appearance rather than a flat circle.
Attaching Appliques
The cherries are typically crocheted separately, then stitched onto the flap or front panel, which allows for precise placement and a tidy finish.
Step-by-Step Instructions
Step 1: Prepare Your Materials
Wind your yarn into manageable balls and choose your hook size based on a quick swatch test. A tighter gauge keeps the bag sturdy enough to hold its shape when filled with everyday items.
Step 2: Crochet the Base
Start with a magic ring and build a flat circular base using single crochet stitches, increasing evenly around each round until you reach your desired bag width, usually around 15–18 rounds depending on size preference.
Step 3: Build the Bag Body
Once the base reaches the right diameter, stop increasing and continue working straight rounds without adding stitches. Keep working until the body reaches your preferred bag height, checking regularly against a reference item like a phone or wallet.
Step 4: Shape the Top Opening
Reduce stitch count slightly over the final two or three rounds to create a gentle taper at the top opening. This small shaping detail helps the bag close neatly and sit nicely against the body.
Step 5: Make the Front Flap
Crochet a rounded or slightly pointed flap separately, matching the width of the bag opening. This piece will later hold the cherry decoration and closure hardware.
Step 6: Crochet the Cherries
Make two small round cherry shapes in red yarn, lightly stuffing each one for dimension. Crochet short green stems and simple leaf shapes to complete the fruit cluster.
Step 7: Assemble the Cherry Cluster
Attach the stems to the top of each cherry, then join the two cherries together at the stem base so they appear to be growing from one point, just like a real cherry pair.
Step 8: Attach the Flap and Cherries
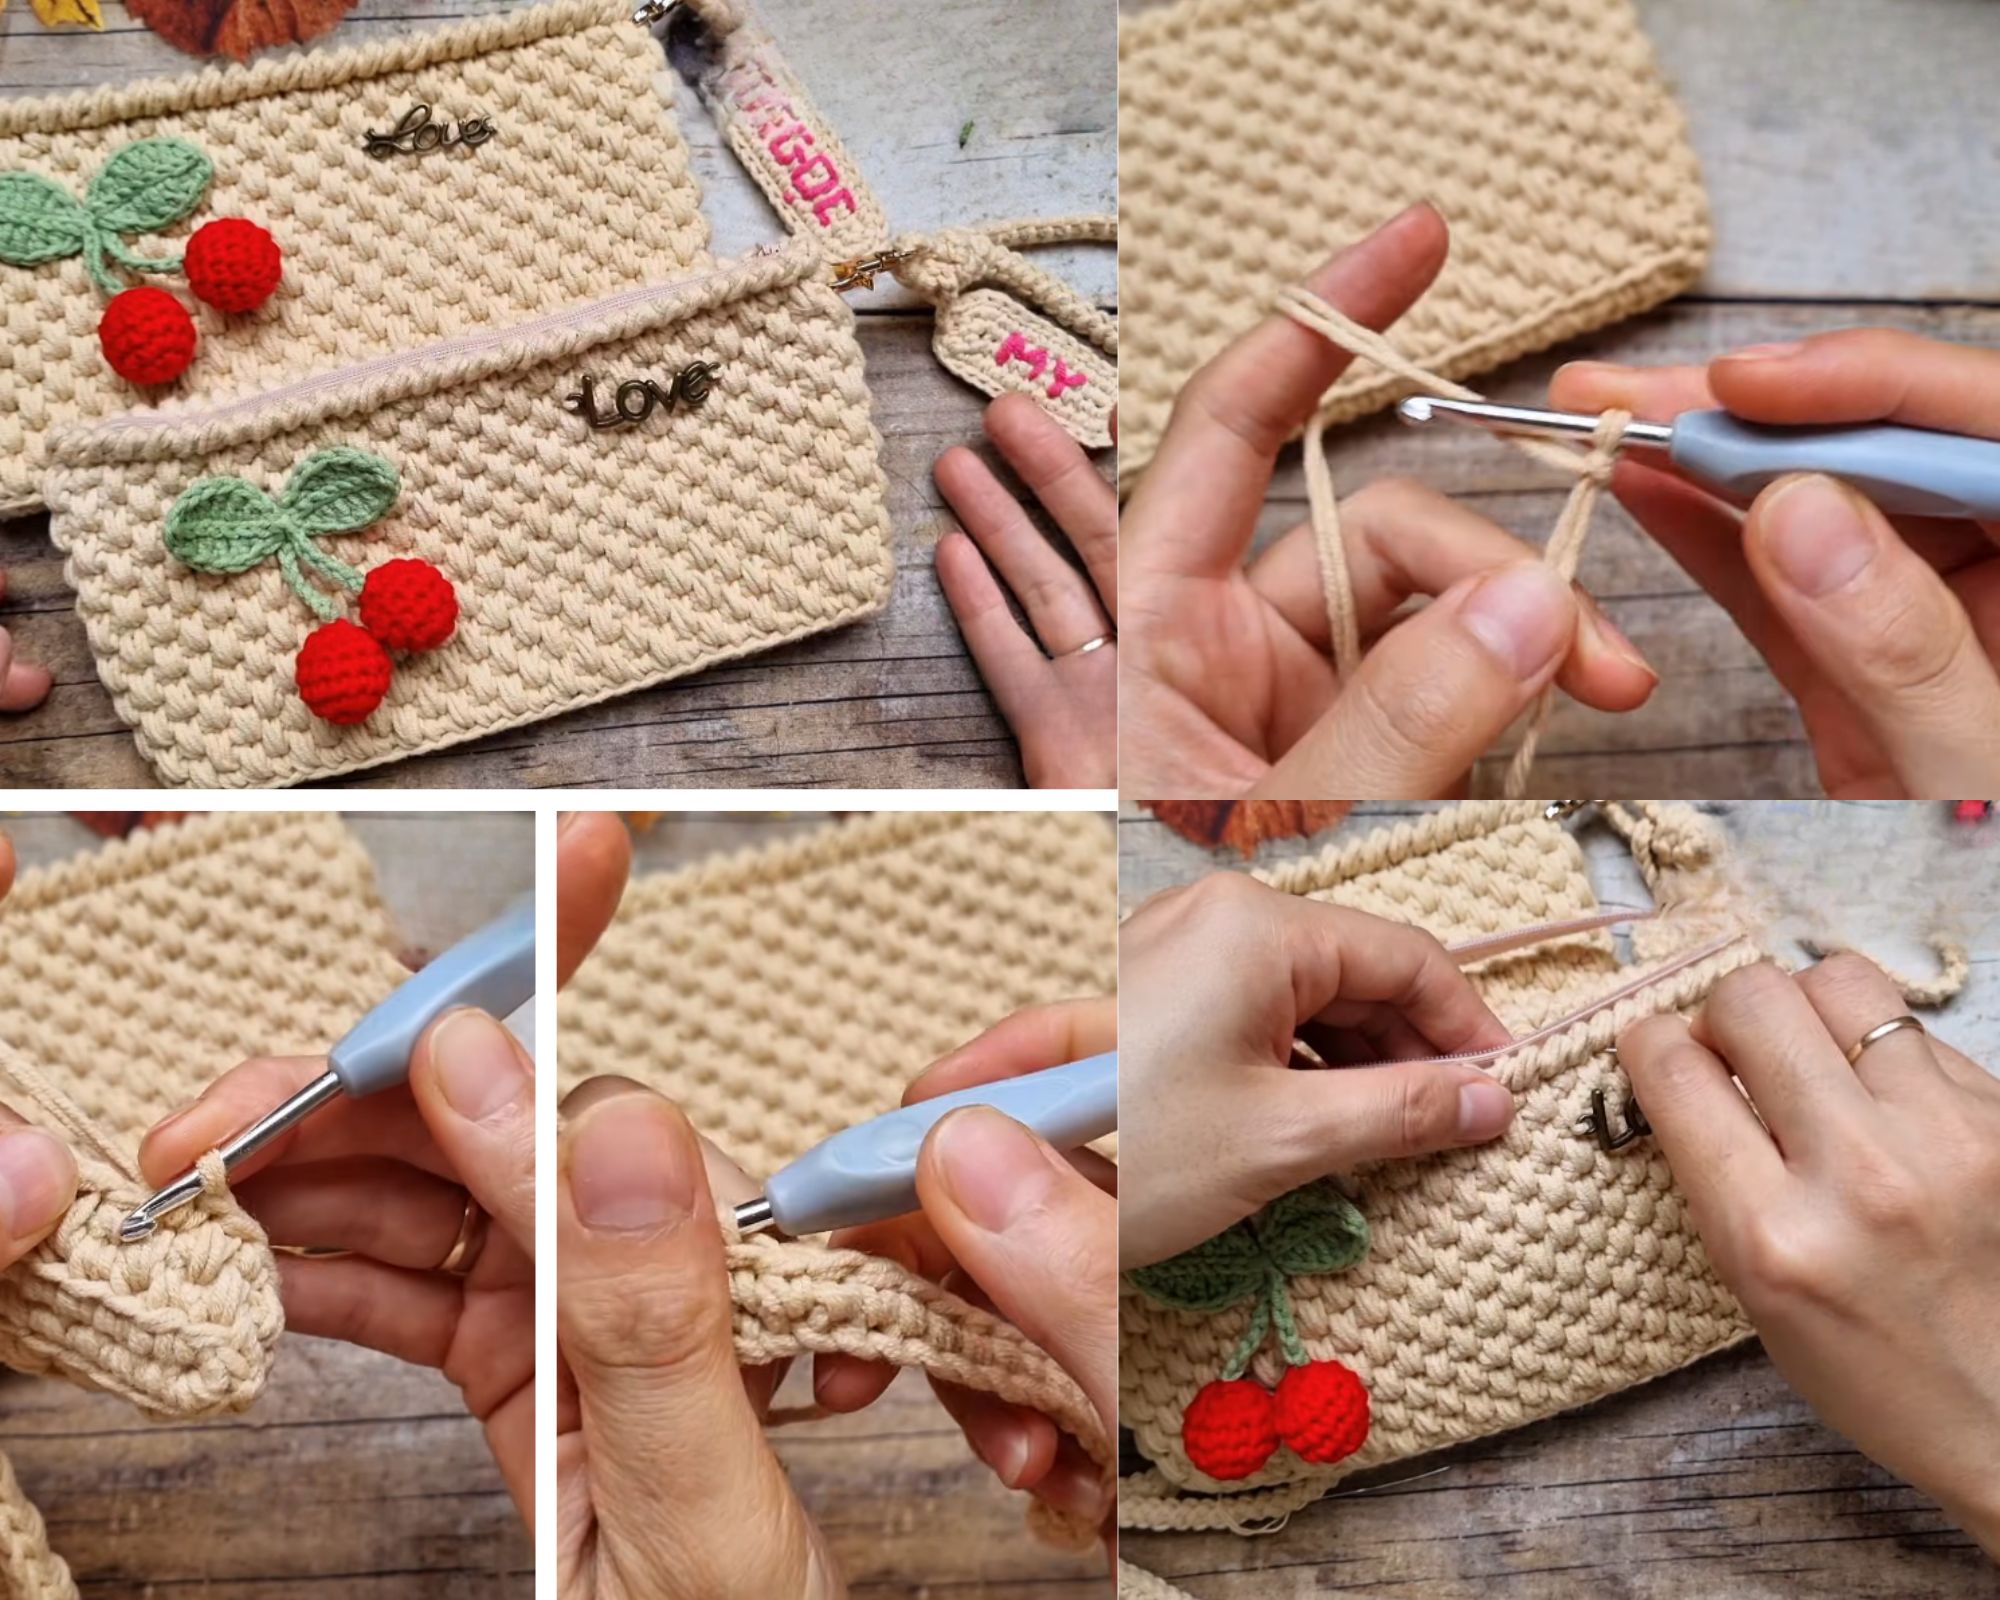
Sew the flap onto the back top edge of the bag body, then stitch the finished cherry cluster onto the front center of the flap for a striking focal point.
Step 9: Add the Closure
Sew one half of a magnetic snap to the underside of the flap and the matching half to the front of the bag body, positioned so the flap lies flat when closed.
Step 10: Attach the Strap
Fold the strap ends and stitch them securely to each side seam of the bag, checking strap length by trying it on before finishing the attachment.
Step 11: Add Lining (Optional)
Cut lining fabric to match the bag’s interior shape, sew a simple pouch, and hand-stitch it inside the bag along the top edge for extra strength and a polished finish.
Step 12: Final Finishing
Weave in all loose ends, steam block the bag gently if needed to even out stitch tension, and give it one last check for any gaps in the seams.
Helpful Tips for Beginners
- Use stitch markers at the start of each round so you never lose track of your place.
- Count stitches every few rounds to keep the circle perfectly flat and even.
- Choose cotton or cotton-blend yarn for structure, since stretchy acrylic can make the bag lose its shape over time.
- Test your closure placement before final stitching by pinning it in place first.
- Work with a slightly smaller hook than recommended on the yarn label for tighter, more solid stitches.
Common Mistakes to Avoid
- Skipping stitch counts, which leads to a wavy or uneven base.
- Overstuffing the cherry shapes, making them look bulky instead of naturally rounded.
- Attaching the strap before checking the length, resulting in a bag that hangs awkwardly.
- Using a hook that is too large, which leaves visible gaps between stitches.
- Rushing color changes, which creates messy, uneven transitions between red and green sections.
Customization Ideas
- Swap the cherry motif for strawberries, lemons, or watermelon slices for a different fruity theme.
- Add a small zipper pocket inside for keys or cards.
- Use a chunkier yarn weight for a larger, more casual tote-style version.
- Try a two-tone bag body using stripes instead of a solid color.
- Add a beaded chain strap for a slightly dressier finish.
Frequently Asked Questions
Q1: What size bag does this pattern typically make?
Most versions finish around 7–9 inches wide and 6–8 inches tall, though you can easily adjust the round count for a bigger or smaller bag.
Q2: Can I make this bag without adding a lining?
Yes, a lining is optional. Working with tightly spaced stitches and firm yarn already gives the bag decent structure on its own.
Q3: What yarn weight works best for this Crochet Cherry Crossbody Handbag pattern?
Worsted weight cotton or cotton-blend yarn generally gives the best balance of drape and durability for everyday use.
Q4: How do I keep the cherry shapes looking round and even?
Light, even stuffing paired with consistent tension throughout each round helps the cherries hold a smooth, plump shape.
Q5: Is this Crochet Cherry Crossbody Handbag pattern suitable for a first-time bag maker?
Yes, the main body uses simple repetitive stitches, so it is approachable even if this is your first crochet bag project.
Q6: Can the strap length be adjusted?
Absolutely. Simply add or remove chain stitches when crocheting the strap, or use an adjustable purchased strap for flexibility.
Conclusion
This free crochet cherry crossbody handbag pattern proves that a handmade accessory can be both practical and full of charm. From the smooth rounded body to the playful cherry cluster on the flap, every part of this project comes together into a bag you will genuinely want to carry. Whether you follow the pattern exactly or add your own creative twist, the result is a one-of-a-kind piece that stands out anywhere you go. Gather your yarn, pick your favorite shade of red, and start stitching this sweet summer accessory today. Once finished, it makes a wonderful gift or a delightful addition to your own handmade collection.