Little Wizardry Crochet Miniature Harry Potter Amigurumi Pattern
Pattern Overview
- Finished size: Approximately 9–10 cm tall (a true palm-sized keepsake)
- Difficulty level: Beginner-friendly with a few intermediate details (glasses and scarf)
- Estimated completion time: 3–4 hours
- Project type: Miniature amigurumi doll / keychain-friendly figure
- Recommended skill level: Comfortable with basic amigurumi shaping and simple color changes
Materials Needed
- Skin-tone yarn (for the head, hands, and legs)
- Black yarn (for the hair and shoes)
- Gryffindor-red and gold yarn (for the scarf and trim)
- Small amount of white and dark brown or black yarn (for the eyes)
- 2.0–2.5 mm crochet hook (to keep the miniature scale tight)
- Polyester stuffing
- Yarn needle for sewing pieces together
- Stitch markers
- Small sharp scissors
- Thin black wire or embroidery thread (for the glasses frame)
- Embroidery thread in black and red (for the facial details and lightning scar)
Crochet Abbreviations
- MR – Magic Ring: the adjustable loop used to start most amigurumi pieces
- ch – Chain: a basic loop stitch used for foundations or spacing
- sc – Single Crochet: the main stitch used throughout amigurumi
- hdc – Half Double Crochet: a slightly taller stitch for texture
- dc – Double Crochet: a taller stitch, often used for edges or trims
- sl st – Slip Stitch: used to join rounds or move across stitches invisibly
- inc – Increase: two stitches worked into one, used to widen a round
- dec – Decrease: two stitches worked together as one, used to narrow a round
- BLO – Back Loop Only: working into just the back loop of a stitch for texture
- FLO – Front Loop Only: working into just the front loop of a stitch
- FO – Fasten Off: finishing a piece by pulling the yarn through the last loop
Step-by-Step Crochet Pattern
Head (skin-tone yarn) Begin with a magic ring of 6 sc. Increase every round until you reach 18–20 stitches, then work several rounds even to build roundness. Begin decreasing gradually, stuffing firmly as the opening narrows, and close with a final decrease round.
Body (skin-tone yarn, transitioning to robe colors) Start with a magic ring of 6 sc and increase to about 14–16 stitches for a small rounded torso. Switch to a deep navy or black yarn partway up to suggest the robe, then work a few even rounds before decreasing slightly at the neck to prepare for attaching the head.
Arms (skin-tone yarn, x2) Chain or ring 5–6 sc, work a few rounds even, then switch briefly to black for tiny cuffs if desired. Leave a long tail for sewing to the body.
Legs (black yarn for shoes, skin-tone for the rest, x2) Begin each leg with black yarn for 3–4 rounds to form small shoes, then switch to skin-tone or robe-colored yarn for the remainder of the leg. Stuff lightly and set aside for assembly.
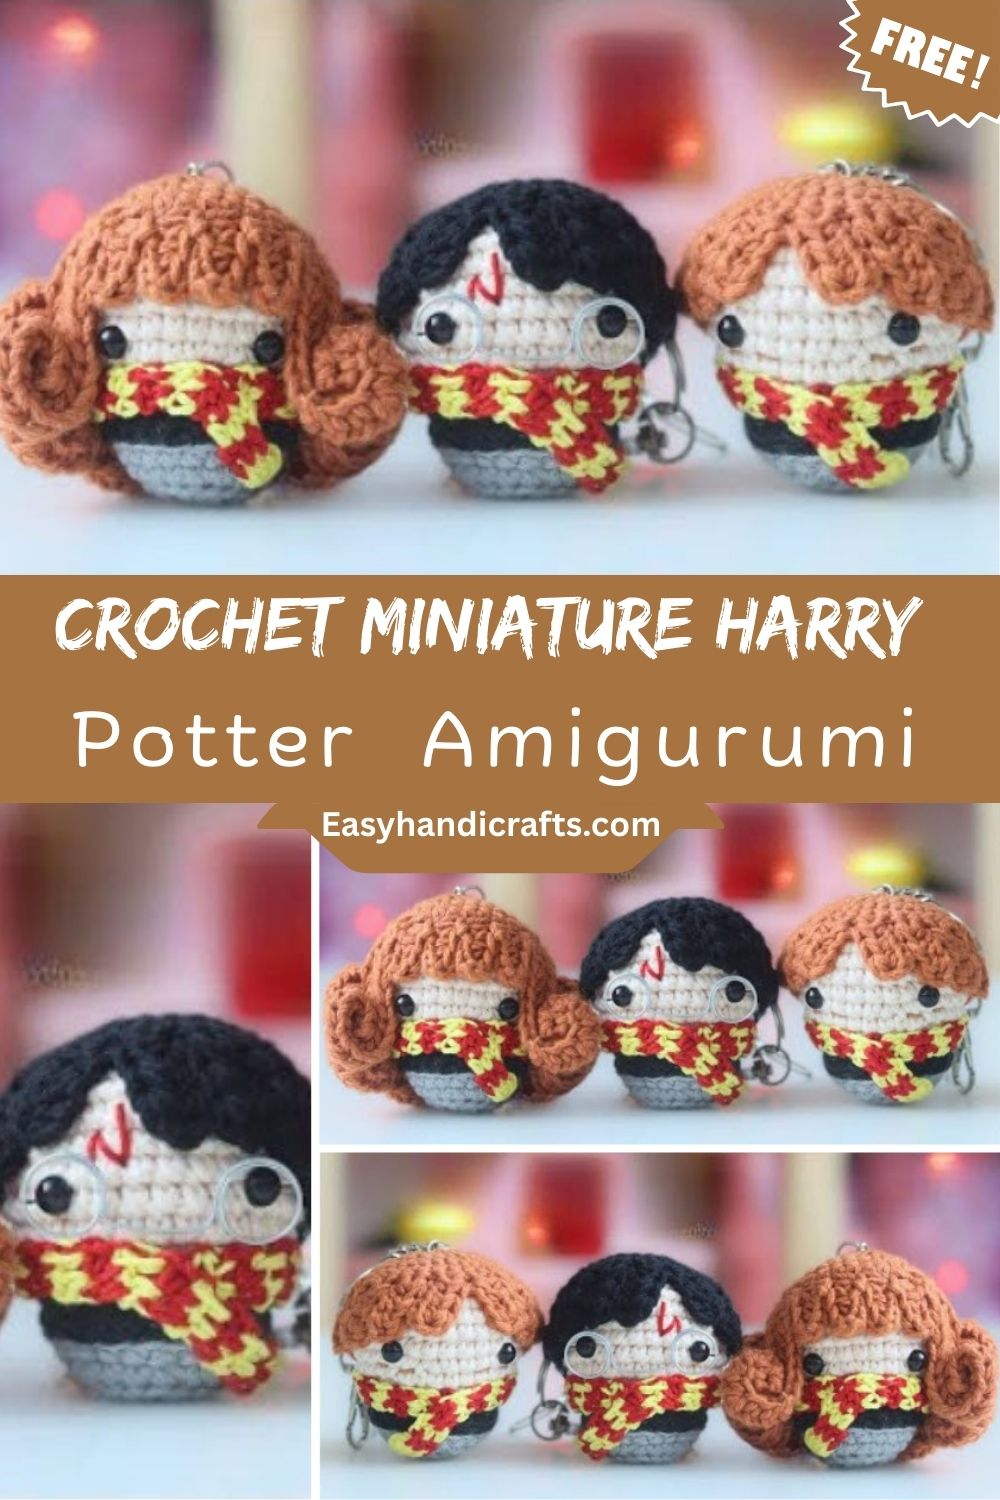
Hair (black yarn): Work a small cap shape over the top of the head using short rows or surface loops to mimic tousled, messy hair Harry’s signature look. Leave the fringe slightly irregular for authenticity.
Glasses (thin wire or black embroidery thread) Shape two small circles with wire or thread and connect them with a short bridge piece across the nose, then secure gently to the face once the facial features are embroidered.
Scarf (Gryffindor red and gold yarn) Chain a narrow strip long enough to wrap once around the neck, alternating red and gold stripes every 2–3 rows using hdc for a slightly textured finish. Fasten off and leave tails for tying.
Assembly Instructions
Sew the head onto the body first, keeping the neck seam neat and centered. Attach the arms just below the shoulders and the legs at the base of the body, checking that the doll can sit or stand evenly. Embroider the eyes in black with a small white highlight, then add the lightning bolt scar in red or brown thread just above one eyebrow using a few short straight stitches. Secure the glasses over the embroidered eyes, and finally wrap and tie the scarf around the neck. Stuff any remaining gaps firmly before closing seams, and give the whole doll a gentle shape-check once assembled.
Beginner Tips
- Use a stitch marker on round one so you never lose track of where a round begins
- Count stitches after every increase or decrease round, especially on the head
- Stuff a little at a time rather than all at once, so the shape stays even
- Keep your tension consistent miniature pieces show gaps more easily than larger ones
- Sew with small, tight stitches when attaching limbs to avoid wobbly joints
- Pin pieces in place before sewing so you can check proportions first
Customization Ideas
- Swap the scarf colors to make a Slytherin, Hufflepuff, or Ravenclaw version
- Add a tiny wand made from a twisted pipe cleaner or thin dowel
- Turn the finished doll into a bag charm or keychain with a small metal ring
- Make a jumbo plush version using bulkier yarn and a larger hook
- Create a matching mini owl companion for a themed gift set
- Use the same base body to design other wizarding-world characters
Care Instructions
Hand wash gently in cool water with a mild detergent if the doll needs cleaning, and avoid wringing or twisting the yarn. Press out excess water with a towel rather than squeezing, and reshape the doll while damp so it dries evenly. Lay flat to air dry away from direct sunlight, which can fade the red and gold yarn over time. Store the finished piece somewhere dry and dust-free, and avoid stacking heavy items on top of it to keep the shape intact.
Frequently Asked Questions
Which yarn works best for this pattern?
A soft acrylic or cotton-blend yarn in a fine or sport weight gives the cleanest miniature stitches.
Is this pattern beginner-friendly?
Yes, as long as you’re comfortable with basic amigurumi shaping; the glasses and scarf are the only slightly fiddly parts.
How long does the whole project take?
Most crocheters finish in about 3 to 4 hours, spread across a couple of sittings.
Which hook size should I use?
A 2.0–2.5 mm hook keeps the stitches tight enough for this small scale.
Can I resize the Crochet Miniature Harry Potter project to make it bigger?
Yes, simply switch to a bulkier yarn and a larger hook to scale the whole doll up.
Can I sell finished items made from this pattern?
You can sell your handmade version, but keep in mind that Harry Potter is a licensed, copyrighted character, so selling character-based items commercially may raise trademark concerns depending on where you sell.
How do I make the finished doll softer?
Use a plush or brushed yarn and stuff generously but evenly for a huggable feel.
How should I wash the finished piece?
Hand wash only, air dry flat, and keep it away from direct heat or sunlight.
Conclusion
This Little Crochet Miniature Harry Potter Amigurumi is the kind of project that makes you smile the whole way through from the first magic ring to tying that tiny red-and-gold scarf. Give it a try, experiment with other house colors, and don’t be afraid to make the hair a little messier or the scarf a little longer to make your version your own. Once you’ve finished, share your miniature wizard with fellow crocheters, and keep exploring more amigurumi patterns to grow your magical little collection.