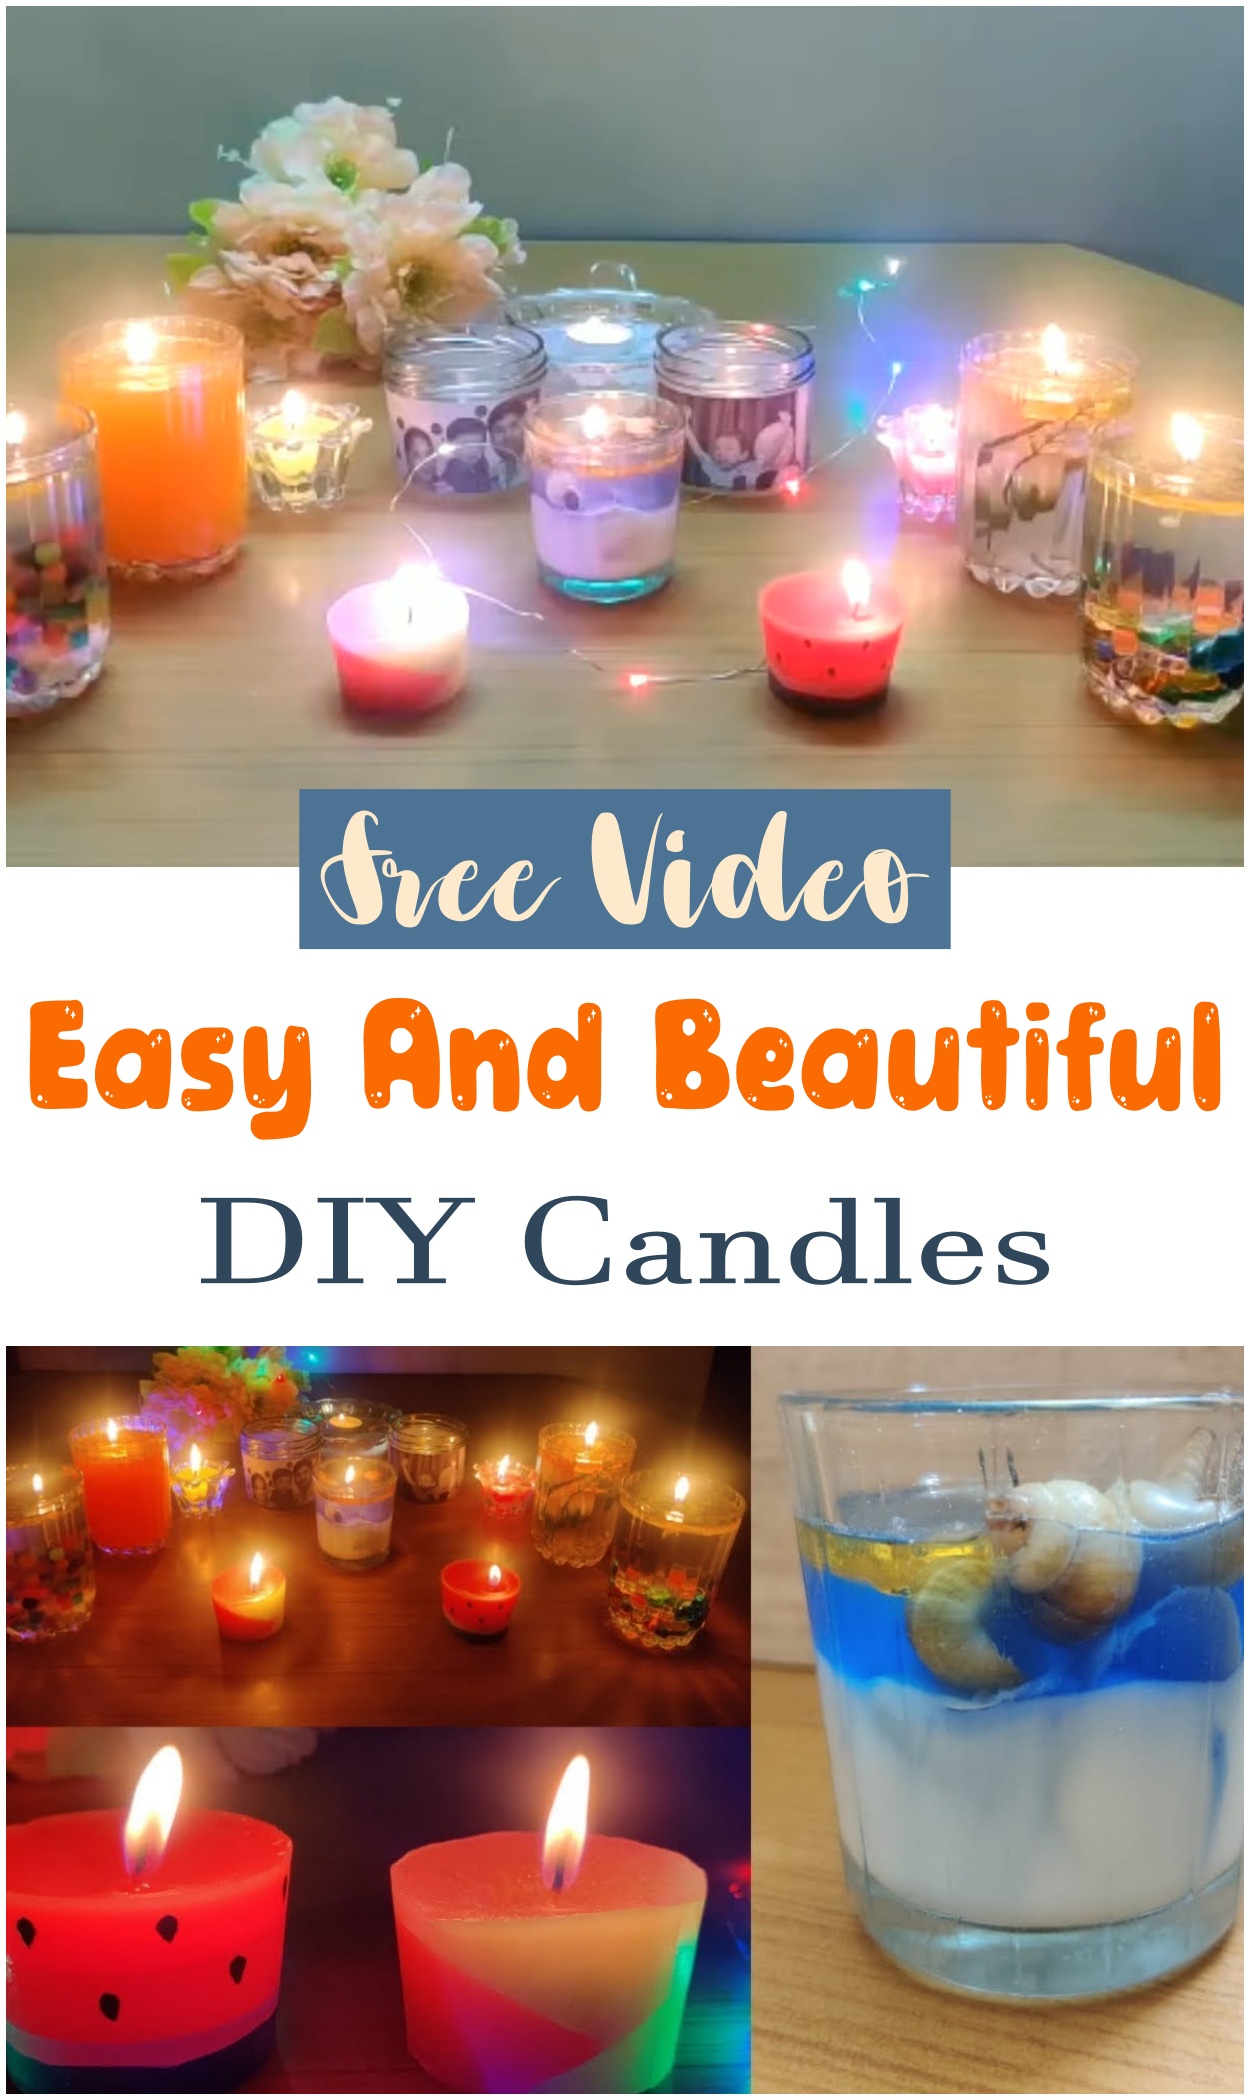
Easy And Beautiful DIY Candles Fun, Affordable, And Relaxing
Easy and beautiful DIY candles are a simple way to bring calm, color, and creativity into any room. These candles are perfect for home décor, a thoughtful handmade gift, or for adding a relaxing touch to a quiet evening. Their soft glow creates a warm and peaceful atmosphere, whether placed on a shelf, dinner table, or beside a bath. Making these candles is both enjoyable and soothing, ideal for anyone looking for a fun weekend project. They’re also budget-friendly and don’t require any fancy tools. All it takes is a few basic supplies and a little time to make something truly special.
To create these candles, all that’s needed is wax, a wick, a container like a jar or glass, and a scent or color if desired. The process takes around 30 to 60 minutes, including cooling time. First, the wax is melted, then colors and scents are added, and finally, it’s poured into the container with the wick placed in the center. Once cooled, the candle is ready to use. There are many ways to personalize the design—layering colors, adding dried flowers, or using shaped molds. This makes every candle unique and easy to match with different styles and moods. With just a few steps, these DIY candles turn into lovely and useful decorations that feel both personal and peaceful.

Cheap Way Make Your Own Candles
Creating your own candles at home is a fun and affordable way to add warmth and fragrance to your space. With just a few basic materials and simple steps, even beginners can craft beautiful candles.
Procedure of Making:
- Prepare the Container: Choose a heat-resistant jar or tin and ensure it’s clean and dry.
- Attach the Wick: Secure the wick to the center bottom of the container using a wick sticker or a dab of melted wax.
- Melt the Wax: Measure the wax flakes—typically twice the volume of your container—and melt them using a double boiler until fully liquefied.
- Add Fragrance (Optional): Once melted, remove the wax from heat and stir in your chosen fragrance or essential oils.
- Pour the Wax: Carefully pour the melted wax into the prepared container, ensuring the wick remains centered.
- Let It Set: Allow the candle to cool and harden completely, which may take several hours.
- Trim the Wick: Once set, trim the wick to about ¼ inch before lighting.
Materials:
- Soy or beeswax flakes
- Pre-waxed candle wicks with sustainers
- Heat-resistant containers (e.g., mason jars, tins)
- Fragrance or essential oils (optional)
- Double boiler or a makeshift one using a saucepan and heat-safe bowl
- Thermometer (to monitor wax temperature)
- Wick stickers or hot glue (to secure wicks)

DIY Christmas Decoration Idea Easy Beautiful
Begin by selecting a base, such as a wire hanger or sturdy cardboard, and shape it into a circle to form the foundation of your wreath. Thread colorful ornaments, pinecones, or other decorative items onto the base, arranging them in a visually pleasing pattern. Secure each piece with hot glue to ensure stability. Once the wreath is fully adorned, add a festive ribbon or bow for a finishing touch.
Materials:
- Wire hanger or cardboard base
- Assorted ornaments (baubles, pinecones, bells)
- Hot glue gun and glue sticks
- Festive ribbon or bow
- Optional: glitter, faux greenery, or lights for added flair

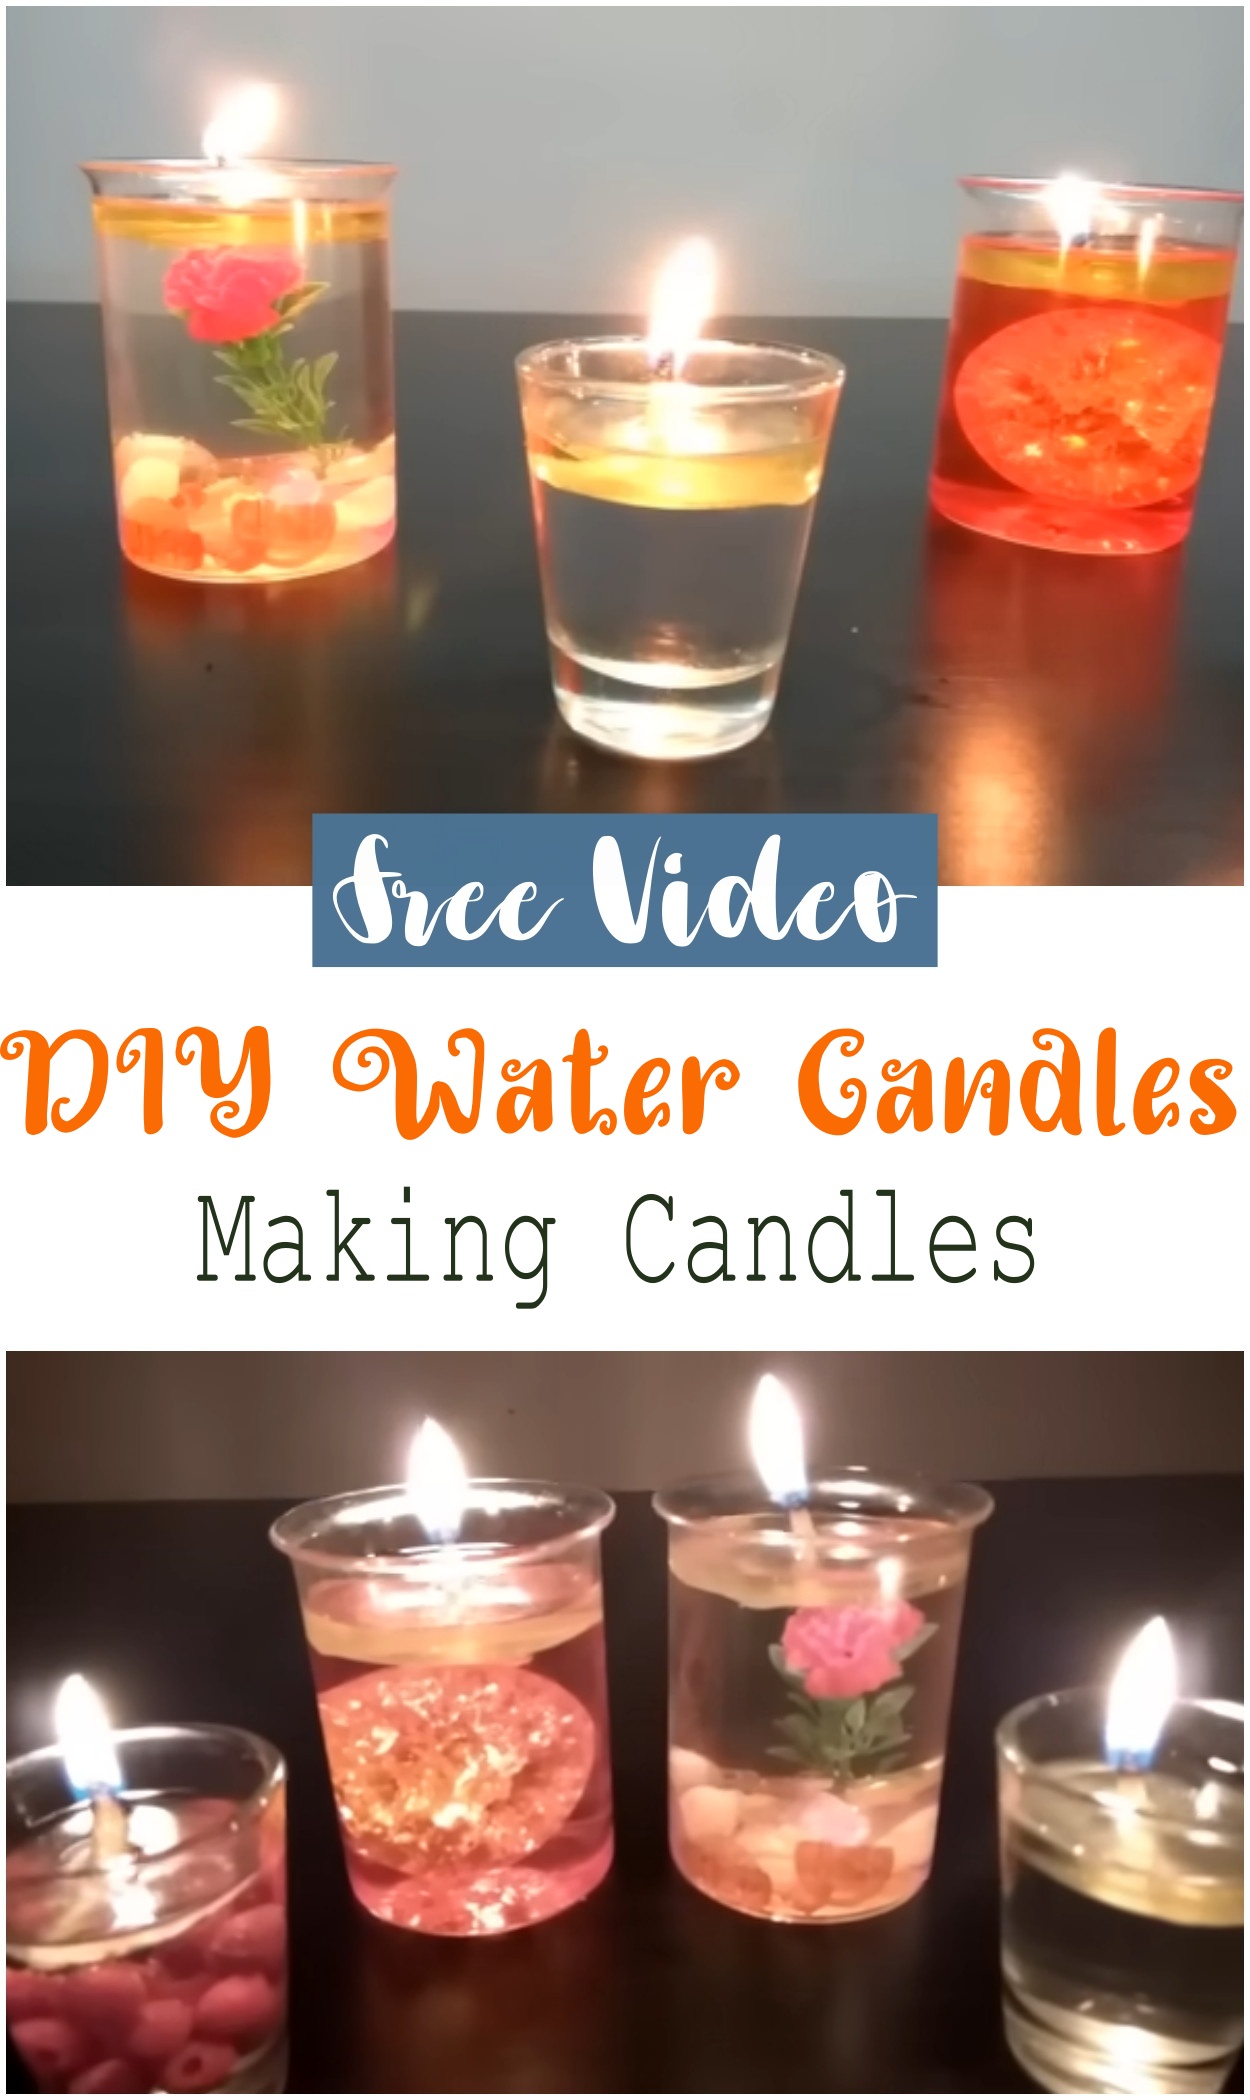
DIY Water Candles Making Candles
DIY water candles is a fun and easy way to add a warm glow to any space. This beginner-friendly project uses simple materials to craft beautiful, floating candles that can burn for hours.
Procedure of Making:
-
Fill a clear glass container with water, leaving about half an inch at the top.
-
Add a thin layer of vegetable or lamp oil on top of the water.
-
Cut a small circle from a plastic sheet (like from a soda bottle) and poke a hole in the center.
-
Insert a candle wick through the hole, ensuring it extends slightly below the plastic.
-
Place the plastic disc on the oil layer so the wick stands upright.
-
Light the wick carefully and enjoy the ambiance
Materials:
-
Clear glass container
-
Water
-
Vegetable or lamp oil
-
Plastic sheet (e.g., from a soda bottle)
-
Candle wick
-
Scissors or a craft knife
Easy And Beautiful DIY Candles
Different Design Ideas:
-
Layered Colors: Pour different colored wax layers sequentially, allowing each to cool before adding the next.
-
Embedded Botanicals: Incorporate dried flowers or herbs into the wax for a natural aesthetic.
-
Unique Molds: Use silicone molds in various shapes like bubbles, knots, or geometric designs for standout candles.
-
Decorative Containers: Repurpose teacups, mason jars, or coconut shells as candle holders for a rustic touch.
Precautions:
-
Always melt wax using a double boiler or microwave in short intervals to prevent overheating.
-
Never leave melting wax unattended.
-
Ensure containers are heat-resistant to avoid cracking.
-
Keep wicks centered to promote even burning.
-
Trim wicks to ¼ inch before each use to prevent excessive flame and soot.
-
Burn candles on stable, heat-resistant surfaces away from drafts, flammable materials, and out of reach of children and pets.
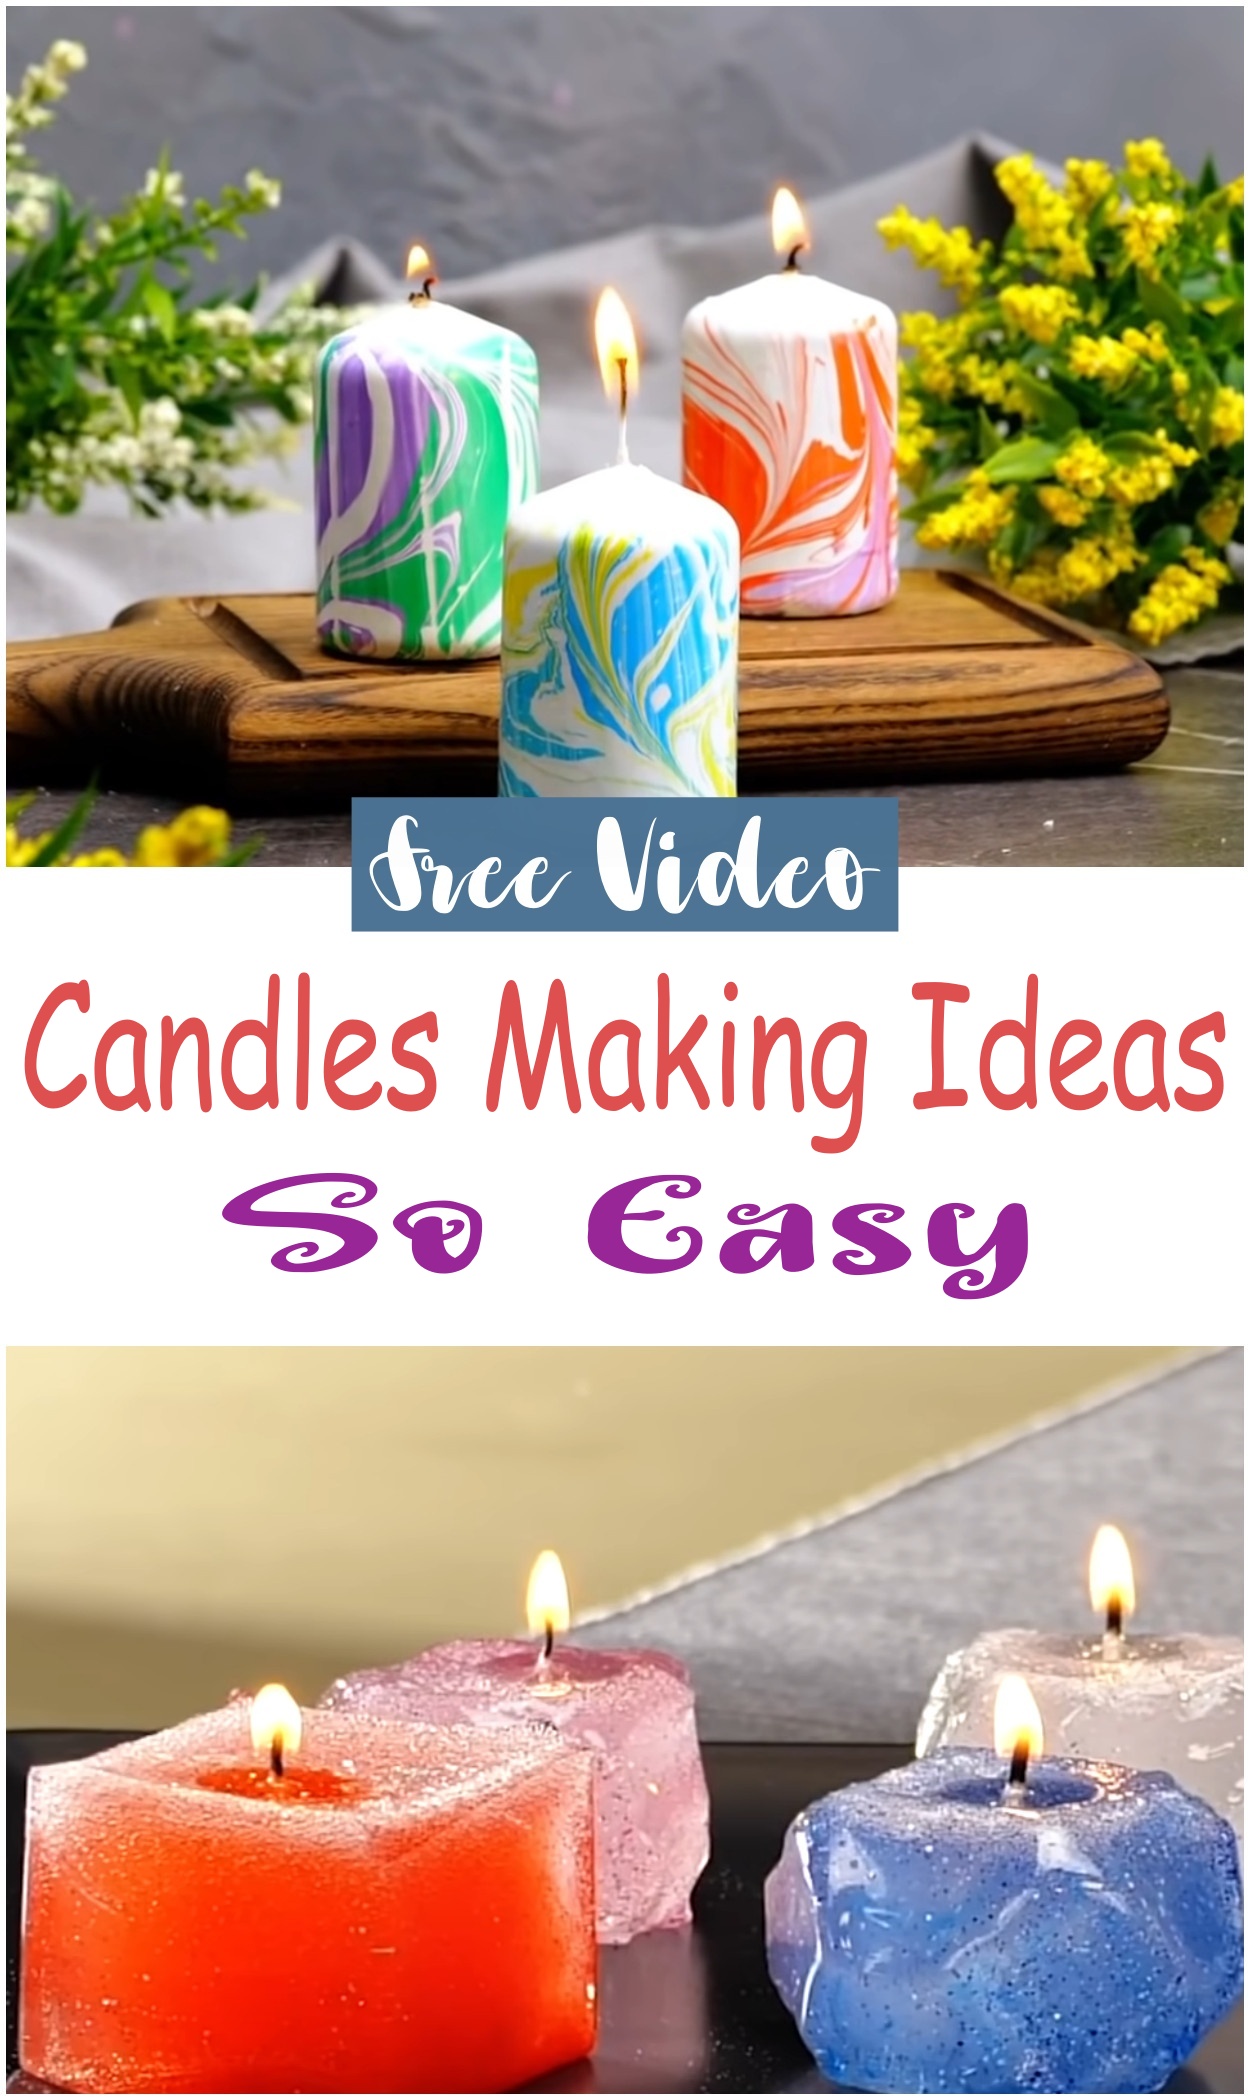
Candles Making Ideas So Easy
Making candles at home is a fun and simple way to add warmth and style to any space. Procedure of Making: Begin by melting wax slowly using a double boiler, then add a few drops of your favorite fragrance or essential oil. Pour the melted wax into a jar or mold with a wick placed in the center. Let it cool and set. Materials: You’ll need wax, a wick, a container or mold, fragrance oil, and optional color dye. Different Design Ideas: Try layering different colors for a striped look, using silicone molds for unique shapes, or adding dried flowers and herbs for a natural touch. Precautions: Always melt wax on low heat, never leave it unattended, and pour carefully to avoid spills or burns. Candle making is easy to learn and offers plenty of room to explore creative and personalized designs.
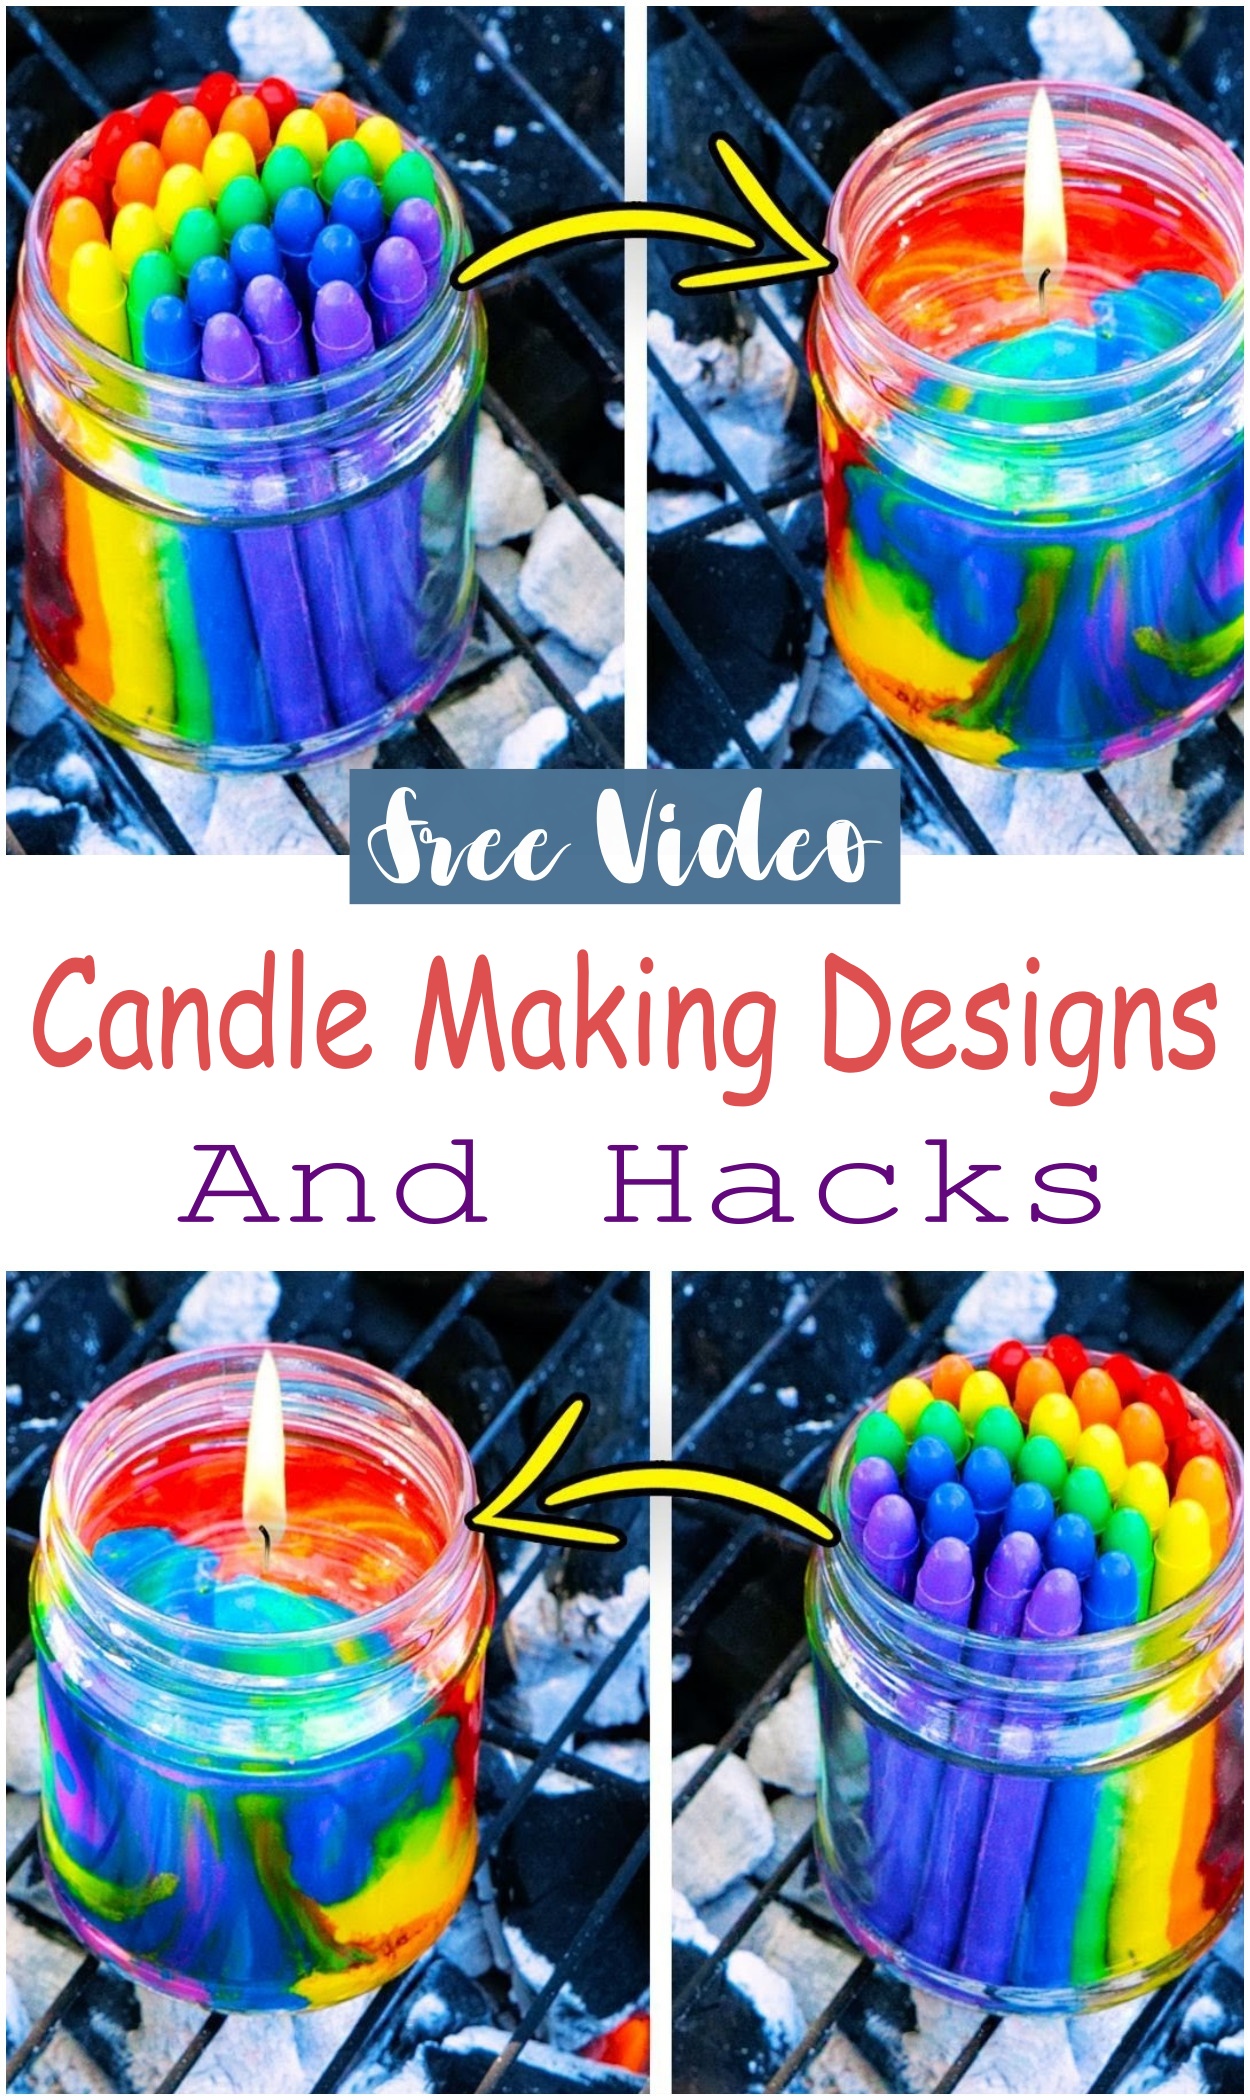
Candle Making Designs And Hacks
Start by melting wax in a heat-safe container using a double boiler method. Once melted, add your favorite fragrance and color. Place a wick in the center of your mold or jar, then carefully pour in the wax. Let it cool and solidify for several hours.
Materials:
Basic supplies include wax (soy or paraffin), wicks, fragrance oils, coloring dyes, jars or molds, a double boiler, and a thermometer for safe heating.
Different Design Ideas:
Try layering colors for a striped effect, or add dried flowers and herbs for a natural look. For a modern touch, use geometric molds or embed decorative items like beads or glitter for a unique finish.
Precautions:
Always melt wax on low heat and monitor the temperature to prevent overheating. Keep flammable items away from your workspace, and handle hot containers with care to avoid burns.
Candle making at home is simple and fun with the right tools and ideas. Explore different designs and stay safe for a rewarding experience.
Amazing Ideas For Candle Making
Essential items include soy or beeswax flakes, pre-tabbed wicks, heat-resistant containers (like glass jars or tins), fragrance oils, a double boiler or melting pot, a thermometer, a pouring pitcher, and tools such as clothespins or chopsticks to hold wicks in place during cooling.
Different Design Ideas:
Enhance your candles by experimenting with various shapes and styles. Consider using molds to create bubble or twisted taper candles, or repurpose coconut shells and vintage teacups for unique containers. Adding natural elements like dried flowers or herbs can also provide a decorative touch.
Precautions:
Safety is paramount in candle making. Always melt wax using a double boiler to prevent overheating, and never leave melting wax unattended. Use containers specifically designed to withstand heat, and avoid adding non-wax materials like dried flowers or glitter directly into the wax, as they can pose fire hazards. Before burning, trim the wick to ¼ inch (6 mm) to minimize soot and ensure a steady flame.

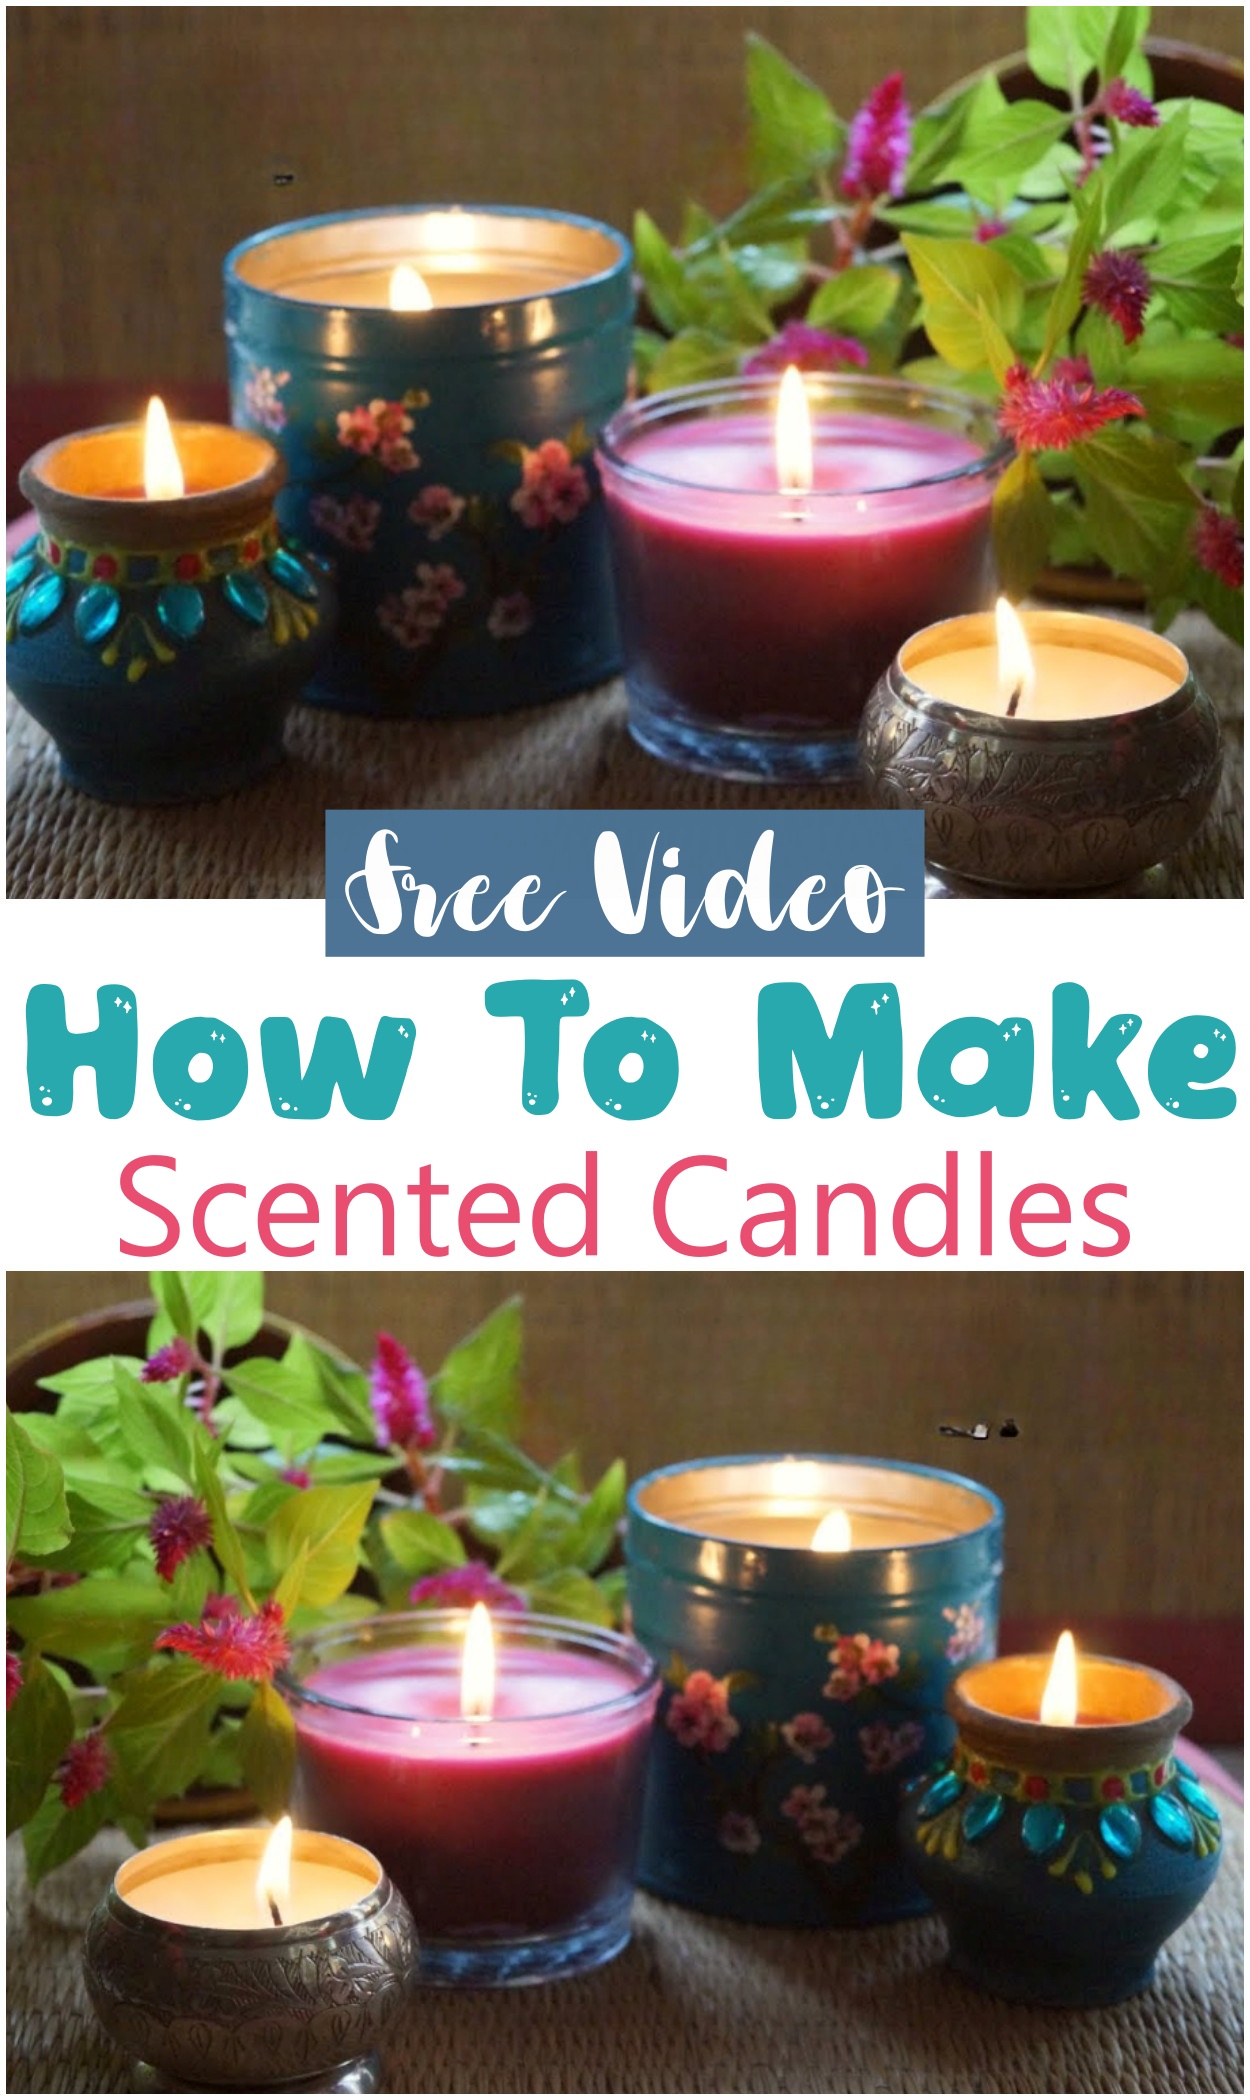
How To Make Scented Candles
Making scented candles is a fun and easy project that anyone can try at home. To start, gather basic materials like wax, fragrance oils, candle wicks, and containers. The procedure involves melting the wax carefully, adding your chosen scent, and securing the wick in the container before pouring the wax in. For creative design ideas, consider using colorful layers, dried flowers, or unique containers to make each candle special. It’s important to take precautions such as melting wax slowly on low heat and keeping the workspace well-ventilated to ensure safety. With simple steps and a bit of imagination, making scented candles can brighten up any space with personalized aromas and style.