Free crochet axolotl pattern, a delightful project that captures the essence of these enchanting creatures. This pattern carefully guides you through each step, ensuring you can bring your axolotl to life with ease and confidence. You’ll be pleased to discover that only a modest amount of yarn is required, making this an ideal project for using up leftovers or splurging on your favorite hues. Detailed instructions for crafting the axolotl’s notable gills are included, adding a touch of realism to your adorable amphibian.
No need to worry if you’re new to crocheting. This pattern is wonderfully beginner-friendly, introducing you to special stitches with clear, simple explanations. Expect to spend a few enjoyable evenings or a weekend completing your axolotl, a testament to both its simplicity and the engaging nature of the work. Should you wish to create a family of axolotls, the pattern offers suggestions for adjustments, allowing for a range of sizes to suit every whim.
With this free crochet axolotl pattern, express your creativity and love for crocheting. Each stitch brings you closer to completing a charming, squishy friend, perfect for gifting or adding a quirky touch to your decor.
Slip knot, ch9, and crochet around the chains making: 7sc
starting from the 2nd ch from the hook, 3sc in the same st,
6sc, 2sc in the same st. (18)
Chl cut yarn, and make another one.
Put the pieces together so that the back sides face each
other and the right sides can be seen. Insert the hook in the
first sc of one piece and in the 8th sc of the other (as shown
in the pic).
R2:
Use the purple velvet and crochet together the pieces
by making: sc, (ch2, Islst starting from the 2nd ch from the
hook, 2sc)x4, ch2, Islst starting from the 2nd ch from the
hook, sc in the same st, sc in the next st, (ch2, Islst starting
from the 2nd ch from the hook, 2sc)x4. Cut yarn and leave
a long tail for sewing
SEWING
• Sew the head to the body
• Sew the fins in the center:
1st end R5-7
2nd fin R9-11
3rd fin R13-15
• Sew the feet: R6-10, 6st
apart
• Sew the hands slightly
inclined forward: R14-19
• Sew tail: R6-11
STAR & MOON
• You can also use felt for both the star and
the moon and then sew or glue them.
• Star:
R1: in a mr make 3ch and 14dc, sist
R2: (6ch, starting from the 3rd ch from the
hook make sc, hdc, dc, tr, sl st in the 3rd
st)x5
Cut yarn and leave a long tail for sewing.
Sew the star in the center of the axolotl’s
belly
Tip:
if you’re using a yarn that
has the same thickness
of the one that you used
for the body, istead of
starting with 6ch in R2,
make 5ch and then make
sc, hdc, dc, sl st in the 3rd
st of dc made in the mr.
DETAILS
TAIL FIN:
Insert your hook in the center of R19 and make: 2sc, 4hdc, 4dc, move to the tail and make 7trc, 3dc, hdc, 2sc in between the mr, 2sc, Isl st cut yarn and FO.
Sew the cheeks with pink chenille/velvet
Tighten eyes: insert needle from R16-17 in the middle (A) to point B and then C, go back to point D (just a bit above point A), and tighten until you can’t see the white yarn anymore. Then go to points E and F, go back to point A, and tighten until you can’t see the white yarn anymore.
If you want to give more expression to your axolotl you can go back again with white yarn through points B-C and E-F, this time leaving it visible.
FINAL NOTES
Congrats! You finished your Dreamy Axolotl!
I hope you enjoyed making this pattern!
If you make the pattern and post it on ig, please
tag me , so that I can see your lovely
creation.
This pattern is for personal use only: do not copy,
redistribute, sell, or claim this pattern as yours.
Step-by-Step Guide to Drawing School Scenery The Step-by-Step Guide to Drawing School Scenery is essential for budding artists and students passionate about drawing. It provides a comprehensive guide to creating visually compelling school environment drawings. Using the Step-by-Step Guide to Drawing presents numerous benefits: Boosts Confidence: Providing straightforward steps simplifies the process, boosting confidence in beginners and enhancing…
Scented candles for Diwali bring a warm and inviting glow to any home, perfect for celebrating the festival of lights. These candles are designed to not only brighten spaces but also fill the air with delightful aromas, creating a cozy and festive atmosphere. They can be used to decorate living rooms, dining tables, or prayer…
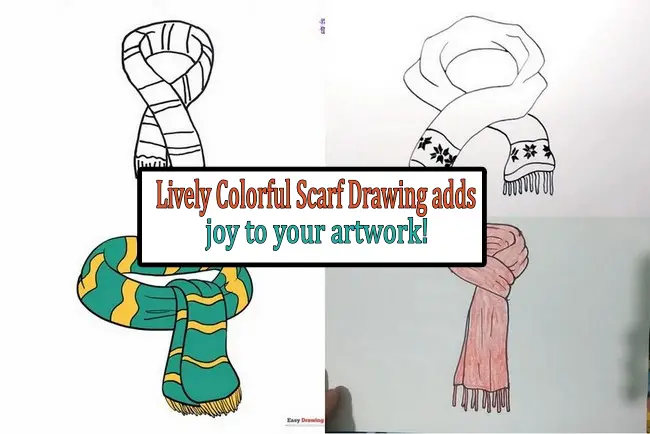
Colorful Scarf Drawing Oh, darling! Let me tell you about the wonders of a Colorful Scarf Drawing. Picture this: vibrant hues swirling together like a dance of colors on a canvas, each stroke bringing life and joy to your artwork. With every flick of the brush, you can feel the energy and excitement radiating from…
Crochet enthusiasts and ocean lovers alike will find boundless charm in creating amigurumi crochet hair clips that bring the beauty of the sea to your hair. These delightful projects not only offer free patterns but also inspire creativity and joy in every stitch. Whether you’re crafting for yourself or gifting to friends, these adorable crochet…
The free rustic wooden log candle holder for beginners is a simple, natural piece that adds a warm and welcoming touch to any space. Made from pine wood, this candle holder reflects the beauty of nature through its clean lines and natural bark texture. Pine wood is soft, easy to work with, and is often…
The Free Crochet Market Bag combines style and functionality, making it a perfect accessory for shopping trips. This market bag stands out with its chic design and practical use, offering ample space for groceries or personal items. Making the Market Bag Creating this market bag involves a straightforward pattern that includes working in rounds to…