Crochet Spider-Man Pendant Pattern Swinging Cuteness
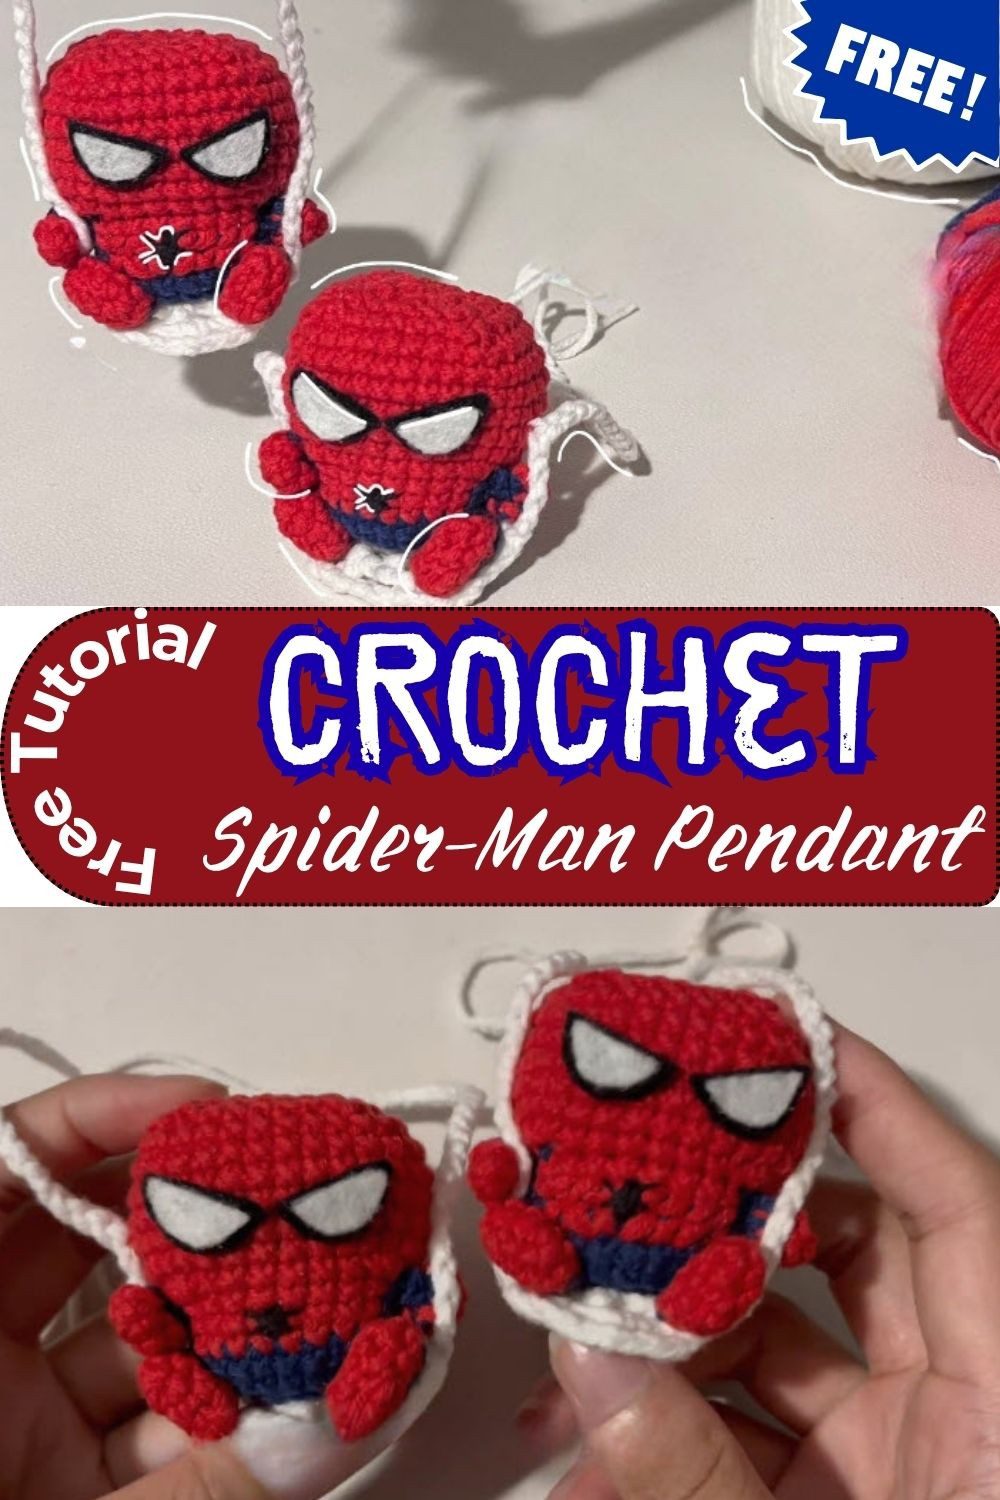
Want a small gift that you can hang anywhere? This crochet Spider-Man pendant pattern helps you make a cute doll with a big red head and wide white eyes. Because he sits inside a web swing, he looks ready to hang from a bag or a car mirror. The steps are easy and free. Also, the finished pendant makes a great gift for Spider-Man fans.
Crochet Spider-Man Pendant Pattern Overview
- Skill level: Beginner-friendly and easy. In fact, only basic stitches are needed, plus two small shaping tricks: the triple increase and the triple decrease.
- Finished size: About 6 to 7 cm in height.
- Hook size: 2.5 mm crochet hook.
- Terminology: US terms.
First, you work the body and head in one piece, from the bottom up. Next, you make the arms and legs separately and sew them on. Meanwhile, the web swing is worked on its own.
Triple increases make the sharp corners, so the doll gets a boxy cube shape. Then, triple decreases bring the top in. Because the web swing is made with chain loops, it cradles the doll like a tiny hammock.
Materials and Tools for the Crochet Spider-Man Pendant Pattern
Yarn for the Crochet Spider-Man Pendant Pattern
- Fine or sport weight cotton or acrylic amigurumi yarn, smooth and matte
- Colors: red, blue, black, and white
- Quantity: small scraps of each color
- Black yarn or thread for the chest spider
Tools and Notions
- 2.5 mm crochet hook
- Stitch marker
- Scissors
- Pins
- Yarn needle (tapestry needle)
- Toy stuffing (polyfill)
- Black and white felt for the eyes
- Hot glue gun (optional, for the eyes and the web attachments)
Why Felt Eyes Instead of Safety Eyes
Safety eyes are not used here. Instead, the eyes are cut from white and black felt, so you can shape them large and wide in true chibi style.
Abbreviations
- MR: Magic Ring
- ch: Chain
- sl st: Slip Stitch
- sc: Single Crochet
- dc: Double Crochet
- inc: Increase (2 sc in the same stitch)
- dec: Decrease (sc2tog)
- tri-inc: Triple Increase (3 sc in the same stitch)
- tri-dec: Triple Decrease (3 sc worked together over 3 stitches)
- FLO: Front Loop Only
- Rnd: Round
Special Techniques for the Amigurumi Spider-Man
Magic Ring
First, wrap the yarn tail around your fingers to make a loop. Next, put the hook through the center, yarn over, and pull up a loop. Chain 1 to lock it. Then, work the number of single crochets the pattern asks for into the circle. After that, pull the tail firmly to close the ring. Tug gently once to test it, because a twisted ring will not close properly.
Basic Stitches
- Single crochet (sc): Insert the hook into the stitch, yarn over, and pull up a loop (2 loops on the hook). Then, yarn over again and draw through both loops.
- Slip stitch (sl st): Insert the hook, yarn over, and pull straight through both the stitch and the loop on the hook.
- Chain (ch): Yarn over and pull the yarn through the active loop on the hook.
- Double crochet (dc): Since this stitch is used only in the web swing, you can skip it until Part 4. Yarn over, insert the hook into the stitch, yarn over and pull up a loop. Then, yarn over and draw through 2 loops, twice.
Shaping Stitches
- Increase (inc): Work 2 single crochets into the exact same stitch.
- Triple increase (tri-inc): Work 3 single crochets into one stitch. As a result, you get the sharp corners of the cube-shaped body and head.
- Decrease (dec): Insert the hook into the front loop of stitch 1, then into the front loop of stitch 2 (3 loops on the hook). Next, yarn over and draw through 2 loops. After that, yarn over and draw through the remaining 2 loops.
- Invisible decrease: Insert the hook into the front loop only of the next two stitches. Then, yarn over and pull through both front loops. Finally, yarn over and pull through the remaining 2 loops.
- Triple decrease (tri-dec): Work 3 single crochets together over 3 stitches, so three stitches become one. Because of this, the shoulders and the top of the head taper neatly.
Front Loop Only and Spiral Rounds
Front loop only (FLO): Insert the hook under only the front vertical loop of a stitch. You use it on the last round of the head, so the opening cinches flat.
Continuous spiral rounds: Work in rounds without joining at the end of each round. Place a locking stitch marker in the first stitch of each round right after making it. Then, move it up as the rounds grow.
Color Changes
Work the last stitch of Color A until 2 loops remain on the hook. Then, drop Color A, pick up Color B, yarn over with Color B, and pull through the remaining two loops. Meanwhile, carry the unused yarn loosely across the back, or trap it under the stitches when working multi-color rounds.
Keeping the Stitch Count Right
Count the stitches at the end of every round. If the total does not match the number in brackets, fix it before moving on.
Crochet Spider-Man Pendant Pattern Instructions
The body and head are worked continuously from the bottom up. To begin, start with blue yarn.
Part 1A: Blue and Red Body of the Crochet Spider-Man Pendant Pattern (Rnds 1–7)
- Rnd 1: Make a magic ring and work 8 sc into it. Pull tight to close. (8 sts)
- Rnd 2: Work 2 sc in each stitch around. (16 sts)
- Rnd 3: (2 sc, tri-inc in next st) x 2, 4 sc, (tri-inc in next st, 2 sc) x 2, 2 sc. (24 sts)
- Rnd 4: Work 23 sc in blue. In the 24th sc, do not finish the stitch. Instead, drop blue, yarn over with red, and pull through to complete the stitch. (24 sts)
- Rnd 5: Work the color blocks: 4 sc red, 4 sc blue, 8 sc red, 4 sc blue, 4 sc red. Change colors on the last stitch of each block, using the color-change method above. (24 sts)
- Rnd 6: Repeat the color sequence of Rnd 5: 4 sc red, 4 sc blue, 8 sc red, 4 sc blue, 4 sc red. (24 sts)
- Rnd 7: Repeat the color sequence of Rnd 5 once more. Then, cut the blue yarn and secure the tail inside. After that, continue with red only. (24 sts)
Part 1B: Red Head (Rnds 8–17)
Switch fully to red yarn for the head.
- Rnd 8: 3 sc, tri-inc, 4 sc, tri-inc, 3 sc, then repeat the same sequence once more: 3 sc, tri-inc, 4 sc, tri-inc, 3 sc. (32 sts)
- Rnd 9 to 14 (6 rounds): 1 sc in each stitch around. (32 sts per round)
Stuffing tip: Start adding stuffing to the lower body around Rnd 14, before the opening gets narrow.
- Rnd 15: 3 sc, tri-dec, 4 sc, tri-dec, 3 sc, then repeat the same sequence once more. (24 sts)
- Rnd 16: (2 sc, tri-dec) x 2, 4 sc, (tri-dec, 2 sc) x 2. (16 sts)
Now, stuff the head firmly. Push the filling into the corners with your fingers or a blunt tool, so the cube profile stays sharp.
- Rnd 17: Work 8 decreases in FLO. (8 sts)
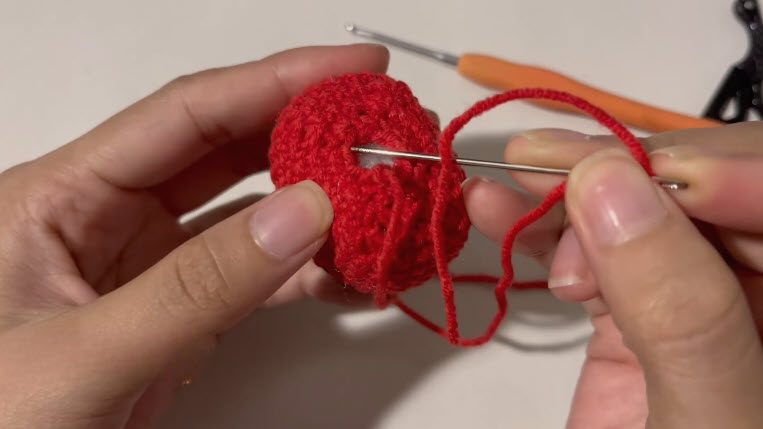
Fastening off: Cut the yarn, leaving a long tail for sewing and securing the web. Then, thread the needle through the 8 front loops, pull tight to close, and weave the tail into the body.
Quick step: First, thread the needle through the 8 front loops. Next, pull the tail tight to close the opening.
Part 2: Arms for the Crochet Spider-Man Pendant Pattern
Start with red yarn.
- Rnd 1: Make a magic ring and work 5 sc into it. (5 sts)
- Rnd 2: Work 4 sc in red. On the 5th sc, change to blue on the final pull-through. (5 sts)
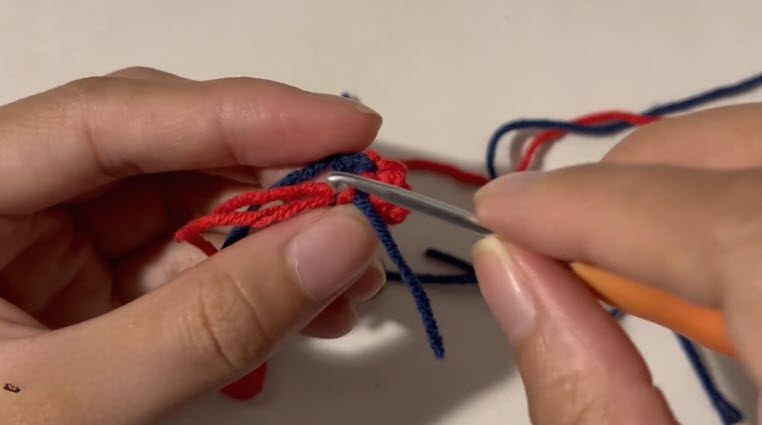
Next, flatten the arm opening and close it across, through both layers, with 2 sc in blue. Then, chain 1 and cut the yarn, leaving a long tail for sewing.
Quick step: Each arm is red with a blue cuff, so make two the same way.
Part 3: Legs for the Crochet Spider-Man Pendant Pattern
Start with red yarn.
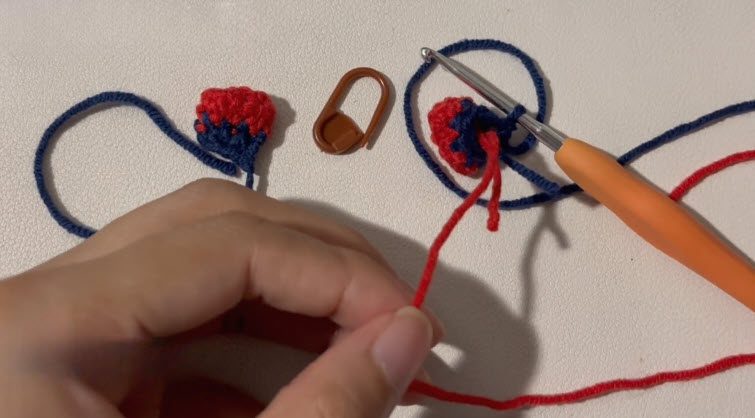
- Rnd 1: Ch 4. Starting in the 2nd chain from the hook, work an inc, then 1 sc, then 4 sc in the last chain. Turn to work along the opposite side of the chain: 1 sc, then an inc in the final chain. (10 sts)
- Rnd 2: Work 9 sc in red. On the 10th sc, change to blue on the final pull-through. (10 sts)
- Rnd 3: 3 sc, 2 dec, 3 sc. Then, flatten the opening and close it across, through both layers, with 3 sc in blue. Chain 1 and cut the yarn, leaving a long tail for sewing.
Part 4: Spiderweb Swing for the Crochet Spider-Man Pendant Pattern
Use white yarn.
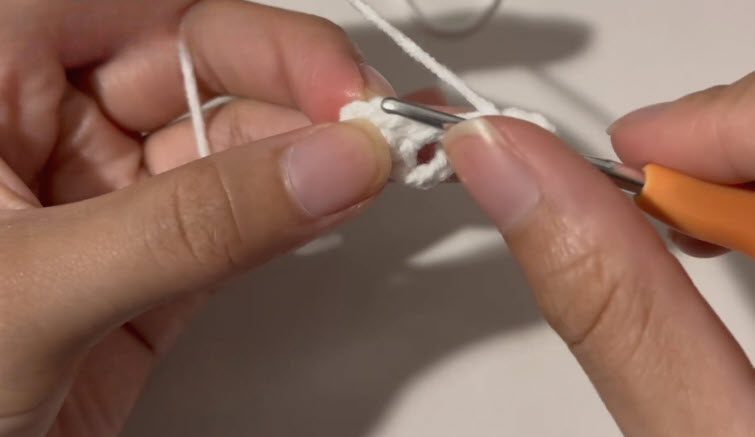
- Rnd 1: Make a magic ring, work 6 sc into it, and join with a sl st.
- Rnd 2: Ch 5, then 1 dc in the next stitch. (Ch 3, 1 dc in the next stitch) 4 more times, for 5 web loops in total. Ch 3 and sl st to the 2nd chain of the starting ch-5.
- Rnd 3: Ch 5, then 1 dc in the top of the previous dc. (Ch 3, 1 dc in the next ch-space) all the way around. Ch 3 and sl st to the 2nd chain of the starting ch-5.
Hanging cords: From two opposite points on the web rim, chain 30 stitches on each side to make the suspension cords. After that, cut the yarn and fasten off.
Quick step: Work the whole web in white yarn.
Eyes and Emblem for the Crochet Spider-Man Pendant Pattern
Add the Felt Eyes
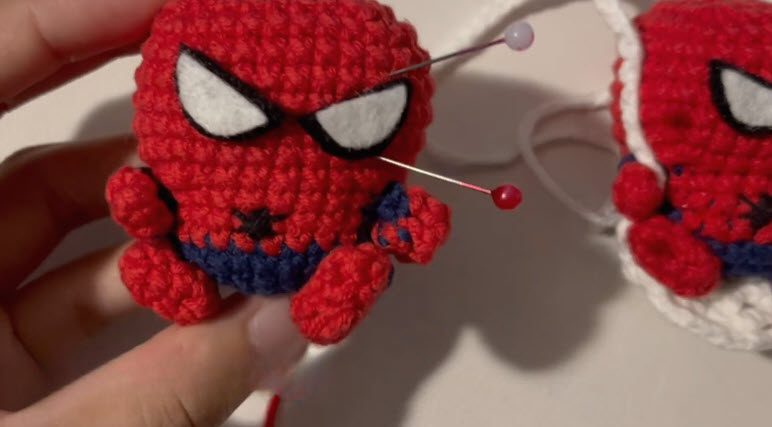
First, cut large chibi-style eyes from white and black felt. Then, layer the white shape over the black outline. Finally, glue or sew them onto Rounds 10, 11, and 12 of the head, leaving a narrow gap in the center.
Embroider the Spider Emblem
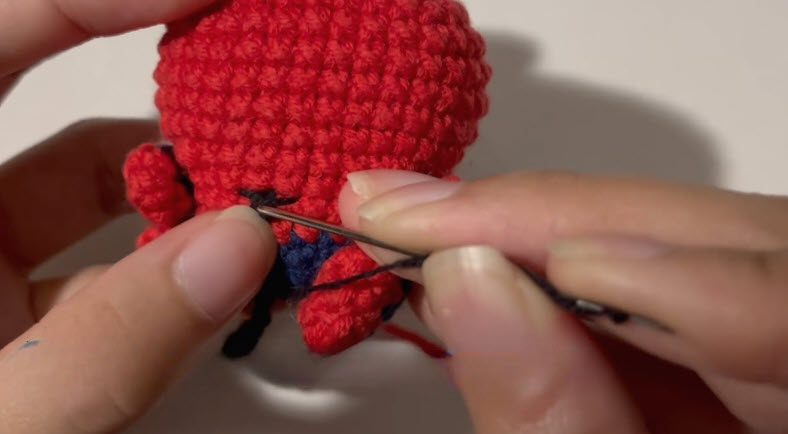
The emblem is the small black spider on the red chest area. Here is how it comes together:
- First, use black thread or yarn on Round 6 of the red chest area.
- Next, pass the needle through the chest with the black thread.
- Then, wrap single strands vertically through the center to build an oval spider body.
- Finally, add diagonal leg lines on both sides.
Assembly and Finishing the Crochet Spider-Man Pendant
Attach the Arms and Legs
Attach the arms. Pin the arms onto Round 7 of the body. Place them just outside the first vertical blue stripe, and then sew them on.
Attach the legs. Pin the legs between Rounds 3 and 4 of the lower body, lined up evenly on both sides, and then sew them on.
Quick step: Before sewing, pin the eyes, arms, and legs in place and check from the front.
Place the Doll in the Swing
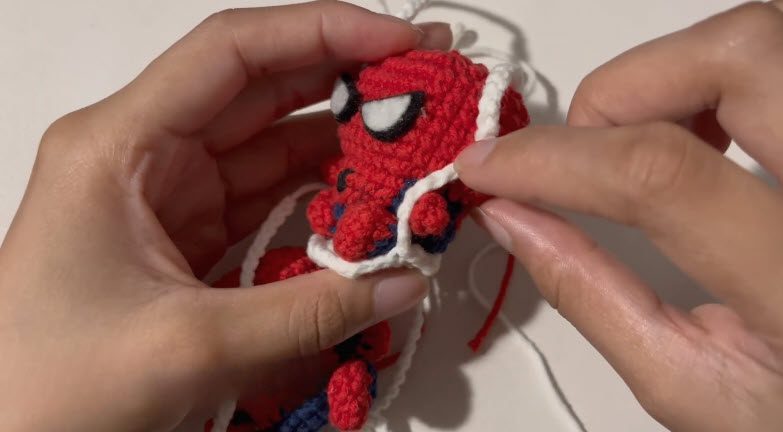
Set the finished doll inside the web. Then, pass the hanging chains over the arms and secure them with small red stitches, or use hot glue for a firmer hold.
Quick step: Rest the doll in the white web and guide the cords over the arms.
Getting Symmetry Right
Use the stitch counts and color columns as vertical guides. Also, pin every part in place and check from the front before any permanent sewing or gluing.
Finishing Touches
- First, cut the yarn, pull it through the last loop, and use a needle to cinch the final stitches flat.
- Next, anchor the tails and hide them inside the toy.
- Then, massage the head and body with your hands to square off the corners.
- After that, trim loose embroidery threads.
- Finally, check that the web swing is secure.
Common Beginner Mistakes and Final Checks
- Twisted magic ring: Pull the tail gently as a test before continuing.
- Dropped stitches on color changes: Always finish the last pull-through with the new color.
- Uneven stuffing: Push the filling into the corners instead of packing only the center.
- Wrong stitch counts: Count at the end of every round, because the body should read 24 stitches and the head 32.
Finally, compare your stitch counts with the round targets. Then, confirm the proportions are square. The head should look like a neat cube, and the body should be blocky and even from side to side.
Safety Notes for the Crochet Spider-Man Pendant Pattern
For babies and small children, embroidered eyes are safer than glued felt pieces because they remove a choking risk. Also, make sure every knot is tight and every tail is buried. Since small parts like the arms and legs can come loose, sew them on firmly.
Care Tips for Your Crochet Spider-Man Pendant
Once your doll is swinging, a little attention keeps him looking sharp.
- Check the web swing now and then, so the cords stay secure.
- Squeeze the head and body gently to keep the corners square.
- Trim any loose threads that pop up on the embroidery.
- Tie a short loop of yarn at the top of the cords, because it makes hanging easy.
- Hang him from a window latch, a car mirror, or a bag strap.
Bonus: Fun Ways to Use Your Amigurumi Spider-Man Pendant
- As a bag charm: Clip the hanging cords to a strap, so he swings as you walk.
- As a car mirror charm: Hang him where you can see him, since the web swing keeps him upright.
- As an amigurumi keychain: Add a ring to the loop of yarn, and then attach your keys.
- As a gift: Make one for a Spider-Man fan, because the small size fits easily in a card or a gift bag.
FAQs About the Crochet Spider-Man Pendant Pattern
What hook size does the crochet Spider-Man pendant pattern use?
You need a 2.5 mm crochet hook, and the pattern uses US terms.
Is this crochet Spider-Man pendant pattern good for beginners?
Yes. It uses basic stitches, plus two small shaping tricks: the triple increase and the triple decrease.
Why are felt eyes used instead of safety eyes?
Felt lets you cut the eyes large and wide for true chibi style.
How does the swing hold the doll?
The web swing is made with chain loops, so it cradles the doll like a tiny hammock. Then, the hanging cords go over the arms and are secured with small red stitches or hot glue.
How are the body and head made?
They are worked as one piece from the bottom up. Triple increases build the sharp corners, and then triple decreases bring the top in for the cube shape.
Okay, Go Make Him
So yeah, that’s the little guy. Do the body and head first, because that’s where the cube happens. Then make the arms, legs, and web. Put the eyes on last, since that’s when he suddenly looks alive. After that, hang him somewhere you’ll see him a lot.