Easy Crochet Owl Amigurumi Pattern for Lovely Gifts
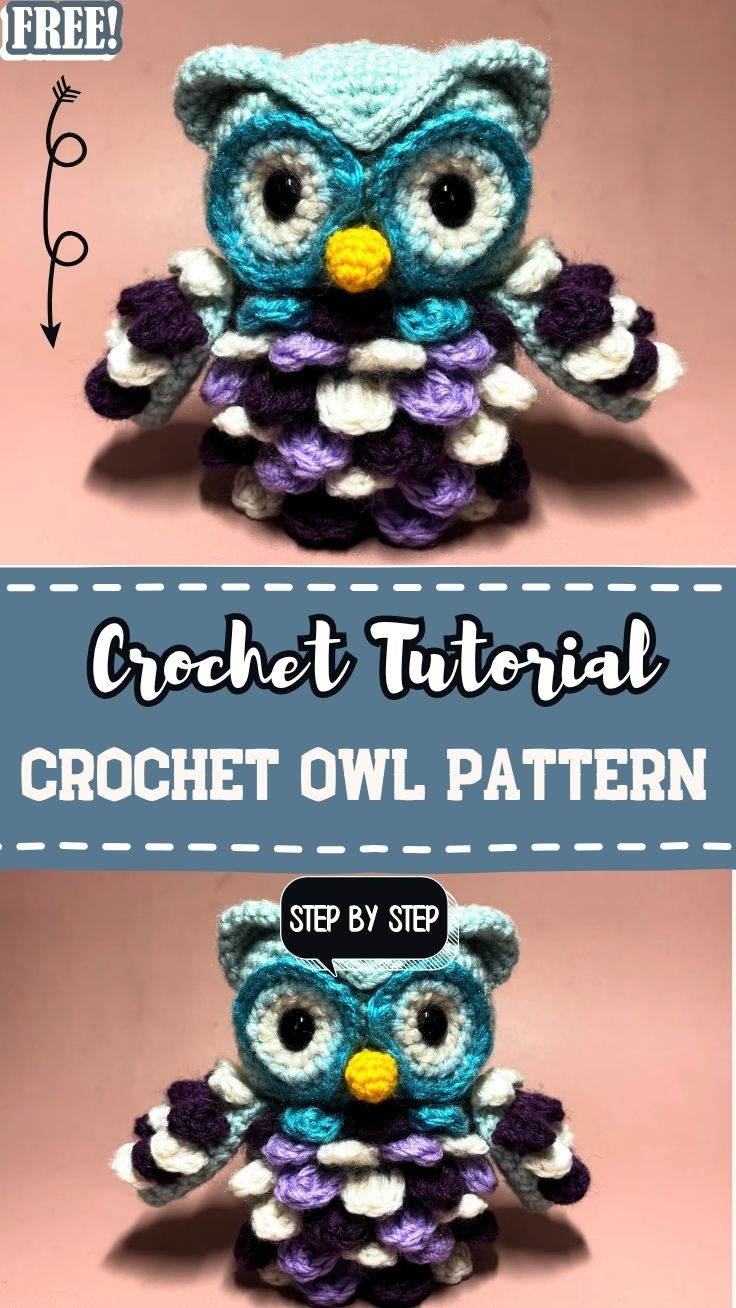
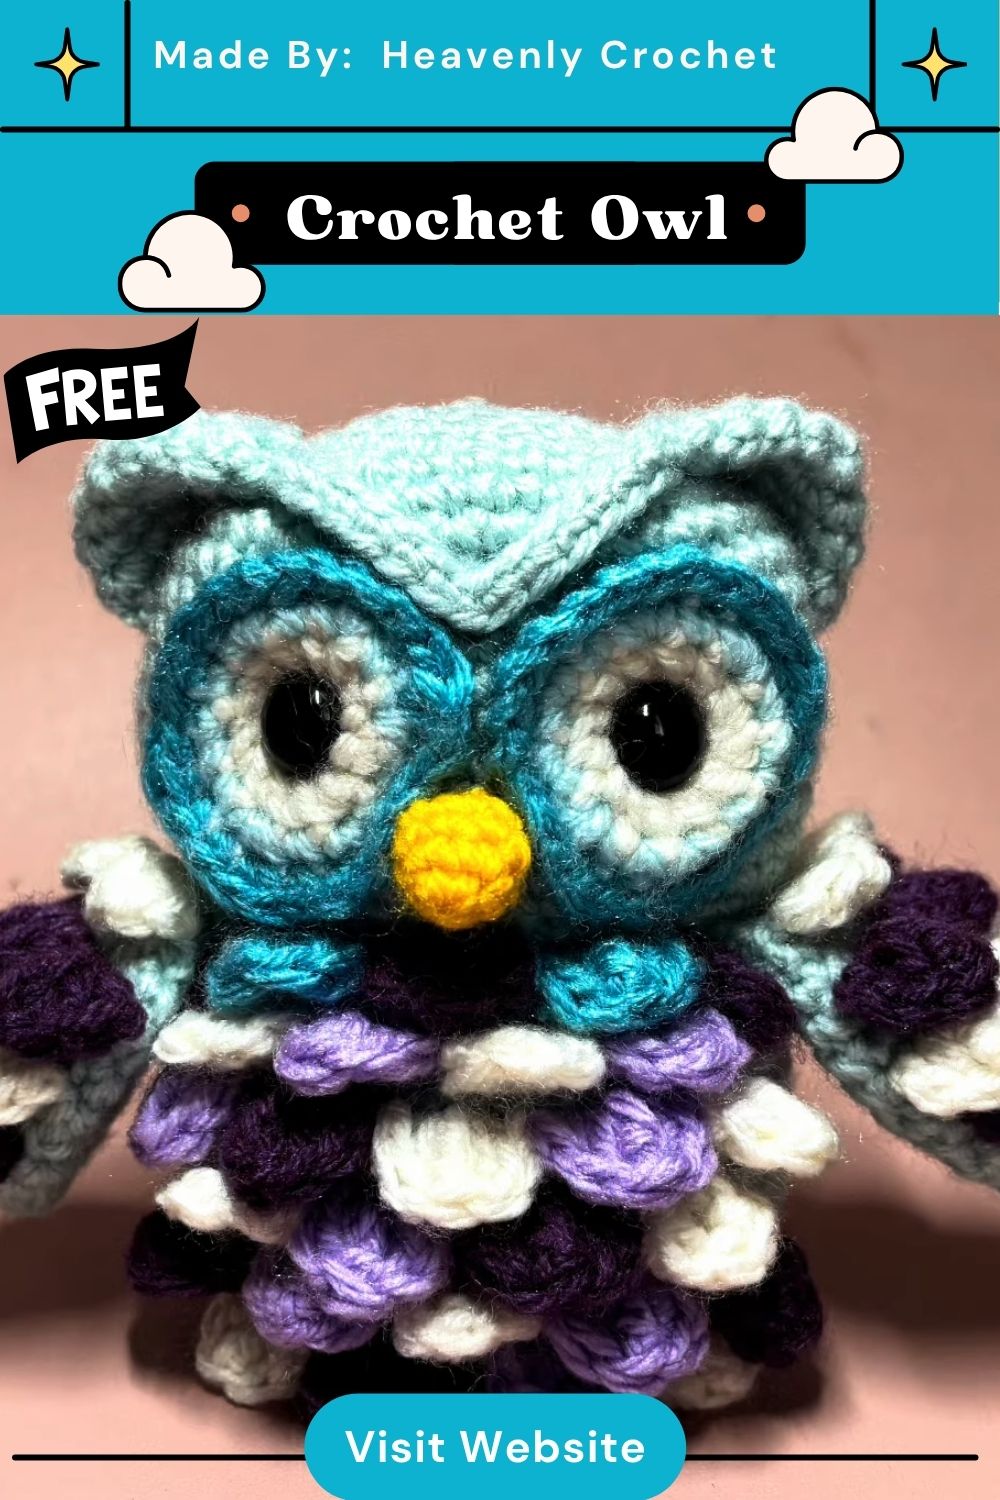
Soft cream stitches curl into a tiny spiral before deepening into dusty teal the quiet start of this Easy Crochet Owl Amigurumi Pattern for Lovely Gifts, a huggable little amigurumi owl built round by round with simple single crochet and a pair of watchful safety eyes.
Made almost entirely from basic single crochet rounds, this pattern proves that a genuinely charming amigurumi owl doesn’t need complicated shaping or a long stitch dictionary. The body works up as one continuous piece, color changes create the layered “feather” look on the chest, and a simple safety-eye placement gives the whole toy its personality in seconds. It’s the kind of small, satisfying project that finishes in an evening and still looks handmade in the best way.
Project Details
- Time Box: Prep & materials – 10 minutes | Stitching – 2 to 3 hours | Finishing & assembly — 30 minutes
- Yarn: Worsted weight (Weight 4) acrylic or cotton-blend yarn in cream and two shades of teal
- Hook: 3.5 mm crochet hook
- Notions: 2 black safety eyes (9–12 mm), stitch marker, polyester fiberfill, tapestry needle
- Tools: Scissors, measuring tape
Stitching Essentials
- Magic ring (adjustable ring)
- Single crochet (sc)
- Increase (2 sc in same stitch)
- Invisible decrease
- Yarn color change
Pattern Overview
- Body and head are worked as one continuous piece from the base upward, no separate assembly needed for the main shape.
- The pattern starts in cream, then transitions into two shades of teal for the wings and outer body.
- Safety eyes are placed partway through stitching, before the head closes, so the face can still be adjusted for the cutest expression.
- Firm stuffing throughout keeps the owl sitting upright without a wire frame or base.
Special Techniques
The color change happens mid-round rather than at the start of a new one, which keeps the transition line from sitting in an obvious spot. Instead of finishing off the old color, the last yarn-over of the final stitch in cream is completed with the new teal yarn, letting the colors blend cleanly without a visible knot.
Common Mistakes
- Working too loosely, which lets stuffing show through the gaps between stitches
- Placing the safety eyes too early, before checking spacing against the actual head width
- Skipping the stitch marker, which makes it easy to lose track of round starts during long stretches of plain single crochet
- Pulling the color-change stitch too tight, which distorts the round and pulls the shaping off-center
Uses & Benefits
This little owl works as a shelf sitter, a nursery accent, or a soft first toy once it’s stitched securely and stuffed firmly. Because the whole body forms from one piece, there’s very little seaming, which makes it a forgiving project for anyone still building confidence with amigurumi shaping. The compact size also means it uses up leftover worsted-weight scraps efficiently, so it’s a practical way to work through a yarn stash while still ending up with a genuinely gift-worthy finished piece. It photographs well too, sitting naturally on a windowsill or desk without any extra styling needed.
Helpful Beginner Tips
- Keep a stitch marker in the first stitch of every round so increases and decreases stay aligned
- Count stitches after every round for the first few rows, since amigurumi shaping compounds quickly if a round comes up short
- Stuff a little at a time rather than all at once, working the fiberfill into the shape as you go
- Use a smaller hook than the yarn label suggests to keep stitches tight enough that stuffing won’t peek through
Assembly
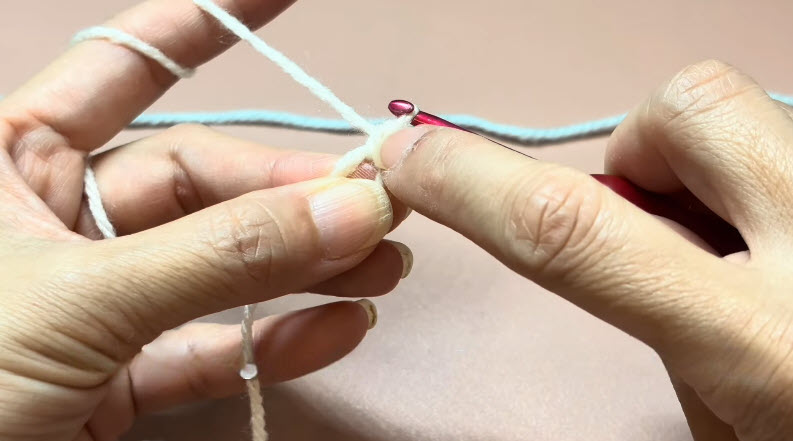
1. Starting the Magic Ring
- Form a loop with cream yarn, leaving a short tail, and hold it between your fingers as shown.
- Insert the hook through the loop and pull up the working yarn to begin the first stitch.
- Work 6 single crochet stitches into the ring, then pull the tail to close it completely before joining or continuing in a spiral.
Pro-Tip: Wrap the yarn around your fingers twice before starting the ring it gives you a firmer loop to crochet into and keeps the very first stitches from slipping loose.
2. Building the First Rounds
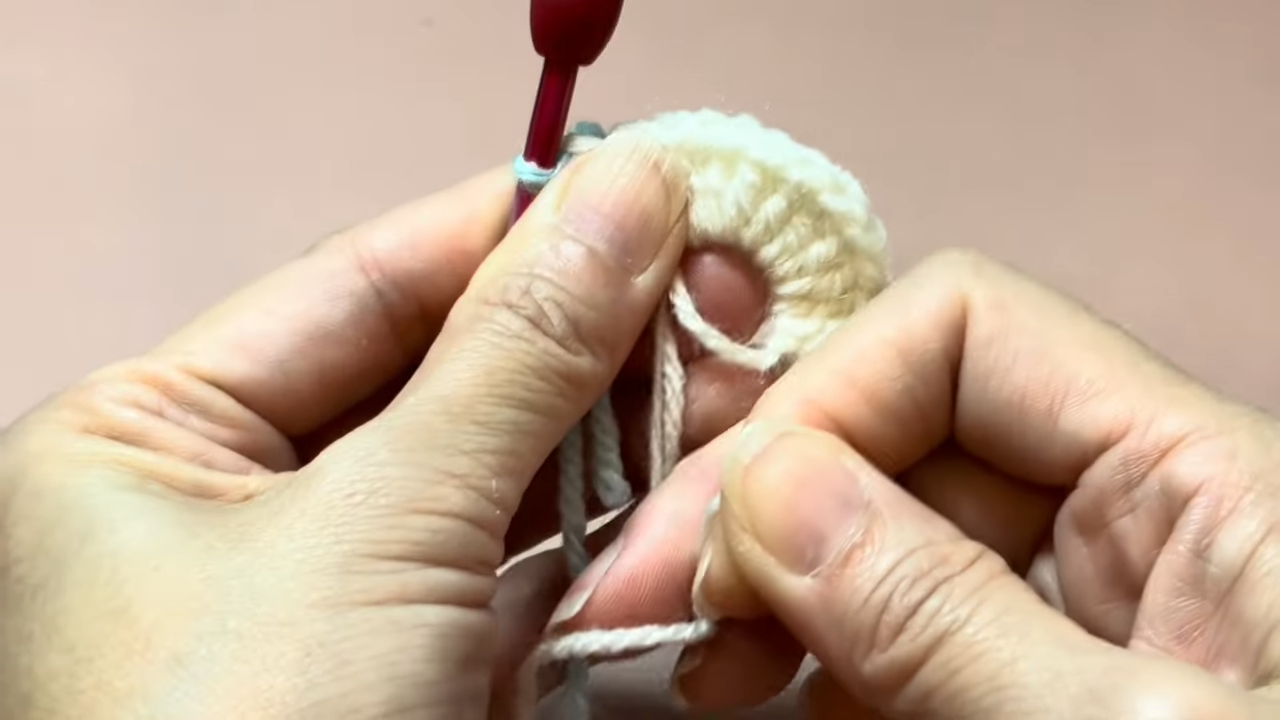
- Round 2: 2 sc in each stitch around (12 stitches total).
- Round 3: 1 sc, 2 sc in next stitch repeat around (18 stitches total).
- Continue increasing every other round until the base measures roughly 2.5 inches across, keeping the stitch marker moved up at the start of each new round.
3. Changing to the Body Color
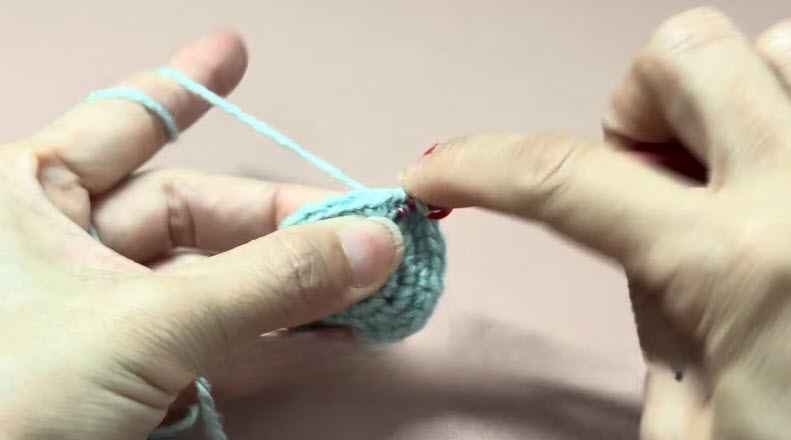
- On the last stitch of the final cream round, draw the new teal yarn through instead of finishing with cream.
- Continue in single crochet with teal, working even rounds without further increases to build the straight sides of the body.
- Insert the safety eyes once the body reaches roughly two-thirds of its final height, spacing them about 4 to 5 stitches apart at the center front.
4. Joining the Pieces and Finishing
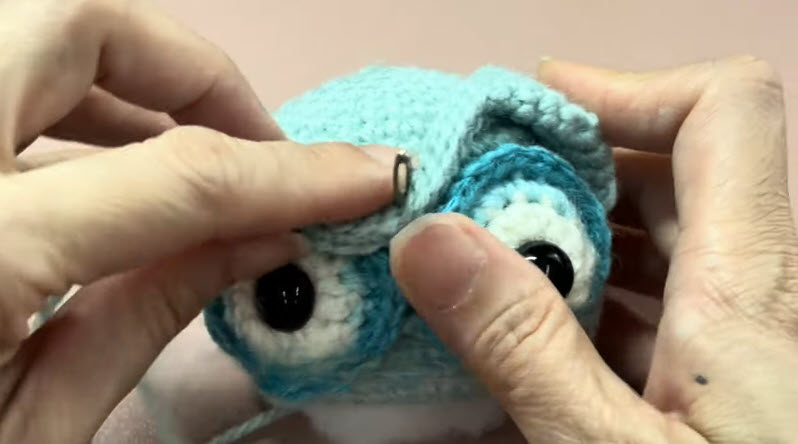
- Begin decreasing evenly around the top rounds to start closing the head, working invisible decreases to keep the shaping smooth.
- Stuff the body firmly before the opening becomes too small to work through comfortably.
- Close the final gap with a tapestry needle, weaving through the remaining stitches and pulling tight, then weave in any loose ends securely.
Where Can You Use This?
Sitting the finished owl on a bookshelf, a baby’s dresser, or beside a reading nook gives any small corner a handmade touch without taking up much space.
Why Beginners Will Enjoy This Pattern
The single continuous piece and repetitive stitch pattern make it an easy way to practice amigurumi shaping without juggling multiple separate parts.
Tips and Tricks for Success
- Test your safety eye placement with removable stitch markers before snapping the eyes in permanently
- Weigh out fiberfill in advance so both sides of the body end up evenly stuffed
- Block the finished piece lightly with a damp cloth if the stitches look uneven after stuffing
- Keep tension consistent by crocheting at the same time of day when your hands are least tired
Why This Crochet Owl Pattern Is Trending
Amigurumi animals have held steady popularity for years, but owls in particular keep resurfacing because their round shape and big eyes translate so naturally into the amigurumi style.
- The two-tone color-blocking trend in amigurumi keeps this pattern feeling current rather than dated.
- Compact, one-piece toys like this fit the growing interest in quick, giftable handmade projects.
- Neutral cream-and-teal palettes photograph well for social sharing, which keeps patterns like this circulating widely.
Personalization Ideas
Color Swaps
Try warm mustard and rust instead of teal for an autumn-themed owl, or soft pastels for a nursery-friendly version.
Size Variations
Work with a bulkier yarn and larger hook for an oversized cuddle-sized owl, or drop to a fingering weight for a miniature keychain version.
Added Details
Stitch on tiny felt wings or a small yarn bow for a more decorative finish, or add a loop at the top to turn it into a hanging ornament.
Frequently Asked Questions
What yarn weight works best for this owl?
Worsted weight (Weight 4) gives the most predictable stitch definition and holds its shape well once stuffed.
Can I skip the safety eyes?
Yes — embroidered eyes with black yarn work as a safe alternative for anyone stitching this as a gift for a very young child.
How much yarn do I need?
A single skein of each color is typically more than enough for one owl of this size, with plenty left over for a second project.
Is this pattern suitable for a first amigurumi project?
Yes, the repetitive single crochet rounds and single-piece construction make it a gentle introduction to amigurumi shaping.
Storage and Care
Keep the finished owl away from direct sunlight to preserve the color contrast between the cream base and teal body. Hand wash gently in cool water if it ever needs cleaning, then reshape and lay flat to dry rather than tumble drying, which can flatten the stuffing unevenly.
Conclusion
From a simple magic ring to a finished, gift-ready owl, this pattern shows how a handful of basic stitches can build something with real personality. Keep the tension even, stuff it firmly, and this little Crochet Owl Amigurumi is ready to sit proudly on any shelf.