Chubby Crochet Rag Ufufy Amigurumi Pattern
About This Crochet Pattern
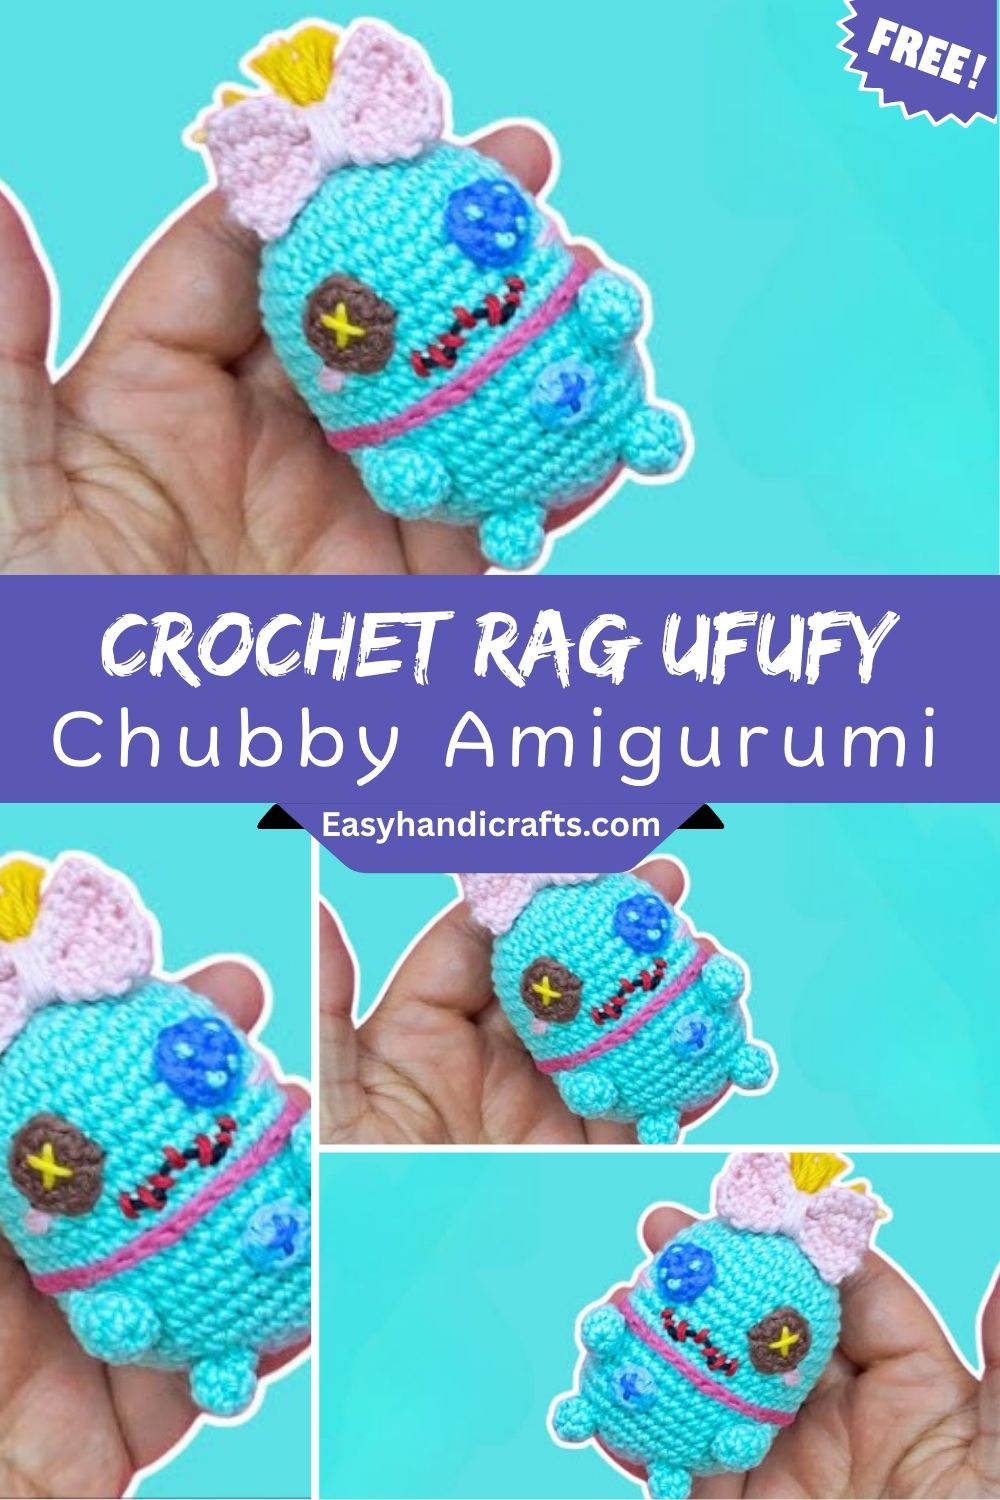
Ufufy-style dolls stand out because of their soft, rounded silhouette and oversized head-to-body ratio, giving them an endearing, toy-like presence. The stitching stays simple throughout, relying mostly on single crochet worked in continuous rounds, so the surface texture ends up smooth and tidy once the piece is stuffed.
What makes this particular design so appealing is its flexibility. The chubby rag shape lends itself to endless variations swap the yarn shade, change the facial features, or add small accessories, and the same base pattern becomes a completely different character. It’s an ideal weekend project that doesn’t demand advanced skills but still delivers a polished, professional-looking result.
Project Details
- Skill Level: Beginner to Advanced Beginner
- Finished Size: Approximately 5–6 inches tall (varies with yarn weight and hook size)
- Estimated Time Required: 3–5 hours, depending on experience
- Recommended Yarn Weight: Worsted weight (Medium, 4) cotton or acrylic yarn
- Crochet Hook Size: 3.0mm–3.5mm (or as needed to achieve tight, gap-free stitches)
Materials Needed
- Worsted weight yarn in your chosen main color
- Small amounts of contrast yarn for facial details or accents
- 3.0mm–3.5mm crochet hook
- Safety eyes (or embroidery thread for stitched eyes)
- Fiberfill stuffing
- Tapestry needle for sewing pieces and weaving in ends
- Stitch markers to track the start of each round
- Sharp scissors
- Optional: small ribbon, bow, or fabric scrap for extra styling
Crochet Stitches & Techniques
This pattern relies on a handful of core techniques, all approachable for someone just starting their amigurumi journey.
- Magic Ring: Forms a tight, adjustable starting loop with no visible hole at the center.
- Chain Stitch (ch): Used sparingly, mainly for any small details or limbs that begin flat.
- Single Crochet (sc): The main stitch throughout, creating a dense, stuffing-friendly fabric.
- Increase (inc): Two single crochets worked into one stitch to widen the round.
- Invisible Decrease (dec): Keeps shaping smooth by working through the front loops of two stitches, avoiding visible gaps.
- Color Changes: Switching yarn mid-round for two-toned pieces or accent rows.
- Fastening Off: Securing the last stitch and weaving the tail through remaining stitches to close the top neatly.
- Sewing Pieces Together: Joining the head, limbs, and any extra details using a whip stitch or mattress stitch for a seamless finish.
Pattern Instructions
Creating the Main Body
Start with a magic ring and build outward in continuous rounds, increasing steadily until the body reaches its widest point. Because the ufufy shape is chubby rather than elongated, most of the increasing happens early, giving the piece its signature round belly before you begin working even rounds without increases.
Once the widest circumference is reached, continue in single crochet without shaping for several rounds to build height. This is where stuffing usually begins adding fiberfill gradually as you go keeps the shape even and prevents lumps later.
Shaping the Head
The head typically continues directly from the body in a one-piece construction, which is common in the rag doll style. After the last body round, begin decreasing gradually to narrow toward the neck, then switch back to increasing to shape the rounded head.
Stuff firmly but not overly tight, checking the shape from multiple angles as you fill it. A slightly looser stuffing near the neck helps the head sit naturally rather than looking stiff.
Making the Arms and Legs
Small tube-like limbs are worked separately, usually starting with a magic ring and a few rounds of single crochet before fastening off. Because these pieces are tiny, keep tension consistent — loose stitches here are more noticeable than on the larger body.
Lightly stuff the limbs, leaving the top few rounds unstuffed and flat so they attach smoothly to the body without bulky seams.
Facial Features
Positioning matters more than technique when it comes to the face. Place safety eyes symmetrically, usually a few rounds up from the widest point of the head, spacing them evenly on either side of the center. Embroider a simple mouth using backstitch or a small straight stitch, and consider adding blush with a bit of pink yarn or fabric marker for extra warmth.
Joining All Pieces
Pin the arms and legs in place before sewing, checking that the doll can stand or sit evenly once everything is attached. Use a tapestry needle and matching yarn to whip stitch each limb securely, tucking knots and tails inside the body where they won’t show.
Final Assembly
Once every piece is joined, give the doll a gentle shape check, press lightly on the body to redistribute stuffing if needed, and trim any stray fibers. A final light steam (if your yarn allows) can help smooth out the surface for a cleaner finished look.
Tips for Success
- Count stitches at the end of every round, especially during increase and decrease sections.
- Use a stitch marker consistently so you never lose track of where a round begins.
- Stuff in small amounts rather than one large handful, checking the shape as you fill.
- Keep tension even throughout; switching hooks mid-project can create visible texture changes.
- Weave in ends securely using a tapestry needle, running the tail through several stitches before trimming.
- Block or lightly steam the finished piece if the yarn fibers allow it, for a smoother surface.
Personalization Ideas
- Try pastel yarn shades for a spring version or deep jewel tones for a cozy winter look.
- Add a tiny scarf, hat, or bow for seasonal themes like Halloween or Christmas.
- Change the eye shape or add eyelashes for different personalities and expressions.
- Attach a keyring or clasp to the top of the head for an on-the-go keychain version.
- Scale up with bulkier yarn and a larger hook for a jumbo cuddle-sized version.
- Turn a mini version into an ornament by adding a loop of yarn or ribbon at the top.
Common Mistakes to Avoid
- Many beginners rush through the increase rounds without counting, which throws off the entire shape of the body. Slowing down and confirming stitch counts after each round prevents this early on.
- Overstuffing is another frequent issue; packing too much fiberfill can distort the round shape into something lumpy or overly firm. Aim for a plush, huggable feel rather than a rock-hard one.
- Skipping stitch markers often leads to losing track of the round’s starting point, which causes visible seams or miscounted rows. A simple marker solves this instantly.
- Finally, sewing limbs on without pinning first can result in a lopsided doll. Take a moment to position everything before committing to the final stitches.
Frequently Asked Questions
Can I use a different yarn weight for this Crochet Rag Ufufy Amigurumi pattern?
Yes, though the finished size will change. Thinner yarn creates a smaller, denser doll, while bulkier yarn produces a larger, softer result.
Do I need safety eyes, or can I embroider them instead?
Either option works well. Embroidered eyes are safer for very young children, while safety eyes give a cleaner, more polished look.
Why does my doll look lopsided?
This usually comes from uneven stuffing or inconsistent stitch tension. Stuff gradually and check the shape from several angles as you go.
How much yarn will I need?
A small amount is typically enough for a single doll, roughly one skein of worsted weight yarn depending on color changes and accessories.
Can beginners really finish this pattern?
Absolutely. The techniques stay simple throughout, making it a great project for someone building confidence with amigurumi basics.
What’s the best way to close the final round?
Fasten off and use the tapestry needle to weave the tail through the remaining stitches, cinching gently to close any gap.
Can I felt or wash the finished doll?
Hand washing is generally safer for Crochet Rag Ufufy Amigurumi, since machine washing can distort stuffing and shape over time.
Conclusion
This chubby Crochet Rag Ufufy Amigurumi pattern proves that simple stitches can produce something genuinely charming. Every round brings the little character closer to life, and the process stays relaxing from the first magic ring to the final stitch. Give it a try, experiment with your own color combinations, and don’t hesitate to share the finished doll with fellow crocheters. Seeing your own version come together is one of the best parts of this craft.